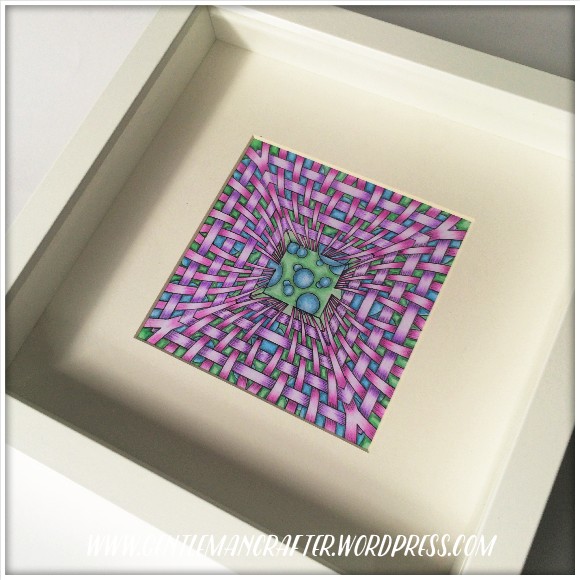
Hurrah! Another one done!
It’s been a labour of love with much hand-cramp but commission number two is finally complete :)
Hurrah! Another one done!
It’s been a labour of love with much hand-cramp but commission number two is finally complete :)
I’m super excited today as I have had confirmation from Stamford Arts centre that I can use one of their rooms for my planned Creative Scene Stamping workshops!
If you’re interested then read on my friends!
Well, you’ll not believe it but I have managed to finish something AND write a blog post about it – just.
For this project I decided to have a fiddle with a set of drawers.
I was perusing the shelves of my local Colemans stationary shop the other day (looking for a quickie glue pen) and I stumbled across some little wire frames onto which beads could be threaded.
They naturally fell into my basket … now where have I heard that before?
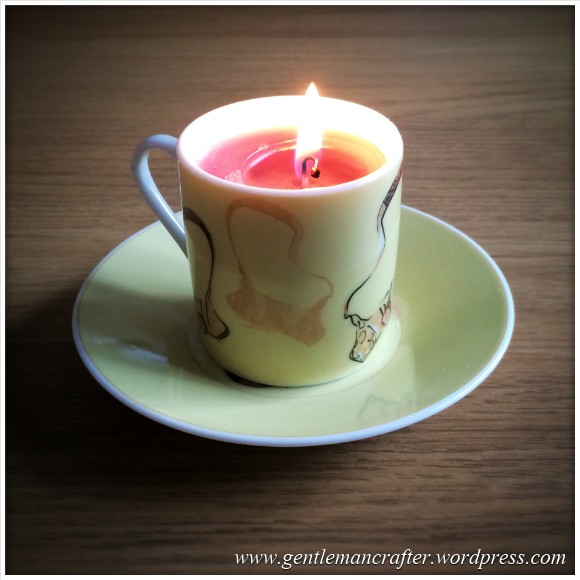
Today’s make is a home made gift in the form of some tea cup tea-lights.

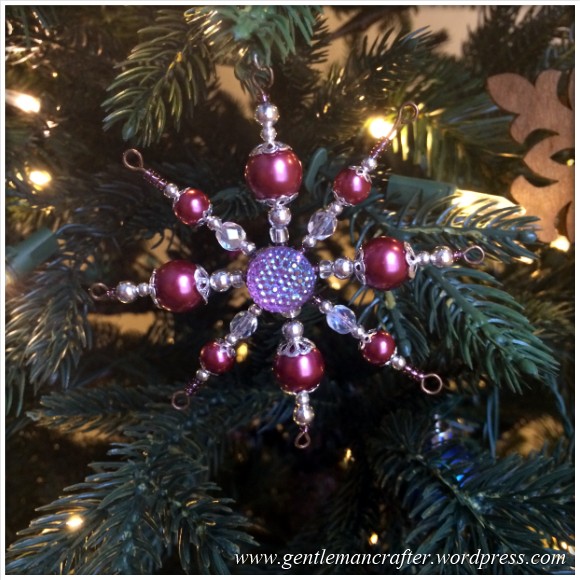
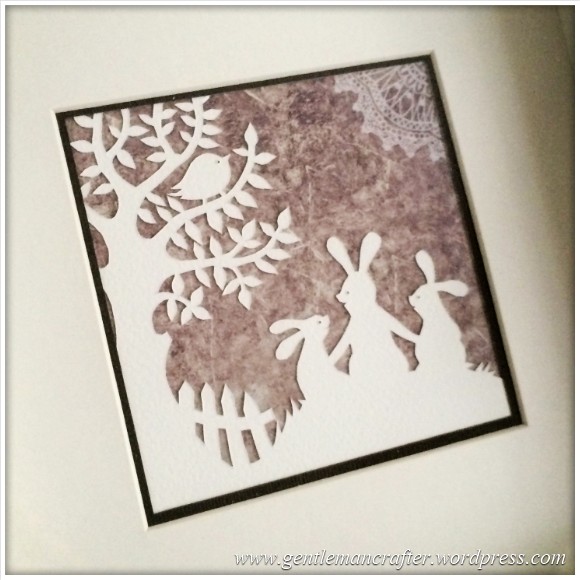
For this Christmas tree decoration I have again enlisted the help of the Brother Scan N Cut for some simple decorations.
Missing artworks, a priceless jewel and a murder.
This could be a case for Holmes, Marple or Poirot.

This may seem odd but I have never actually owned a Christmas tree before this year or had one in my house over the holiday period as I rarely have people over – it’s just been easier for me to visit everyone else.
This year though I wanted to bring Christmas home, and also bring the homemade into Christmas.

It was some time ago that I bought a few sets of MDF craft room storage kits from Fernli designs and I meant to blog about them but it totally slipped my mind!
Anyway, I stumbled across the images that I had taken in my archives recently so thought that I would pop a quick blog post on here about them.Read More »

I was having a play with my paper bead roller the other week and thought that making little Christmas tree decorations from hand rolled paper beads would be a nice change from the usual round baubles so I set to work plotting and playing again.
Here in this post is an overview of how I made them and what they ended up like.
My enthusiasm in making canvas creations seems to be continuing this week with quite a quick and simple abstract affair.

In a couple of previous posts I have been detailing a few projects that I started using some pretty Fat Quarters that I had picked up at the local market.
I am pleased to say that I have most of the things now finished (but not in the way that I had expected).
Last week I highlighted a few projects that I started using some pretty Fat Quarters that I had picked up at the local market.
My intention was that I would have all of the projects finished this week and that this post would show the triumphant results!
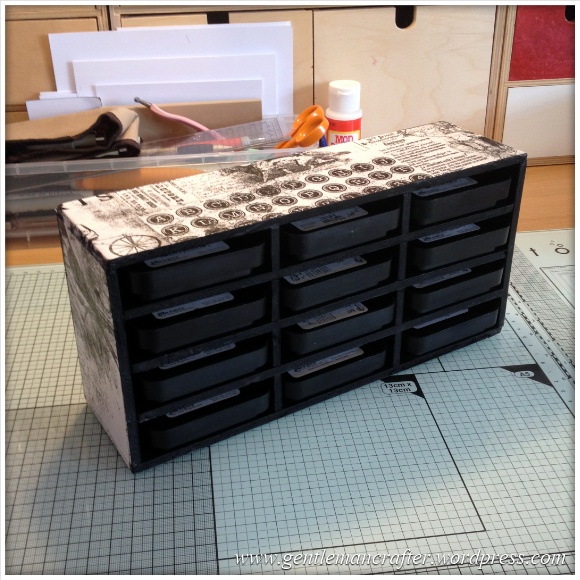
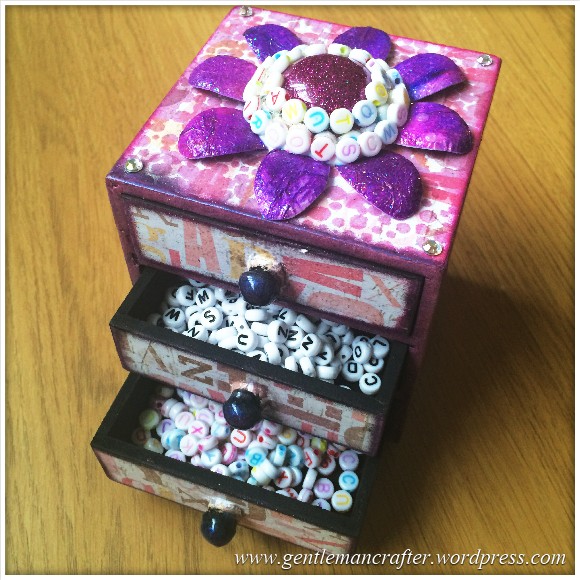
My collection of Tim Holtz Distress Inkpads has grown a fair bit over the last 12 months and until recently they have been stored in a plastic box which I have to wrench out from under other boxes in order to get to them.
After a recent craft stash avalanche, whilst trying to get to the inkpads, I thought that I would have a try at making some storage for these so that I can access them at anytime without causing a disaster each time.
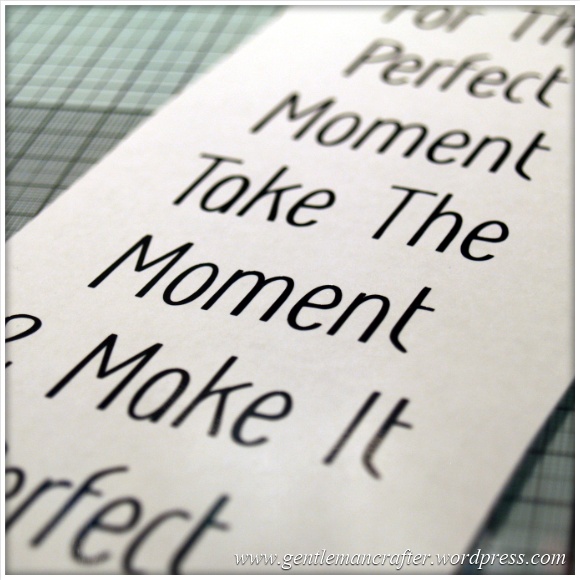
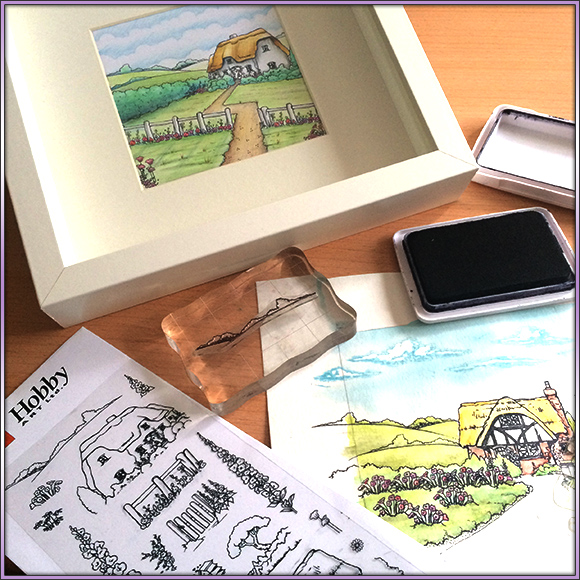
In a range of my completed projects using the Brother Scan N Cut I have used Peel Off vinyl sheets to create sentiments or even a complete verse.
Transfering this to the finished project was a little challenging until I remembered Magic Transfer Tape.
Here is a quick run down of how it works and why it is AMAZING!

You must be logged in to post a comment.