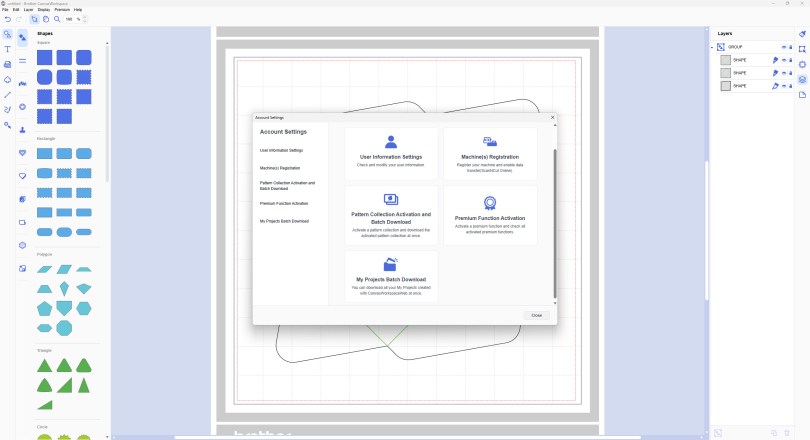
Today I have a cool trick for you for creating spiralised text, it’s really easy and I am even offering a free download to go with this tutorial!
Read More »
Today I have a cool trick for you for creating spiralised text, it’s really easy and I am even offering a free download to go with this tutorial!
Read More »An updated version of Canvas Workspace for PC/MAC got released recently. Just the one new feature which I will share with you here.
Read More »Very excited to let you know that I have just released a bunch of new SVG files based on my Cut, Foil and Emboss dies.
If you have a Brother Scan N Cut™, Silhouette™ or Cricut™ cutting machine, then you NEED to check these out!
Read More »A creative how-to this week featuring the knockout text effect.
Read More »No tutorial this week, just an honest and open review. Read on and hopefully you will be impressed.
Read More »When working without a colour fill on your objects it can be mystifying when you try and weld text inside a frame or aperture and it simply disappears. Here is why and how to correctly weld a word or phrase inside another shape.
Read More »Watcha, no tutorial in this one however I am going to save you money AND provide you with inspiration – well, truthfully Brother are however I am still going to tell you where to find it all.
Read More »Popular with Cricut users this trend has been all over social media so I thought that I’d be a sheep and follow the herd but give it a go with me Scan N Cut.
Read More »Tired of not being able to see all of your SVG files in your Windows 10 file browser? Bored of having to open every single one individually in order to find the one you want? Then read this!
Read More »Namasté, Again, My Friends. Also, Free Embroidery File Included! Feeling a little calmer this week, thankfully. The chance to stitch up some loveliness has very much helped so I hope that you are too and that you are looking forward to part 2 of this two-part blog post.
Namasté, My Friends. Well, the world continues to descend into utter madness so I wanted to spend some time being creative to redress that imbalance – fancy a look at what I cobbled together…?
Digitizing An Embroidery Design In Hatch Embroidery Software Part 10. It’s time to stitch out the design – YAAAAAY!
Digitizing An Embroidery Design In Hatch Embroidery Software Part 9. As I designed, I was a bit naughty and didn’t set my preferred colours before digitizing so I needed to go back and change up the colours.
Digitizing An Embroidery Design In Hatch Embroidery Software Part 8. I originally titled this one, “Fiddling About” because it’s the one where I make multiple adjustments in order to make the design “perfect”.
Digitizing An Embroidery Design In Hatch Embroidery Software Part 7. Time to create the last digitized element of this design – the cursive text. For this one I couldn’t use the lettering tools so had to take a different approach…
You must be logged in to post a comment.