
The bid to decorate my new home with handmade items continues with an acrylic paint poured clock that is a riot of colour.
Although technically only a project that would have taken a couple of days it has actually taken a while to create as I have been back to it a few times, unable to finish it through indecision, however, this week I managed to pull things together and thought that it was a good time – no pun intended – to share it with you.
It is a few months since I did a series of posts and a video based on the acrylic paint pouring process that seems to have gripped YouTube with a fever. This, however, was where this project actually started so you can see that it took a fair while longer than it should have.
Oh, I mentioned the previous blog posts so might be worth me chucking them in here in case you haven’t seen this or wanted to go back for another look.
- GCTV 4 – Affordable Acrylic Paint Pouring With Cells Made Easy Part 1
- GCTV 4 – Affordable Acrylic Paint Pouring With Cells Made Easy Part 2
- GCTV 4 – Affordable Acrylic Paint Pouring With Cells Made Easy Part 3
- GCTV 4 – Affordable Acrylic Paint Pouring With Cells Made Easy Video
- A Screen Sensation Experiment With Paint Pouring
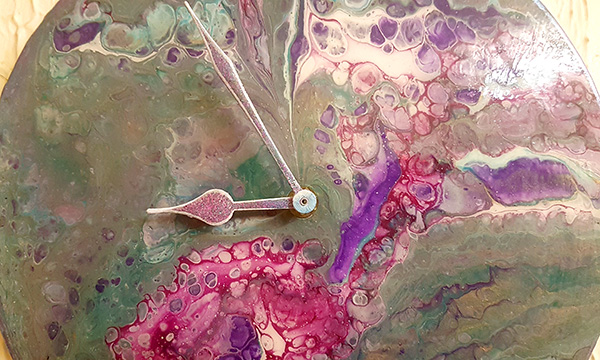
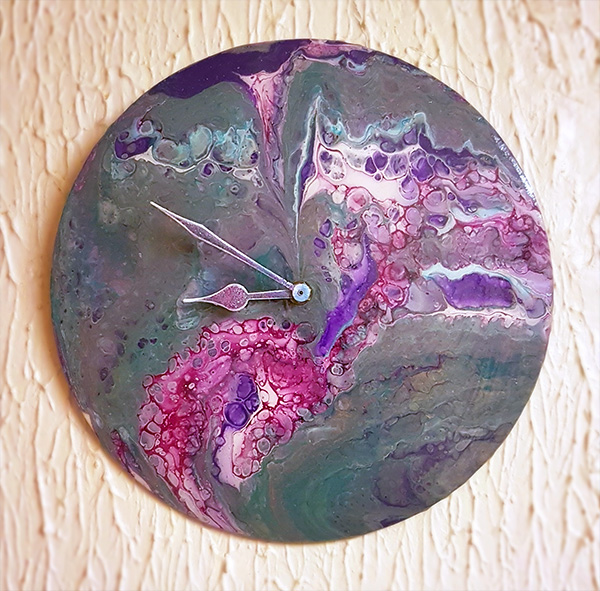
Using the same process as shown in those posts I decorated a circular piece of MDF that had a hole in the middle – a clock face if you will – and you will, because it was. Lol.
That is how it sat for a long time. Months in fact.
In the last week, I found some cool triple thick glaze that I thought would coat and protect it well so added a couple of layers and left it to dry. This is how it looked after the drying.
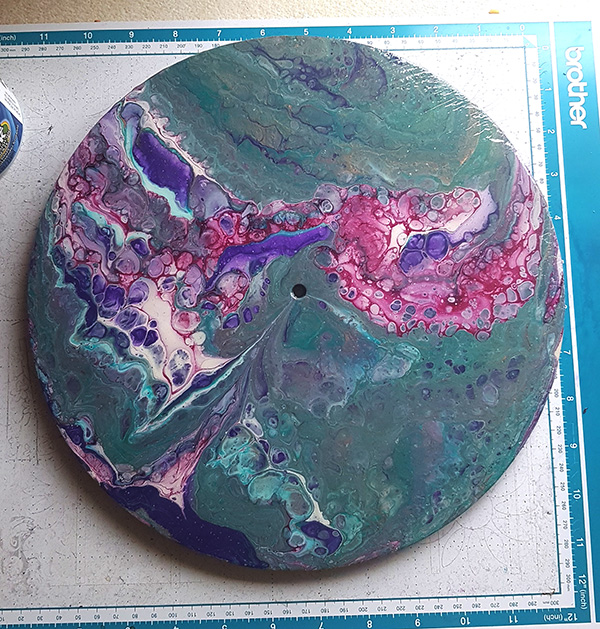
Very decorative don’t you think?
The glaze neither detracted or added to the colours – so that was good! Sometimes these glazes can change the colour properties but this was perfect.
The Personally, I love how the colours swirl and interact with each other so it was important to protect them.
I had used a fair few colours in this one. Also a copper metallic acrylic paint.
")
")
")
")
If you are looking for a similar glaze to coat your paint pouring, I used this one > Deco Art Triple Thick Brilliant Brush On Gloss Glaze via Amazon*.
Once all of the layers of glazes had dried I added the clock mechanism.
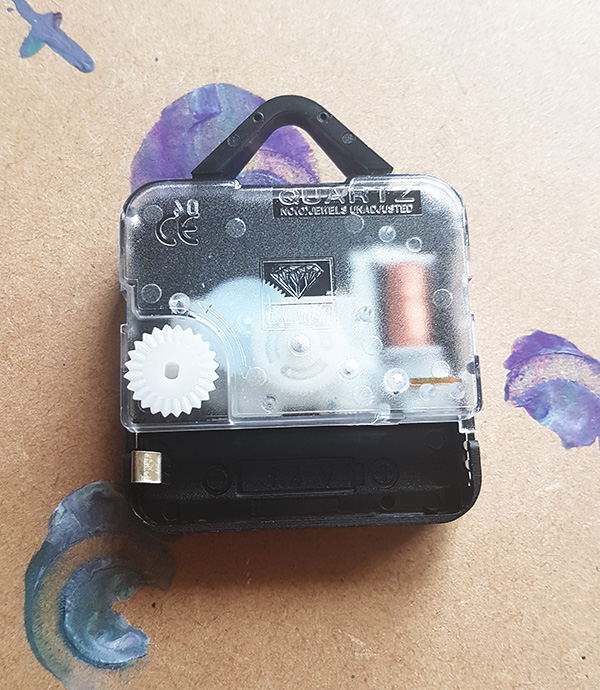
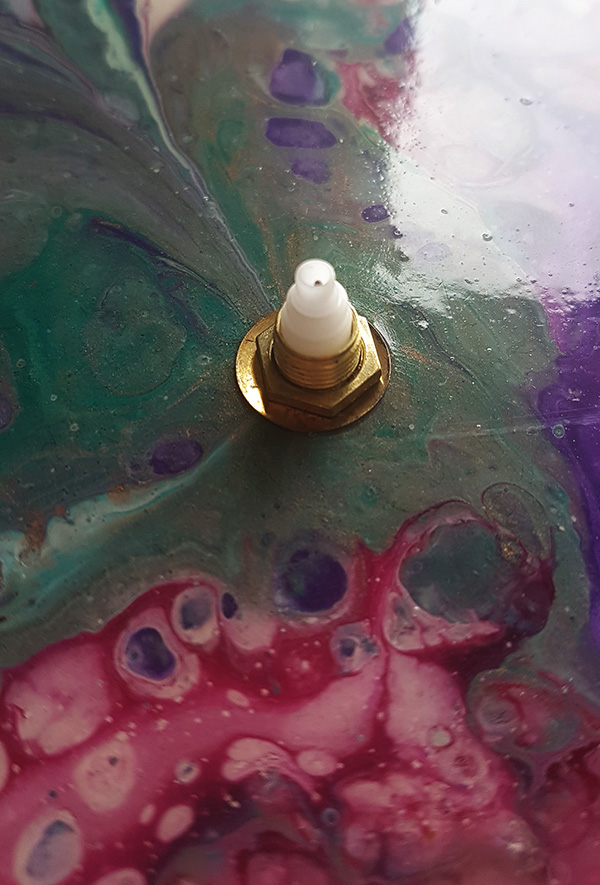
Nice and easy to fit.
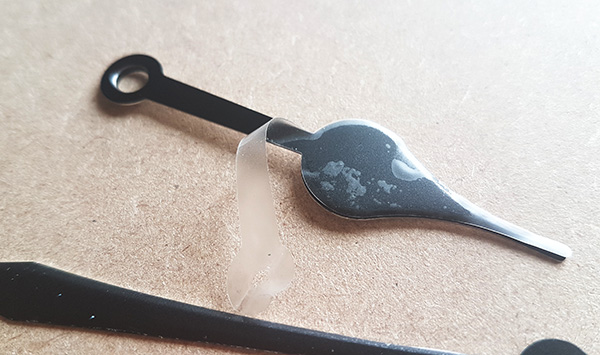
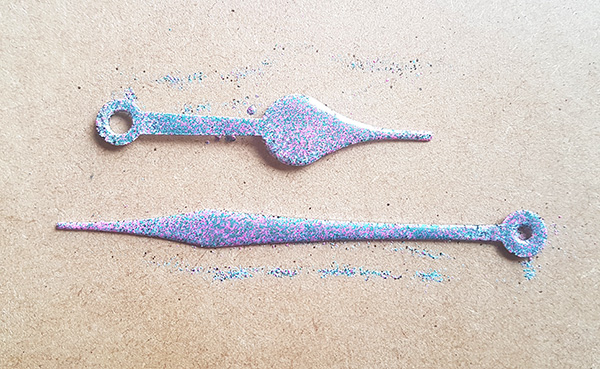
Now, the clock hands were stark black and this is defo something that I didn’t want. Or did I? No, I didn’t. You can see another reason why this took a while, LOL!
So I had a good old thunking session and a root around the craft stash and found a few things that I thought would work well.
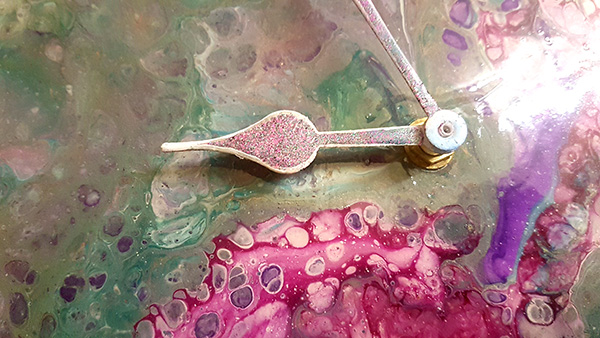
To decorate the hands I first peeled off the protective plastic layer.
The next step was to mix up some embossing powders. I had decided that this was the best way to do this and it would stick well to the metallic hands.
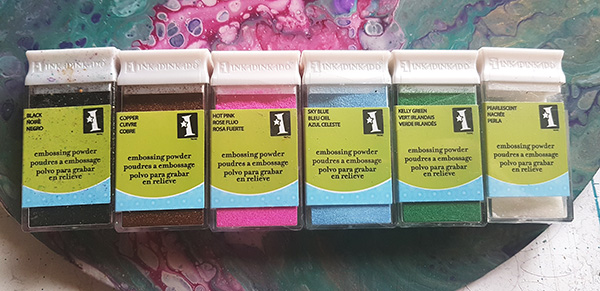
Just a few.
I chose these because they were all colours that appeared in the paint pouring. A simple creative trick that helps a project come together.
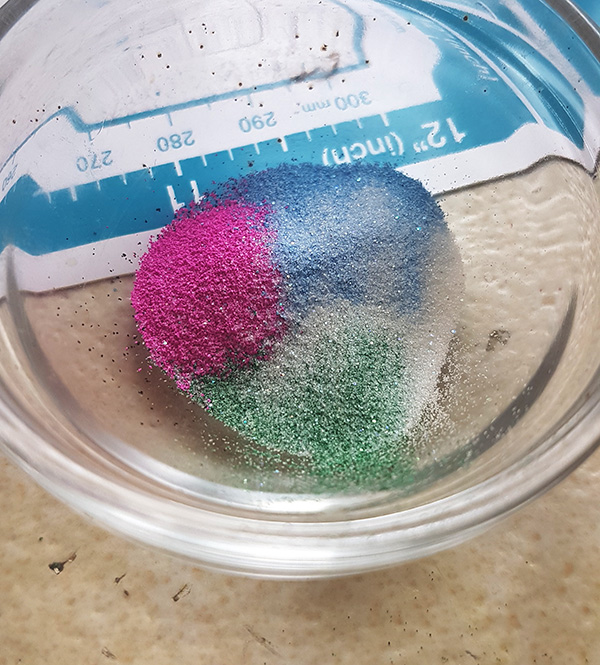
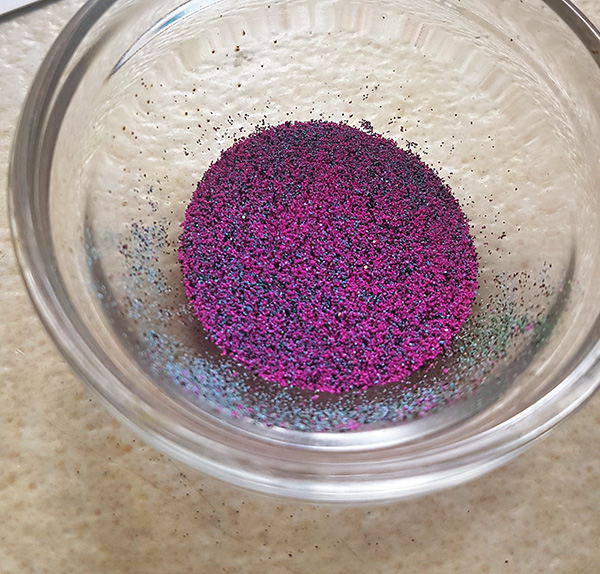
Most colourful salt and pepper that I have ever seen!
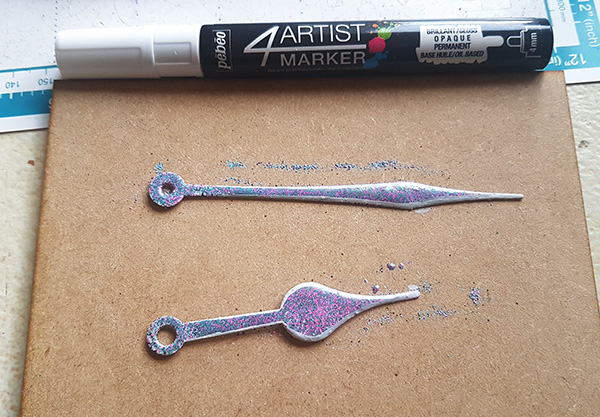
I used Perfect Medium from Ranger to stick the embossing powder to the hands.
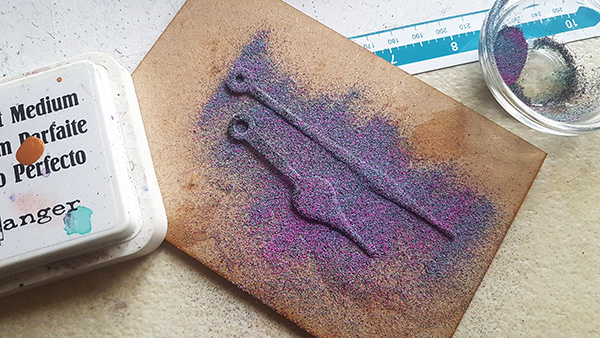
Then, heated it with a heat tool.
After heating I was well happy with the result – you never know until it’s heated what it will look like do you?
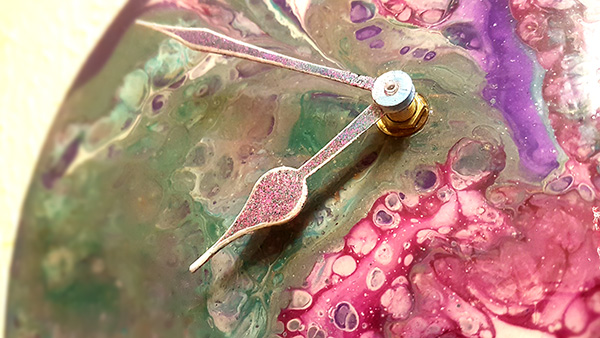
Although I loved this, I felt that it may be a little too similar to the background so, to differentiate between the background and the hands, I added a little edging with a white acrylic marker.
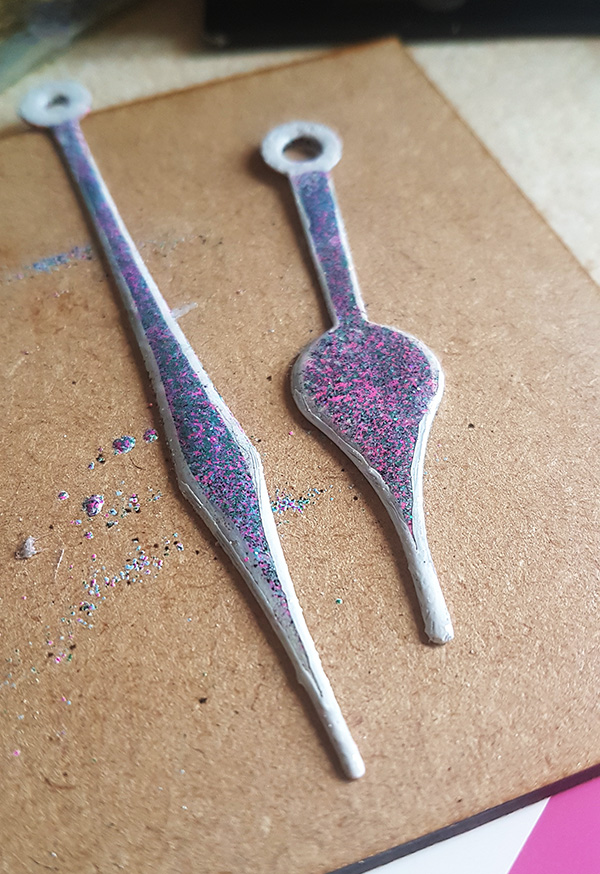
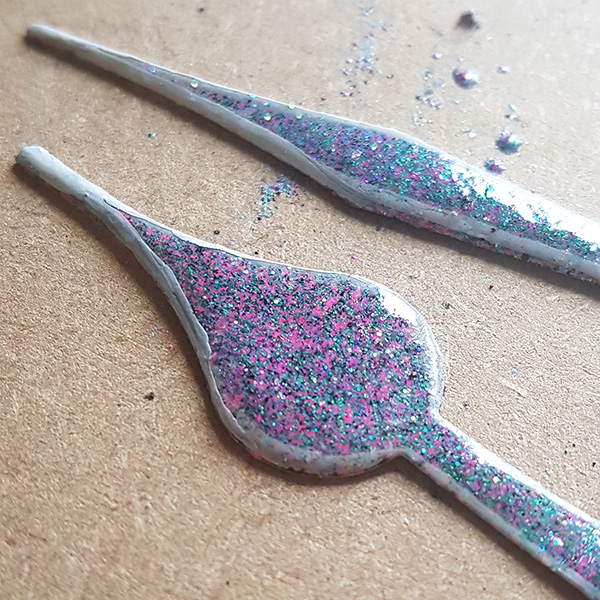
Perfect!
So the final thing to do was to add the hands to the clock.
By the way, earlier on I attempted to add numerals off sorts with dots of dimensional medium but decided that this didn’t work so wiped them off before they had dried.
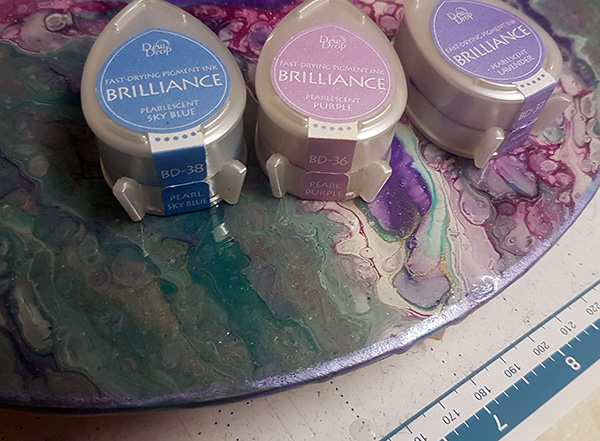
Maybe just another little something. A little pearlescent ink around the edges I reckon.
I may still add something with white vinyl in the future but for now, that’ll do.
Here is the ‘final’ thing?
I still have to decorate the kitchen walls so imagine this texture but in mineral stone (grey). Think the clock will sit nicely against that.
Right, another clever creation is done, what do you think?
Would you have added something more? Numerals? Dots for the hours? Something else? I would love to hear your thoughts.
For now, though, I shall log off and go and do something productive, or lay on the sofa. Perhaps this can be both?
Thank you for stopping by and I look forward to sharing more with you in the near future.
Bye for now.
J :)

Beautiful! good idea to emboss the hands .
I had one but the wheel fell off I hand stitched a clock and proudly put it on the wall after 3 months it fell off the wall and the hands bent only slightly but after numerous attempts to straighten them still not right You have inspired me to get a new mechanism and hands and put it back up. It had two fabric dangly bits that I hadn’t ironed and once I took it down to iron that’s when the wheel fell off1
Your clock is beautiful, its colour will indicate the time to you.
LikeLiked by 1 person
Beautiful just as it is, no need to mark the hours 😊
LikeLiked by 1 person
Hi John. I hope you are well. Another masterpiece. It’s absoluteky beautiful as it is. If you go into production let me know. A true work of art. Please post a picture when it’s in situ and the kitchen is finished. It will look fabulous. Take care x
LikeLiked by 1 person
There you go again with your amazing creativity! Its really lovely and huge thanks once again for showing us how to do something. It’s lovely as it is, but if you personally feel it needs dots what about pearl/jewel drops? – Now carry on, as you were, being lovely you x
LikeLiked by 1 person
Fabulous make John. Love it as it is without any numbers xx hazel
LikeLiked by 1 person
Absolutely fantastic John, I have three sets of clock mechanisms I found while tidying up the other week so this a project I must try I also have a round clock pack I bought but by the time they arrive you forget what you were planning to do so thanks for the inspiration.
Nancyd xx
LikeLiked by 1 person
I love it. No need for numerals as its perfect just as it is. X
LikeLiked by 1 person
Why not use jewels for 12, 3, 6, and 9. You could use flat backed diamonte’s in a clear or that snazzy deep pink colour from your pour. They would just give you enough of a hint of the time while adding a bit of focal bling too. I’ve been gathering equipment for a few months now and I’m planning my first pour this weekend. I’m so excited. Great Project 😀
LikeLiked by 1 person
Amazing, and beautiful. You have such a talent, John. Thank you for sharing, I think this is a must-have-a-go project. As for numbers/dots I don’t think them necessary, we all know where they are and, after all, sometimes it’s nice for the clock not to keep reminding you of other things to do like… tea or housework! Go lounge on your sofa you’ve deserved it.
All the best Jean in Wales.
LikeLiked by 1 person
Love it! Love it! Love it!
Umm hour markers…. well we all know where they are sooo purely aesthetic… and once you have sited and hung the clock…they could be on the wall around the clock…ooh actually they don’t have to be conventional as in occupying the correct position… or ..or…they could be captured mid melt as they slide down the wall inspired by those other surreal clocks …or…OK you get the idea : )
Take care
LikeLiked by 1 person
Wow, John that is amazing. I love it and would be very proud to display that on my wall. I must watch the tutorials you posted, think I’ll have a go 😜 I think quite flat Roman numerals covered with embossing powders to match the section you are placing it so they almost dissolve into the acrylic background colours, think white would stand out too much and deviate your eye from the beautiful colours you have made, well that would be my thoughts lol…enjoy your lay down it may well break out some more vivid ideas haha. Thankyou for sharing xx
LikeLiked by 1 person
John you amaze me every time. Really beautiful – might have to go rooting through my stash tomorrow and see what I have ‘hidden’ away. I know I have a clock mechanism lurking somewhere. Hope you are feeling better! Best wishes from Derbyshire! Lorraine
LikeLiked by 1 person
You do cheer a day up, I must have laughed out loud because the dog took off…Still, she took her snoring with her. Lol. You’ve prodded my comfort zone again. Not my scene, but I love it, I imagine it will appeal to a lot of different people. I’m a bit torn about putting something to mark the hours, but I think it would have to be the same colour as the hands, if you did. Maybe not. xx
LikeLiked by 1 person
Absolutely fantastic need to find all my bits and give it a go, thanks for the inspiration Gentleman Crafter.
LikeLiked by 1 person
Oh wow, I love this clock, great work John. At first I thought you have to put something for the hours, but the longer I watch it the more I thought but what do you have to put than on it?? No numbers, dots are melt in the background, or you have to do them in black, is that’s an option?
I think you can be productive and lay down on your sofa, LOL, if you can, I can alsoLOL.
Thanks for sharing this great piece of art and untill the next time.
LikeLiked by 1 person