
Free Printable Design Grids for Pattern Stamping Part 2
Halloooo you. Welcome to Part 2 of this 2 part series looking at the stamping grids that I have designed and that are available as a free download.
Missed part 1? Don’t worry, you can check it out here.
The downloads will be in multi-page PDF format so you can print the lot out in one go, or just the one page – no muss, no fuss.
If you would like to join me in having a go at pattern stamping using printed grids then all you need to do is click here to download Gentleman Crafter’s Handy Pattern Stamping Grid eBooklet, PS, you can use these for more than just pattern stamping – think embellishments, rhinestones etc.

For my light source I have been using a light-box. You choose from a variety of sizes and styles.

Ok, so this week I had a quick play with the circular grids.

There are various versions contained within the pack. They range from six sections up to eighteen sections. Useful as we have a range of sizes of stamps at our disposal.
First I had better check that the grid is visible through the thick milk cardstock that I will be using.
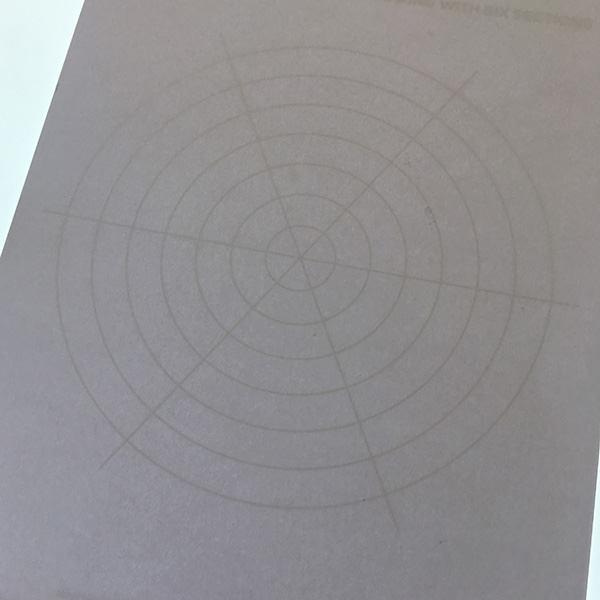
I do believe that that would be a yes.
Grabbing a butterfly, we wrestled for a bit but I managed to overpower him after a while, I stamped the design out using the six sectioned grid.

Looks good, lights off please.

Even better.
Maybe I’ll try that again with two tones of ink.
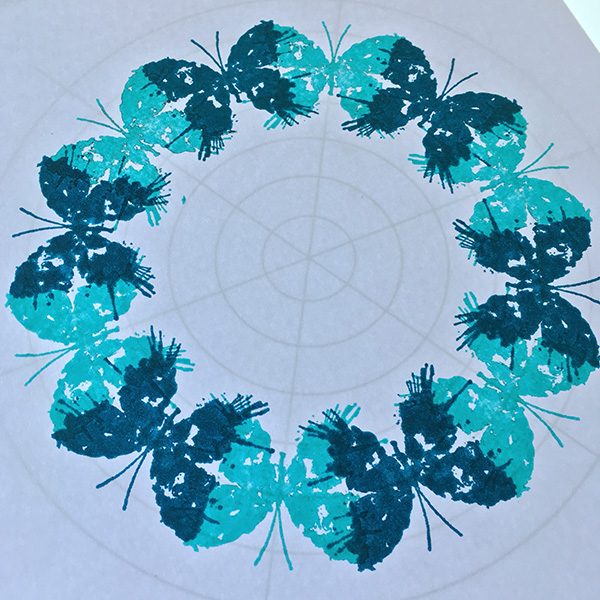
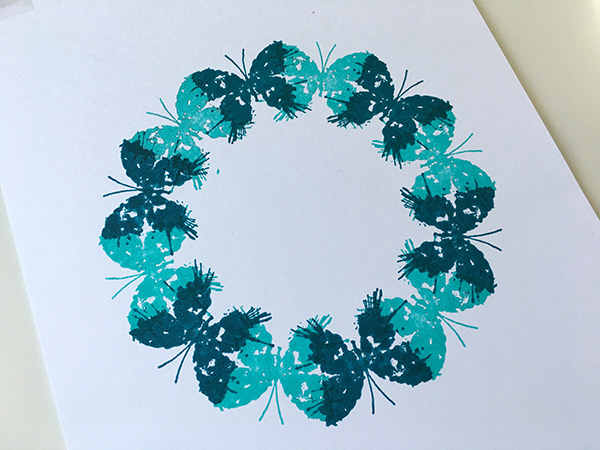
Pretty!
Ok, as I was doing the last design I began to form an idea. I wondered what would happen if I masked of each ‘wedge’ of the design.
With the grid being visible it was easy to position some sticky notes to do just that.

For this design I chose a lacey border and made the first impression, lining up two symmetrical base points of the stamp with two points on the grid.


Right, mask off.

Hey, that worked quite well!
Nervously I continued to mask, stamp and then reveal.

Until the whole circumference was complete.
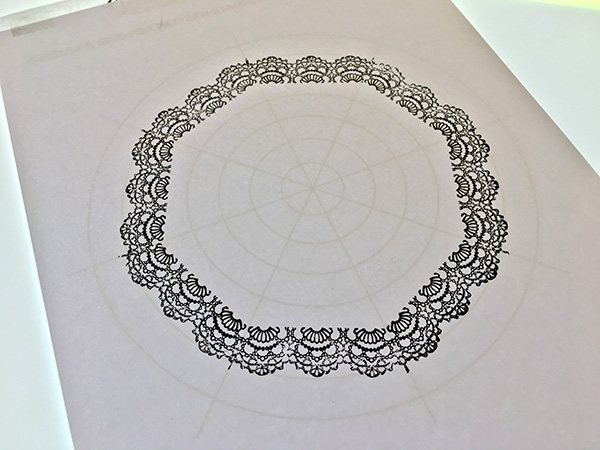
Wow! Love that!
Did end up with a few ‘spikes’ where the overlaps weren’t quite lined up right.

So I grabbed a mini bird stamp and used these to hide these unsightly protrusions.


One other tip that I have for you in this post is not to leave your inkpad under your arms as when you come to rest them, you may get a little inky.

Whoops!
Right, time to move on and by this time I had also changed the grid onto the eighteen sectioned circle.
I plonked a Santoro stamp design right in the middle.
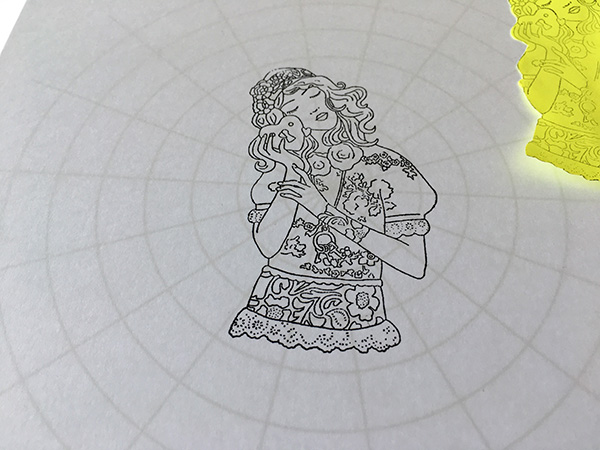
Masked it off and then started using some very small stamps to begin adding in a patterned background.

After removing the masks it looked awesome!

I did add another outer row of impressions as I felt that it needed it.


Probably could have left that though.
Ok, time for some more.
A diamond is a crafters best friend. Well, it is in this case.
On the eighteen sectioned circle I stamped a row of diamonds.

Nice, but what if I rotated the stamp.
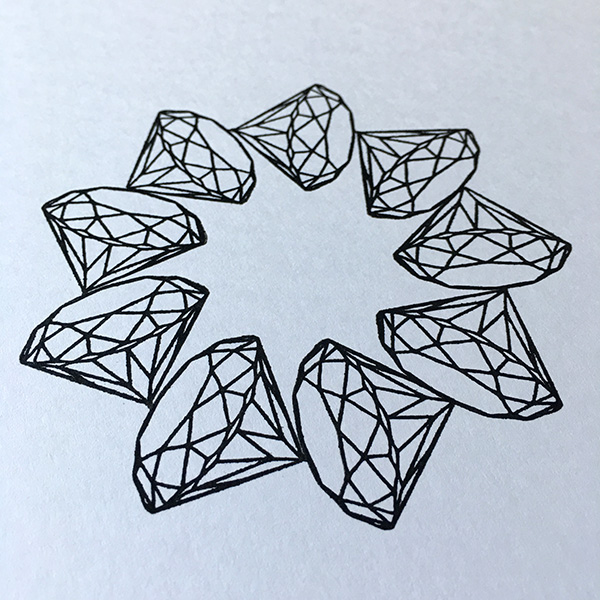
Cool! What if I inverted the diamond and used the outer edge.


Cool!
Right, time to get a little more complicated.
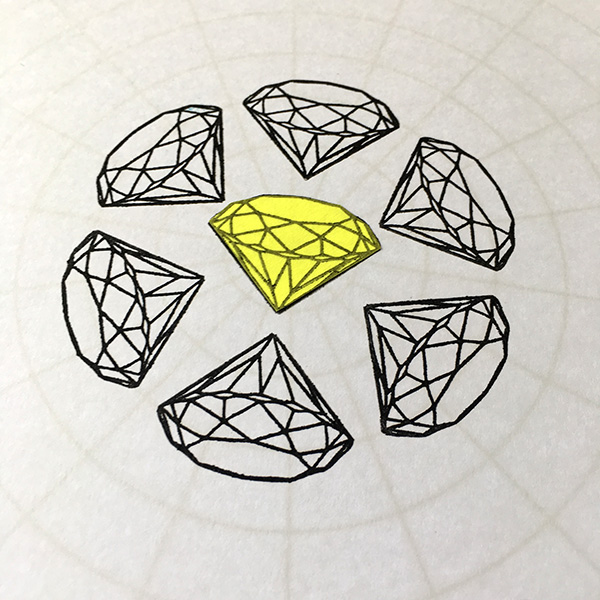
Diamond stamped in the middle and then create a border.
Mask the one in the middle.
A lightbulb went on whilst doing this. Because I have the lightbox I could actually trace my masks rather than stamping them out!

That means that even if I miss stamp or create a combo of stamps, I can created a custom mask with ease!
Ok, more masks on and more stamping over the top.

More masks on, this time connecting the outer diamonds together.
Then some detail stamping over the edge.

Followed by some pen shading and …


So, what do you reckon? Not a bad set of reference sheets to have are they – and help create a whole bunch of designs.
Anyway, don’t forget to come back next Sunday for Part 3 in the Design Grids for Pattern Stamping series of posts.
Also, if you know anyone that would be interested in giving this a go then please do use the handy social sharing icons at the bottom of this post to let them know about these free printables.
In the meantime, thanks for popping in and I will catch you again next time.
Ciao for now.
J :)

Thank you!
LikeLiked by 1 person
Fantastic John TFS xx Hazel
LikeLiked by 1 person
You are a genius John thank you for sharing. Xxxx
LikeLiked by 1 person
Thanks, the grids are great!
LikeLiked by 1 person
What happened to part 3?
LikeLike
I took an unexpected break.
LikeLike
Thank you very much for these awesome grid patterns !
LikeLike
My pleasure.
LikeLike
Thanks so much for this – I can imagine that I’ll be using it a lot x
LikeLiked by 1 person
John have you been cloned? How are you powering through so much work? Hope you are remembering to buy baked beans ….I know you get loo roll in kuz we see it in your projects : ) More useful fabulousness, cheers!
LikeLiked by 1 person
Wow, great ideas John. Thanks
LikeLiked by 1 person
Fab idea John. I can’t help thinking this would be something that could be developed to work with Clarity’s groovi system. Shh! Message Barbara!
LikeLiked by 1 person
Wow! So much to take in! Can’t wait to try it all out. Thanks so much for all your tutorials and inspiration. You’re a gem! Thanks again – Liz X
LikeLiked by 1 person