
This week I was having a wander and on passing my local charity shop, noticed an analogue alarm clock in the window so stopped for a closer look. As I looked closer a light shone down from the heavens and a chorus of inspirational voices burst forth …
If you don’t think I’ve finally lost it then please do read on to find out what happened next …
This is, as I said, where the story starts. With an alarm clock. Just £3 in my local charity shop.

Upon getting it home I obviously began to dismantle it and see what was available to use.


Blimey, who would have thought that there was so much in a wee little alarm clock?!
Cogs, frame, handles, bells – the works!

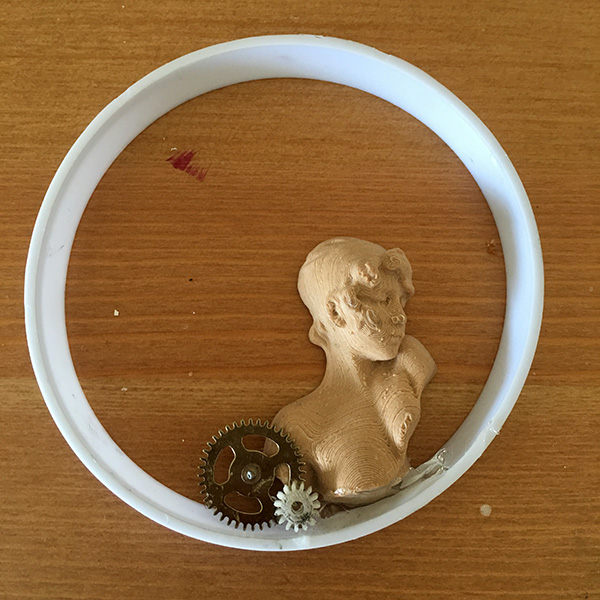
After fiddling about with the bits for a while the original idea, that I had had whilst gawping in the charity show window, resurfaced and I went off to rummage through my 3D printed bits and came across a bust that was a test print.
Perfect!
I glued this into the inner ring of the clock with Pinflair Glue Gel and added a couple of the cogs that came from the clock.
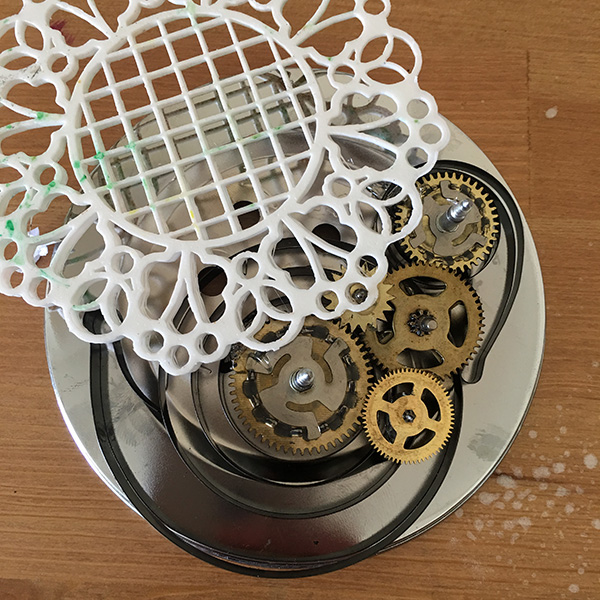
In my stash of 3D printed bits I also found a doily design that I thought would look awesome as part of the background.
Again, using Pinflair Glue Gel, I added this and a load of the cogs to the back plate of the clock.
At this point I realised that I might not have enough of the right size of cogs to achieve the look that I was going for so I converted some of my SVG cutting files into 3D printing files and bashed out a batch on the CoLiDo 3D Printer.

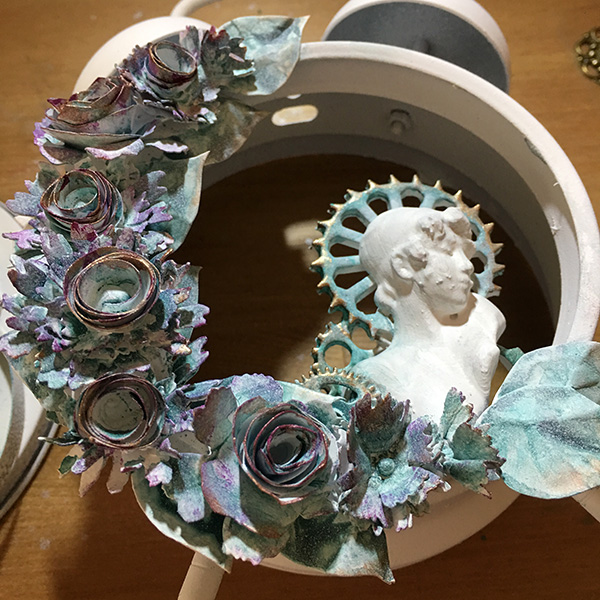
One of these cogs stood out as a perfect accent for use behind the head of the bust so in it went along with a couple of smaller printed cogs.
I popped the inner ring into the clock to make sure that it was what I was aiming for …

… yup, that’s just right.
Next I grabbed my Tonic scissors and hacked down the doily print so that it would fit within the clock when I came to reassemble it later.

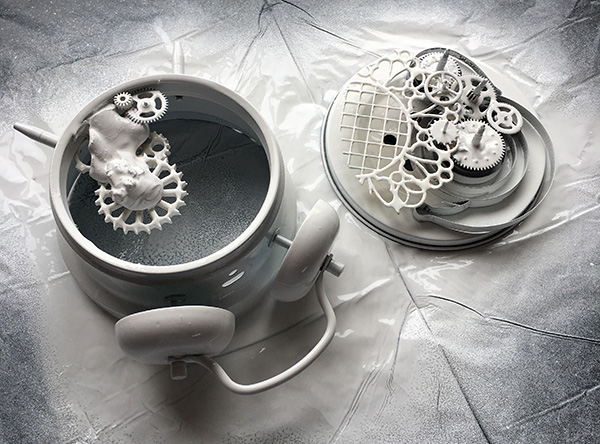
Time to get messy!
First job was to give both parts a couple of light coats of white Liquitex Acrylic Spray. This was to make sure that all of the surfaces would take the paints, that I would use later, in the same way.
Whilst that dried I rummaged the punch box and found my Tim Holtz/Sizzix distressed flower punches and cracked off a load from lightweight cardstock.
These were then assembled and were joined by some crumpled leaf shapes that I cut freehand from some crumpled paper.
Using Pinflair Glue Gel again these were then built into a floral spray around the outer edge of the clock body and given a couple of light coats of white Liquitex Acrylic spray.
Here are a few piccies of how this process went …


Here is where I got to and decided, that’ll do pig.


Starting to love this!
A bit of colour needed though I reckon.
Much deliberation ensured and I even used my ‘phone a friend’ lifeline before settling on a tealy/pinky/coppery palette.
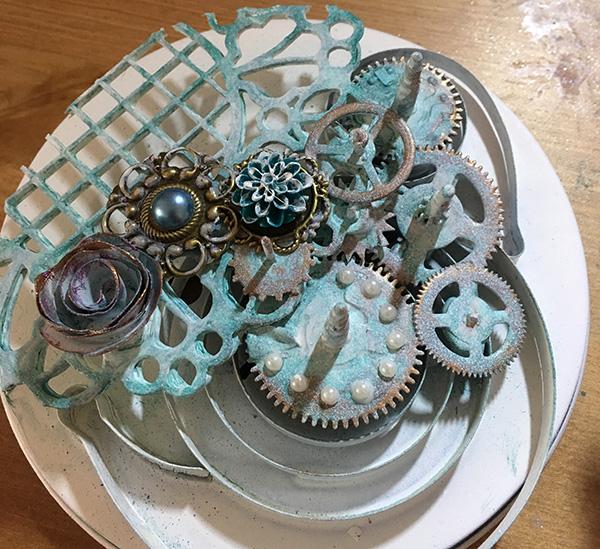
The process began with a light wash of DecoArt patina antiquing cream.

A bit wishy-washy though so some sea spray, cobalt teal and conifer green acrylic paint were dry brushed and dabbed over the piece.
This was followed by some tittivating with some copper coloured Ken Oliver Liquid Metal to bring back the metallic look.
Earlier whilst rummaging for paints I also stumbled across some extra embellishments that I shoved in with some Pinflair Glue Gel and then spattered with sea spray acrylic paint to tone their shinyness down.
Oh, and of course some faux pearls.
Using the lessons that I had learnt decorating the background I then went on to decorate the front of the piece.
I haven’t mentioned the pink paint so far but this was just a tiny amount of Quinacridone Violet DecoArt fluid acrylic paint dry brushed over various extremities.
One final touch, some sparkly gems in the centre of the flowers. They probably don’t show as I was waiting for the glue to dry as I photographed the piece – the patience of a saint I do not have, lol!
Anyway, so as not to risk overdoing this I decided that all was as it should be and inserted the back plate into the clock and …. voila!
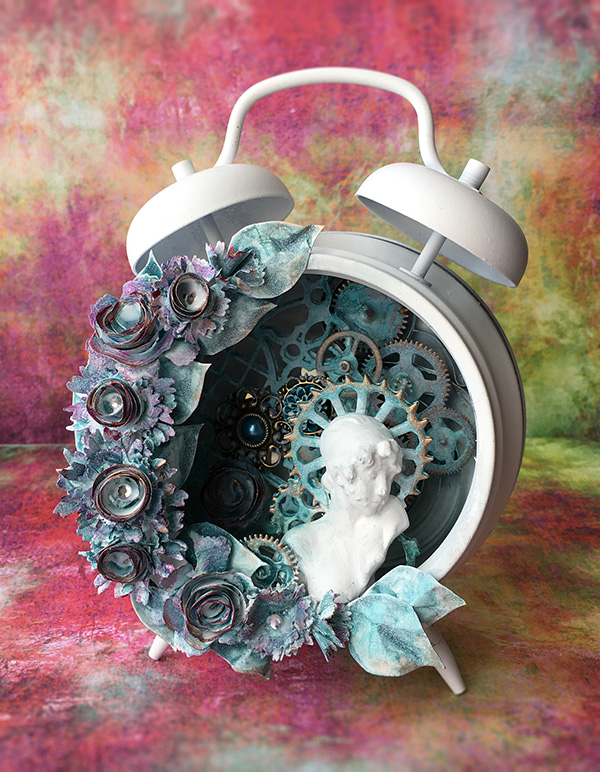
I am going to be honest, and I don’t mean to blow my own trumpet, but this is probably one of the best things that I have ever made – or at least it felt like it.
As ever I did a ‘few’ more pictures for you to browse – click on any of them if you want to take a closer look and open a gallery.


Breathes sigh of relief. So, what do you reckon? Anything you would change or do differently?
Hope you have enjoyed this journey from charity shop to mixed media clock.
If you are interested in finding out more about these fabulous 3D printing machines, why not look out for the shows or head over to Create and Craft TV now.
Appreciate the time you have spent with me on this post today and look forward to bringing you more.
Ciao for now!
J :)

My clock just brake down and today I found your lovely clock. Now I know what to do with it as I hate to throw away things.
LikeLiked by 1 person
Great to hear!
LikeLike
Really, REALLY pretty John.
You clever thing!
~ Cobs. x
LikeLiked by 1 person
What a transformation,fabulous and good therapy too. Can’t get more mindful than concentrating on that.
LikeLiked by 1 person
This is something else. Quite brilliant. I love love that printer thing it really changes the game. I like the paint sprays, do you have a list of what you keep in your Crafty arsenal? I think that would be amazing. Being new to mixed media I struggle with what to use on whatever This is droolingly gorgeous..well done you x
LikeLike
It changes frequently and also hides often so the list would not be the same form day to day, plus I’d lose valuable crafting time … ;)
LikeLike
Think the charity shops will be wondering why they are selling all their clocks! This is fabulous! Well done.
LikeLiked by 1 person
Well John it is certainly something different.
LikeLiked by 1 person
Well impressed…..
LikeLiked by 1 person
Wow! I agree, John, I think this shows you at your creative best. I don’t do steam punk style either, probably not enough imagination, but I can appreciate other people’s art. I would probably have been tempted to tint the hair of the bust a soft gold, to tone down (or up?) some of the flat white. But it’s brilliant as it is. Cheers!
LikeLiked by 1 person
Its amazing, who would have thought that a bob standard alarm clock could become such a beautiful piece of home decor. Well done, you should be proud.
LikeLiked by 1 person
Love it. Would probably have put pearls in the flowers as i think they are ‘softer’, but i still like yours. You should show it to the charity shop.
LikeLiked by 1 person
Absolutely stunning John! Charity shops, here I come!!!
LikeLiked by 1 person
Soooooperb! I love it John x
LikeLiked by 1 person
Beautiful. This is creative, imaginative and unique. Wonderful!
LikeLiked by 1 person
Absoluter stunner John! I love it! Clare x
LikeLiked by 1 person
Wow! What a fab piece of art you’ve produced, I love it.
LikeLiked by 1 person
Brilliant John love it xx hazel
LikeLiked by 1 person
Love it John, I really do need one of those 3D printers – ho hum ….. somewhere, over the rainbow 😉
LikeLiked by 1 person
A wonderful creation John, it really is a work of art. You are completely entitled to be pleased with it. Keep them coming John as you are a brilliant inspiration xx
LikeLike
Seam Punk not me, but looks good, The Lady in the clock is to me the best yest xxx
LikeLiked by 1 person
I think this is your best too! Absolutely fabulous darling 😉
LikeLiked by 1 person
Absolutely fabulous John, what a work of art who would have thought it from a humble old clock!! Well done John
LikeLiked by 1 person
I’m not normally into this style, probably because I’m lazy, but this is beautiful. You could be right about it being your best ever, although some of your others take some beating. I noticed Scotland creeping in to your writing. x
LikeLiked by 1 person
Lost it!!!! No I think you have found the true calling for you amazingly active brain. What crazy,mad teenage girl would not love this in their bedroom? Keep them coming. You breed inspiration.
LikeLiked by 1 person