It’s been a while since I last blogged but I certainly haven’t been idol. I’ve been trying out lots of new things and trying to work in some techniques that I already enjoy.
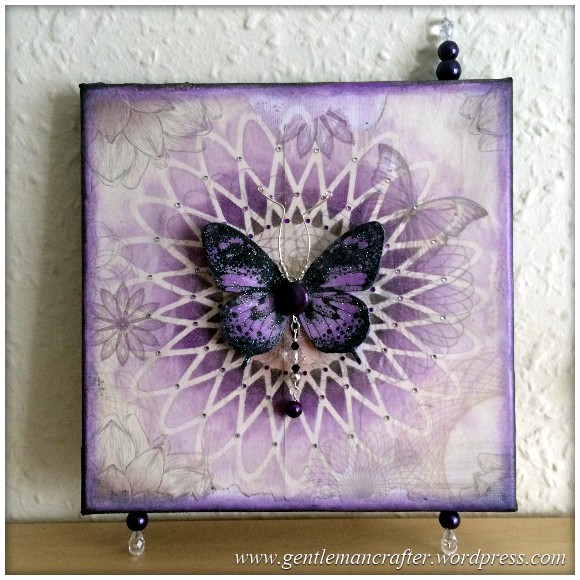
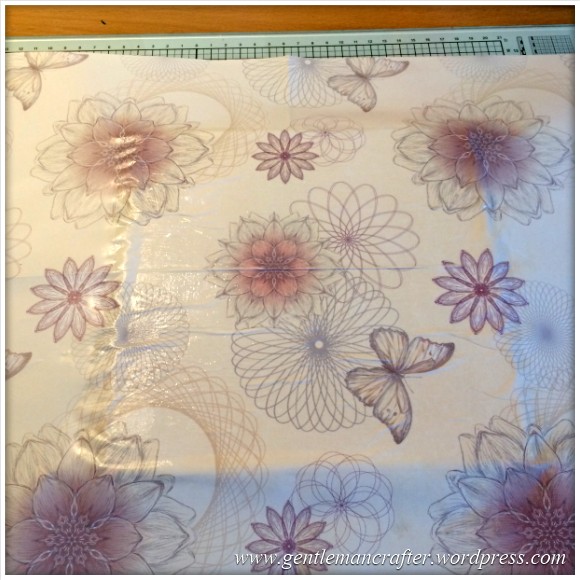
I am therefore very pleased to be able to bring you another Monday Mash Up this week. This time it is a bit of home decor that starts out with a small artist’s canvas and some cheap wrapping paper.
The creation process was quite organic. I only really had the canvas and wrapping paper as a starting point – as I started, I didn’t have a clue what this was going to look like when it was complete.
To start this canvas I applied a thin layer of Mod Podge (for paper) to adhere a sheet of pretty wrapping paper to a blank canvas.

I did use a foam roller to press the paper down and also used a heat gun to speed up the drying process.
The paper did wrinkle as a result a little however, rather than having a creative paddy, I thought that I would try and use this to my advantage and make this a distressed canvas.
I then cut/tore away most of the overlapping sheet.

Then, using a sanding block, I roughed away the remaining overlapping sheet and also roughed up the edges a little, to start enhancing that distressed look.
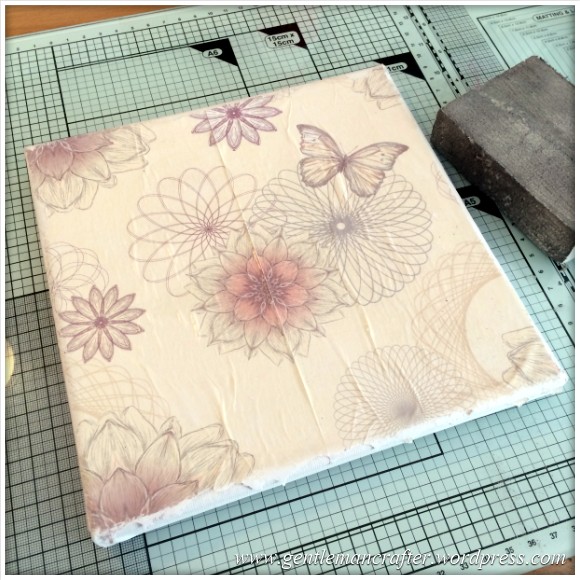
To bring this into the fore, I also roughed the sanding block over the main area of the design (where the wrinkles were) and also roughed away more of the edges.
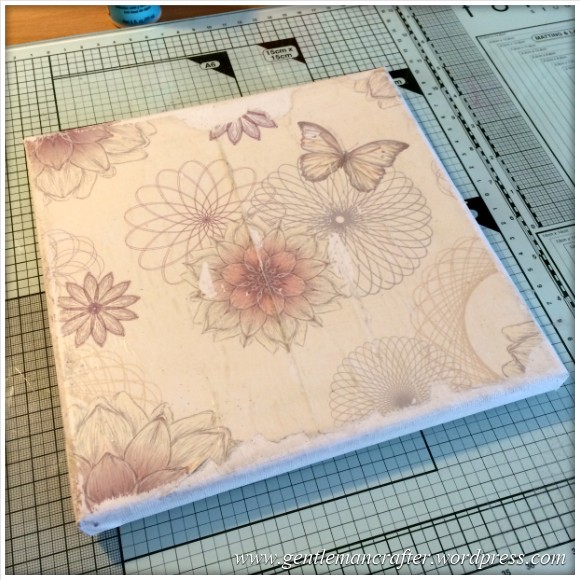
With the distressed look I have noticed that there are often “dirty” edges or corners.
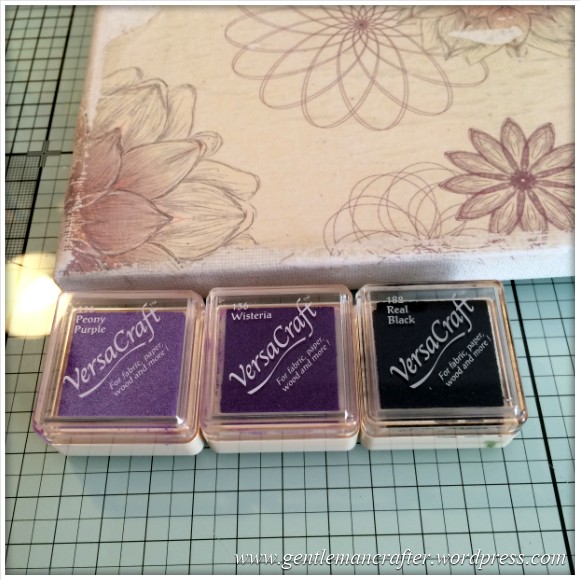
To “dirty” up the corners on this canvas I used three shades of Versacraft Ink Cubes – light = Peony Purple, midtone = Wisteria and the dark shade = Real Black.
I chose these colours specifically as they worked well with the colours already present on the wrapping paper.
I applied the lightest shade first, dragging the ink cube over the edges and into the main area.

I repeated this technique with the mid shade ink cube but brought less of it over the edge.
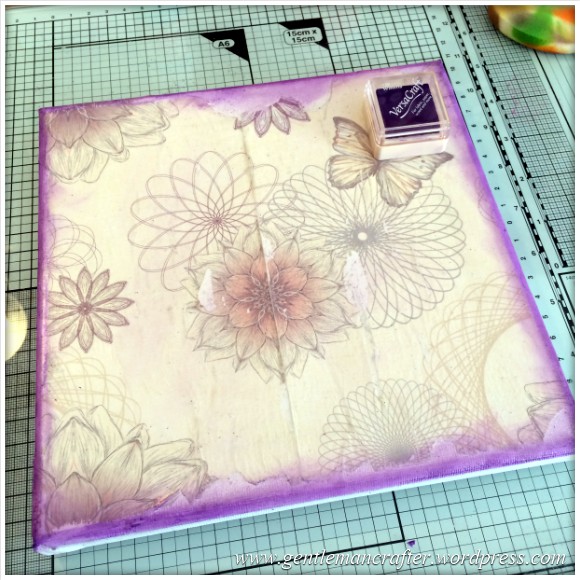
The first application didn’t quite give the intensity of colour that I wanted so I did go back and “fiddle” a little by applying a couple more layers of colour. I dried each layer with the heat gun because this was a glossy paper and the ink was taking quite a bit of time to dry.
The benefit of Versacraft ink is that it can be heatset.
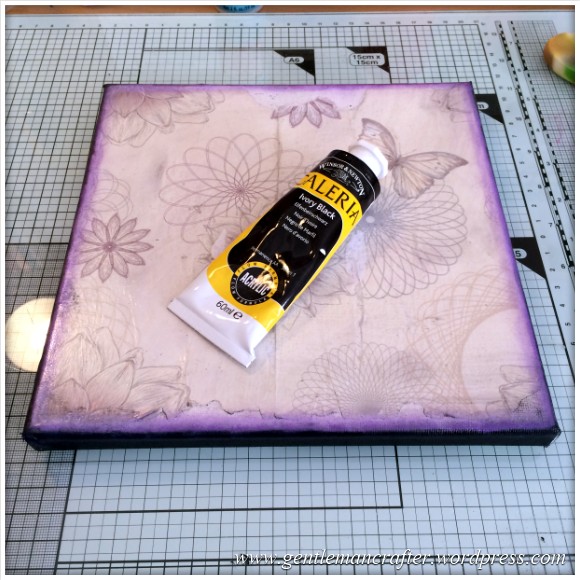
I then sponged some Ivory Black Galeria Acrylic paint onto the edges of the canvas.
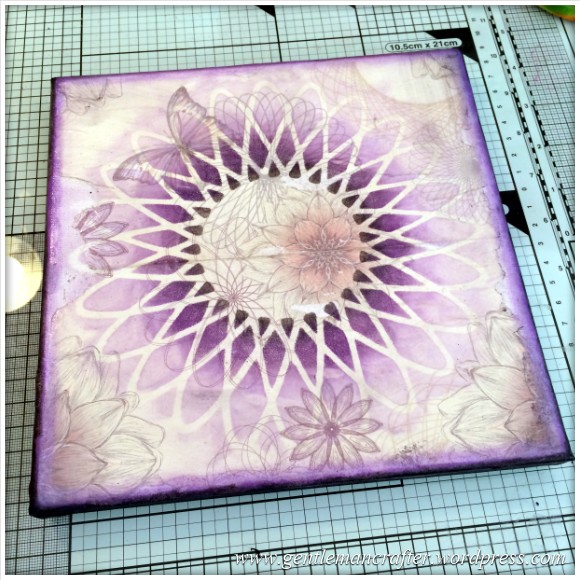
With the background complete I turned my mind onto what I was going to put in the centre of the canvas.
Looking at the backing paper I remembered a stencil that I had made from Doeflex Template Plastic with my Brother Scan N Cut so went and hunted that out – my craft room REALLY needs more organisation, lol!
After locating the stencil I placed it in the middle of the canvas and, using the same three colours of Versacraft Ink Cubes as for the edges, I began daubing on successively lighter shades of colour, working out from the centre – first the black …

… then the Wisteria …

… and finally the Peony Purple.
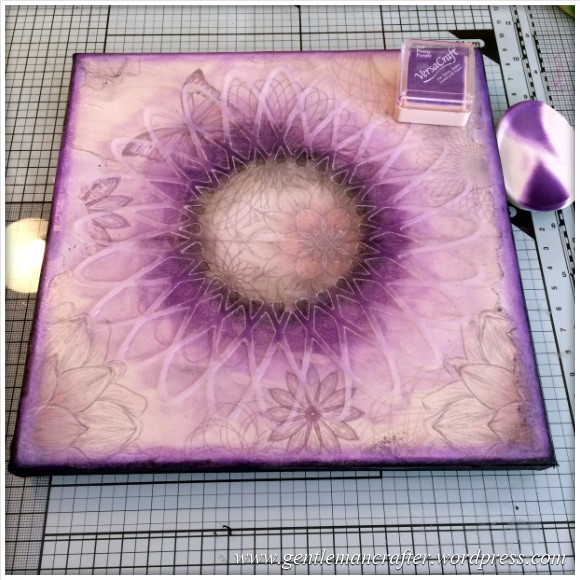
Looks good so far.
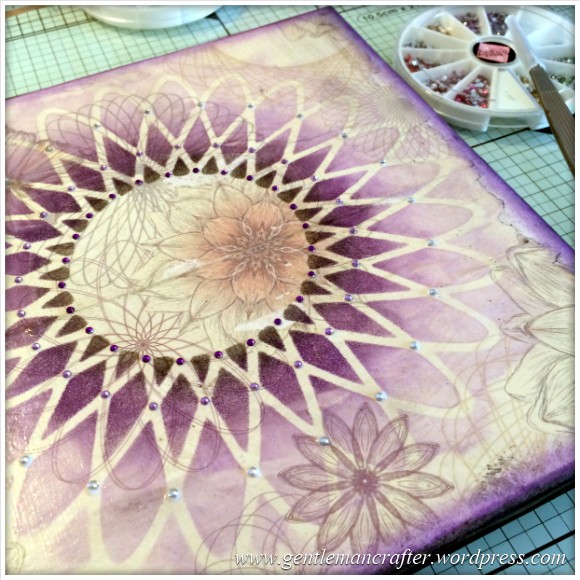
Cup of tea in hand I then began musing what to add in terms of embellishments.
Again, looking at the background I noticed butterflies in the design – I therefore decided that that was going to be the focal feature however I needed to satisfy my need for bling first so I used some Anita’s gems to punctuate each junction of the stenciled design.
For the butterfly focal feature I had a dig through my stamp collection and found a beautiful butterfly design from Indigo Blu.
I stamped the design (in black Versacraft) and heat embossed (with clear embossing powder) onto white cardstock and then smeared over some of the Versacraft inks.

I liked the butterfly but wanted to add a little sparkle to it so I used Perfect Medium to adhere some Inkadinkado clear sparkle embossing powder and then heat set it.
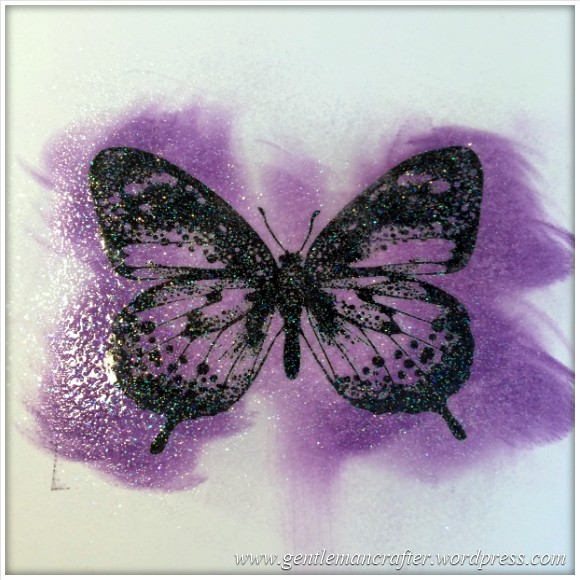
This looked nice so I cut the design out using a pair of scissors. It then occured to me that the embossing needed more “depth” so I used Perfect Medium and added another layer of clear embossing powder to encapsulate the glitter layer.

I had made a mistake on a previous attempt at the butterfly but it still looked ok-ish so I decided to use this as a base layer for the butterfly and stuck that to the canvas with Pinflair Glue Gel, raising the wings a little.
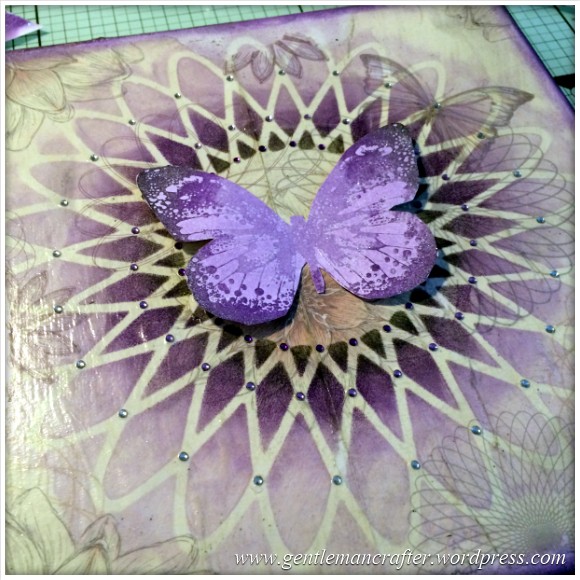
And then added the finished butterfly (that I was happy with) over the top of the first one, again lifting the wings with some Glue Gel.

So this was where I got to with that canvas.

Although I liked it, I wanted to add a little more to the design to finish it off so I broke out the wire and bead box and combined a few random bits and bobs to create the thorax and antenna of the butterfly.
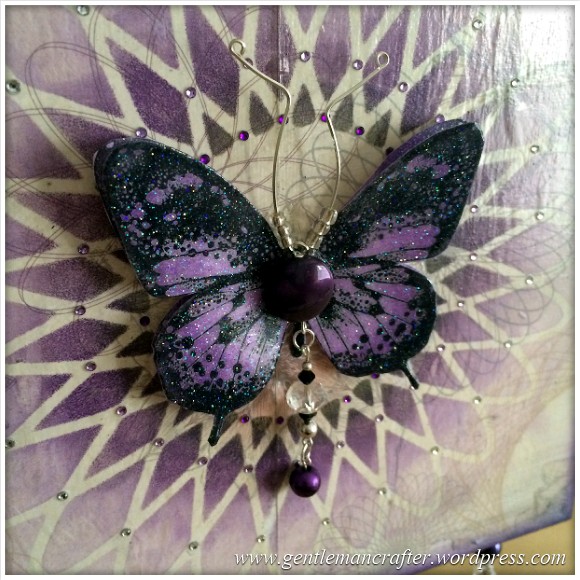
I also added some purple beads to glass head pins and stuck them into the canvas.

There you have it, a lovely design I think. Don’t you?
I was quite proud of this design – I like the simple colour combo that works through all aspects of the design and also those finishing touches really bring it to life, don’t you think?
Well, that’s it for this one. There are more on the way so do pop back when you have the chance.
As ever, if you have any questions or comments about this post, please feel free to pop them in the comments section below and I will do my best to answer any questions.
Thank you for reading and I’ll see you next time.
J :)

Happy Birthday John!
Wow, I love it John, it’s fantastic, especially with the beads and wire too- butterflies and purple, two of the necessities in life! I remember seeing the stencil on your blog before and I have the IB stamp too, love it, it’s a very big butterfly stamp! Love how you just ride your crafty mishaps and turn them into features that look part of the plan. Keep them coming :-)
Crafty hugs,
T x
LikeLike
Welcome back John and Happy Birthday!! Super project, best wishes Jackie
LikeLike
Thank you John,love it.Also great to see your name in my e-mails.Missed that a lot.
Thanks again,Jackie Lewis
LikeLike
Hi John. Good to see you back, was getting a bit worried.
Lovely canvas. Love the idea of the wrapping paper and what a beautiful butterfly.
Bye for now
Val in Spain x
LikeLike
Great piece of wall art John and am glad you went with the wrinkles (well we all have to eh?)! Turned out so well and love the stencil you used for the centre piece. I did have a bit of a giggle reading your post where you said you hadn’t been idol……….now you definitely are that to lots of people but think you really meant idle!!!! 😜
Karen x
LikeLike
Lovely John , really like the overall effect . Oh and Happy Birthday too x
LikeLike
Wow John, I L O V E this canvas art. Butterflies and my favourite colour, perfect! I have this indigoblu stamp, I’ve used it to stamp on cotton fabric and applique onto a plain blanket, so I could do a matching canvas too!
LikeLike
Hi John, this is a very good idea for using up wrapping paper, or wall paper, or….
Good to see you back, you have been missed very much! I am sure not only me was wondering what might have happen to you.
Have a lovely day.
Greetings from Germany
LikeLike
Love the organic progress of this beautiful canvas. Must dig out those canvases from the back of the wardrobe and try something like this.
LikeLike
John this is stunning, thanks for posting again I have miised your posts, x
LikeLike
Beautiful project….very detailed. How long did this take you to complete John ?.
One day I would love to try and attempt to replicate this lovely canvas, so I will keep it safe until then.
Thank you for sharing this with us.
Happy Crafting,
Catherine.
LikeLike
I did most of it in one day.
LikeLike
Just thinking yesterday that it had been a while. Project really lovely. I love the beads on the butterfly. :)
LikeLike
great work John – love it.
Greetings from Germany
Antje
LikeLike
Welcome back John – it has been a long summer without your bloggs, missed you! :)
Love the picture, you are so clever. I would not know where to start with these media! Although I do keep promising to try – when I can find that elusive ‘spare time’… lol.
Take care…
LikeLike
Well done John another fantastic creation would look lovely on my wall lol still have not got to grips with my scan n cut after having it a year x
LikeLike
Wow, that is beautiful. Might have a go at doing this.
LikeLike
smashing – great work of art; love the colours and techniques.
LikeLike
Hi John,
Another masterpiece I think. I have to say as I kept reading down I wasn’t quite sure what the end result would be but I did not need to be concerned.
Thanks again for another fab tutorial and as I understand it is your birthday today — HAPPY BIRTHDAY!
All the best.
Carol
LikeLike
Thank you :)
LikeLike
Thanks again for sharing your wonderful ideas – truly inspiring – Liz
LikeLike
John this is beautiful. I have just changed my bedroom colours to this purple/plum colour. Hope you don’t mind me having a go at this, will look perfect as I bought a glass butterfly same colour. You are so clever and inspirational. Thank you.
LikeLike
This is great ~ and my favourite colour too. I have many friends who will love to receive an adapted version of this in their letters!
LikeLike
L.O.V.E. it. Interested to see you used wrapping paper – must try this. Gorgeous colours and that butterfly is stunning – the beads and wire are perfect.
LikeLike
I love this John and it just goes to show that if you make a mistake just persevere. After all it is just a happy accident and looks wonderful… Vx
LikeLike
Good morning John! Once again a top design – where do all these ideas come from? Wish I was lucky enough to have such creative ability. Keep up the good work.
LikeLike
Love this canvas. Thanks for the instructions.
LikeLike