
I’ve been having another play with the Inkadinkado Stamping Gear and came to the conclusion that quite a few of the designs that I was making looked like doilys, so I thought that I would explore this route and see what I could create.
If you’re familiar with this blog, and my other posts about the Inkadinkado Stamping Gear, you’ll probably realise that this project started with an Inkadinka-doodle.
Here it is.

The one above was stamped with 3 different colours of distress inks and I liked the way the colour graduated towards the corners. I felt that it gave it a little bit of interest rather than all being one colour.
I began by trying one all in black with some shading. To be honest, I REALLY didn’t like it and abondoned it half way through. I don’t normally show my “changes of mind” but here it is …
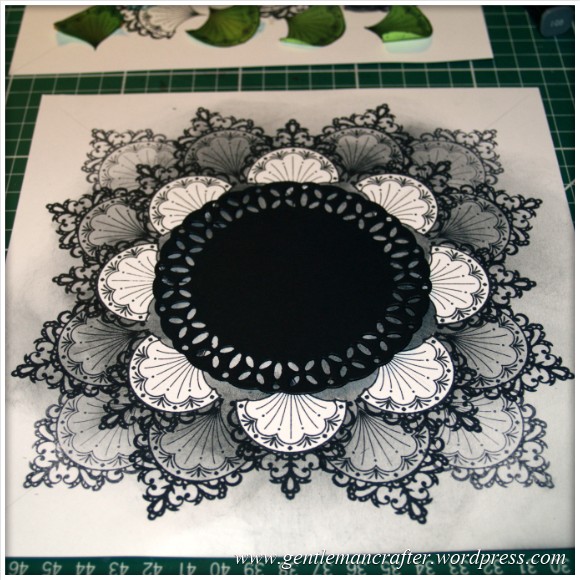
Not bad if you are a Victorian chimney sweep and need something to put a vase on in the sitting room! Lol.
Maybe I’ll revisit that idea when I am feeling a little less heavy handed however I chose to start over and selected some different colours as that is what had enamored me to the idea in the first place.
I wanted to do this in purple but didn’t have three of the same brand/type of inkpad so did some tests first and found that the following three worked well together tonally – Adirondack Earthtones – Eggplant, Distress Ink – Dusty Concord and Adirondack Brights – Purple Twilight.
Right, onto the actual stamping.
As in previous designs I needed to make sure that the stamp was in the right place on the paddle so I laid it onto the card (without ink)…

…slid the paddle into the cog and picked up the cling stamp. I made sure that it was straight of course and made the first round of impressions.
I had made the masks for the last attempt so re-used those for this and applied them to the first set of stamped images.
This next image shows the masks on the card after I had made the first circuit of stamping.

You’ll probably have noticed that the first circuit was done with the Open Basic technique.
The first circuit was done with the Adirondack Earthtones “Eggplant” inkpad.
I then had to re-do the placement/pick-up for the second circuit. Here is how the stamp was positioned.

As you can see it’s going to be going into the notches of the cog that I missed on the first circuit, but at a larger distance from the cog.
Here is how it looked once it was stamped out.

This second round was stamped using the Dusty Concord Distress Inkpad.
Now, when I came to do the stamp placement/pick-up of the stamp for the final round I discovered that the paddle didn’t reach quite far enough so, because I had enough visual references to do the corner impressions by hand I resorted to just using a standard acrylic block and the Purple Twilight Adirondack Brights Inkpad.


So, here is the final design as I had stamped it, and after the masks had been removed.

I seem to be getting into the habit of shading edges lately, mostly because I think that it adds a little more interest to the card. This design was no exception; here is the design with inked edges.

Oh, you may have noticed that I had trimmed the design down too. I did this as I thought that the extra white area around the edges was a little too much. Just call me fickle ;)
I created the sentiment by using a nice verse from the “Kind Thoughts” unmounted stamp sheet from Creative Expressions and stamping it onto white cardstock using the Eggplant Adirondack Earthtones Inkpad.
I then cut it out using a Spellbinders circle die and used the die as a stencil to apply a little of the Purple Twilight Adirondack Brights inkpad to “blush” the edges.

I then got some black cardstock and cut the largest of the Delightful Circles die collection from Spellbinders and a circular mat from purple cardstock and assembled it all.

So, I had all of the parts but my initial impression was that the overall thing was still going to look a little bland. Yes, even with all that doily-esque designs and the sentiment on top. I felt that it need a little floral arrangement or two.
I had done something similar with clear stamps from Tonic Studios so reached for those again.
This time I stamped them onto patterned paper several times using black ink.

Cut several layers…

…I gave them a little shape…

…and then layered them up and added an adhesive pearl in the centre of each flower.

I created another one and then all that was left to do was assemble the card, add some gems to the corners and sit back and admire my work – et voila!

So, there you have it. Another design idea using the Inkadinkado Stamping Gear as a design tool – and yet another new term in my crafting dictionary – along with Inkadinka-doodle and Inkadinka-designer, I can now proudly sport the term Inkadinka-Doily! Lol.
Here is a final look at the completed design all stood up and proud like.

Also, a little close up on the topper area.

Anyway, thanks for reading this blog post. If you have any questions or comments, please feel free to use the comments box at the bottom of this screen.
Take care. See you again soon.
J :)

Well John, I know it is a while since you placed this tutorial but I have finally stumbled upon it. I just love this design and it has inspired me to give this a go myself. I was so impressed with the stamping gear kit when you brought it to us on C&C and bought the big starter kit and also since have bought many more of the bits and the stamp sets but after my initial attempts I was making a right pigs ear of it. I can now see that your guide lines are a terrific way to place the design and it was something I was getting wrong. I also like the use of the masks to just get the bit you want. I am going to get it all out again and try to make some good use of it. The wonderful thing is it can be used for so many occasions throughout the year just by changing the sentiment and the embellishment. Thank you so much for this tutorial.
LikeLike
I still have mine and love it. Planning more tutorials in the future.
Glad that I have helped :)
LikeLike