Pop out inserts have been around for a while and they are super easy for you to design to cut with your Brother Scan N Cut.
Watch this video and get creating your own unique pop outs in no time … I promise!
This is what I will be showing you how to create in this post/video.

This is the view of the inside of the card once the card has been open.
You can adapt this to use any shape in the centre. This could be from the library of designs in Canvas Workspace or one that you have created yourself! The only thing to think about is that it is a nice open shape so that you can see through it. You can even use the cut-out part to hang within the aperture.
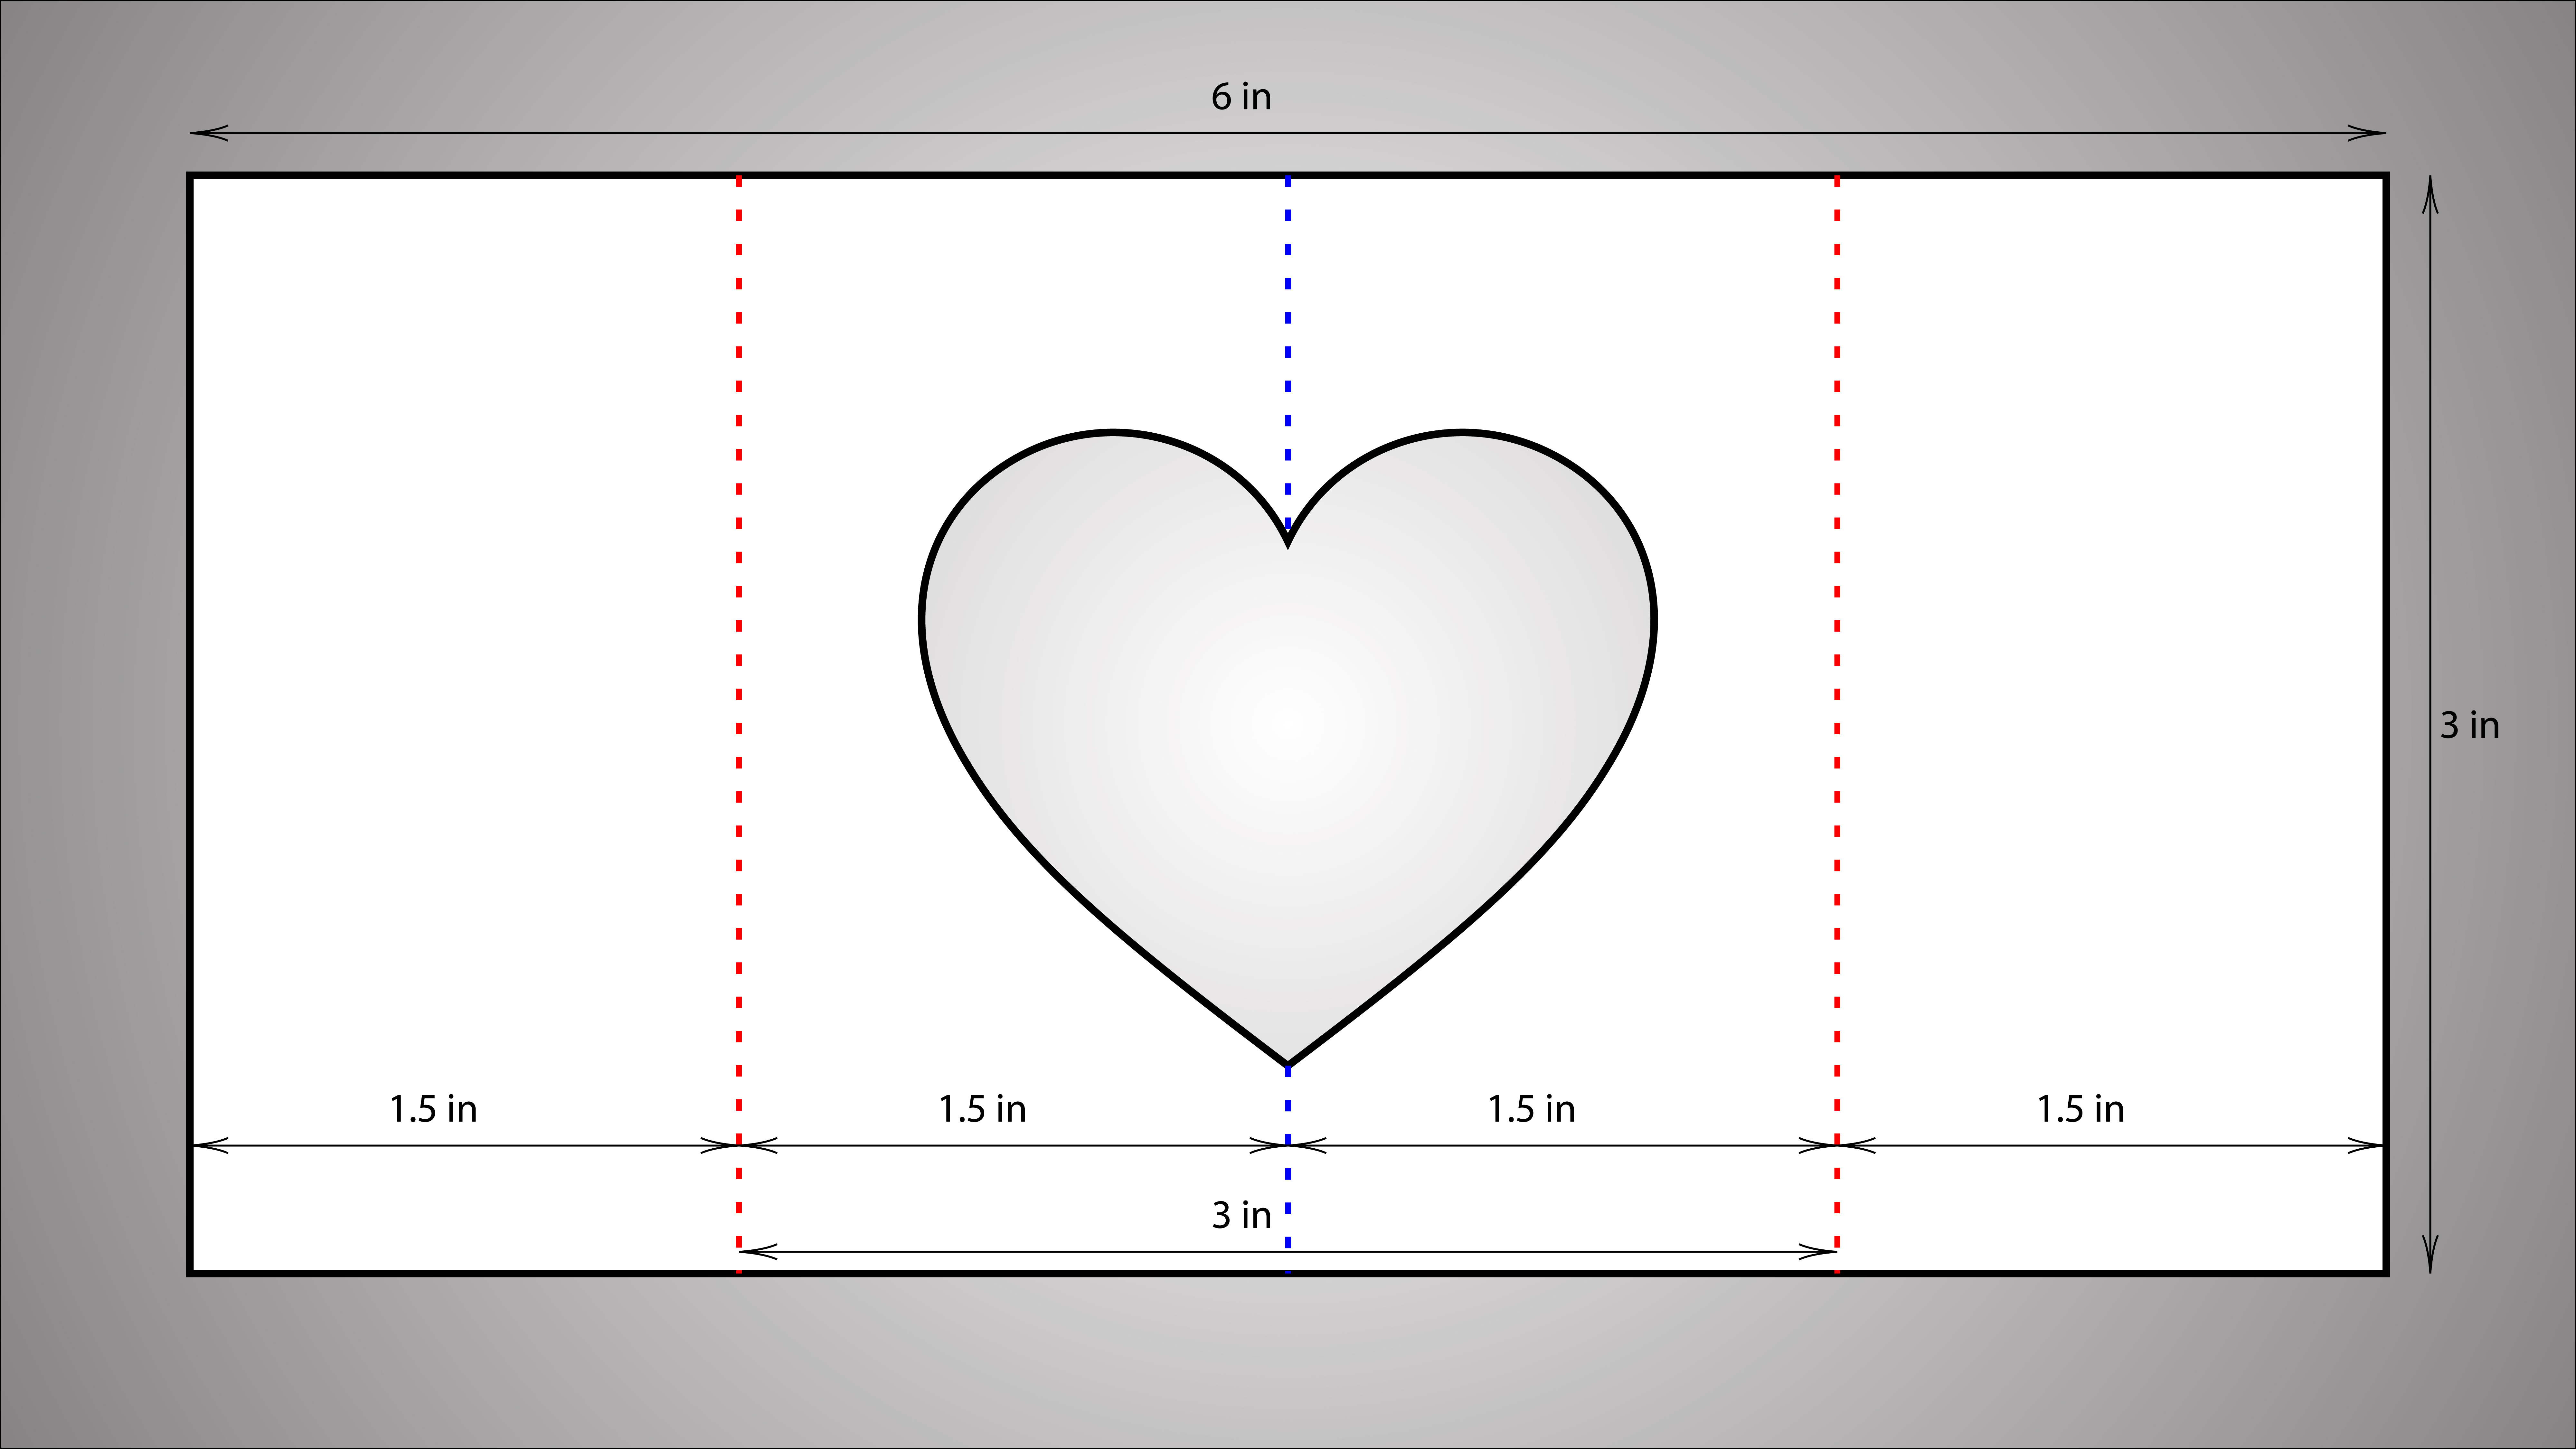
In the video, I mention that I would leave the dimensions image on this post, so here it is.

If you would like to print this out, just right-click and choose ‘Print…’ or ‘Save Image As…’ and then print it out as you would any other image.
Ok, that’s most of the housekeeping out of the way but just before I show you the video, please let me share with you a few links relating to this blog post.
Ok, if you have your brew ready, let’s do this!
Ok, I hope that you enjoyed that and will make use of it in the near future.
I would love to see what you create if you do follow this tutorial.
In the meantime, thanks for watching and I will see you again next time.
J :)


Thank you for this video, very interesting! Please, can we have more tutorials on pop out and pop out cards!
LikeLiked by 1 person
Thanks John for all your tips with the Brother Scan and Cut. Jenny x
LikeLiked by 1 person
Fantastic tutorial John very helpful thanks
LikeLiked by 1 person
thank you will do this as soon as x
LikeLiked by 1 person
Wow, this is awesome John, now only find time to make al those gorgeous things you learned us. Thanks and have a nice sunday.
LikeLiked by 1 person
I’ve just cleared the desk off, and found the scan n’ cut under the clutter, so might have a go at this in the morning. Loved your article on FB, so funny xx
LikeLiked by 2 people