In late 2015 I decided that I would like to launch my own little range of clear stamps.
Well, I’ve been fiddling and sweating behind closed doors and have recently finalized the design for the first in the range and am super happy to be able to finally show you what I have been up to…
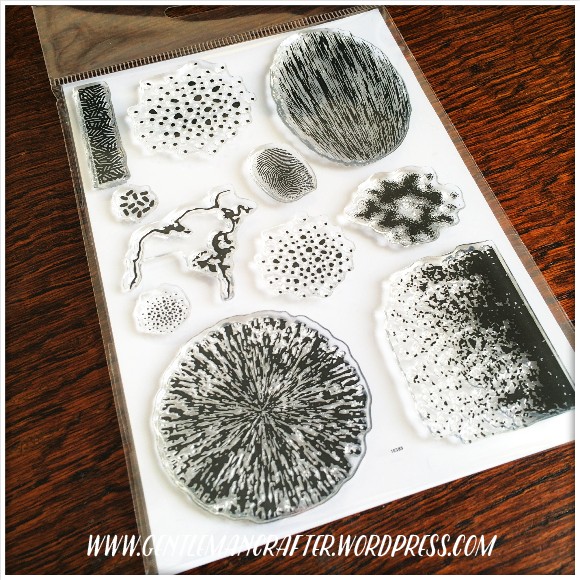
Here they are! *fanfare*

You’ve no idea the pitch at which the squeal emanated from me when these landed on my doorstep, lol!
But listen, you’re possibly looking at these and thinking that I have gone a little bonkers and are wondering what inspired me to create such a plethora of weird and wonderful textures.
Well my good friends I wanted to create something for me; something that I would regularly use. As you have probably gathered from this blog and my general ramblings I do like a bit of a dabble in all sorts. (don’t giggle).
As I designed them I began thinking of ways other people may use them too …
It occurred to me thatt they could be used with my existing stamp collection, be used on their own, be used for decorative effects, be used for livening up plain die cuts, be used for – well, I think that you get the idea – they can be used for allsorts!
So, if you have a mo, grab a cuppa and let me give you a little guided tour … let’s start with a closer look at the stamp sheet.
There are eleven stamps in total.
Three different sized stipplers, two rough shaders (circular and oval), a bitty blobber, an edger, a distresser, a veiner, a hatched strip and a finger print (my fingerprint!).
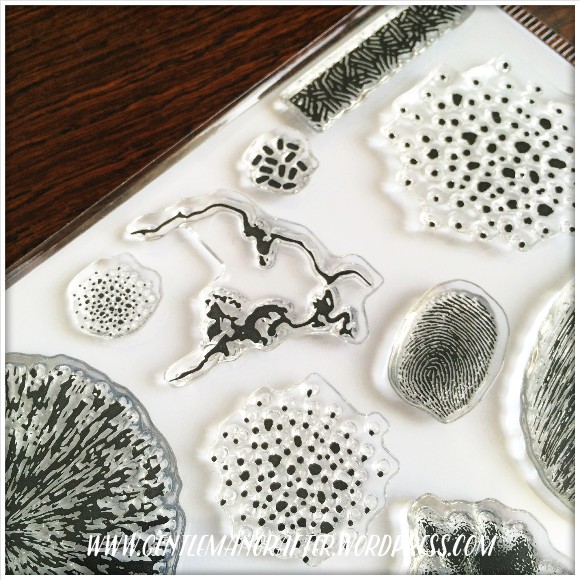
Here is a close up of the circular rough shader – don’t be fooled by the name though, just wait until I show you some of the experiments I’ve been doing.

And here is the oval one.

A little mish mash of the finger print, veiner, shader, distresser and edger.
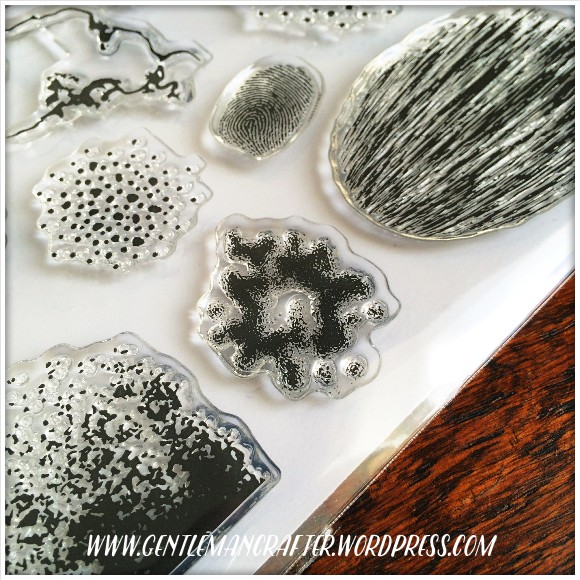
A closer look at the veiner; are you thinking marbling, lightening or topography? We are clearly on the same wave-length.
Anyway, I obviously had a good old play (and made a good old mess too!). Some ideas were already forming …

I thought that it might be an idea though if I did a few examples of things to show you just some of the applications of these stamps and then you will get a better idea of what you could use them for too.
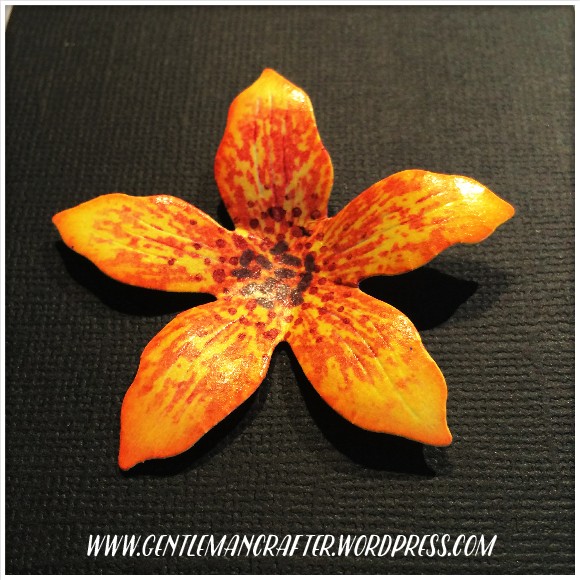
Ok, let’s take a look at plain die-cuts. What do you currently do to add interest and excitement to them? Nothing? Give them a flat colour with a pen?
Well with just one or two stamps from this set, you could make floral die cuts like these …
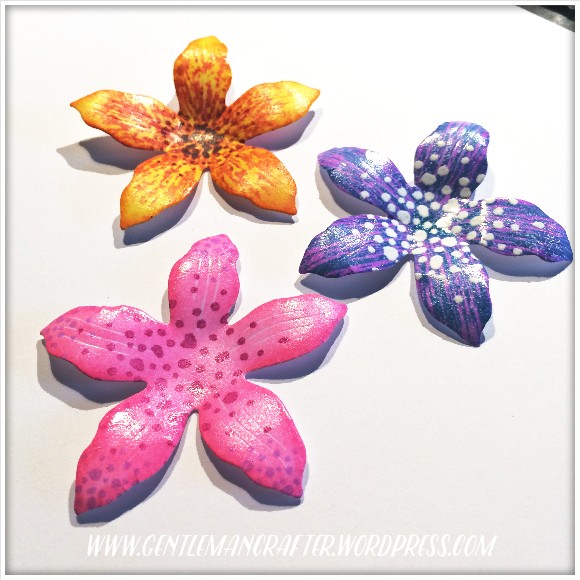
Aren’t they the brightest and most lively things you’ve seen? (possible over exaggeration there but they’re pretty awesome in my opinion).
Over time I will be adding ‘recipes’ to this blog with different combinations of the stamps for different effects but I think that you are already getting the idea aren’t you?
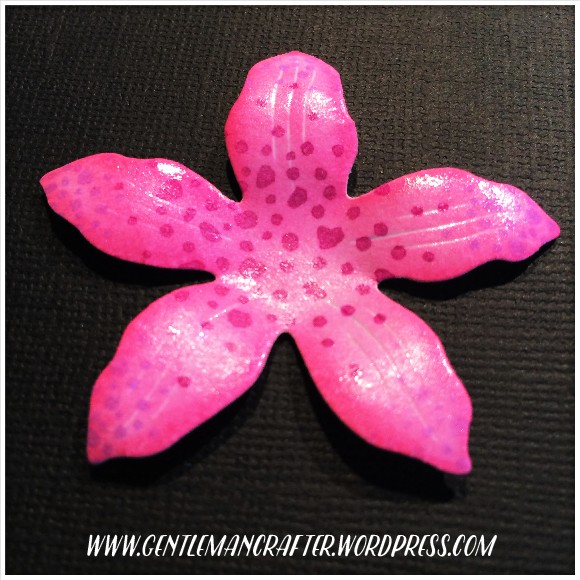
Oh, don’t forget, because they are standard photo-polymer clear stamps, you can do all of your regular stamping techniques such as heat embossing.
I used a white embossing powder here to give this purple and blue flower a rare species look.

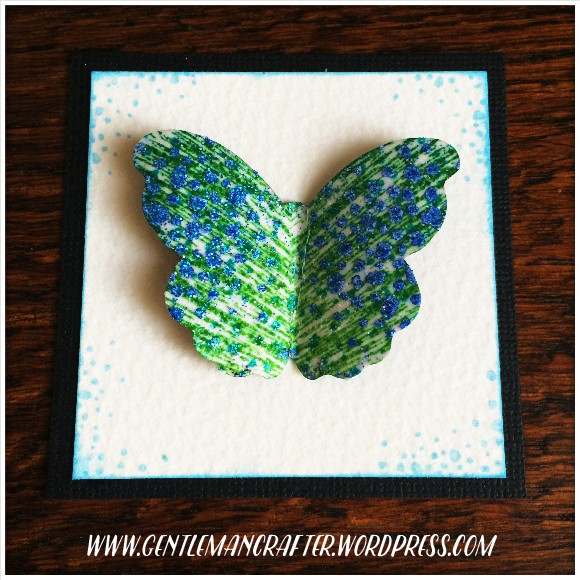
Floral die cuts aren’t the only kids on the block though. What about the other staple of the craft room, the butterfly?
Well, as with the flowers, these stamps will help you create some unique and exciting looking embellishments for your projects; take a look!
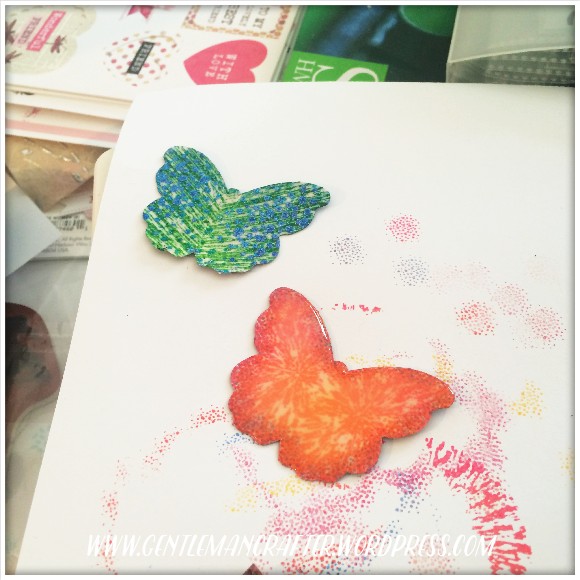
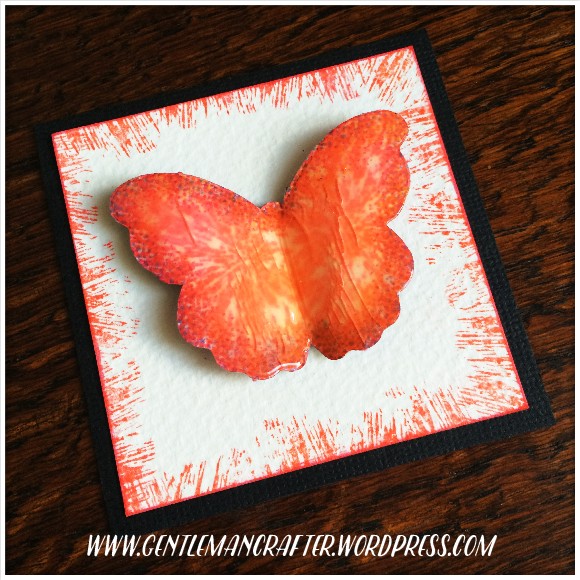
Just a couple of colours and a couple of the stamps and bish bash bosh – BAM! A colourful and fiery butterfly. (The outer edge of the mat was also created with the stamps too).

Prefer the cooler end of the colour range? No problem. Check out this peacock butterfly!

Right. You know me. I like a challenge.
I therefore set myself the goal of creating a larger background using these stamps.
With the veiner and three sizes of stippler I managed to create a background that was almost A6 in size!
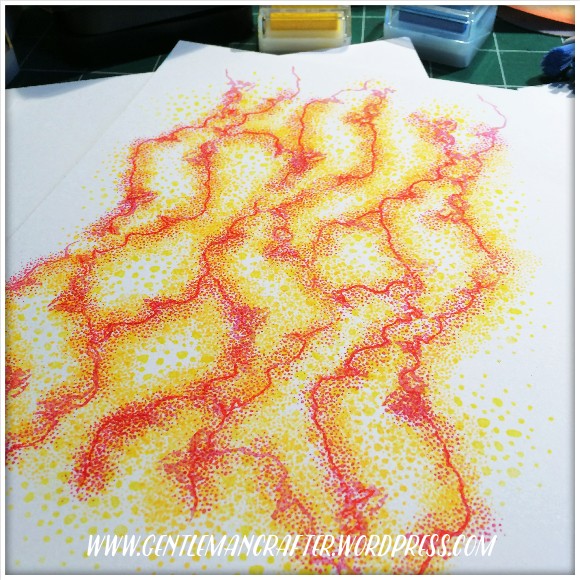
What do you mean what is it? Lol.
It could be a lava field where a dragon lives. Or a weird and wonderful agate rock … imagination is a wonderful thing isn’t it?

Taking the same concept and limiting myself to just the veiner I then created what will be (when I’ve finished it) a lovely marble-esque background … or is it rippling water … ?
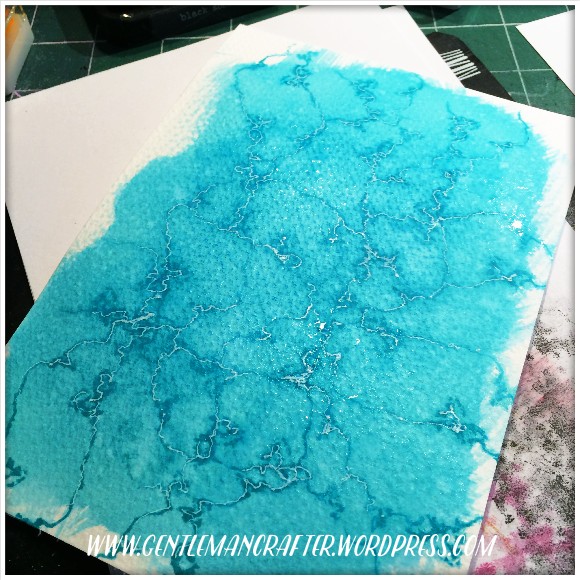
We will see when it dries, eh?
Ok. One more go and then I must pack up the bits and bobs and get some tea.
This time I wanted to see if I could pick something from the sheet to match or create a themed background for one of my existing stamps.
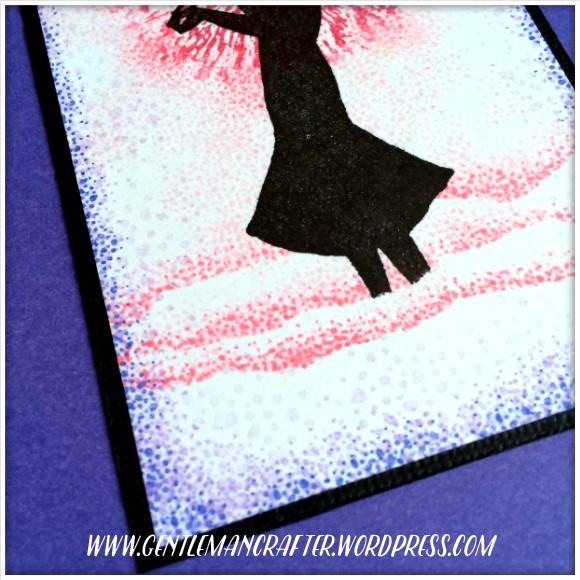
I picked an elegant lady stamp (mostly because I did panic for a mo thinking that there might not be anything suitable on the sheet and this was a challenge after all).
Not sure that I should have worried though because as soon as I picked her up (saucy), I knew straight away what I was going to do.
This time it was the circular shader and stipplers to the rescue. I mixed up the colour range from pinks to purples to add a little character and depth and this is what I created.
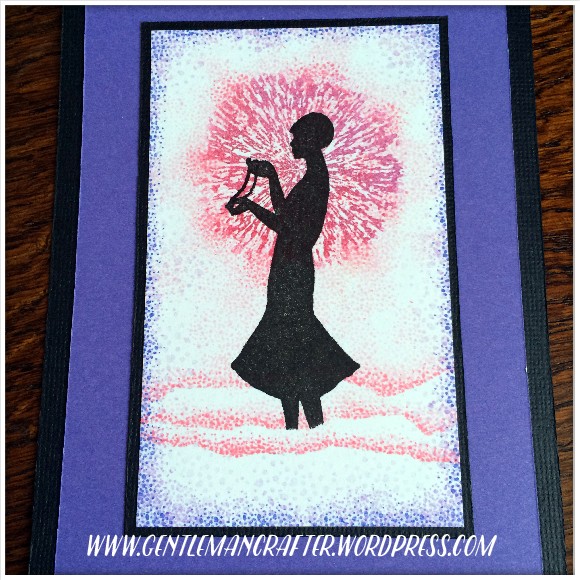
Some creative techniques were used on the circular shader so that I didn’t get a sharp edge. I’ll share these with you in a future post.
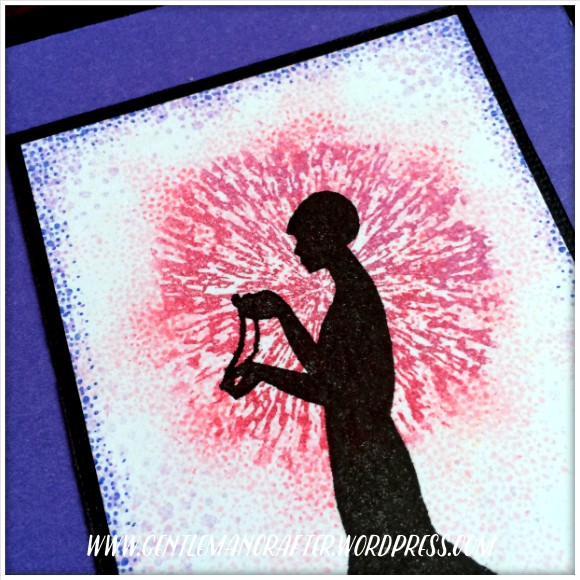
You know, on closer inspection this really does have a Seurat/Pointillist feel to it, don’t you think?
Right. No tea yet. ONE MORE GO!
This time I hoped to be able to make an entire focal image just from the stamps on the sheet … aaaaaaand GO!
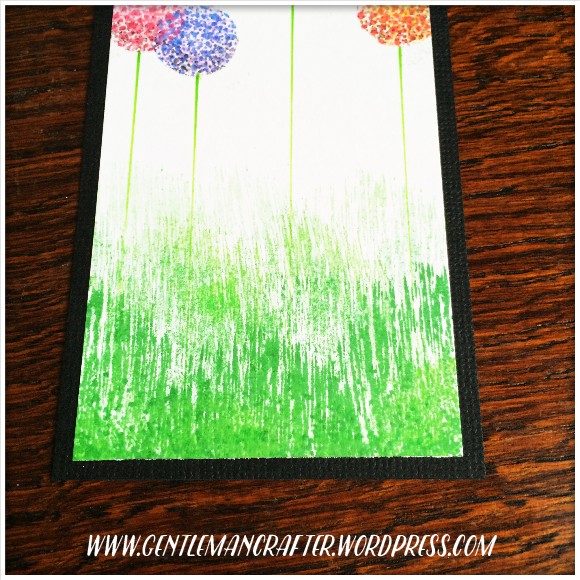
Bearing in mind what I had noticed in the last creation I thought that I would play on this and create some pom-pom flowers using the stippler stamps and then bring these down into a grassy meadow.
It seemed to work! What do you think?

I love these blooms! (It was simply a circular mask made from a sticky note and then different colours of ink used with the stipplers – love it).
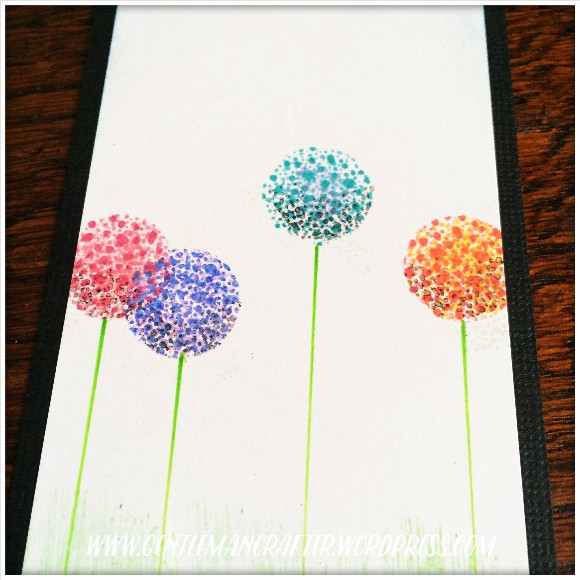
The grass! Well, believe it or not, this was the oval rough shader!
Ok, seriously, that really is it – now, hopefully you would like a set of these to have a play with.
Well, the good news is that I am currently awaiting my first lot of stock but there won’t be a huge amount.
If you would therefore like to be the first to have a set, you can pre-order right now by clicking on the PayPal button below.
The price for this set is £5.99 (+£1.95 UK P&P). If you are overseas and would like a set, please get in touch and I will let you know how much the postage would be before ordering.
SORRY. THESE STAMPS ARE NO LONGER AVAILABLE
Ok, well, I’m buzzing from excitement right now but a little light headed from postponing my tea so I’d best get on.
Many thanks for taking the time to read about my news and visiting the blog.
Look forward to sharing more ideas with these stamps in the near future!
Ciao for now …
J :)

[…] glass, chipped shappire and cracked pistachio distress inks and loved the colour combo. I used John Bloodworth stamps for the spots on the feathers with picket fence distress ink and tuxedo black memento. Using the […]
LikeLike
I live in Inglewood, California, USA, Zip Code 90303. I’d like to order a set of your stamps… LOVE them!… What would the postage be? Thanks so much. 😃
LikeLike
Hi and thank you for your enquiry.
At present I don’t have any available stock. I do plan to have more manufactured in the future so please do keep an eye on the blog for news of when these become available.
J :)
LikeLike
[…] background made with distress inks. For the edging I used some new stamps from John Bloodworth aka The Gentleman Crafter, his first design and produce, and love his abstract stamps. All in all had a great time making […]
LikeLike
Hi I have ordered these stamps early Feb. Just wondering when they are expected to be shipped, I know it was a pre order but you stated you were expecting delivery soon, only asking as looking forward to having a go with them :-)
Thank you.
LikeLike
Apologies. An update was recently issued. They are expected to be with me on the 7th March and will ship shortly after.
If you are not happy to wait that long I am happy to cancel and refund the order.
I think I must also add an addendum to this page in case others visit here looking for answers.
Hope this clarifies/helps.
J :)
LikeLike
No not a problem happy to wait. New it was a pre order but just wondered when to expect them :-)
LikeLike
Next week!
LikeLike
I have just found your blog, coming from youtube and scan n cut videos.
I would like to order your stamps but can’t find anywhere on the site to contact you as you said for international orders to contact you for postage etc. Where do I look to send you a message? I am in the USA
LikeLike
There is an email link at the top of the blog. Looks like an envelope or there is a contact me form through the main menu.
J :)
LikeLike
I’d like to order even though they are delayed. I am in the USA at zip code 40218. What would shipping be.
LikeLike
$10 standard or $20 tracked and signed for. Both are an estimated 5-7 working day delivery. If that’s good, please email me (link at top of page) and I will send you a PayPal payment request.
J :)
LikeLike
You’ve sold me on purchasing a set. I was all set not to, because, honestly, who needs more stamps (right???). I live the the good ole US of A. How much would shipping be to the Chicago area?
LikeLike
taken the plunge and ordered the stamps, hope I can do justice as you have, brilliant xx
LikeLike
Wow John, these stamps are amazing! I love all the ways you have used them but as I am, essentially, a country girl at heart, I love the flowsies on the last example. Thank goodness you didn’t go off for your tea before you did that one! Clare x
LikeLike
Fantastic stamps! You did a wonderful job creating them and all your examples are wonderful and definitely inspiring.
LikeLike
They are fabulous and I have bought them. Well done – I can well understand how delighted you are!
LikeLike
I’ve been keeping an eye out for a good set of texture stamps and I absolutely love what you’ve done with these. Ordered.
LikeLike
[…] Source: A Proud Day – My New Stamp Designs […]
LikeLike
John, these stamps are amazing. They will have to be added to my wish list for a few days, then ordered immediately. Well done!
LikeLike
Lovely stamps. Excellent for scrapbooking. Going to order now!
LikeLike
Love these new stamps and can see lots of potential with them. Thanks.
LikeLike
Oh my!! Love, love…..mmmm, love them, John. Congrats. How much to ship to Melbourne , Australia, please? Would you consider getting a distribution deal going over here?
LikeLike
Postage to Australia would be £5 standard or £10 tracked. Delivery estimate is 5 to 7 working days.
If you’d like to go ahead, please email me and I will send you a PayPal payment request for the total amount.
J :)
LikeLike
Hello John, These new stamps are terrific, and I love what you have done with them. What cost to send them to Australia please?
Cheers Yvonne
Date: Mon, 15 Feb 2016 17:30:29 +0000 To: yrenfree@hotmail.com
LikeLike
Postage to Australia would be £5 standard or £10 tracked. Delivery estimate is 5 to 7 working days.
If you’d like to go ahead, please email me and I will send you a PayPal payment request for the total amount.
J :)
LikeLike
Congratulations John!
A decent set of texture stamps should be in every crafter’s arsenal, and at a very very reasonable price too. I quite like the idea of using watercolour inks and pens to make background for paintings. Count me in and congratulations again… You should be really proud of yourself :-)
Big hugs, T x
LikeLike
Wow – well done John – you have outdone yourself – excellent – I love the way you showed up what they could be used for! I just wish the AUSSIE $ was more equivalent and the postage too is a killer for us! Maybe one day!
LikeLike
Postage to Australia would be £5 standard or £10 tracked. Delivery estimate is 5 to 7 working days.
If you’d like to go ahead, please email me and I will send you a PayPal payment request for the total amount.
J :)
LikeLike
Ooooo…..I like. Got to have those. Congratulations John on very good job well done.
Sue
LikeLike
Exactly what I have been looking for! Have pre-ordered mine!
LikeLike
Great set of stamps. Just pre ordered mine
LikeLike
Brilliant set of stamps John :) Just ordered a set myself. Cant wait to have a play. P x
LikeLike
Right up my street! As soon as pay day comes, I shall make an order. Congrats! x
LikeLike