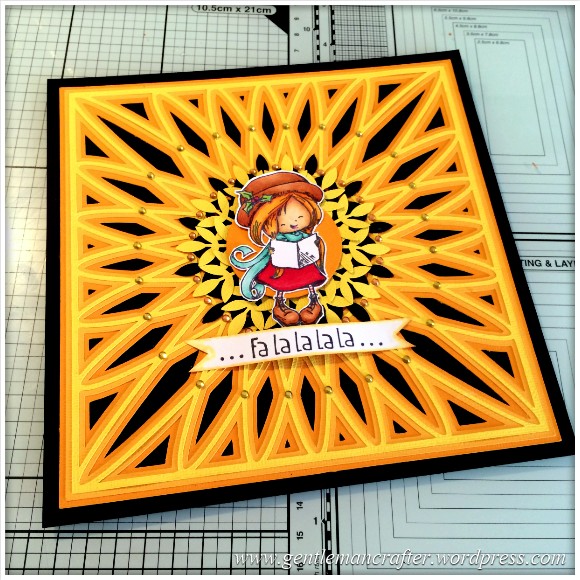
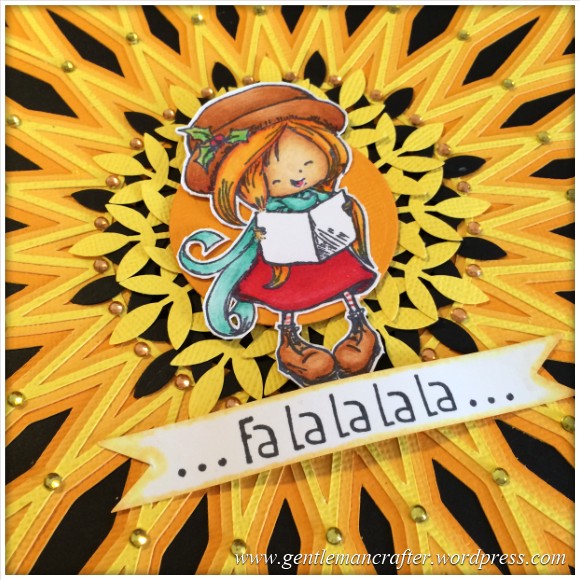
Yesterday I said that I would show you how I created the Christmas Card that featured the SVG cutting file background that I created – so here is that run-through as promised :)
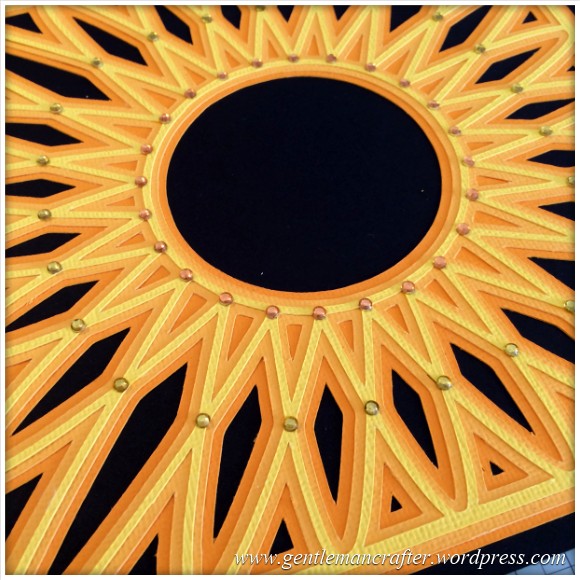
The design started off with the background.I cut the three layers of the design in different shades of yellow, layered them up onto black cardstock and then used some gems to punctuate the “spokes”.

(If you have got a cutting machine that accepts SVG files then you can visit yesterday’s blog post in order to download the background cutting file).
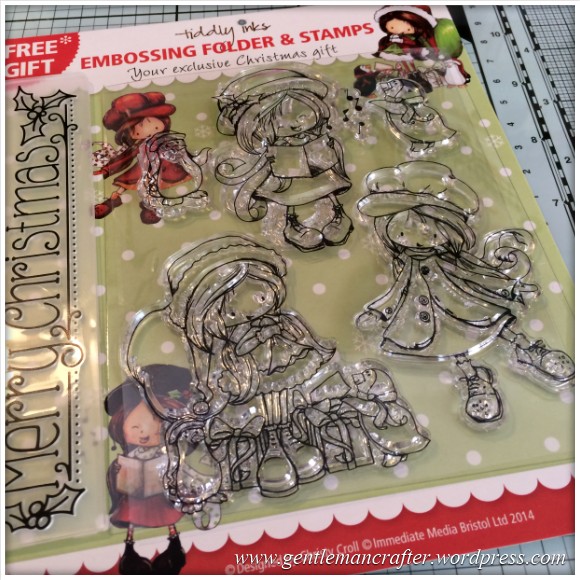
For the stamped image I used one of the free stamps that I recently got with my copy of Quick Cards magazine.
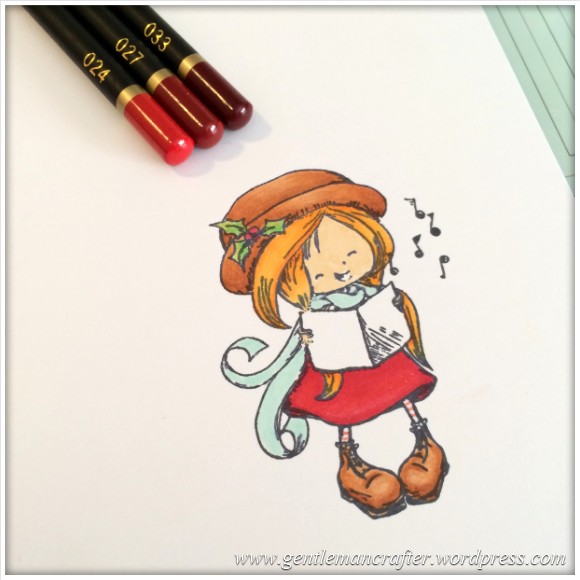
I stamped out the design and then used my Spectrum Noir pens to block in some colour as follows –
- Hat & Shoes = TN5.
- Hair = GB5.
- Skin = TN2.
- Scarf = BT2.
- Dress & Berries = DR2.
- Holly = LG2.

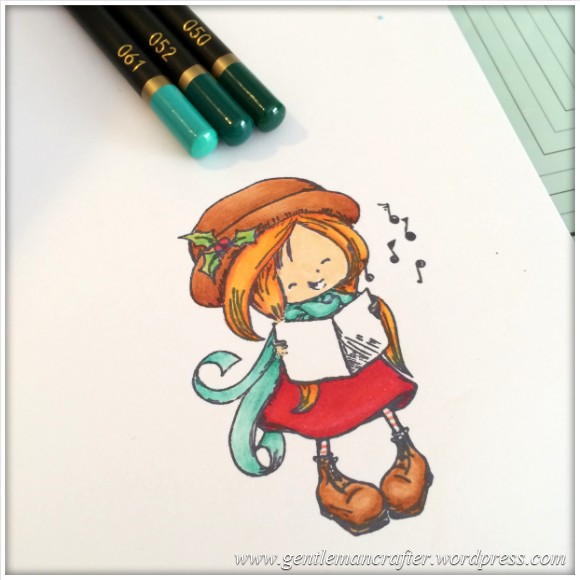
After that I used some Spectrum Noir pencils in order to give the coloured areas some more dimension.
The pencils used were as follows.
For the Hat and Shoes I used 089, 091 & 095.

For the hair I used 015, 020 & 022.

For the holly I used 047 & 058. I didn’t really need three colours for such a small area.
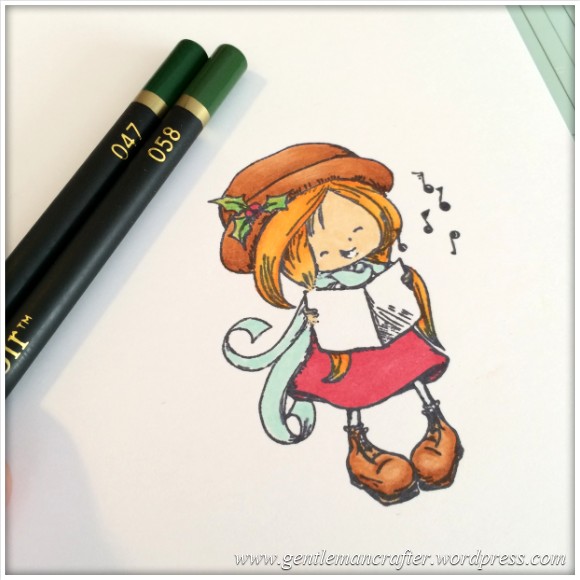
For the dress I used 024, 027 & 033.
For the scard I used 061, 052 & 050.
For the skin I used 067, 033 and the a Derwent blending pencil to even out the shading,
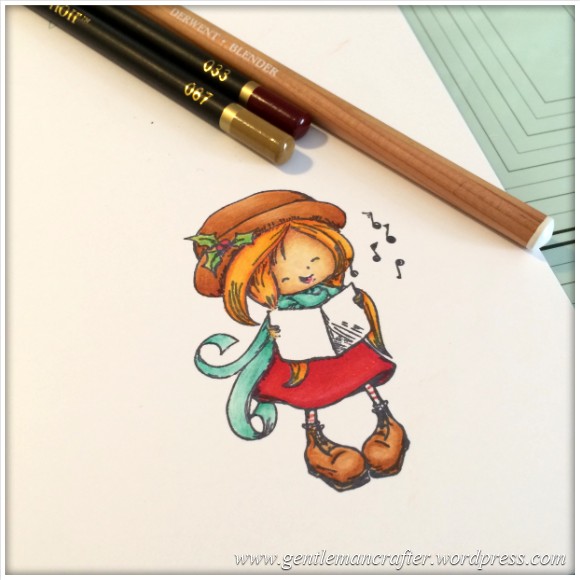
After colouring I cut the design out using a craft knife, leaving a small white border.

A Martha Stewart leaf punch was then used to create lots of black and yellow leafy branches.
These were arranged in a circular overlapping fashion and then topped with an orange circular die cut.
The stamped and cut out design was then fixed into the middle.

I used an EK Success Christmas themed stamp to create the “Fa La La” sentiment banner which was the last addition to the design.

So there you have it. Quick and quite simple really – considering it looks like a lot of work.
I hope that you have enjoyed my little project and will pop back in the future to have a look at more of my creations.
If you have any questions or comments about this post, please feel free to use the comments section below and I’ll do my best to get back to you.
See you next time.
J :)

Thank you so very much for sharing John. It’s lovely.
Love and Light
Sioux x
LikeLike
You have the patience of a saint!!!! The cutting with the exacto knife was amazing, and then the rest of the card…WOW!! I just love reading your post, thanks for taking the time!
LikeLike
I really appreciate being given the colour numbers on pens and pencils as I am not a natural at this. Many thanks John.
LikeLike
Thanks for sharing that John, it looks great! Question … why the craft knife and not your trusty brother scan n cut?
LikeLike
It was a quick job that I could do myself.
LikeLike
Really enjoyed this tut, John. Thank you very much :-) B x
LikeLike
Brilliant as usual John and so inspiring. I look forward to your posts. Thank you so much for sharing with us.
LikeLike
Hi John, I recently treated myself to the complete pen set when it was pick of the day. I’m frightened of them, which is a bit silly when I can just throw the bit of card away and start again. I have used your colouring guides before (fairies) and I am very grateful for the time you take for your tutorials. And I LOVE your cutting files. Getting braver with my SnC. It comes out at least once a week. Mainly thanks to you and Mel and your brilliant shows.
LikeLike
Thanks again John for all your sharing, you are a great help to us all.
LikeLike
i like it straight forward and looks good thanks John
LikeLike