Hello fellow scanners!
You’ve heard the saying – “Big Things Come In Little Packages”. Well, it couldn’t have been more true for me this week than when I had a bit of a eureka moment whilst playing with my Brother Scan N Cut.
Read on and I’ll tell you more…
Why this elation and mention of eureka?
Because I figured out how to include single cutting lines and scoring lines within my cutting files for the Brother Scan N Cut.
Now, I’d love to tell you how I did this however I don’t think that I can easily explain this without causing mass confusion so I decided that it would be easier for me to share the template that I came up with during this eureka moment until I can figure out an easy way to share the method.
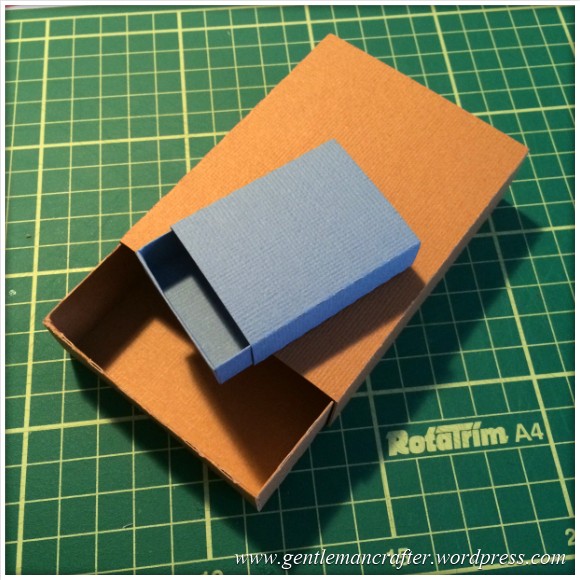
The template that I made was for a small matchbox (about 2 inches by 1.5 inches) and a corresponding slide over cover. Like this …
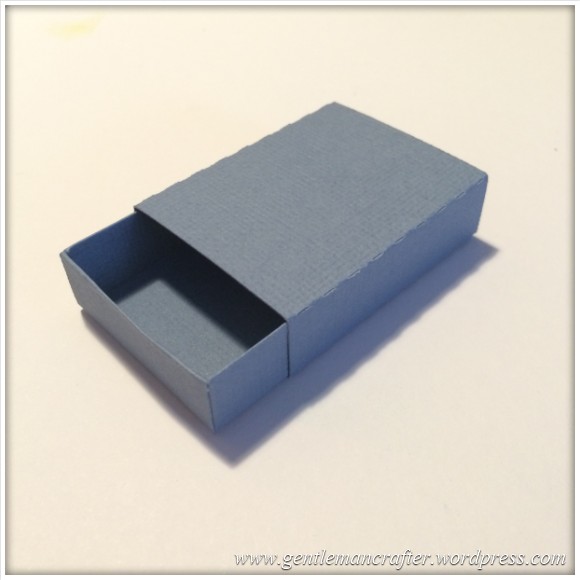
Yes, yes, I know that grey wasn’t a very inspiring cover but this was a test piece and I didn’t want to waste the good stuff.
When I had made this little matchbox, I actually squealed with joy! It was so cute and perfectly formed :)
Ok, now I guess that you want the files so that you can have a go yourself?
Not a problem, but do reminder that these are already in the FCM format so no converting needed, just download directly to your USB stick and then load the designs into your Scan N Cut machine and get cutting.
I have formatted these into two different files, one with dashed scorelines on the drawer part and one without the score lines. The box wrap into which the drawer slots will have the score lines in either case as it’s not obvious where to put them.
Anyway, here are the links.
- Matchbox and Cover WITH scorelines on the drawers
- Matchbox and Cover WITHOUT scorelines on the drawers
(Windows users you will need to RIGHT CLICK on the link and SAVE TARGET AS… or SAVE FILE AS…)
At the size they are you can cut four (plus covers) from one sheet of twelve inch square cardstock. If you need to add more to your cutting area of the Brother Scan N Cut, just group (unify) and then duplicate – you may need to rotate a couple of them to make it all fit though.
The cardstock that I used was the American Crafts cardstock which is around 220gsm (80lb) – I wouldn’t go much more or less than that as the cardstock probably won’t fold well or it might not fit together properly.
Now, a couple of things to note.
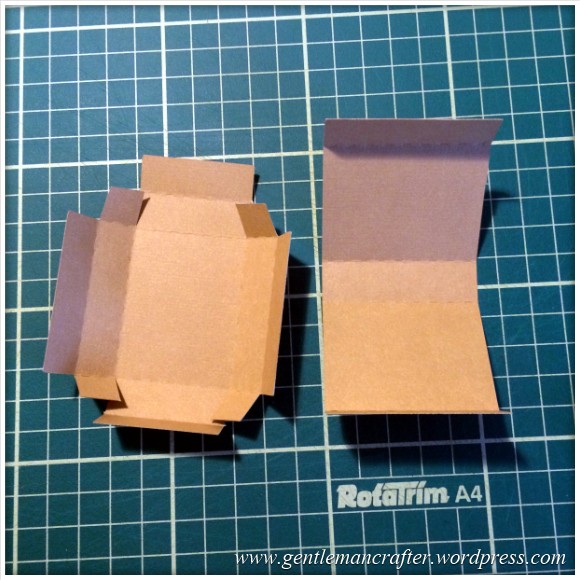
First, if you download the one without the scorelines you will need to manually score the lines as shown in the image below. I drew them so that you could see them; you don’t need to draw and score, just score.
In either case, the following steps are how to assemble the matchbox and box wrap.
Pre-fold all score lines.
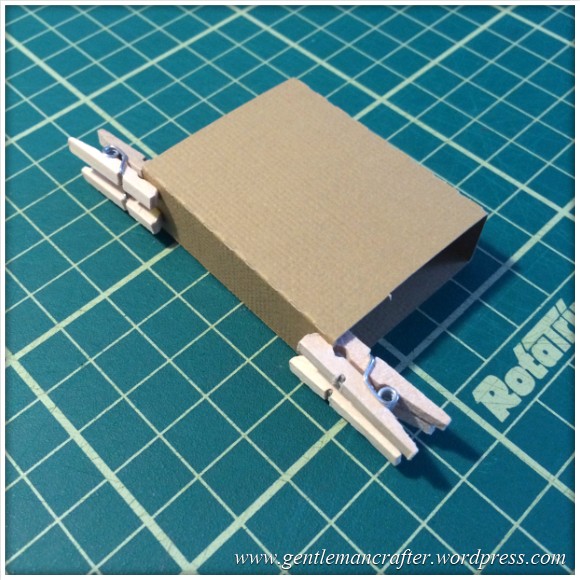
For the box wrap, apply glue to the end flap and then fold the other end tab over this and stick.
You can hold the tabs in place with mini clothes pegs or paper clips whilst it dries if you need to.
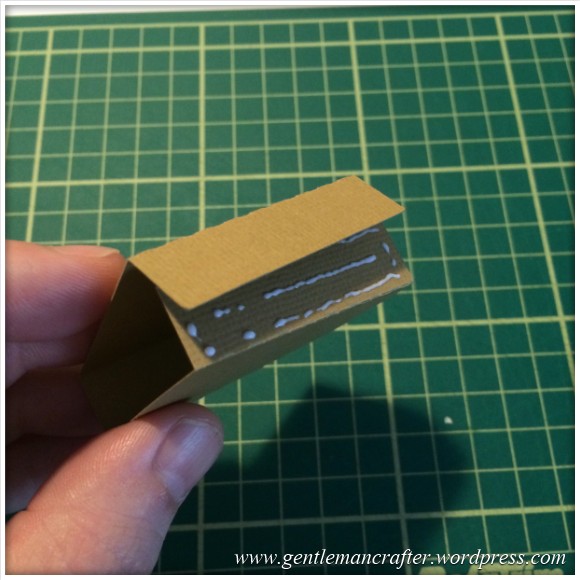
For the drawer apply glue to tabs and fold in and stick, one at a time until you have this.
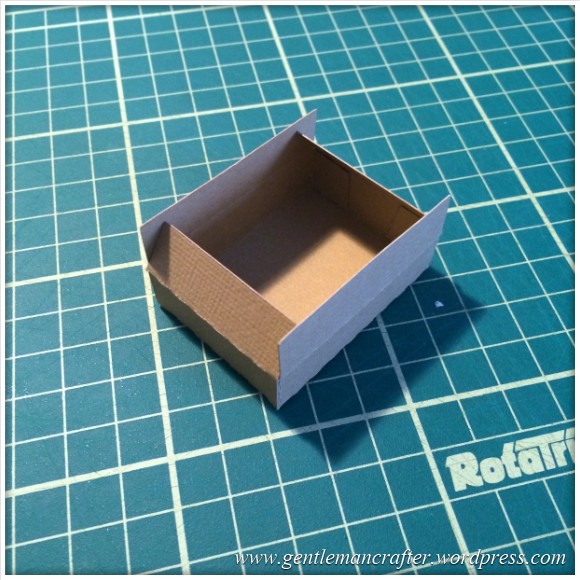
Now, apply glue to the two end flaps, fold inwards and hold briefly until stuck.
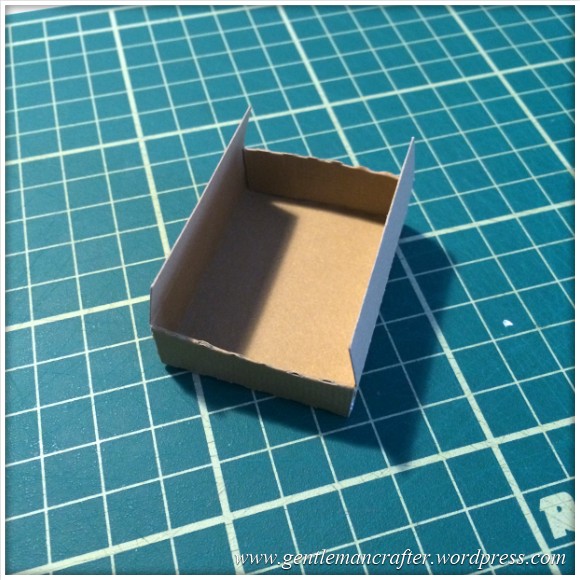
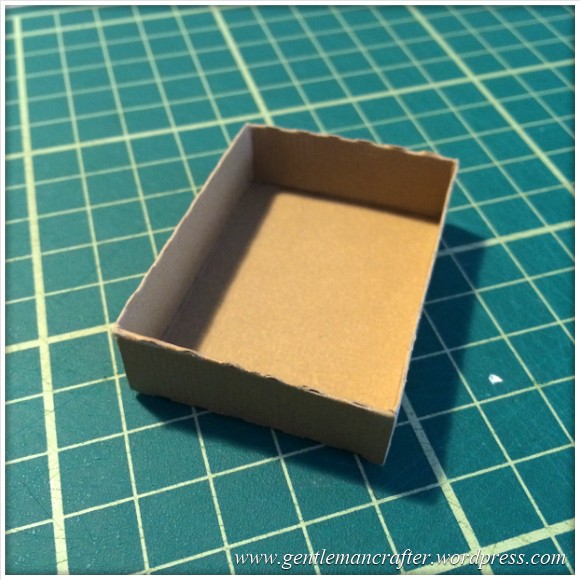
Repeat this for the two side flaps and then smooth down the sides with a scoring tool or bone folder, paying particular attention to the corners.
That is the drawer complete and it should look something like this.
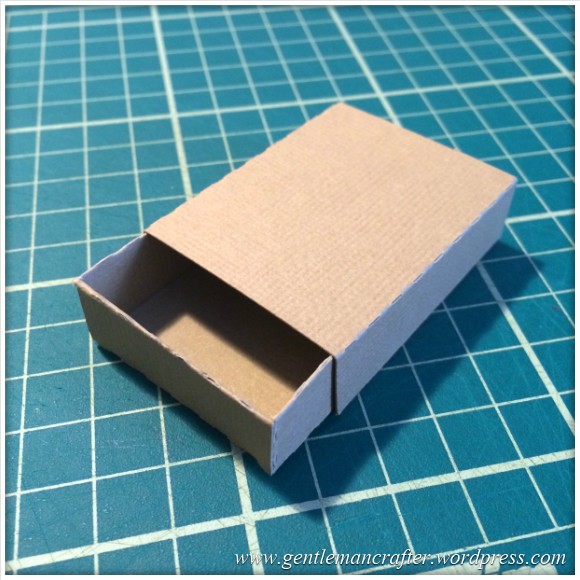
Now slide your matchbox drawer into it’s cover, make your favourite drink and admire :)
You could always make several and then stick them together to create a unit like this.
Or of course you could decorate them with all sorts.
Now, I am sure that some of you are wondering if you could resize this box – the answer is yes!
In your Brother Scan N Cut machine just group (unify) all elements together and then resize in the usual way. In the next picture I resized the cutting file so that it filled a whole twelve inch piece of cardstock.
I have shown it in comparison to the original matchbox sized box.
Ok, well that’s about it for this post.
It just remains for me to say that these are from an original cutting file that I created so please feel free to make as many as you like, and sell the finished projects that you make. Just please don’t sell the cutting file (Brother don’t allow this) or the resulting unfinished cuts.
I would love to see what you make with this file so if you want to tag me in an image you can find me on Facebook – http://www.facebook.com/GentlemanCrafter or on Twitter – https://twitter.com/john_bloodworth or feel free to email a pic to me – there’s a link at the top of this page.
If you know someone else that would like this file for their Scan N Cut, or run an internet based group that would be interested, please share a link to this post (there are lots of handy sharing buttons at the bottom of this page) rather than sharing the file itself :)
Thanks for reading and I’ll see you next time scanners when I hope to have more boxy-templatey fun-times for you then!!!
Ok. Signing off now.
J :)
Thank you for sharing this file, or whatever it is called. I am new to scan n cut, yes I bought one seeing you do demos was great. I might have to message you on how to download it and how to save, simple terms please, as him indoors and both the kids tell me how to do it in gobbledegook! Anyway, I think this would look good if you cut enough and enlarged them and then assembled them into an advent calendar. Look forward to seeing more.
LikeLiked by 1 person
Merci beaucoup !
LikeLiked by 1 person
If I wanted to use embossed card (using Spellbinds) would I emboss it before I cut the pattern out or after???
LikeLike
It’s probably better to do it after. You could try both and see which works best though.
LikeLike
not sure if I’m in the right section here but I’ve been following your blogs via email as a follower and I can’t seem to get the pictures to come up on your blogs. or connect by filling in details and clicking on ican to log into facebook. comes up with an error.
LikeLike
I’m not sure why that would be. The technical side of the blog is hosted and run by WordPress so it might be worth contacting them if you are having issues.
J :)
LikeLike
This project was so well timed. I’ve arranged a countryside walk and treasure hunt tomorrow (well, I suppose it’s today now) and am expecting about 24 groups to take part. As well as answering clues, each team has to fill matchbox with specified objects. All arrangements have been made and all treasure hunt sheets printed. All I had left to do was source some matchboxes. I found some in a craft shop but they were expensive, poor quality and tiny! Then, in the nick of time, your project came through. I was panicking as the only chance I’d got at this was midnight – and I’m not brilliant with the SNC yet. Thought it would all go wrong! The files downloaded a treat, the boxes cut first time and were really easy to make up. I resized them to make them bigger (that was a bit tricky because the base and the lid need to be scaled up slightly differently) and in no time at all I’d made and glued a dozen boxes. I even did a couple of posh ones using red dotty card for the drawer and blue striped card for the sleeve. I made 2 cutting files for a4 card – one is 2 drawers and 1 sleeve and the other is 2 sleeves and 1 drawer – I could then get 3 complete boxes from 2 sheets of A4. So, an hour and a half’s effort and I have greatly increasedy knowledge of the SNC and I have over a dozen perfect little boxes. A huge thank you for sharing these files. It’s now 2.20am – just time to get a quick sleep before tomorrow’s fun starts!
LikeLike
Glad to have helped! *hangs shining armour on coat rack and parks steed in the stables*
Have a fab treasure hunt! :)
LikeLike
Don’t hang your armour up and park your steed. Put it back on again quickly and nip over to East Leicestershire for a treasure hunt (and bellringing tour) around some lovely villages!
LikeLike
Sounds fab but sadly I already have plans today :/
LikeLike
Would have loved to have gone only my husband has been rushed into hospital :)
LikeLike
Not sure why the smilie face after that news, lol ;) Hope all is well.
LikeLike
The smile was because they are at last going to have to sort out what’s wrong with him, and get him well. xx
LikeLike
Fair point. Hope things get sorted soon :)
LikeLike
That’s fantastic John, as always ! I don’t wish to sound as if I’m begging but is there any chance at all (pretty please) of something similar to this to create Artist Trading Blocks ?? I have to say that your blog has helped me so much with my Scan n Cut – I would have been a little lost without your posts – thank you
LikeLike
Artist Trading Card Blocks? Can you describe a little more as to what you are looking for please?
LikeLike
Thank you John. My mind is now racing with all the storage possibilities that can now be made so easily, with just a few minor alterations, for all my craft ‘essentials’ and all for the cost of a few sheets of card and glue! Plus of course decorated gift boxes etc.
Pat GH
LikeLike
Oh this just brilliant, thanks so much for sharing.
LikeLike
Hi this is about fabric cutting , I have the sheet but each time I cut it cuts through the sheet , iv used the settings they gave said it cotton foe quilting. Thanks sandra
LikeLike
If you mean the high tack sheet then this is normal.
LikeLike
Excellent as always you clever, generous boy!
LikeLike
hi john, this is about having to use tempory adhesive spray on the mat, it leaves a sticky residue on the card, is there anything that can be done about this. thanx gary nicholls
LikeLike
After doing this several times there will also be residue on your mat. This may be enough to have given your mat new life for a while.
Lots of people have come up with ways of giving their mats new life – it might be worth doing a web search for ideas.
LikeLike
Can’t wait to have a go at this box your very clever
LikeLike
Thank you – you’ve got me thinking Christmas and gifts in a box for my cardmaking friends – so many ways to decorate these boxes!
LikeLike
This is fantastic John as I was making a Christmas countdown from a crafter’s companion magazine and had to cut 25 boxes and drawers the hard way so now I can do them faster thanks to you.
I’ve also been working on some of my own cutting files.
LikeLike
thank you!!
LikeLike
Hello John, I had a brother cut and scan bought for me as a present, I was one of the first to receive mine. I have stopped using it as I can’t update it. I have a computer but the file to download is always in PDF and won’t download onto my memory stick. Do you have any suggestions?
June
Sent from my iPad
>
LikeLike
The file that you need is not a PDF. I think you might be downloading the wrong thing.
LikeLike
Thank you for this brilliant idea, must try it.
LikeLike
Great idea and such a neat storage idea for a many of our crafty things.
LikeLike
Thank you John this is brilliant, by increasing the size I bet they would make a fab little chest for crafty stuff, jewellery etc xx
LikeLike
Thanks John. I will TRY to make this, a bit bigger though so it can hold my quick unpick, tape measure etc. and a few others to hold cut squares & triangles for quilting.
LikeLike
Brilliant as always John. Can’t remember how to download onto my Mac. Do I left click?
LikeLike
Yes.
LikeLike
Many thanks for doing the hard work for us and also generously sharing it.
Marie
LikeLike
Wow this is sooooo good. I normally buy a kit to make my granson an advent tower with draws, and fill it with little toys and sweeties, and spend ages decorating it with his favourite characters. Now I can cut my own in any size I like, with decoration already printed on the card, and fill it with anything I think he might like to play with. Thank you so much John, I’m tickled pink with this, well done.
Sioux x
LikeLike
Good idea! :)
LikeLike
Morning John,
Nifty little box and leaves so much to the imagination as stackable units……like it !!.
Much appreciated,
Catherine.
LikeLike
Again – many, many thanks for sharing. I really must find time to try this one.
You are very clever – can you design some more hours for crafting please!!!
Carole.
LikeLike
Absolutely brilliant, thank you, still struggling with SNC, but getting there
LikeLike