
Welcome back to another Monday Mash Up!
This week I have been toying with using old templates again … this time I have been taking a two dimensional template and turning it into a three dimensional gift box.
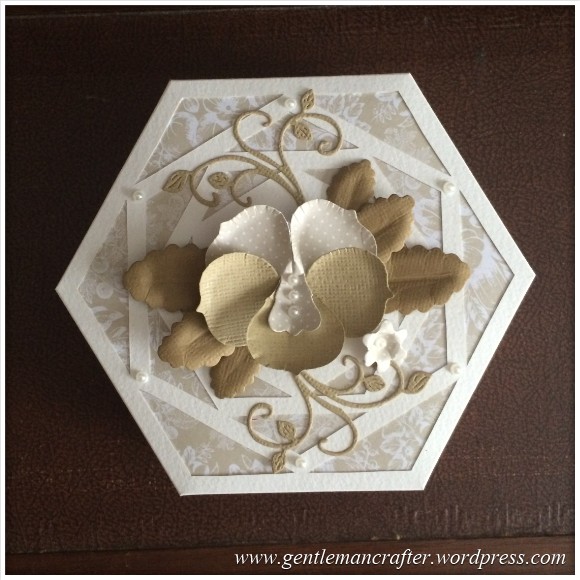
I was very proud of the finished result …

But it all started with this template.
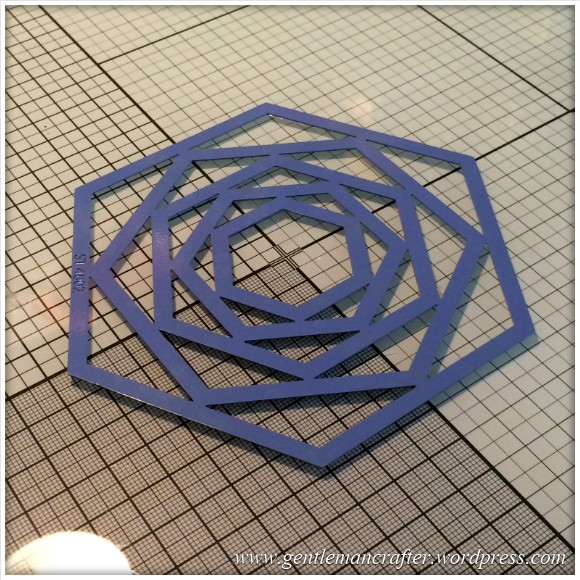
(I’m afraid that I don’t know what the brand of stencil is, but it should work with any equal sided hexagonal template).
After toying with a few ideas I got it into my head that I wanted to make a box from this.
Not an easy job, I thought. For a start there were no clues as to where to score, cut or fold.
So I set about experimenting and then came up with a solution which went as followed.
Firstly I traced around the outside and some of the inner areas.
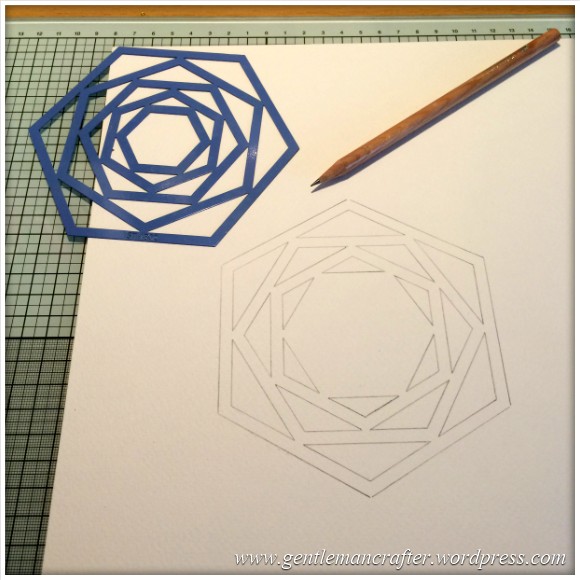
I then used a ruler (with layering marks) to draw a new border around the outside edge (equal on all sides).

Then I added lines that went from corner to corner, running across the middle of the design.
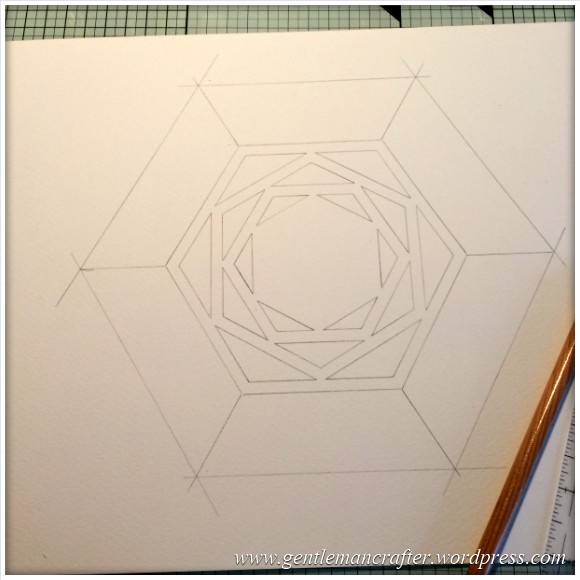
Next I added additional lines to create pie wedges on the corner.

I then cut out some of the central design.

I found it easier to do it at this stage rather than trying to do this after I had cut out the lid as it helped to have the rest of the page as a holding structure.
I then cut out the box top, leaving a flap at each corner, and scored the folds, as seen here.

I then used the stencil to cut out a piece of decorative paper and stuck it in the middle over the aperture.

I then began folding in the edges and sticking the flaps with PVA glue.
I held them in place with paper clips whilst it dried.
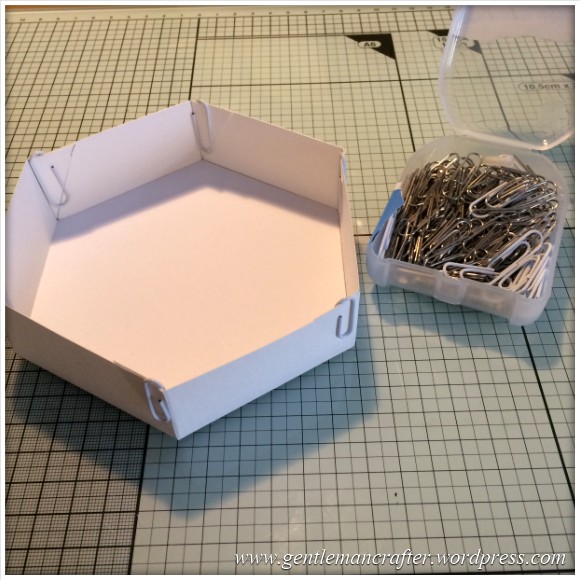
Here it is with everything stuck and drying.

I made the base by tracing just around the outside of the box.
The construction for the box bottom was similar to that of the top apart from adding a small (1mm or less) border INSIDE the shape AFTER tracing the outer border. The intersecting lines went to the new corner point. This made the box base slightly smaller than the lid so that it fitted inside the lid.
The decoration was a mixed affair and used a variety of dies for the flowers and swirls. Some sticky backed pearls were the final touch.

So that was basically it. A mini mash up if you will.
For those that are interested here’s a quick list of some of the specific things that I have used:
- Watercolour card for the box.
- Decorative papers from the docrafts Papermania Jesse Edwards Capsule Collection
- Cardstock from American Crafts Neutral collection.
- Pansy dies from La Crea Designs.
- Swirl die from Cheery Lynn Designs.
And here are a few more pictures of the completed box.


So, that just about puts the lid on this week’s Monday Mash Up. I hope that you have enjoyed it and will have a go with one of the templates in your collection.
Thank you for stopping by and reading (or just looking at the pictures).
If you have any questions or comments, please feel free to use the comments section below and I’ll do my best to get back to you.
Many thanks.
J :)

Absolutely stunning, love the flower.xx
LikeLike
Absolutely beautiful – thanks for sharing.
Bev xx
LikeLike
Fabulous, John!! Love it, well done for your spot-on calculations and love the decoration. Thank you!
Annie
LikeLike
Lovely project John, inspiring me to give it a go. Love the topper.
LikeLike
This is fabulous John, loving the flower it is gorgeous as is the dimension.
Hugs
Linda xxx
LikeLike
John I love the box and was about to ask you where you got the die from, as soon as the package was displayed, I realised that the exact same die had arrived in my morning post (freaky). Now I’m looking forward to using the die and folding the front of the die over as I know realise how lovely the pansey looks. I love the idea of going back over what you already have in your stash – just wish there was more space in my house to put everything I keep ordering. (obvoiusly I’m not going to stop buying the goodies – that would be utter madness).
Keep on crafting.
Cheers
Linda
LikeLike
Thats brilliant! love making boxes my self, but am not so good with measurements,not sure if I can name what I use to help me with the making and measurements on here.
was also wondering if it could be done on the scan and cut?..but why don’t I go and try my self?
thanks John grate idea!
CraftyPete.
LikeLike
Another really great post, John. The end result is fabulous and the idea for making it from the template was brilliant ‘of the box’ thinking. (get it? ‘out of the box’…?) … (I’m available for weddings, birthdays and bar mitzvahs).
I’ll put the kettle on and get the biscuit tin out – there aren’t many left from last week but I’ve got cakes if you’d prefer.
One condition: Could you bring that Pansy Die set with you – or tell me where I can buy it? It’s a lovely die set, and the flowers (and leaves) are so stylish.
LikeLike
John, as was said before you are so creative. I so look forward to your weekly ideas and projects.
Ann
LikeLike
Hi John,
This is absolutely so clever! I wish I had half your talent.
All the best.
Carol
LikeLike
I’ll post my address John so you can send the box to me. I’ve been invited to a wedding and the wedding colours are pretty much a match for your box colours !!!!!!
Beautiful.
Deborah.
LikeLike
Absolutely beautiful xx
LikeLike
I think you’re absolutely brilliant You have so much talent in all your different crafts. I’m going to have a go at this. I have a scan N cut do you think it would be easier on that
Have a good week. Thanks Elly
LikeLike
John – You have every right to be very proud of this box. Well done, it is beautiful. I want to find time to make one myself some time, and hope it turns out as good as yours!
Thank you for sharing.
Carole.
LikeLike
What a gorgeous project John. Although I am not good with a craft knife I am going to have a go myself x
LikeLike
Thank you you are so clever please keep it up x
LikeLike
Hi John, thanks for the tutorial as it looks very complicated! Really love the end result.
LikeLike
Pretty box John, and when you put it like that. relatively easy to create from a basic shape. You have me going now, on some of my patchwork rulers – I wonder if I could make them work the same way. Thanks for the inspiration.
LikeLike
Nice one John, I really like the cut out on the top. XX
LikeLike
Not heard of this make of dies before. Are they coming to C&C?
LikeLike
Love it
LikeLike
So you should be proud, it’s beautiful,thanks for the tutorial xx
LikeLike
lovely John – you must be a mind reader – I love making different boxes – exploding (in all shapes and sizes), different shapes – thanks for this
LikeLike
What a thing of beauty John. I´ll definitely be having a go at this. Thank you for the great and different idea.
Love Val in Spain x
LikeLike
Oh your cutting with your craft knife is so neat!! A lovely project John, thank you
LikeLike