I’ve been sewing up some pin cushions this week as little testers for christmas (yes, I said it) gifts for some friends and family that like sewing so I thought that I would share the results (so far) with you.
Got a few done and not sure which to go with at the moment, but there’s plenty of time until December the 25th. Mind you, I say that every year and end up scratting around at the last minute every time, lol :)
Putting together a basic square pin pillow/cushion was fairly straight forward, in fact it was much the same as the process used for the bowls and bookmarks of previous Fabric Friday posts so I’ll just give a quick bullet point list of the process that I used, rather than a blow by blow account, and then I’ll share some variations later in this post.
- Cut two equal sized squares of fabric. For these basic squares I used my Sizzix Big Shot and 3.5 inch square die. You could of course use an alternate die cutting system or electronic cutting machine for this.
- Place the two pieces of fabric right sides together.
- Using a 1/4 inch seam allowance sew around the outer edge leaving a 1.5 inch gap.
- Clip the corners.
- Turn right sides out (making sure to poke the corners out well) and press.
- Stuff with stuffing of your choice.
- Slip stitch or Whip stitch or glue the gap closed.
Done!
Here’s the basic one completed.
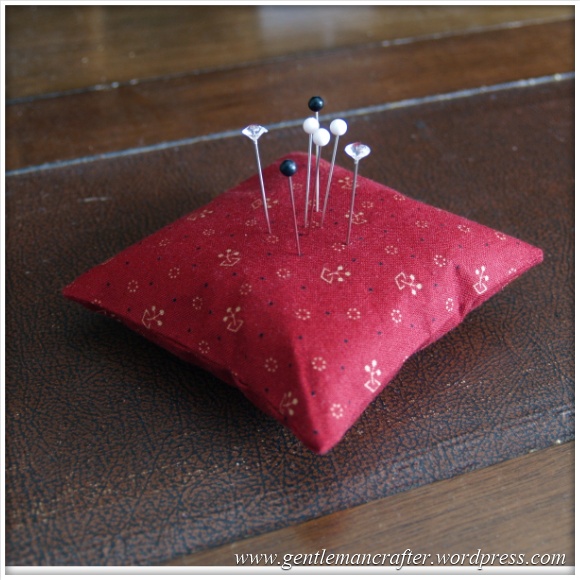
If you were making to sell, I imagine that you could get a swift production line going on these little things.
Just a note with the one above, I did use some fusible interfacing to give that fabric some body as I initially thought that it would need it, but with later ones I didn’t use it and it didn’t seem to make a huge difference – hence why I didn’t list it in the process above.
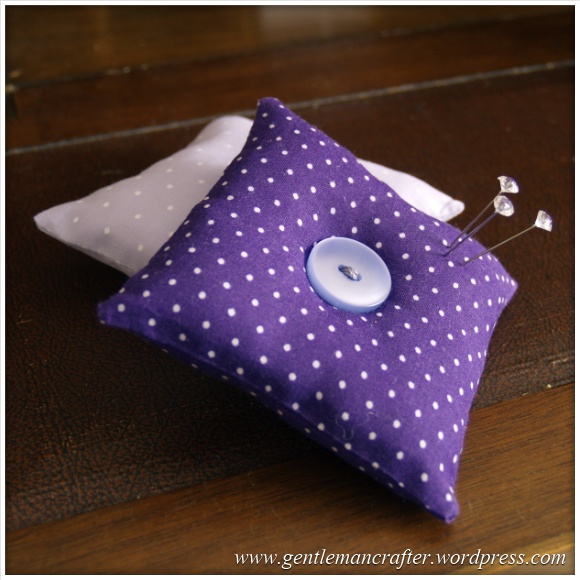
Moving on from the basic design, I stitched a button in the centre of the cushion.

Not breaking any creative molds with that one now am I? Lol! :)
Of course, there are plenty of decorative ideas that could be applied to this basic model. Tassels, bows, ribbons etc. If you have any suggestions, please feel free to pop them in the comments section below.
I then looked at patchwork ideas and came up with a reversible log cabin style cushion …
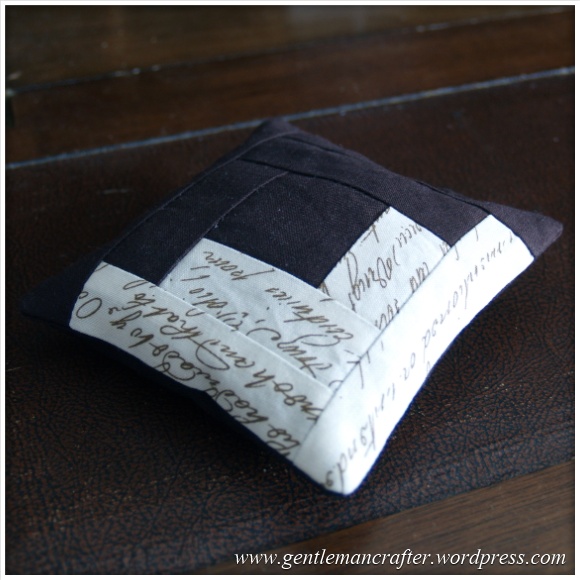
…and side 2…
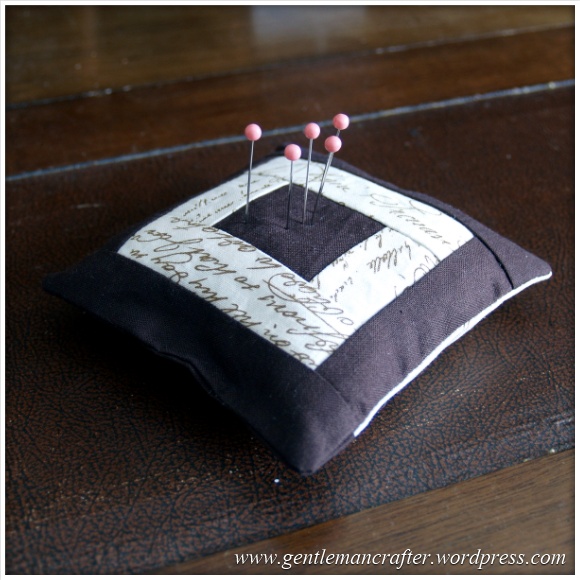
I then tried a quarter square triangle design.
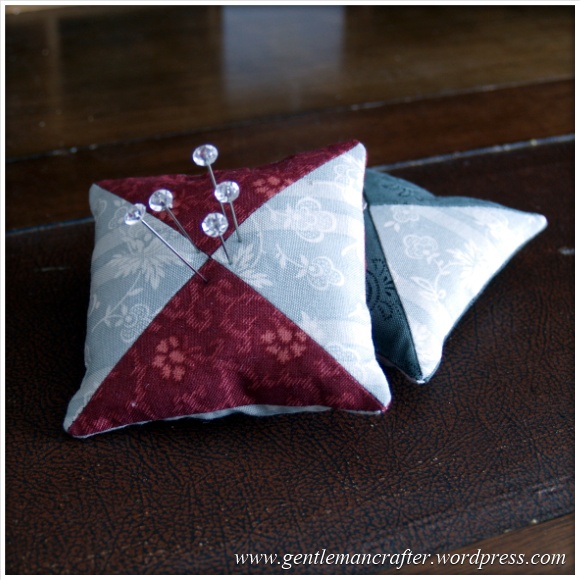
I think that that one was my favourite of the lot.
Finally, I did go a little bit overboard and made a “giant” pin cushion with a framed fabric panel in the middle.
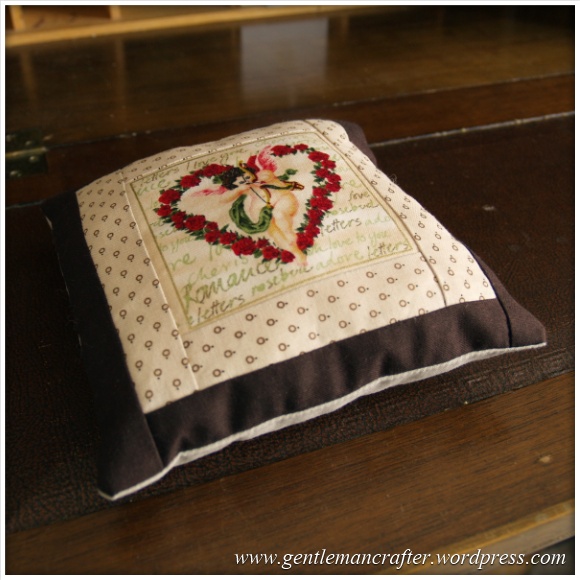
In all honesty, it’s the size of a small throw cushion and totally impractical as it would take up most of the sewing table, but hey, when you’re experimenting, there are now rules, right?
Before I packed away the sewing machine for the night I also thought that these things don’t need to be square so I quickly whipped up a longer version using strips of fabric.
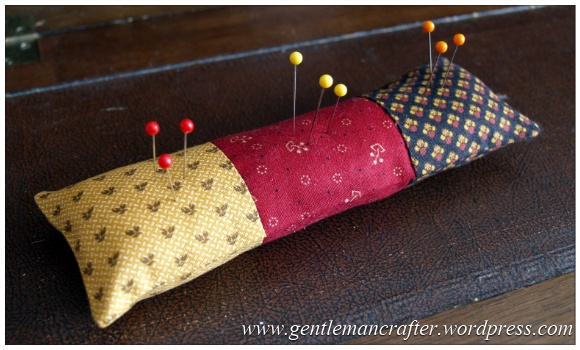
I quite liked this one. Not sure why, it just made me smile :)
Anyway, I’ll need to do a little more experimentation, especially with decoration, before I settle on the final design but I’m very pleased with the initial results.
Mind you, if I show you the one that I use, (that Debbie Shore made for me), I think that I really need to pull out all of the stops to make something so amazing.
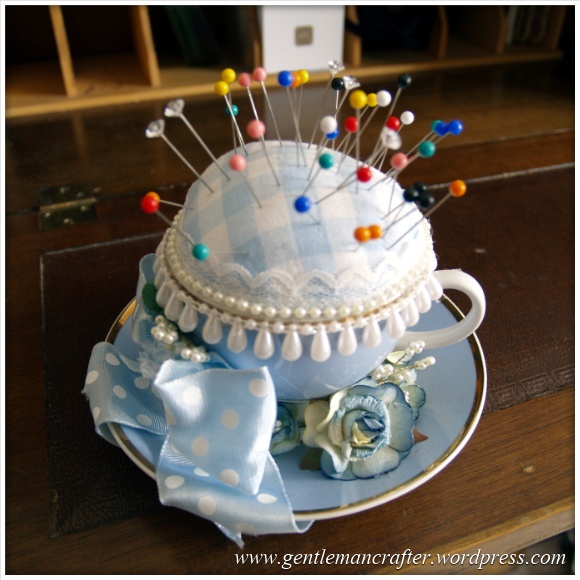
Cute isn’t it?!
Before I sign off I just wanted to share a little tip with you. For the stuffing of these I have been using an unused throw cushion. To avoid the stuffing going everywhere I simply slipped the whole thing into a carrier bag and then snipped a little hole in the top of the cushion and dipped my hand in and pulled out the stuffing bit by bit. It really did save me having to tidy that fluffy nonsense up afterwards or trying to get it back into a packet that it has been compressed into :)
Right, so that’s it from me. What do you think of these? I bet you’ve already had a go at making your own from a pattern or your own imagination? It’s one of the first things that a lot of sewers make as it’s such a manageable size; it also covers more skills than you realize…
If you’ve any questions or comments about this post then please feel free to use the comments section below.
By the way, I’m hopefully working on more bags next week so will hopefully be able to show you that in a fortnight or so.
In the meantime, happy sewing!
I’d better let you get on with your day now.
Thank you for reading again. See you next time.
J :)

just love the log cabin one, what about putting dried lavender in with the stuffing?
LikeLike
you do inspire me John – love seeing all your ideas
hugs
ally x
( another crafter from Spain )
LikeLike
Hi John,
Thanks for more great ideas to cheer up a miserable Friday (weatherwise).Another idea like Debbie’s is to make cupcake and sew on some pearls (like sprinkles) on top with embellishment cherry in centre
Celia
LikeLike
Hi John
Love the designs. Where do you get all those ideas from?
Talking of the ‘C’ word – I made 30+ poinsettia embellishments for ‘C’ cards yesterday. Tomorrow it will be snow flake embellishments. I am really ‘sad’!
Have a great weekend! Lorraine
LikeLike
Great John ten out of ten, you could add some fragrance to filling according to season.
LikeLike
Brill as always good way to use up scraps too. May I ask a question please I have been trying to buy the peel off vinyl from c & c for the scan n.cut , but can’t find them can you help. Thank you .
LikeLike
I’m not sure. I’ll try and find out.
LikeLike
Love the cup Debbie made it’s very pretty, prefer the more practical cushions you are making. Love the oblong shaped one, given me an idea… Looking forward to more sewing tips from you :-)
LikeLike
Hi John
what a grate idea! they look lovely, am afraid to say am just like you, all ways rushing about at last minute. Tried knitting a father Christmas last year,but did not realise how long it would take. But managed to do it in time for Christmas. Trouble is my sister in law see it and wants 3 knitted for this Christmas. .
have good weekend
Crafty Pete.
LikeLike
The triangle ones are my favourite John but I had to smile when you put you had got out a machine to cut the fabric – what’s wrong with a tape measure and scissors when they are such small pieces!! Thank you for showing us what you have been up to though. I’m looking forward to seeing your bags next time, best wishes Jackie
LikeLike
Thanks for the smiles :) :) really sweet John and I love the giant one. I might be able to get all my pins into 1 place with that!
Really look forward to your Friday posts – can’t wait for the bags….
LikeLike
Hello John
What a lovely practical gift for your friends.
At my quilting class we have been making pin cushions too! We have been cutting 5 squares of fabric – using one for the bottom, the other 4 squares we fold into triangles and place them on top (right sides together) lapping them over each other like you would close the lid of a box. Then we sew all around turn right side out stuff then gather up the opening with a running stitch to close and then sew a button top and button pulling them tight to indent the cushion.
They are really lovely and you can use combinations of fabrics. A good use of scraps.
Looking forward to seeing the bagds.
Diana
LikeLike
Love your Pin Cushions John. As a beginner I am so glad you have started “Fabric Fridays”. So looking forward to your bag tutorials.
Kind Regards Janet
LikeLike
These are all brilliant John, but I think my favourites are the quarter square triangle and small throw cushion. I really must get my sewing machine out of the cupboard!!! Have a great weekend xx
LikeLike
Hi John. Love all of these especially the cup design. I´m not a sewer sadly as I have problems with my hands but I can admire them. What wonderful gifts. Please don´t mention the “C” word again until at least November !!!
Have a lovely day.
Love Val in Spain x
LikeLike