
I find creating geometric patterns in Serif Craft Artist very easy. I have had a couple of questions in recently asking if I could create a video on how I do this.
I don’t actually have the facility to do this right now however I though that it would be easy enough to explain how to do this with step by step screen shots – so that’s what I did. I hope that this helps those of you that were curious …
Ok, well first step is to obviously open the Serif Craft Artist Software.
Choose the option marked, “Blank Document”.
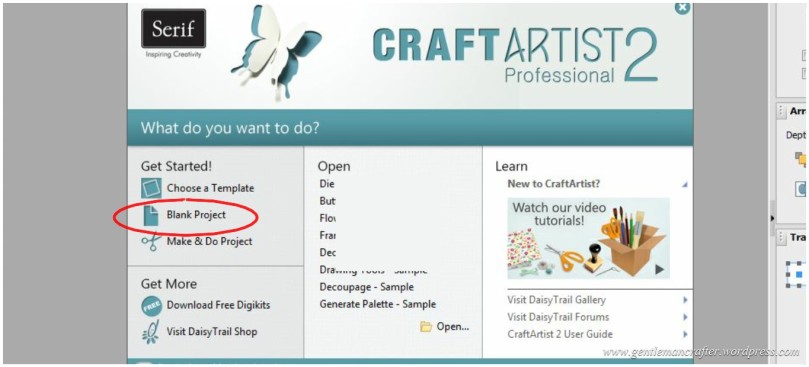
From the next menu choose A4 and then clock OK. You might be presented with the Digikit Browser; just click OK without selecting one.
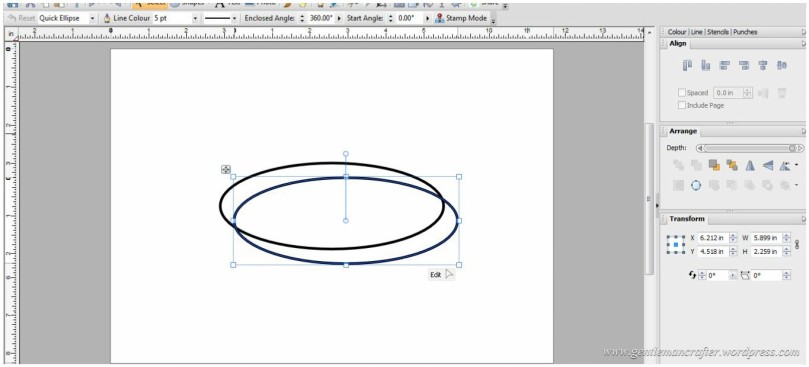
Next, drag a circle auto shape onto the page, but make it more ovular than circular, if that makes any sense – maybe a picture will help here.
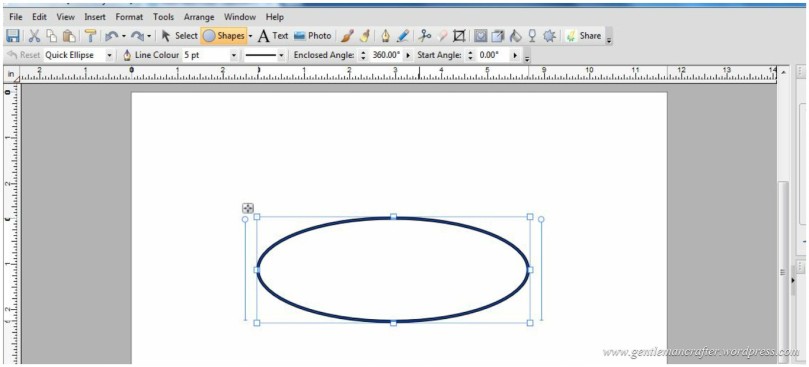
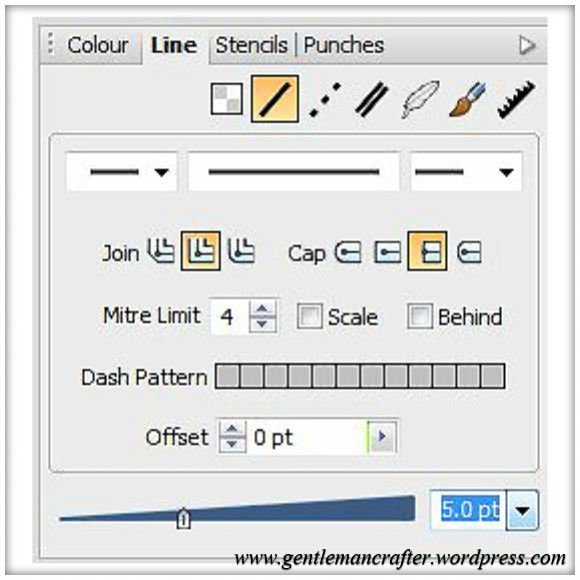
Set the line weight to 5pt.
Set the Fill Colour to transparent.

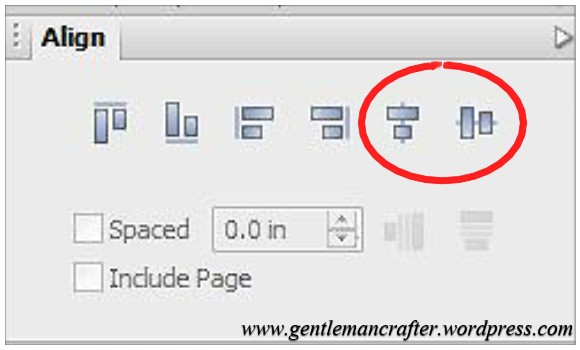
Then, click on Centre Horizontally and Centre Vertically to centre your oval into the middle of the page. This step is not strictly important, I just got into the habit so that I know where everything is going to end up and if I am zooming in and out, it’s likely to end up where I can see it.
Next, copy and paste the oval.
Then, using the Transform Tab, rotate this oval 30 degrees.
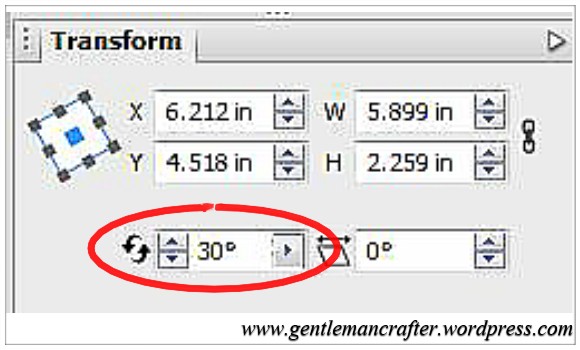
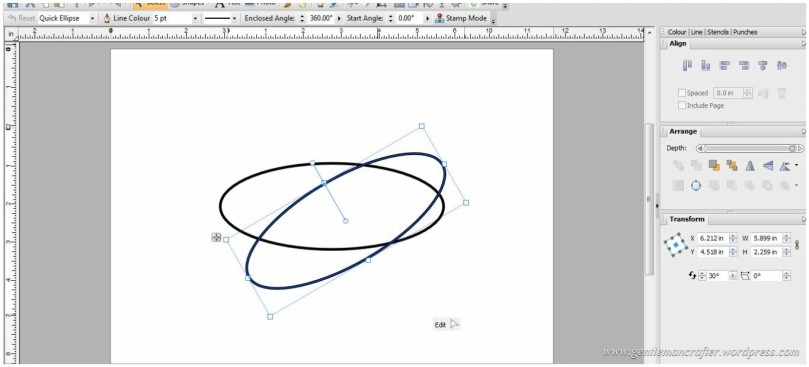
Now continue to paste and rotate the oval, increasing the rotation 30 more degrees each time (i.e. 30, 60, 90 etc), until you have six shapes on the page.
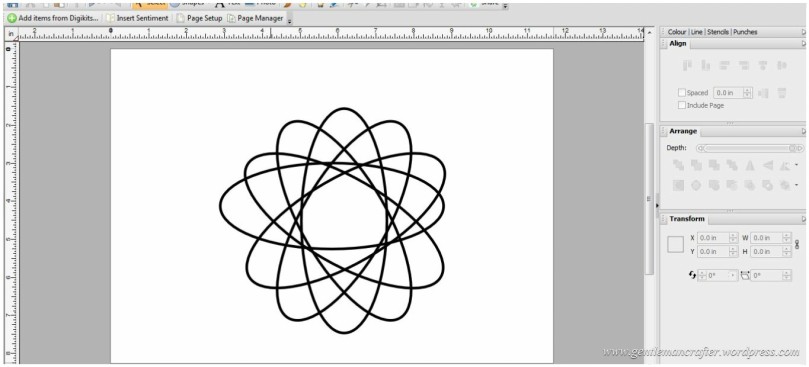
Click and drag your mouse so that all 6 shapes are selected.
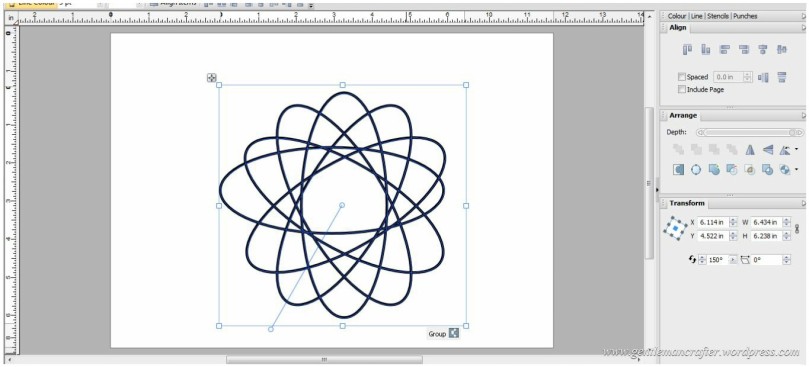
Then, using the Align Tab (shown in a previous step), click on Centre Horizontally and Centre Vertically buttons. This will arrange your ovals into a uniform pattern as seen here. Click the Group ‘button’ at the bottom of the group of objects and then click Centre Horizontally and Centre Vertically again. This will put your design in the centre of the page if it isn’t already.
Here is roughly how it will look.
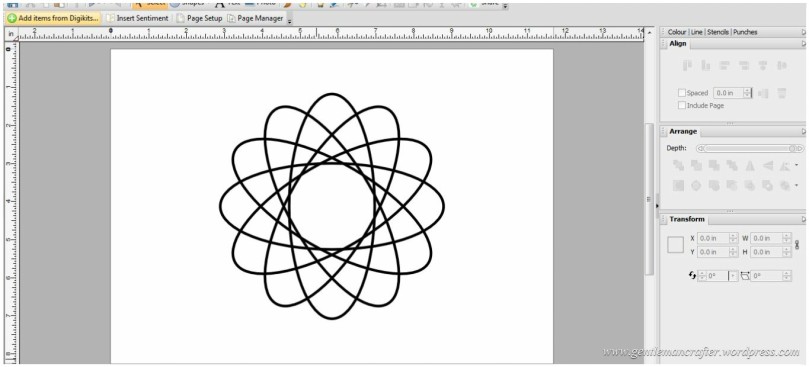

You can of course use the floral autoshape and adjust some of the parameters there but I thought that this was a nice easy way to help you understand how I go about it.
Now it is up to you what you do with this.
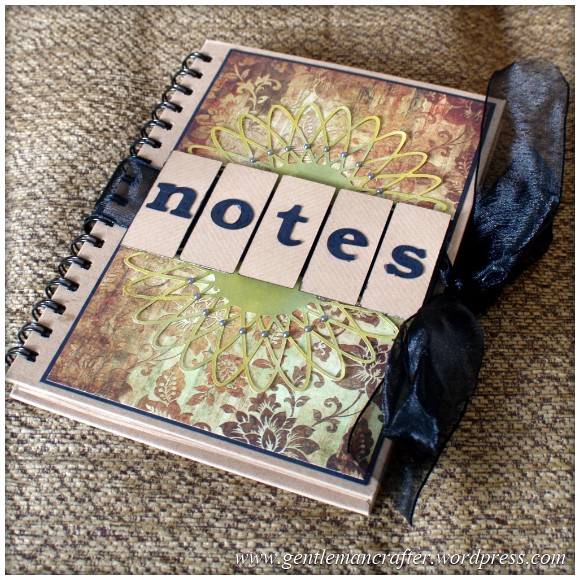
This way of designing geometric patterns is how I created the design used in the black and white card and notebook that I showed on recent Brother Scan n Cut shows.
You can of course use these patterns in order to create digital stamps and punches to use again in Serif Craft Artist, but that of course is up to you.
Anyway, that concludes this quick post. I hope that you have learnt a little from it and will start creating your own unique designs.
If I haven’t explained something well enough, please feel free to use the comments section below to post your question.
Many thanks for reading. See you next time.
J :)

Thank you for the easy step by step guide, I find this all so hard !
LikeLike
Hey cool. Thank you very much. It worked.
LikeLike
Hi John
I have tried to save a design I made in serif to use with my brother scanNcut, it would only save as a craft project and when I tried to use it on the scanNcut it was not visible.
LikeLike
Shirley, you will need to ‘Export’ as an image rather than ‘Save’. It’s on the file menu.
LikeLike
hi john, may i say thank you for posting directions on how to make your own designs in serif. i did not know how to do this. but thanks to you i have been creating all day, making many different designs for my scan n cut . thankyou ..GILL
LikeLike
Wow thank you for a great idea. Not been using Craft Artist long and not very adventurous yet. This I must try. Thanks again.
LikeLike
thank you John this was easier than I thought it would be
LikeLike
Thank you John just what I’ve been waiting for xx
LikeLike
Hi John. Thank you so much for this tutorial, it will come in very useful. SueL
LikeLike
John, that is a superb explanation. Thank you. So now I am getting more out of CA as well! Just tried it and it works perfectly. Dee
LikeLike
Fantastic explaination John. I have already tinkered with this and had some amazing results but could not have explained it as well as you have. Please bring us more turorials!!
Thanks so much. Sandra
LikeLike
John u have no need to worry u have explained very well. Love your shows u explain things so clearly. Joan
LikeLike
Can’t wait to have a go at this … thanks for sharing John x
LikeLike
Wow I did wonder how you did these and made them so perfect. Will be giving this a go. Thanks for the tutorial. :)
LikeLike
Great John. Tried doing this last week but failed. Now it is so easy with your step by step instructions. Thank you.
LikeLike
Very easy to follow tutorial I will definitely try it.
LikeLike
Thank you, John, that has really helped. I’m off now to try myself. :-)
LikeLike
thanks John – I learn something new every day………..
LikeLike
Thank you so much for sharing this John, wouldn’t have known where to begin with it to be honest. Off to play! xx
LikeLike
Yay! have done it! Thanks again John x
LikeLike
This looks easy so I can’t wait to give it ago, many thanks for sharing this.
LikeLike
Yesterday’s Miri square in a circle design shown on C & C was most impressive. A true “crafting ” experience of combining PC’s with equipment and glue and card !
LikeLike
Thank you John,very well explained I will definitely try this with a few different shapes later this morning. Jane
LikeLike
Thanks so much, can I print it off so I can have it open while trying it?
LikeLike
Yes :)
LikeLike
Great John I used a protractor to create a similar design but because was using a pen my lines were really to thin for the scanner. Keep up the great work.
LikeLike
Thanks John.
I have been wondering how to do this, you make it look so simple.
You’ve inspired me!
Love n hugs
Ally x
LikeLike
Thank you John…..this has been really helpful as I love the design you showed on one of the Brother Scan ‘n Cut shows….I think I was one of the first to receive my scan ‘n cut as i ordered it at the launch day and it arrived the sat before it was due to be dispatched!! I love love love it!…thanks again for all the inspirational help! :o) x
LikeLike