For a long time now I have wanted to have a go at making my own glass beads. Well, recently I bit the bullet, lit the flame and got stuck in. To say that I am hooked is a definite understatement.
Here is a quick look at the tools that I used, the process that I went through and the results that I achieved.
Tools
To get started I bought a beginner’s kit from Tuffnell Glass. I thought that this would be easier and more reliable than trying to source the individual elements myself.
It arrived in super quick time (very impressed) however I had to source the gas myself (which in itself was a challenge). I eventually tracked down a suitable canister which cost just under £20 for a small one (about the same size as a 1 litre bottle of fizzy pop). It was at this point I did question the sensibilities of having a highly flammable gas canister sitting around the house but in for a penny, as they say.
The set up was fairly easy, it was mostly a case of attaching the heat proof surface to my table, and then attaching the Hot Head torch attachment to the gas canister. Easy really.
Here’s a quick look at the basic tools.
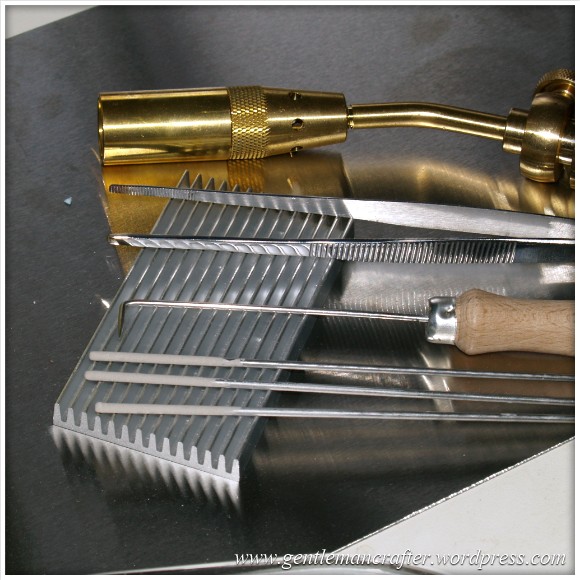 At the top you will see the Hot Head torch that I have mentioned already.
Below that you can see the tweezers, pick and bead mandrels (already coated in bead release). They are all resting on a “marver” which is a paddle like object on which you press the hot glass to shape it.
Underneath all of that you can see the metallic heat reflective sheet that would protect my table (to some degree).
There were also the tinted safety glasses (tinted as I would be looking into a hot flame and at molten glass so don’t want the glare to affect my eyes). I think that they are rather fetching …

… you can stop laughing now. :/
So that’s the kit. There was also the glass rods that I would need to melt. Here they are resting in some bubble wrap.
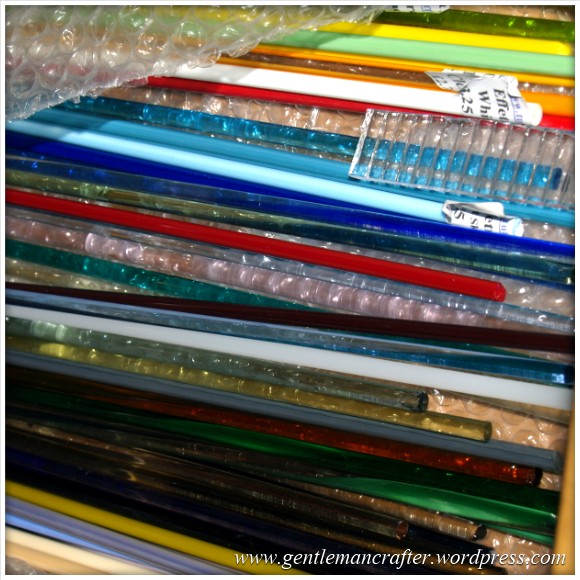
There were so many to choose from in the kit that I did take a while just sorting them, looking at their pretty shiny colours and trying out different colours side by side. Of course I had no idea how they would turn out as there were so many variables but I made a few ‘best guesses’ when pairing them up.
The glass apparently has to be of a matching COE (coefficient of expansion) – sounds right technical but just means that the glass expands and contracts (when heated and cooled) at the same rate. If I mixed them, they would probably crack, or even explode! Luckily all of the glass supplied with the kit was ‘compatible’ so that took the guess work (and potential issue) out of things – which was nice.
The final part to the kit (which I added) was some cooling beads.
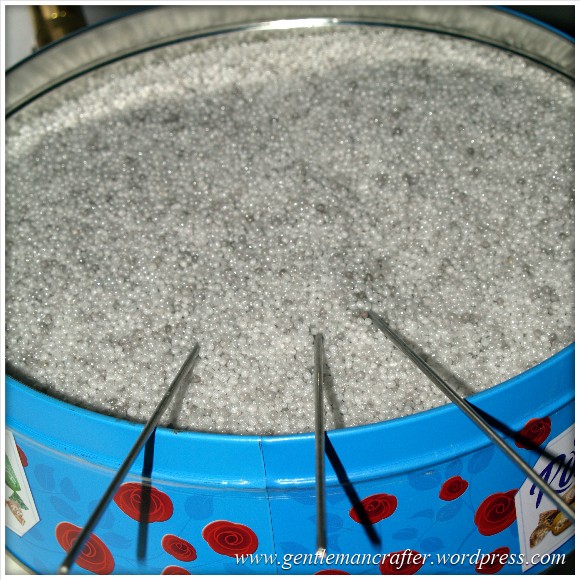 These look a little like those polystyrene balls that you get covered in when opening a parcel but they are very different. For one, they are very heat resistant. Also they are not static – which was good.
They arrived in a plastic bag so I decanted them into an empty chocolate tin. I obviously ate all of the chocolates – it would have been silly not to.
The purpose of these beads is to insulate the cooling beads (which are extremely hot) and to allow them to cool much more slowly than if left out in the open so that ‘thermal shock’ does not cause them to crack.
It’s not pictured here but there was also a simple to follow book in this kit which explained some of the basic techniques step by step, which really helped me on my first attempt.
Technique
If I’m honest, it was very difficult for me to do this technique AND take the photographs as both hands were in play whilst making the beads.
Instead therefore I found a little video from Tuffnell Glass that should really give you an idea of the set up and basic process. It’s not Speilberg, but it covers the basics.
Results
So, after all of the trepidation, nervous dipping of glass into flame and much experimentation I was very pleased that my eyebrows were still intact and the neighbourhood hadn’t disappeared in a plume of smoke and I had three beautiful little beads.
Here they are…
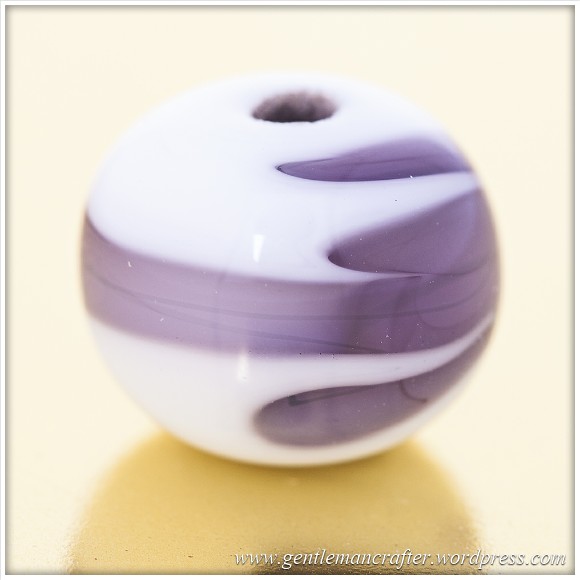
This first one uses an opaque white as a base and then has a transparent purple addition to it.

This next one was a combination of transparent and opaque blue and white glass to create a swirling wave effect.

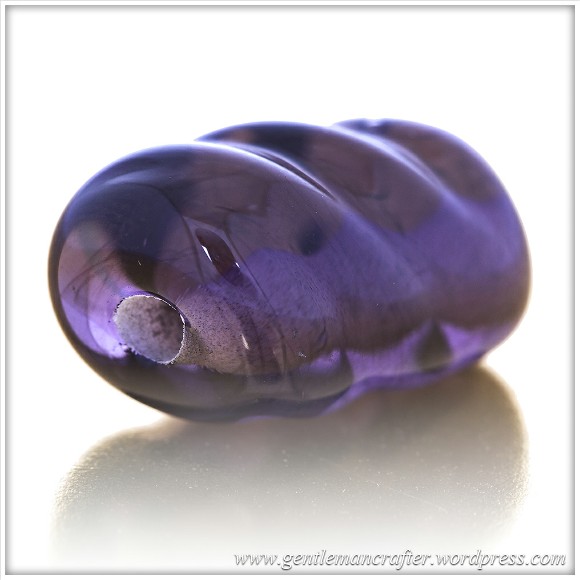
This final one used a transparent purple coloured glass and the ridged side of the marver to create the ridges in it whilst it was molten.
What do you think? Nice eh?
I have already collated a small collection of books with many different styles and techniques that I plan to have a go at in the future and I have also watched quite a few videos online to try and perfect the process.
I will definitely be looking for ways of doing more of this in the future and perhaps even grow it into a full time career. I think however that I might need to wait until I can move the set up into a more suitable location – burning that hot gas in my little kitchen wasn’t the best idea in hindsight.
Safety Note
Just a quick note – If you are intending to give this a go yourself, there are some serious safety considerations (as you may have already gathered) so please do make sure that you research those requirements thoroughly.
Final Thoughts
As I mentioned, I have wanted to do this for a while and am therefore really pleased that I have finally done it. I am also happy with the results that I got although there are many things that I would like to go on and try.
Is this something that you would like to try? If you did it, what colour combo would you use?
I have previously experimented with copper foiling techniques in glass and can guarantee that this won’t be the last technique that I try with glass (I hope to document my trials with the Hot Pot microwave glass fusing kiln soon). Glass is definitely going to form part of my future craft repertoire – not sure how yet, but it’s going to happen some day.
Anyway, thank you for reading this post. If you have any questions or comments, please feel free to use the section below.
Take care. See you again soon I hope.
J :)

You are very talented, I have just got into jewellery making, have a large bead order on the way, eek! Hubby is drowning in all my stuff! I would love to have a go at glasswork, but that will need to wait until I have done my precious metal clay course! Please keep posting your efforts. Has this ever been demonstrated on C&C?
LikeLike
Thank you for the compliment :)
Glass bead making hasn’t been on Create and Craft before but precious metal clay was on some years ago.
J :)
LikeLike
Your beads are beautiful. Really enjoyed reading this – would love to have a go – but not at home I might add. I did have a go at enamelling on copper many years ago and I loved that too.
LikeLike
Hi John, the beads look fantastic! I like blues and pinks.but not together though! Would really like to try this..
LikeLike
so glad I watched the video – I’ve got one of those drill things but never new what it was for. My brain is now thinking I need the rest of the kit – just so the drill thing does not go to waste. (naughty Crafty thinking). Does this drill thing get rid of the rough edges?
LikeLike
Yes :)
LikeLike
amazing john you are so creative, I would love to try (don’t think hubby would be pleased) I love turquoise blue and purples, I have a lot of glass items in my home and love to see lots of colours of glass together xx
LikeLike
Beautiful beads, no one would guess that they were your first. I’d love to have a go, but I really can’t start another hobby – I don’t have enough time for those I do now.
LikeLike
John,
I am just too jealous of your accomplishments with learning to make beads. I have wanted to do this for such a long time. I’m sure I shall take some inspiration from your fabulous efforts and see if I can find a class perhaps then go it alone.
You have created such fantastic beads and I love everyone of them. I’m sure you’ll be showing us many more of your creations in time.
All the very best.
Carol
LikeLike
Hi John
Stunning beads. You wouldn’t believe they are your first attempt. I make jewellery as well as cards but wouldn’t be brave enough to make my own beads. Tuffnells make some lovely beads too and are a respected company. Those glasses are shocking lol! x
LikeLike
John the beads are fab and if you can make them to this quality on your first attempt – I look forward to seeing your future creations.
Is there any graft genre you don’t want to have a go at?
I’ve been wanting to try quilting for a long time now and finally managed to join a group a few weeks ago – enjoying it so far but acknowledge I have a lot to learn and master.
Happy Crafting John.
LikeLike
Diana, I love ALL things creative and thoroughly enjoy learning new skills.
I can’t think of a single thing that I wouldn’t like to try.
J :)
LikeLike
Hi John
What beautiful beads they look perfect and professional, you have a natural flare for this by the look of it.
I wish you much luck in your endeavour to make more things glass wise in the future I’m sure you could start a cottage industry making glass things. I look forward to seeing more glass things made by you.
My favourite colours are purple and blue so I think I would do a mix of those and some white to swirl it with.
I didn’t know you could make your own beads like this but I only have a little council flat and I don’t think they would take kindly to me experimenting with a canister of gas in my flat! Plus I have a dog who is a little boisterous sometimes so a little recipe for disaster I think! Shame though!
Good luck with it, I’m sure you’ll do well.
Best wishes from Katie-Louise
LikeLike
Amazing! You should be v proud! To turn out such beautiful work from the start – you have inspired me and many more I’m sure…
Will be keeping an eager eye out for any of your future ventures.
LikeLike
Fascinating, absolutely fab stuff. Never gave it a thought that you could make your own glass beads. Lovely results too. Thanks.
LikeLike
Lovely beads. I think this may become an addiction John. You are very creative. Chris K
LikeLike
Well done, they look fab. Love the purple one. I would like to try a mix of browns and yellows but any mix would look good.
LikeLike
Wow! I love glass beads and would love to have a go too. These are fab John. Julia x
LikeLike
Lovely beads. I make Tiffany glass items and Stained Glass windows. And now rather like the idea of making beads :0)
LikeLike
Ohh John
They are amazing, and the Elton John specs are just an added bonus. I’d be terrified of using the torch so you haven’t tempted me into this technique but your results are very beautiful. They remind me a little of those wonderful glass marbles you used to be able to get.
Your beads would look wonderful in shambala bracelets. If they aren’t your thing how about using them for book ties? The book ties I make work as ways to keep books or sketchbooks closed but also as book marks.
Wishing you all the best with your fabulous new craft. Can’t wait to see what else you make. Can you add mylar or mica to the process or would that alter the heating/cooling properties?
Billie :)
LikeLike