
During a recent appearance on Create and Craft TV I demonstrated a wax paper resist technique that appeared to inspire a lot of people.
I promised that I would write a quick blog post on the process and give some ideas for variation of this technique – so here it is!
In this post I will give you a quick overview of tools and materials I used, the basic technique and then share with you the variations that I tried.
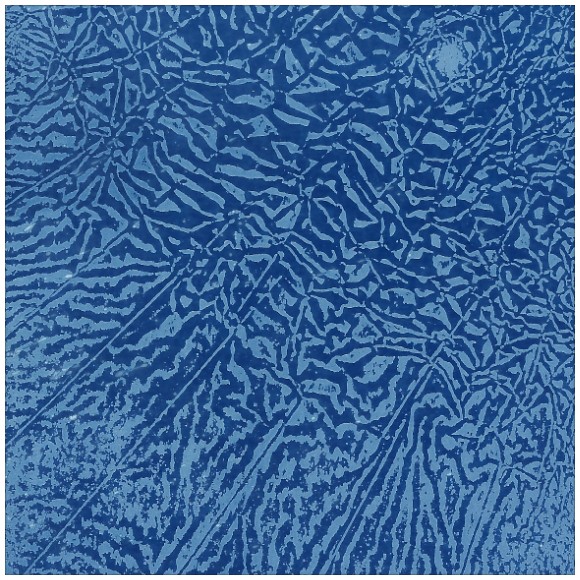
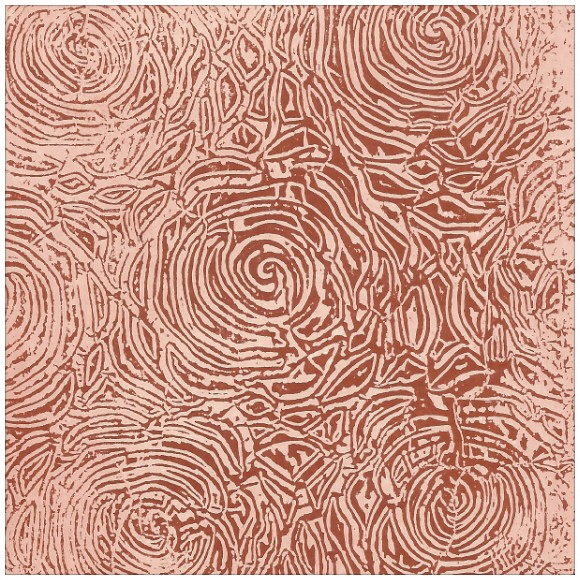
First though, here is a quick look at the effect that I will be talking about in this post.
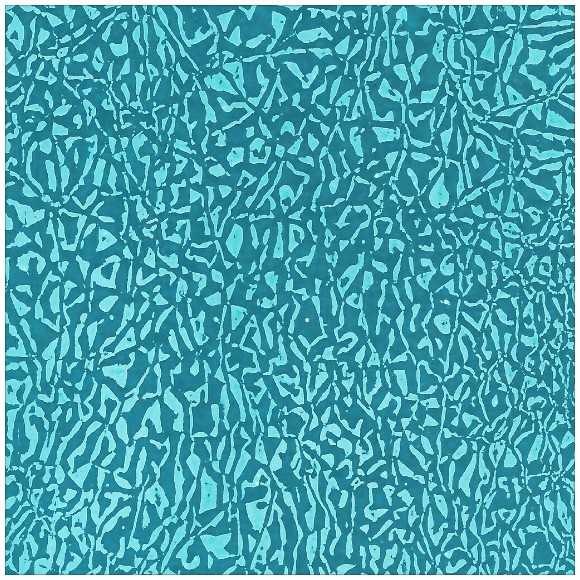
Cool isn’t it? (It’s also ridiculously easy).
There are a few things that you will need to complete this technique so I had better give you a quick overview of what you need and then I’ll cover the “how-to”.
For this technique I used the following tools and materials.
- An Iron (a regular household one is fine – just don’t have the steam on).
- A Speedball Brayer.
- An Adirondack Inkpad (or any other Dye Based Inkpad).
- A sheet of Theuva card.
- A piece of wax paper – big enough to cover the Theuva cardstock.
- A heat resistant worksheet.
- Some copy paper (about 15 to 20 sheets – this doesn’t have to be precise, it’s just an extra layer of protection for your craft mat and iron).
- Some toilet tissue or a couple of paper towels.
- A heat gun.
To complete the wax resist technique takes just a few simple steps. Here’s a quick description of how to do it.
- Make a stack on your craft mat, laying the elements down in the following order
- Heat Resistant Work Sheet.
- 15 (approximately) sheets of copy paper (keep one sheet aside).
- Theuva Card.
- Next, scrunch the piece of wax paper into a ball, rolling it lightly in the palms of your hands. The more scrunching you do the more “crackling” you will get. Tease the wax paper sheet open and gently flatten it. Then lay it on top of the piece of Theuva card.
- Now lay the piece of copy paper (that you kept aside) on top of this.
- Turn the iron on (no steam) and set to the double dot heat setting, this is probably a silk setting.
- Now press the iron all over the top piece of copy paper until you see a translucent impression from the wax come through the paper. About 10 seconds moving it around the paper should be more than enough. CAUTION! The stack may not be enough to protect your craft mat from over exposure to heat and the mat will buckle if you leave the heat on it for to long – NEVER leave the iron unattended or sat in one place on top of the paper! (Ok, health and safety covered, tick!).
- Remove the top sheet of copy paper and wax paper. The wax should have transferred onto the cardstock.
- Remove all of the copy paper from the stack and lay Theuva card on the heat resistant craft sheet.
- Ink up the brayer and blend this on the heat resistant craft sheet and then gradually blend this over your cardstock. You should notice that the wax area is lighter as you work across the card.
- When you have covered the cardstock in ink, grab the tissue and buff away the excess. Quick tips: Use a tissue in your other hand to hold the cardstock whilst you buff otherwise you may end up with your own fingerprints in the design. Buff from the centre to the outer edge, this will reduce the risk of accidentally crumpling the cardstock.
- Now heat set the ink by blasting the cardstock for a short period with the heat gun.
Once you have done this you should have something like the image that I showed you at the start of this post.
I love the effect and it’s fantastic that it is different every time. I did however wonder if there was any way of controlling the technique and using different combinations of colour so I had an afternoon at the craft desk and had a good old play.
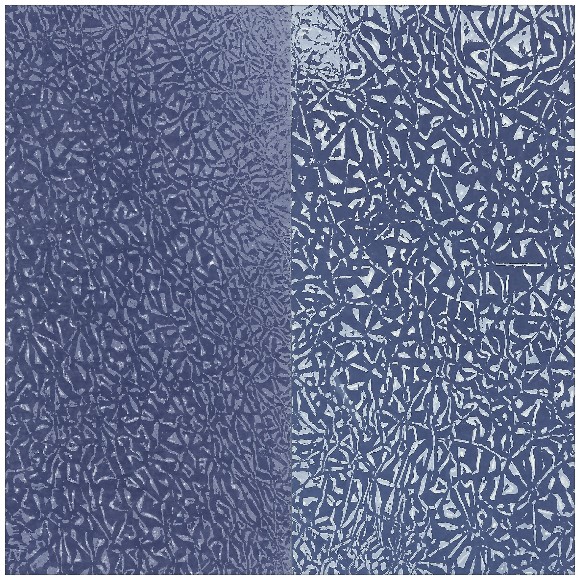
The first alternative that I tried was to heat set the ink before buffing off any excess ink. The difference is quite considerable. Here are the two methods side by side for you to compare. On the left is the version that was heat set before buffing and on the right is the one where I buffed before heat setting.
Next I tried to isolate the scrunched area on the wax paper so just squished a small area rather than scrunching the whole piece. Interestingly, although I had only scrunched a small area, the striations in the wax actually spread all the way across (in varying intensity). I think that this might be to do with the heat “puckering” the paper and/or wax when it is heated. Still good though. Here are a couple of examples.
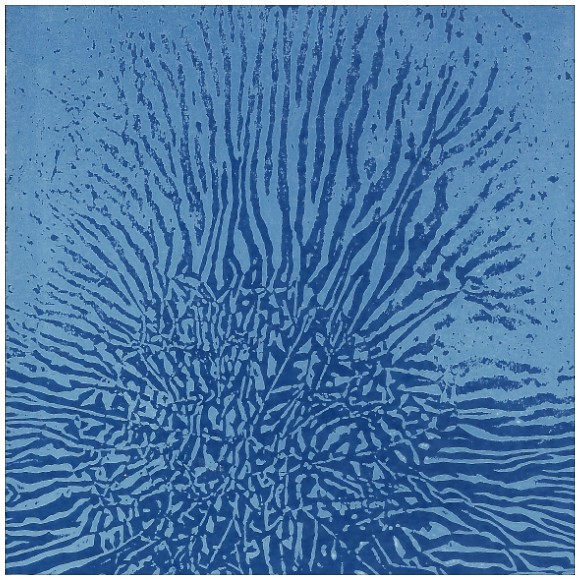
Next I looked at using an ink underlay, by brayering colour onto the card before applying the wax resist.
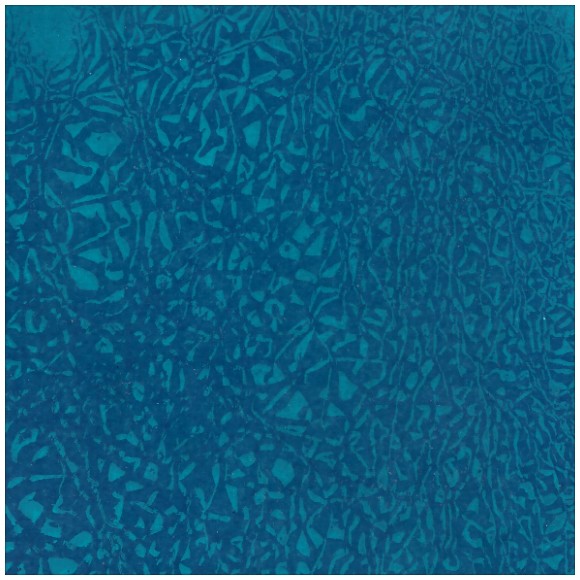
I did obviously use shades rather than totally different colours. This seemed to make the effect more subtle. In the case of these blues, it almost looks like ripples in a pool – sigh, it would be lovely to be sat by a pool with a fruity punch.
*snaps back from dream moment”
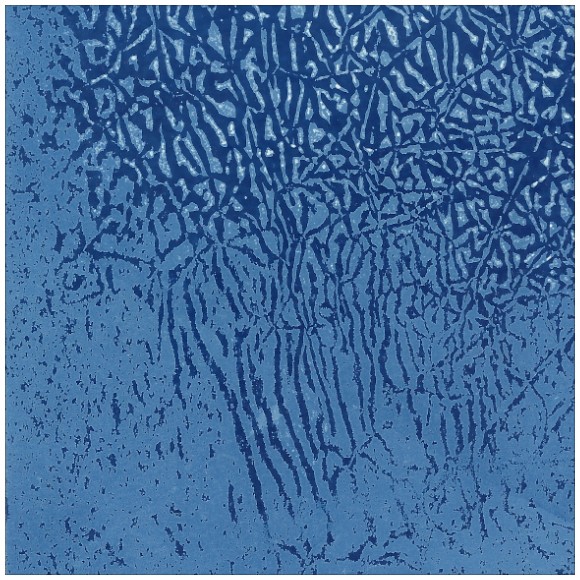
So anyway, I then thought about doing a double resist technique, i.e. doing one layer with one colour and the second layer with another colour, applying a wax resist before each colour is applied.
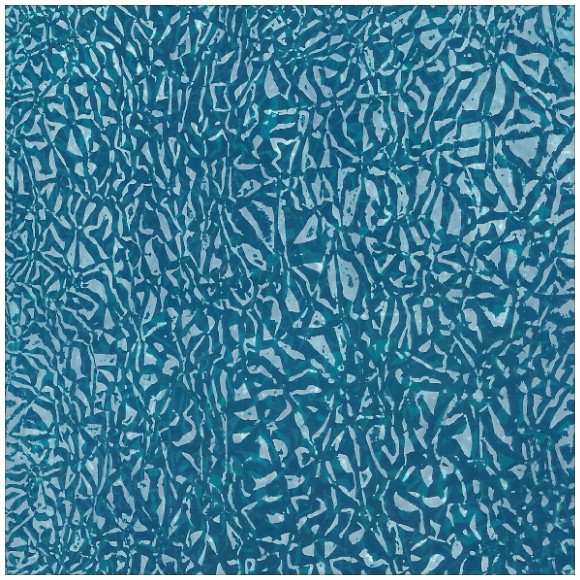
You can just about make out the dark blue crackle effect under the lighter crackle effect. This was quite an exciting revelation and brought about other possibilities that I will need to explore another time.
Next I thought about masking off an area before applying the wax resist, much like I would create a mask normally.
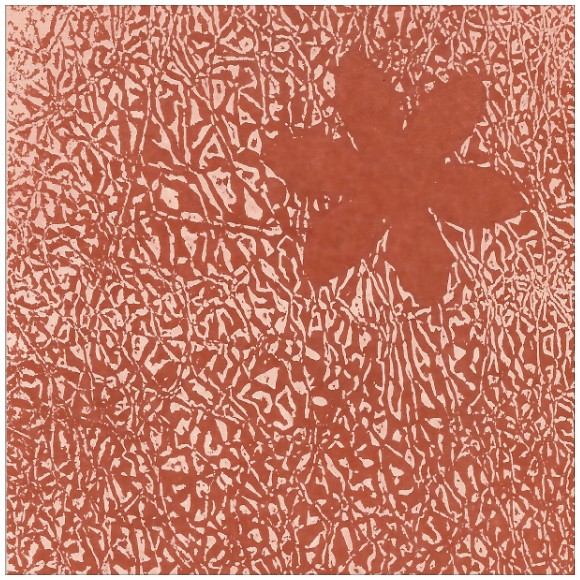
Looks good, and again, raises all sorts of exciting possibilities. Maybe I will try the double resist method with different masks on each layer?! I didn’t get around to that for this post however. :(
Anyway, the final thing that I tried was based on a suggestion from expert crafter Ali Reeve. She suggested running the wax paper through an embossing folder and then use that as the resist. So I did!
O. M. G. I love this idea! I don’t have many embossing folders, but will definitely be looking for designs that I can use with this technique.
Just so you know, I didn’t actually run it through an embossing machine, but instead just pressed down on the folder by hand, this appeared to be enough to transfer the design.
I did try a few of the designs that I owned and found that it was the large bolder designs that worked better. Small filigree designs didn’t really work that well.
Right, so that was a quick play but it yielded lots of ideas and possibilities for future experiments.
What did you think? Do you prefer one style over another? Is this something that you would try?
As ever, I welcome feedback and encourage you to use the comments below to share your thoughts on this post.
Thank you for reading. Look forward to offering you more ideas in the future.
J :)

hi john. Pardon my ignorance but what is theuva card & where can I get it please? jan
LikeLike
It’s a type of card from clarity stamps.
LikeLike
Hi John, I’m a first time blogger (if that’s a word).
I love what you have done with the wax paper, the double resist looks almost 3D, it’s beautiful.
Can you tell me please how you would attach embelishments? Would the wax resist glue or should I use brads or similar.
Also would you be able to stamp over it, or would you stamp the paper before doing the resist technique?
As you can see, I’m a bit bewildered. Thanks for the great idea’s
Best wishes Sioux.
LikeLike
Hi Sioux, thanks for the questions.
I have stuck toppers to the papers that I have created. You can use double sided tape, PVA glue or 3d glue. Generally there will be enough areas on the card that don’t have wax on them that each type can get a grip.
Stamping will differ I have tried both and got results from both. You might need to use a permanent or archival inkpad if going over the top. If you use a slow drying ink or water/dye based ink on top, it might not stick to the waxed area – this in itself might create a really interesting pattern.
I’d say experiment with what you have in your craft room and then make a note on the back what you used and the sequence of application – then you’ll have a reference book of your very own unique techniques.
J :)
LikeLike
Hi John love all your experiments using the wax resist technique I’m amazed by the different effects you have created. I like the embossing folder one such a clever idea, I like all your creations using this technique though. Thank you for sharing your inspiring art work.
LikeLike
Hi john great samples. For wax paper could I use the paper in my breakfast cereal. Is the wax paper same as greaseproof paper. Cheers jacqui
LikeLike
Thank you:( I don’t think so breakfast cereal will have wax paper in the packaging. Wax paper has was in the paper. Grease proof paper is something totally different (as far as I’m aware).
LikeLike
Is the wax paper double sided and if is is, could we sandwich it between two sheets of card then the paper on top to make two at a time? I can’t wait to try this technique out! Thanks for the method.
LikeLike
Yes, it is double sided and the wax does come off both sides. Definitely worth a try :)
LikeLike
Thank you for all of the lovely comments, glad you enjoyed it :)
LikeLike
Once again John thanks,for your tips.I’ve learned so much from you xx
LikeLike
Interesting technique and variations, it does give a lovely texture effect!
Geraldine M
LikeLike
Fantastic technique I love the masked layers and the embossing folders as I have a few (lots!) to try out. Can’t play……..I mean craft till Saturday :(
Thanks for taking the time to post this! Donna :)
LikeLike
Hi John, Thanks for your reply on PanPastels.
I have only used waxed paper through my grand cailbur using the garden lattice m-bossabilites. I used glossy card and my encaustic iron with lovely effects,( I got the idea from Sue Wilson’s blog). However must try scrunching and resists as I know you’ll never get the same results twice! I
LikeLike
This is fabulous and I will be definitely having a go of this. Love the gorgeous effects you have achieved. Thank you for sharing.
Hugs
Linda xxx
LikeLike
Excellent post on wax resist John. I love it and love the simple straightforward way in which you wrote it.
I really like the masking one and using the embossing folder. Off to play with wax paper now :-).
Looking forward to your next adventures. XX
LikeLike
Thanks for the in depth look into this, I love how they turned out and now I have the perfect excuse to dust off that iron… now where did I put it? Off to craft :)
LikeLike
Lol, yes, it’s nice to be able to enjoy using the iron for a change, isn’t it?
J :)
LikeLike
Hi John. Your samples are wonderful. I especially like isolated scrunching 3, double resist and the one using an embossing folder. I really really want to experiment but am on a deadline to get a cross stitch finished, I have 10 days to finish it and get it framed, not looking good, so I want no more distractions thank you:-) SueL
LikeLike
Sorry for distracting you ;)
The blog post will always be there so you can always look back at it once the Cross Stitch is complete.
Good luck!
LikeLike