During the recent shows on Create and Craft TV I received a number of questions asking about the masking techniques that I highlighted during the demonstrations so I thought that I would put together a step by step overview of how to do this technique.
Tools and Materials
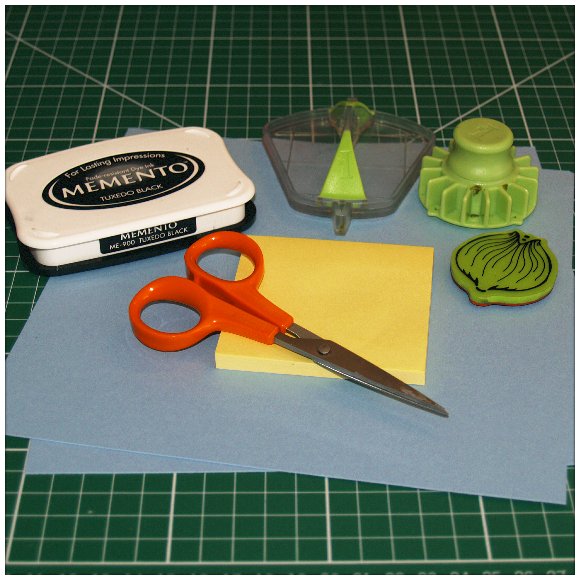
First up, and in true tutorial style, I should give you an idea of what I am going to use for this demonstration.
– Inkadinkado Stamping Gear Circular Cog
– Inkadinkado Stamping Gear Wedge shaped Paddle (for use with circular wheels and cogs).
– A large petal from the Flower Petals set of Inkadinkado Stamping Gear stamps.
– Momento Inkpad (although you can of course use the type of ink that will suit your project).
– Sticky Notes – Any brand will do.
– A 7 inch x 7 inch piece of Cardstock (to be honest, I started with an 8 x 8 piece and then chopped it down later to fit the card – it’s up to you on this really).
– Scissors
For the completed card that I show later in this post I also used a complimentary coloured cardstock for the layers and some of my small die collection to create the centre piece but you can of course use whatever you have available.
Making The Mask
The first thing that you need to do is create your masks. This is a very simple process –
1. Grab your stamp and mount it on the paddle
2. Ink the stamp and stamp an image onto a sticky note. Tip – Each time you make an impression on a sticky note, make sure that one part of the design is over the area that has the ‘sticky’ on the underside of it. I find it easier to make the point that is closest to the centre (of the overall design) the sticky part, this makes it easier to lift from the outer edge later on.
3. Cut it out.
4. Repeat that 7 more times and you will have enough for this technique.
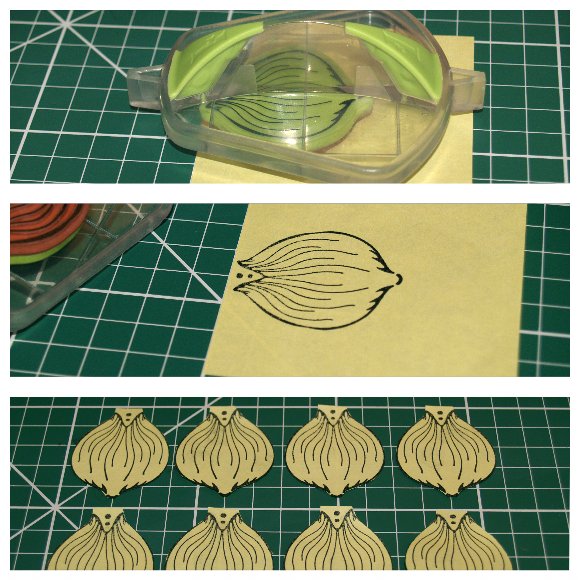
- Inkadinkado Stamping Gear Step by Step Techniques – Masking – Creating the Mask
The Stamping
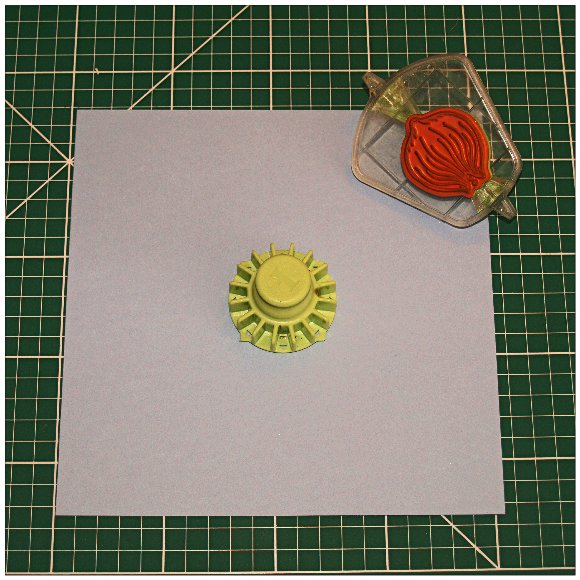
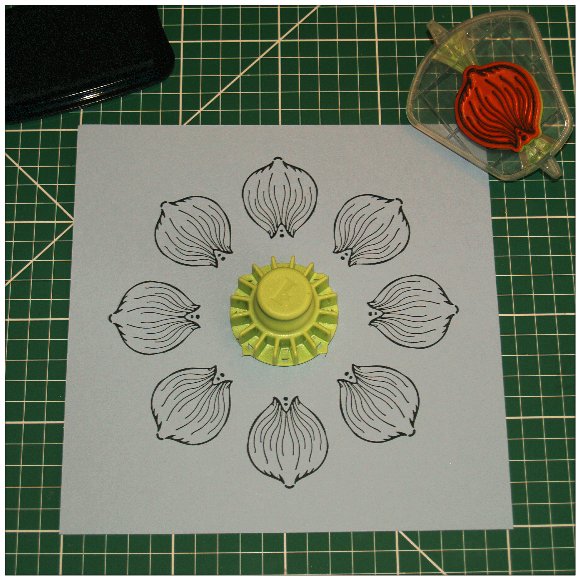
1. Place the cog on your cardstock. In the picture below the cog is shown in the centre of the cardstock, but it doesn’t have to be, you can position the cog over the edge of the page so that you will end up with a partial design coming in from the edge of the card.
2. Make sure that the stamp is on the paddle where you need it to be for the overall design. When using the cog, positioning the stamp towards the bottom third of the paddle will give you a design that will fit nicely onto an 8 inch x 8 inch card (depending on the size of the stamp of course – you may need to have a quick test on copy paper to find the best position).
3. Ink up the stamp and begin stamping using the Open Basic technique, i.e. stamping into every alternate notch. Do ink the stamp after each impression, this will ensure that each impression is as crisp as the last. Remember to keep the paddle in a comfortable stamping position, this may mean rotating the cardstock on your work mat/table carefully so that you can achieve this but be careful not to ‘jog the cog’ out of place. This is what it will look like when you have completed the first circuit.
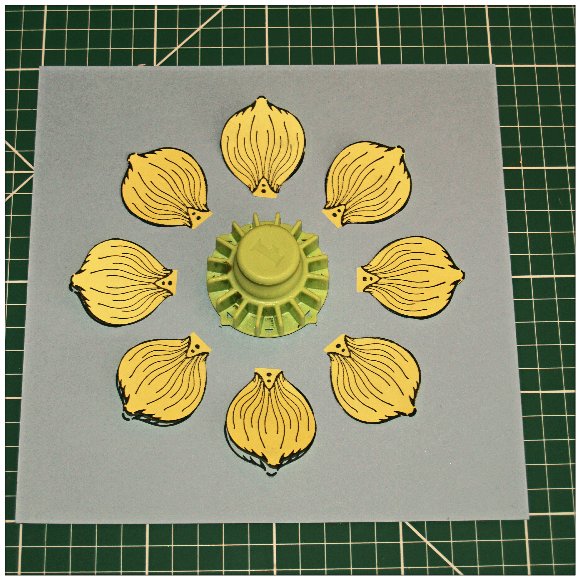
4. Now apply the sticky masks to each of the petal impressions that you have just made. This is what it will look like when you have completed this step.
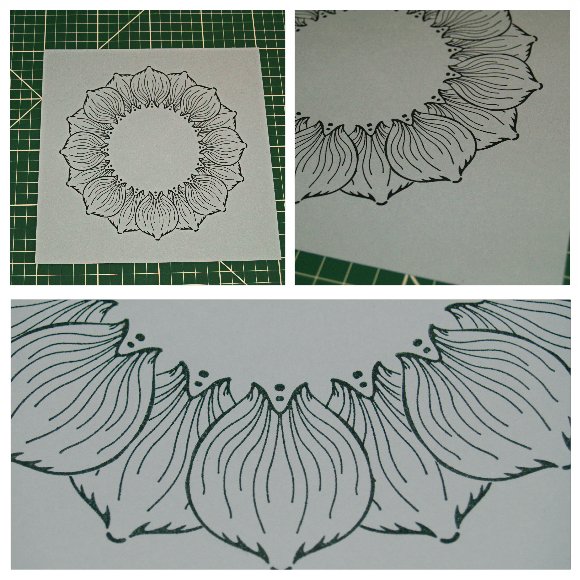
5. Now complete a second circuit of stamping but this time stamp into the spaces that you didn’t stamp into last time. This is what it will look like when you have completed this step.

6. Carefully remove each of the sticky masks.
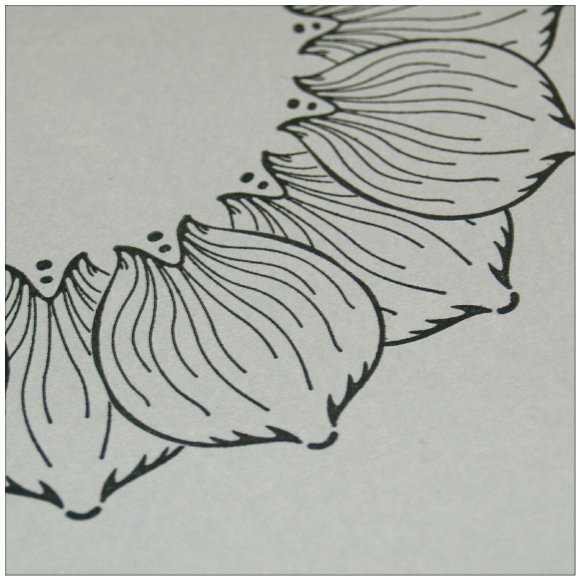
7. Lift the cog from the cardstock. This is what it should now look like.
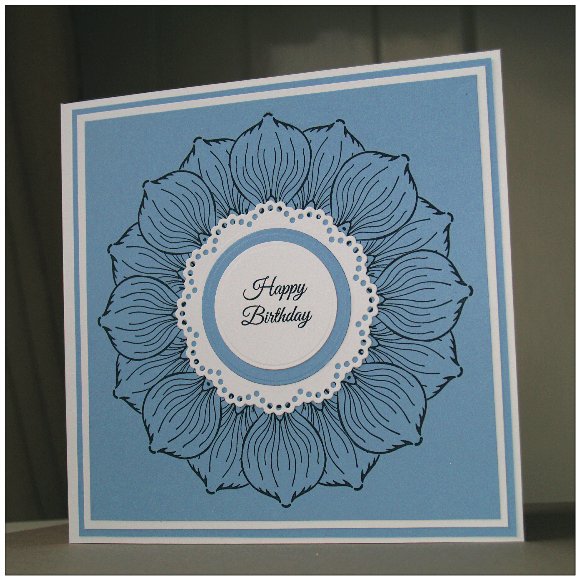
Creating A Finished Design
Finally here’s an example of a card layout that I created using the stamped image and combining with some die-cuts and a simple sentiment.
Final Thoughts
Remember – once you have learnt that basic technique, you can of course apply this to all sorts of combinations of wheel, cog, paddle and stamp – the more you experiment, the more you will discover!
If you still can’t get the hang of this, you could also stamp out your circular design using the Closed Basic technique, then stamp out 8 petals on matching cardstock, cut them out and them stick them over alternate petals, perhaps raising up the tips of the petals as shown below. This would work especially well if your topper is going to sit over the inner area of the stamped design (it’ll hide all of the gubbins in the middle).
Ok, so I hope that you enjoyed that quick tutorial and that it all made sense. As ever, if you have any comments or questions, please feel free to pop them in the comments section below and I will get back to you just as soon as I can.
Finally, don’t forget to clean up after yourself! (lol, only kidding!)
See you again soon.
J :)

What would I do without you John. As an ‘geriatric’ crafter (lol) I need this type of lesson online – will now follow your instructions and look forward to many many more lessons. Thanks. Angela x
LikeLike
There’s one on making dimensional flowers with the stamping gear coming up in the next couple of weeks.
J :)
LikeLike
Hi John…..just saw the stamping gear tutorial. What is the smallest card you can make with this tool? I generally make 6 inch square cards…..will this make the stamped
Images that small?
LikeLike
I have worked sizes as small as Artist Trading Cards (3.5 inches by 2.5 inches). I have created a blog post that will be published next week with advice on this.
J :)
LikeLike
Hi John just found this marvellous tutorial post on your blog, thank you for this step by step photo tutorial, I learn better when there is a picture to refer to, although I think I’d cut out two pieces of sticky pad at a time and then out them down alternately so I only have to cut out a total of four times for this! I bought the flower petal stamps so look forward to giving this a go – on lots of copy paper first until I perfect it for the card stock to be used!
Best wishes from Katie-Louise sweetlove
LikeLike
Thanks for this John my bundle turned up today so hopefull will have a play on Sunday
LikeLike
Hope you have fun when you do get to play Melanie! :)
LikeLike
i have discovered that if you use 2 layers of funky foam, stuck together with stick and stay, then give both sides 2 coats of stick and spray, the stamp will stick to one side and the foam will stick to the paddle! Early days but a few stamp tests work fine xx Loved the shows by the way xx
LikeLike
Thank you Lizzy – a lot of people trying to find ways to work with other stamps, yours sounds like a good idea for those who don’t want to permanently change their other stamps by putting kling foam on the back.
LikeLike