
Just before I share this tale of creativity I would like to remind you that this is part of an ongoing series of posts detailing my journey in learning machine embroidery and digitizing so please be gentle, lol.
If you would like to see other posts in this series, please feel free to check out the archive.
This post also features the Hatch Embroidery software. If you would like to know more about it, please do visit www.hatchembroidery.com
Ok, so, back to the tale of exploration that is this post.
For this practice session I had decided to have a go at working with lettering and decided on the phrase, “Life Happens, Coffee Helps”. Never a truer word said, I think you will agree.
I therefore did a few searches in the designs that are included with the Hatch Embroidery software and found a coffee cup with some swirly steam.
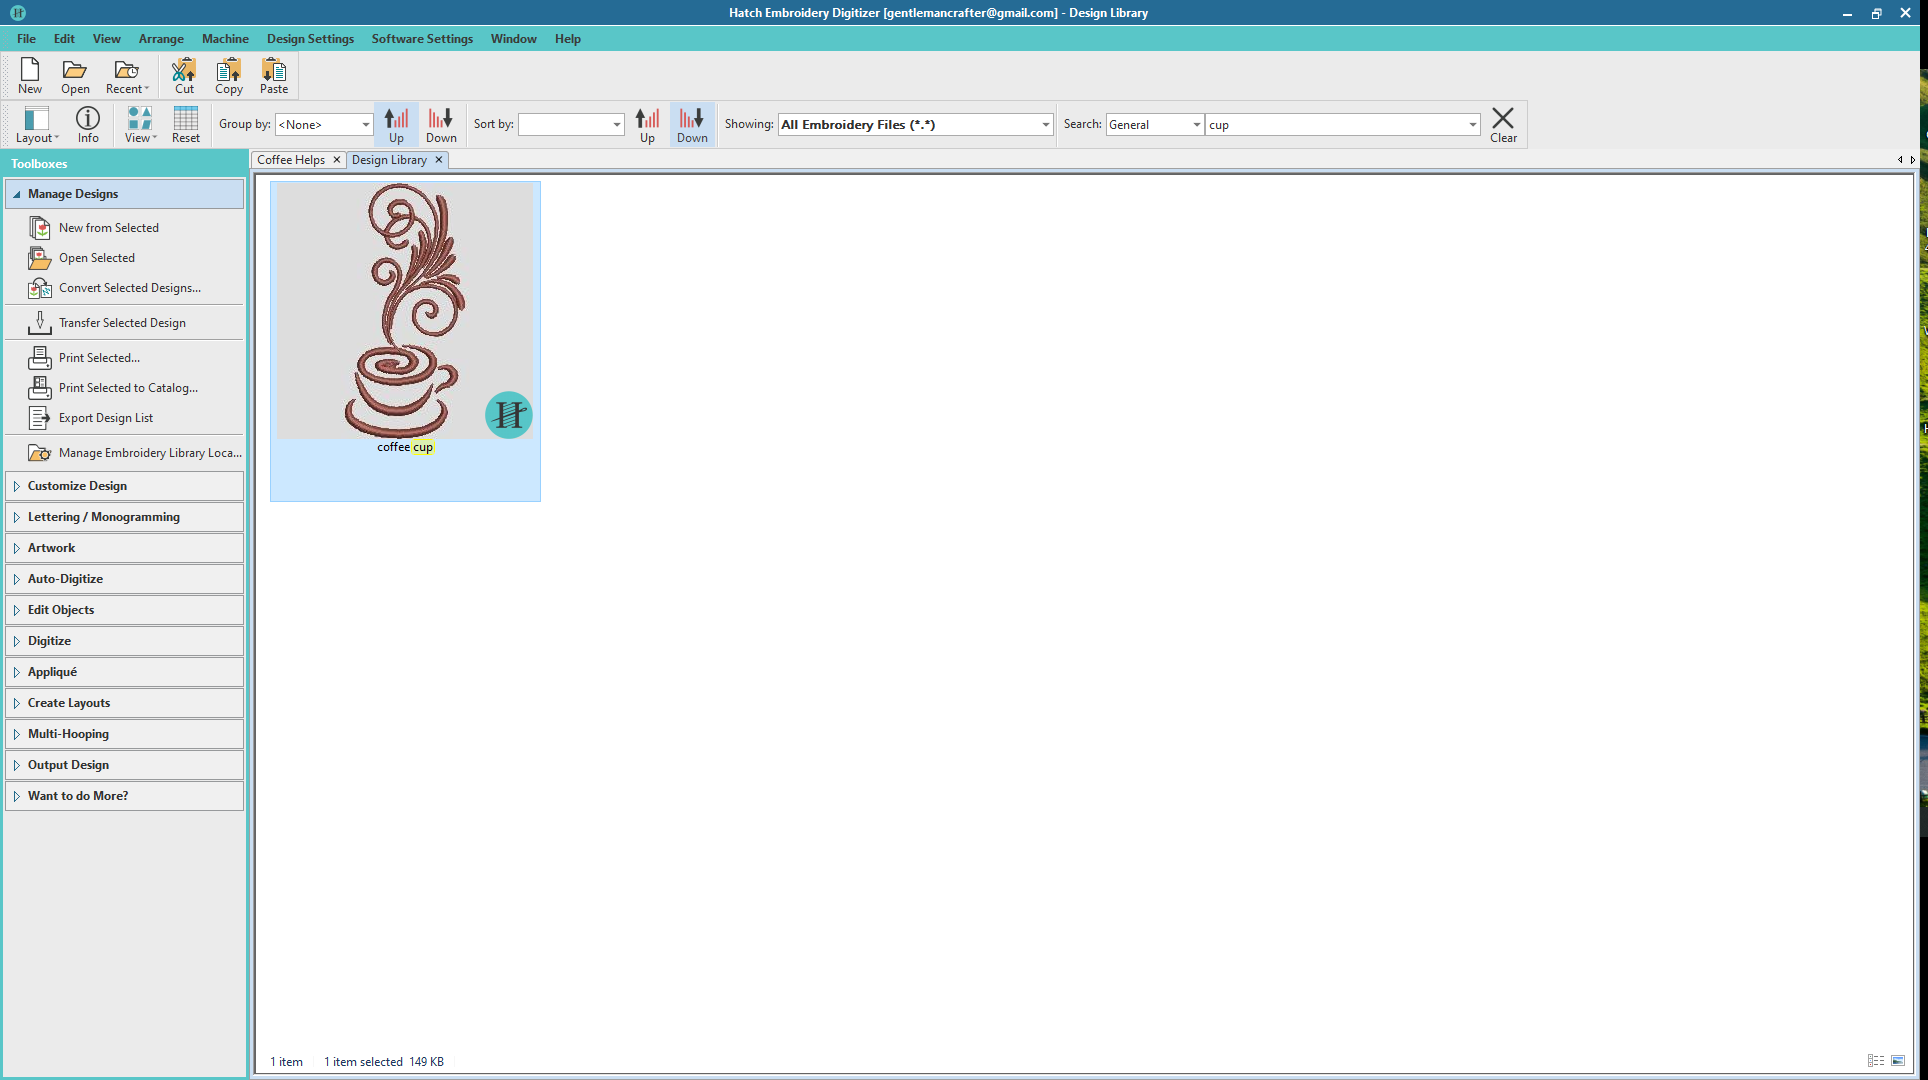
I loaded it by double clicking the design and then selected the cup and deleted it so that I was left with just the steam. This I resized and recoloured.
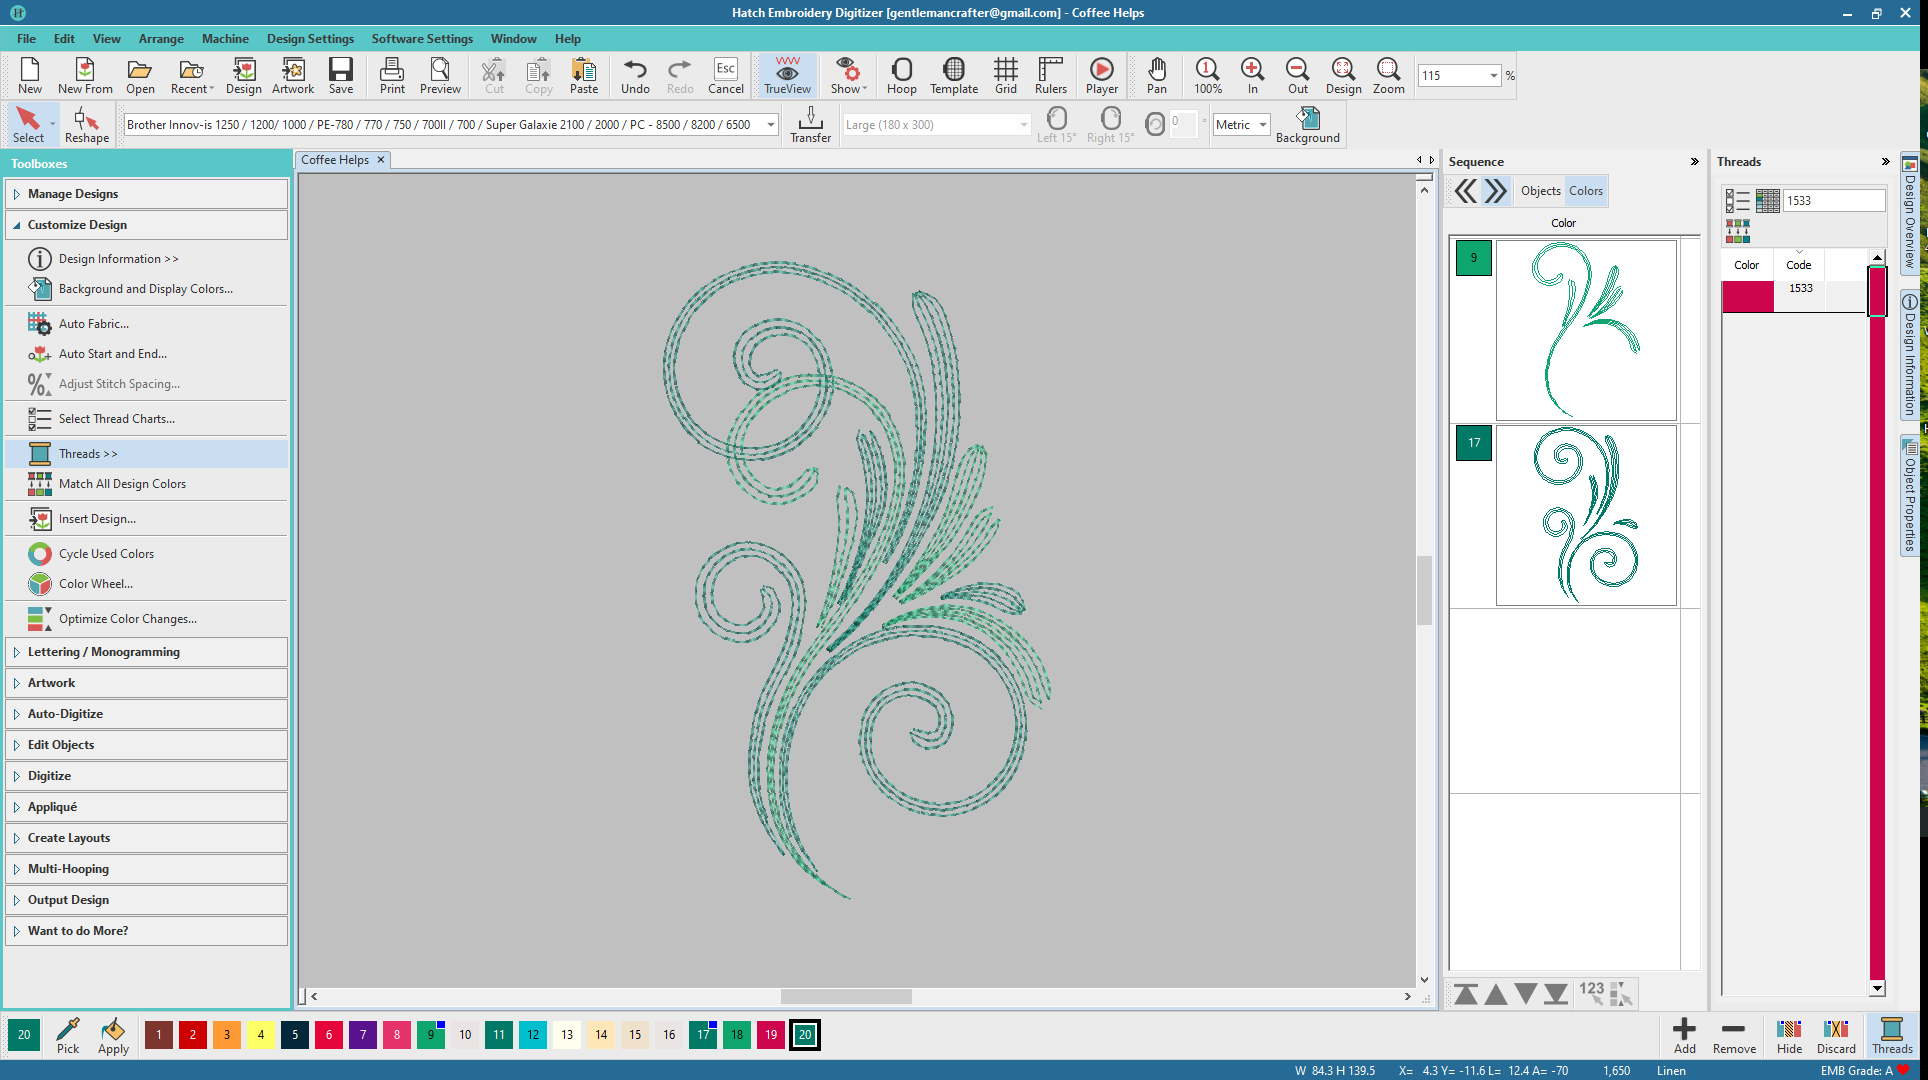
Next I used the basic digitizing tools to add a circle and changed the stitch type to a stem stitch. A matter of a couple of mouse clicks so, easy enough.

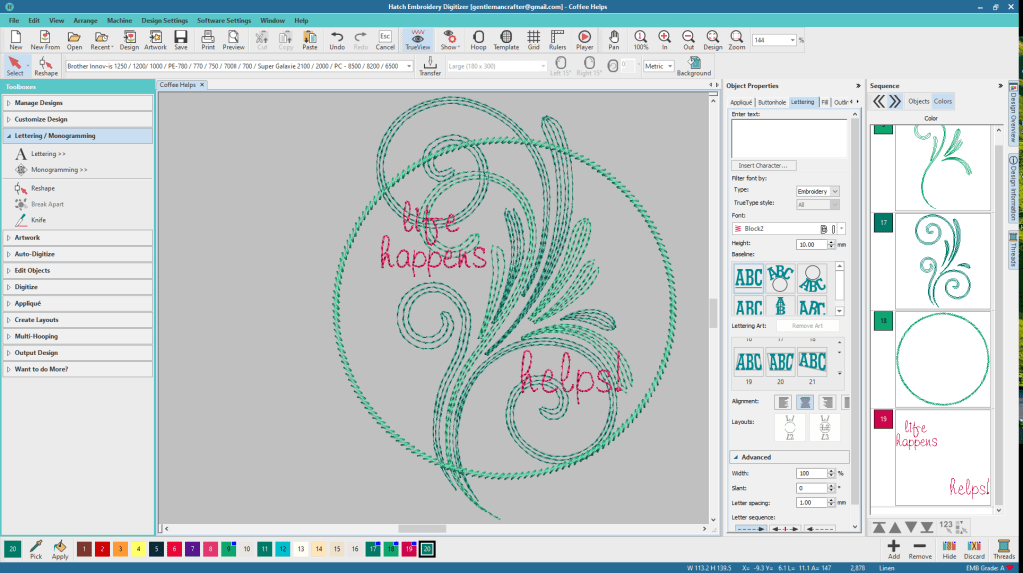
For the next step I opened up the Lettering/Monogramming panel and clicked on lettering. This opened up the options panel on the right where I set the words, font – a pre-loaded ready-digitized character set – and then set the colour.
I used the context menu – right click – to access the alignment tools to further refine the layout.
FYI, I am learning that it’s often quicker to set these parameters prior to creating a design. In fact, it’s a good idea to have an idea of many factors prior to starting – it makes life a lot easier on many levels.
During editing of the text here I discovered that it was possible to make MANY different kinds of changes to the lettering, including resizing individual characters, even after they had been set into the design. I was also able to edit the connectors to make it flow better – in my eyes.
Finally I used a true type font from my computer to add the word ‘coffee’. For this one I also had the option to change the stitch fill and chose a Tatami style – it’s a textured stitch style – there are loads of these built in.
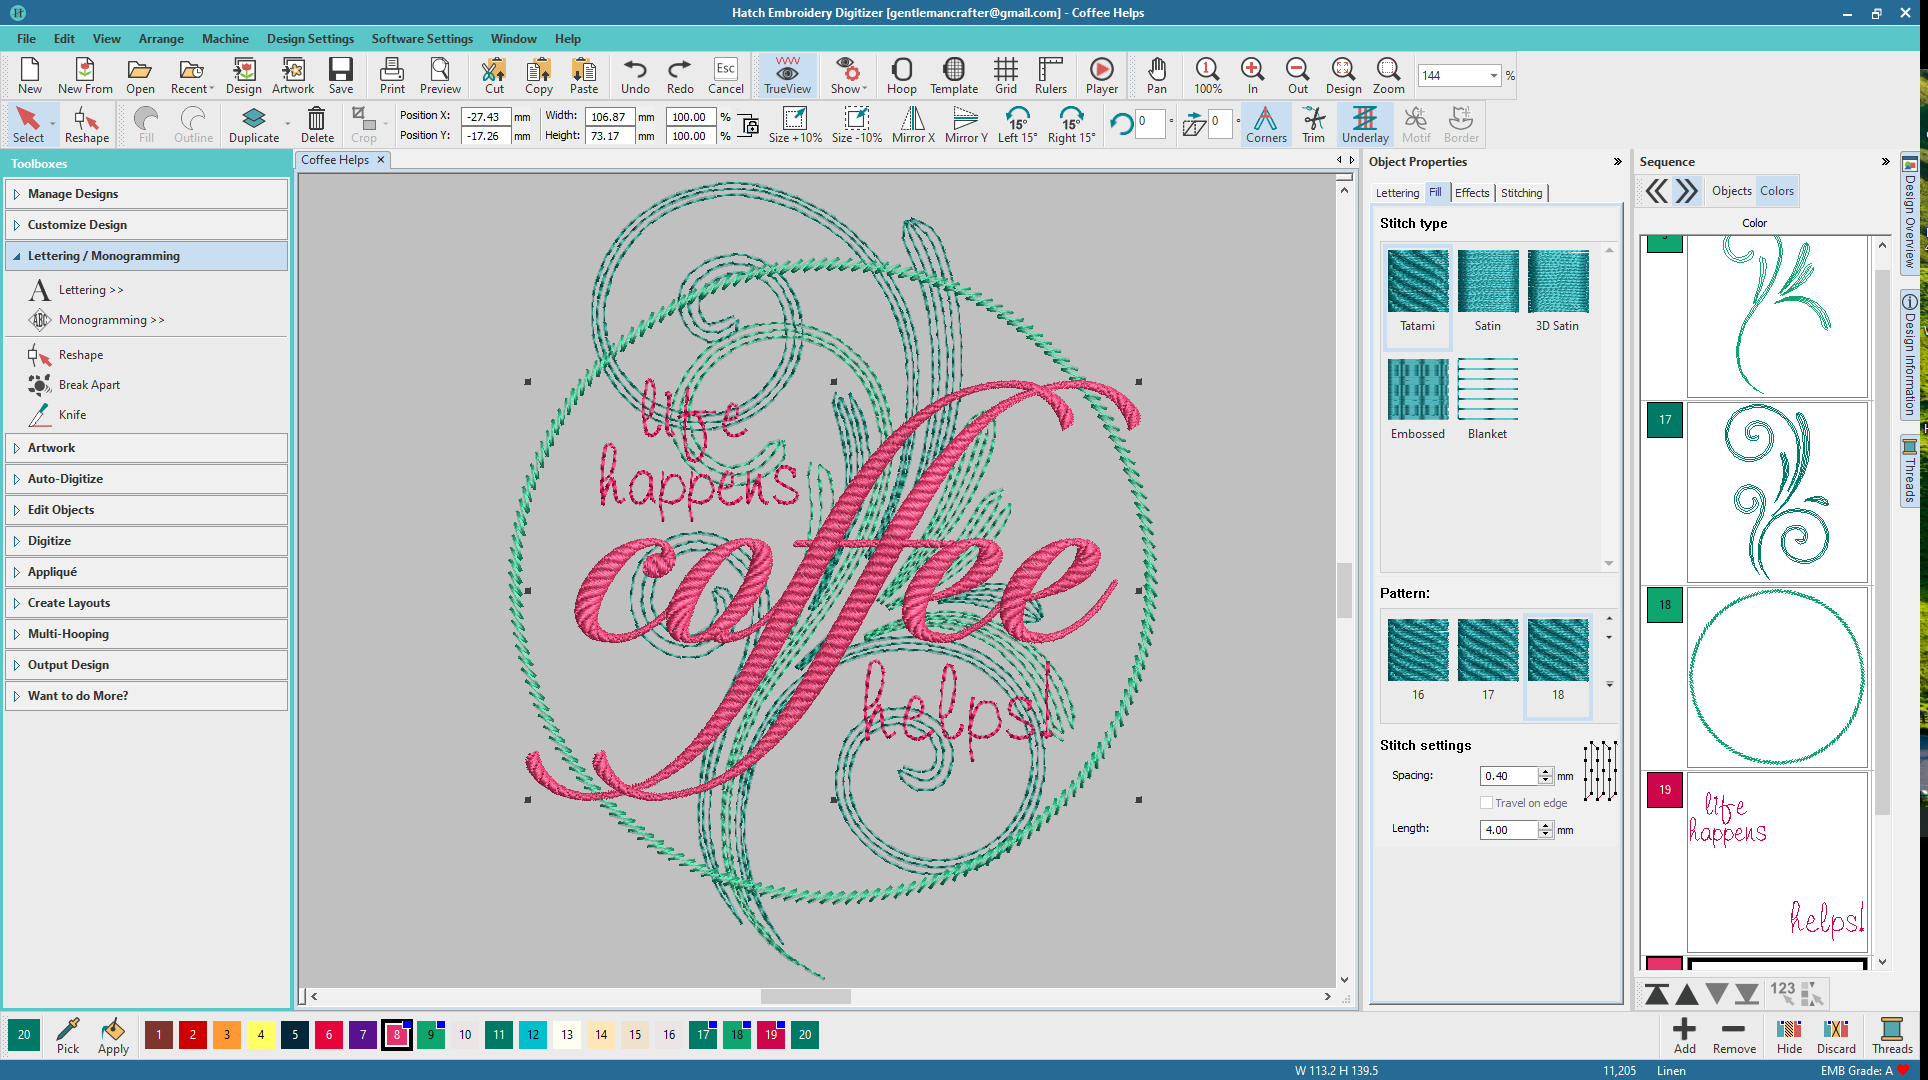
Those text editing tools came in handy again as did the general node level editing tools as I was able to remove a ‘lump’ from the ‘o’ that I felt made for some confusion in the overall appearance.
Pretty pleased with how it looked…

Now, would it surprise you to know that this took me less than 15 minutes?!
Anyhoo, before I fiddled too much it was time to preview the stitch out and see if I spot any issues – click play to have a look for yourself…
Well, it seemed to work OK so I set up me Brother embroidery machine and tried it with a couple of different thread colour combos.
Whilst I liked the variegated thread – below – for the main word, I wasn’t happy with how the steam disappeared onto the plain linen because of my colour choice.

In the end I settled on a pink linen, aqua/turquoise thread combo for the background thread and a bright pink combo for the foreground text.
Here is the final stitched design.


Cool, innit?
What do you think?
If you have any questions or comments, please feel free to leave them in the comments section below.
I look forward to hearing your thoughts.
Thanks for stopping by and I look forward to sharing more with you soon!
Bye for now.
J :)

A little slow getting here, but well worth it. You are so awesome!
LikeLiked by 1 person
Thank you and welcome :)
LikeLike
That is brilliant. Thank you for sharing.
LikeLiked by 1 person
Hi John seeing what you have made makes me want to start embroidering but like many others Im determined to get to grips with my DX1200 in the coming year….let’s hope it doesn’t take the new decade to crack it lol.
You are so creative and I’m thankful you share your crafting journey with us all.
Wishing you all the very best for 2020. Karen x
LikeLiked by 1 person
Thank you Karen. No obligation to get more new machines, just sharing some fun playtime :)
LikeLike
Wow John, this looks awesome and that you only made the pattern in 15 minutes that’s so quick. Can’t wait to see what else you going to make.
Thank you so much for sharing and have a wonderful day.
LikeLiked by 1 person
I’m impressed, I love to watch you trying these things, but I’m NOT thinking of taking up anything new. My DX1200 arrived yesterday……….. xx
LikeLiked by 1 person
Lol, I’m “not” trying anything new in 2020 either. ;)
Oo, exciting!!
LikeLiked by 1 person
That’s the DX1200 I absolutely didn’t need, and was NOT going to get….. xx
LikeLiked by 1 person
Lol! Yup. I know that feeling oh so well about many many purchases.
LikeLiked by 1 person
Well impressed, your skills never stop to inspire me, keep up the great work.
LikeLiked by 1 person
Thanks Gail ❤
LikeLike