So far I have been creating some quite sizable projects with the Inkadinkado Stamping Gear from EK Success however a lovely lady called Suzanne, from Australia, recently contacted me via my Facebook page and asked how she would go about creating smaller projects with the Inkadinkado Stamping Gear.
Through some experimentation I have discovered that size doesn’t matter and that you can work on projects all the way down to an Artist Trading Card (about 3.5 inches by 2.5 inches) so I thought I’d share some ideas with you all.
A quick note about shapes and sizes before I get started talking about techniques.
From some experience I have found that cards come in a range of fat and thin sizes and that ‘standard’ sizes seem to differ greatly from country to country. I have therefore compiled a quick list of some sizes below that I would consider to be small projects.
Just a quick note for my US friends, your A2/A7 etc is very different to our A2/A7 so please go by the actual measurements rather than the ‘A’ sizes (and sorry that some are in centimetres – all I know is that there are 2.54cm to the inch).
By the way, the sizes that I have listed below are the surface area of the front of the card, I.e. the bit that you see when the card is folded shut.
- DL (Sometimes called slimline) 21cm x 9.9cm
- Super Slim – 21cm x 7.42cm (approx.
- A5 – 21cm x 14.85cm
- 5 x 7 inches
- A6 – 14.85cm x 10.5cm
- A7 – 10.5cm x 7.42cm
- Notelet Card – 5 x 3 inches
- ATC – 3.5 x 2.5 inches.
To be honest though, I have found that this system will adapt to whatever size you are using. Hurrah!
Working With The ‘Big Little Sizes’.
Basically put, everything upwards of A6 I would class as ‘big’.
To work at these sizes I didn’t really need to do any special preparations in terms of work area, like securing the project to the table or masking off any areas.
My only recommendation for these ‘larger’ sizes would be that if the cog or wheel sits off the page then place your cardstock and wheel/cog on a larger piece of paper.
The reason for this is that at least some part of any cog or wheel will overlap the edges of your project and this ‘underlayer’ will help make sure that the cog/wheel stays in position as you work. It may also help you when turning you work to get that comfortable stamping position, especially if you work in a seated position.
Generally, when working with smaller sizes, any stamped image (using this system) will go ‘off the page’. I would therefore had to plan where I would stamp so that it worked with the final design.
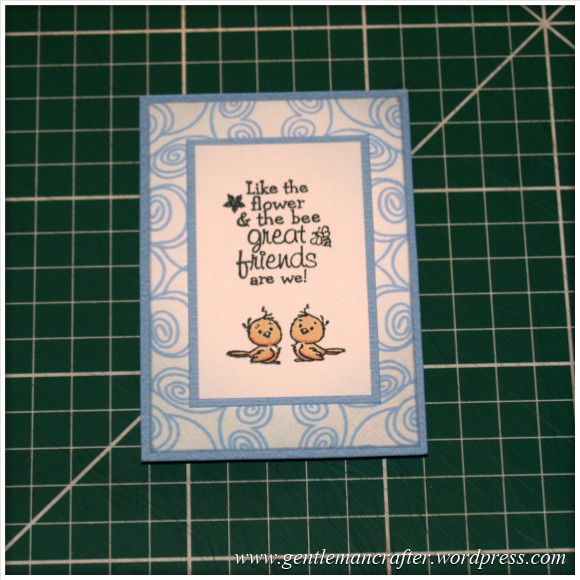
Here is a really simple example of where I used an A6 card front with an ‘off the page’ design. You can see that I have tried to position it so that it will frame the off-centre sentiment topper.
Working With The Small Little Sizes
As before this relates to the list of sizes above and references the sizes of project that are A7 and below, all the way down to the Artist Trading Cards.
As with Big Little sizes, I needed to consider how the design would work ‘off the page’ but this time I had to do a little preparatory work before stamping.
Here is why.

Can you see how there was no surface area of the project for the wheel to rest on? That’s the issue here.
Quick point, you are more likely to use a wheel, rather than a cog when working smaller projects, as you have such a small area to work in you can’t afford to lose the valuable space to the area that using a cog would leave behind.
So, I had a little play and here is one way that I have developed to work with these smaller projects.
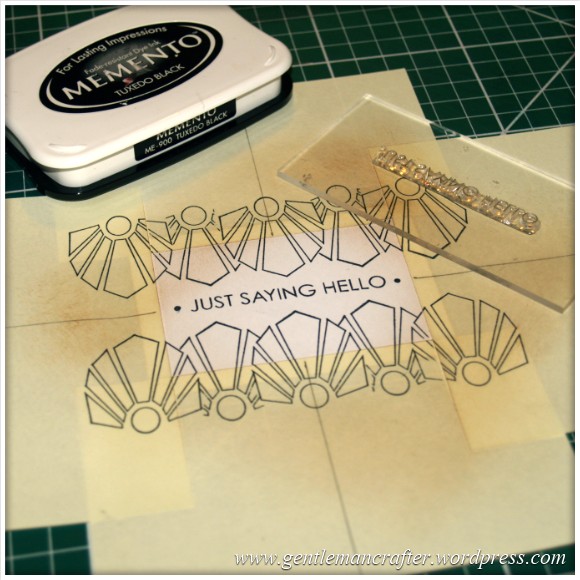
First I cut a piece of cardstock the full size of the planned finished project (which in this case was an Artist Trading Card) and then I marked a thin border along each edge.
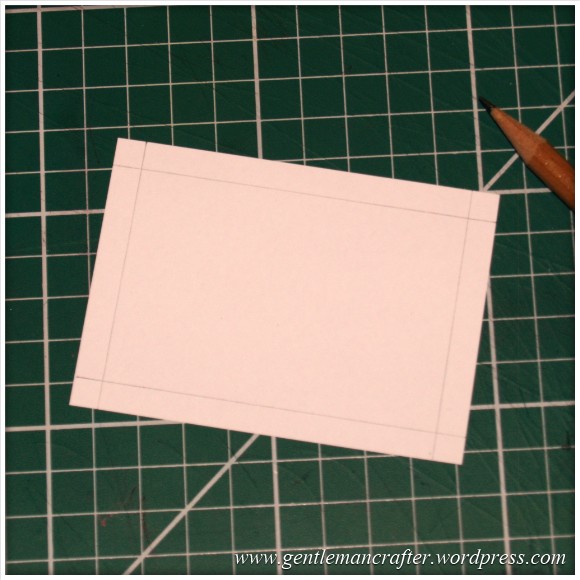
In this instance, I used a 1/4″ border on each side. This meant that I could mat and layer it with two colours later on. You can choose the border width, there are no rules apart from the fact that it’s best to make them equal.
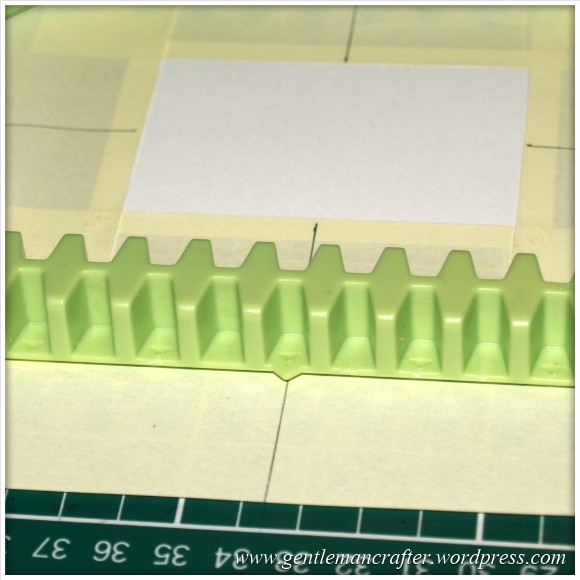
With sticky notes I masked this border area off. This not only masked the area but helped to stick the card to theworkmat and create a larger surface area for the wheel to sit on. It’s a win/win!
I then wanted to make sure that the wheel sat centrally over the ATC so I marked the centre point on each edge and then drew a line that extended from the edge of the card out to the edge of the sticky note.

By drawing these lines I had something that I could use to line up with the North, South, East and West outcrops on the wheel.

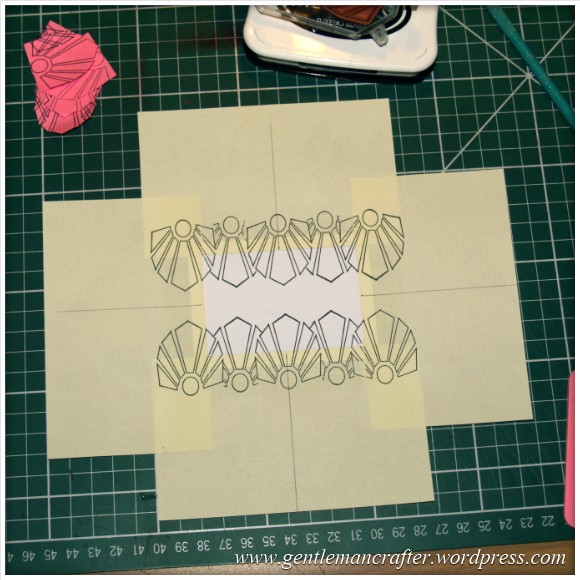
Next I positioned the stamp on the design so that I could see where it was going to be and how it would overlap the masked areas.

I then slid the ‘paddle’ into the notch and down to pick up the stamp. I did this because then I knew that it would be in the right place on the paddle. Them’s the beauty of using cling stamps!
Next, I stamped out the first set of impressions. I left gaps on purpose as I wanted to use a masking technique on this project.

Having created some mini masks from all-over sticky notes I used them to mask off the previous impressions and then made a second set of impressions.

I then removed the wheel and mini masks, but not the large sticky notes. I wanted to ink the edges so thought these would make a good mask for my work mat and would help keep my fingers off the inked area.
 The final thing that I stamped out was the sentiment. I inadvertently discovered that I could use the centre marks, that I’d drawn earlier, to align the sentiment – I must have been thinking ahead earlier on :)
 So, all done, I then removed the sticky notes and ended up with this.
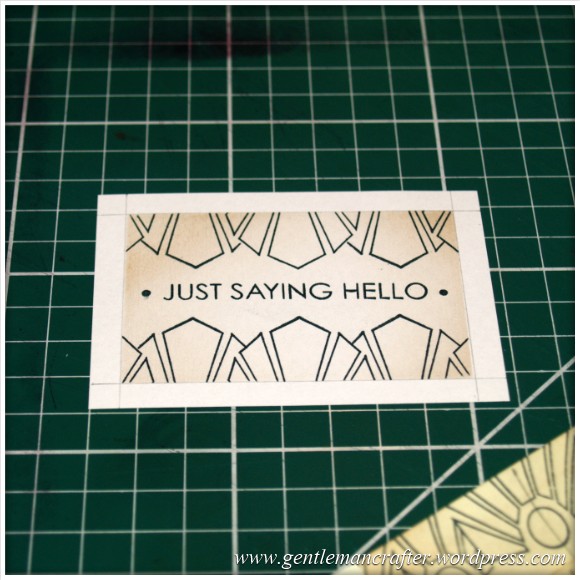 There were choices here. I could rub out the pencil lines and leave it be. I could have drawn a border with a micron pen. I could even have inked over the edges with a very dark alcohol marker.
But I guess I am getting into the habit of matting and layering recently so I chopped off the blank edges and cut some alternate cardstock to create the layers.

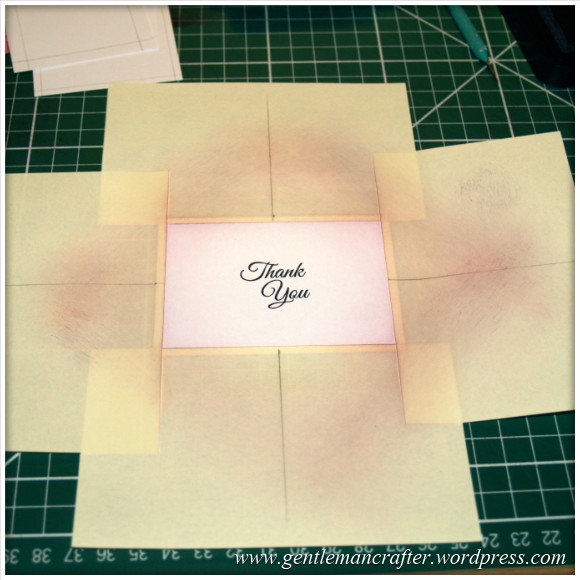
So, at this point you might chirp up and say, “…but I only have the circular wheel…”. This is not a problem. It worked in exactly the same way. Here’s a quick overview.
Mark and mask off the border as before. Mark the centre lines. This next picture does show a small variation in process in that I applied the sentiment and coloured the corners first. The reason that I did this is that I wanted my circular border to fit around the sentiment so by doing this I could then position the border stamp and know that it will fit around the central sentiment.
The next stages are pretty much the same as before.
Position the wheel …

… stamp out the design and the remove the wheel …

… remove the sticky notes …
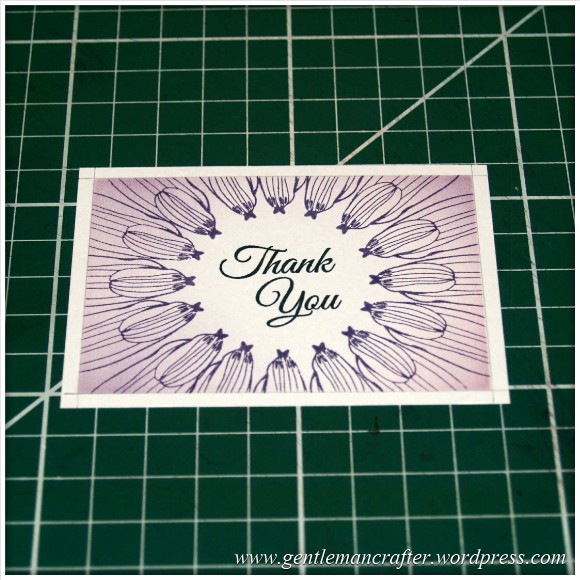
… finish off.
Final Thoughts
Although you might think it, it doesn’t always follow that you have to use a rectangular cog or wheel with a rectangular project. You have already seen one example of where I used a circular cog on a rectangular project. As another idea, if you place a square cog in the middle of a tall rectangular card, you could create professionally spaced borders at either end.
I would always encourage you to play and experiment with the Inkadinkado Stamping Gear. After all, until Suzanne asked her question, I might not have even gotten around to thinking of smaller projects.
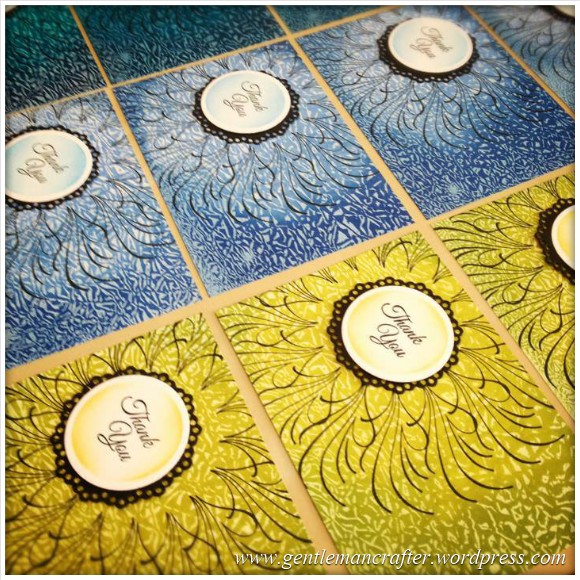
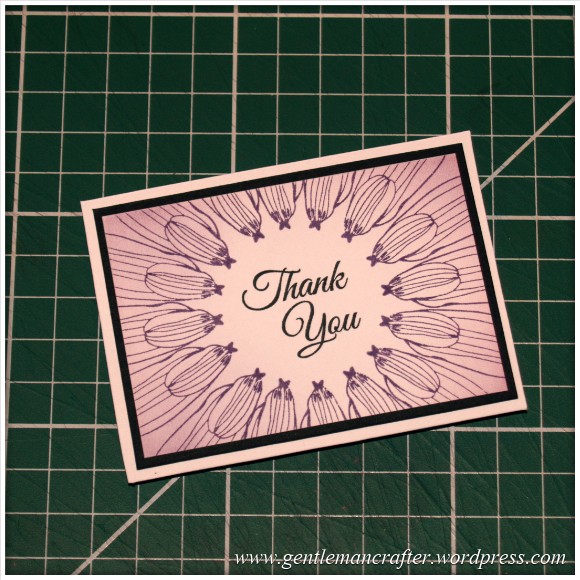
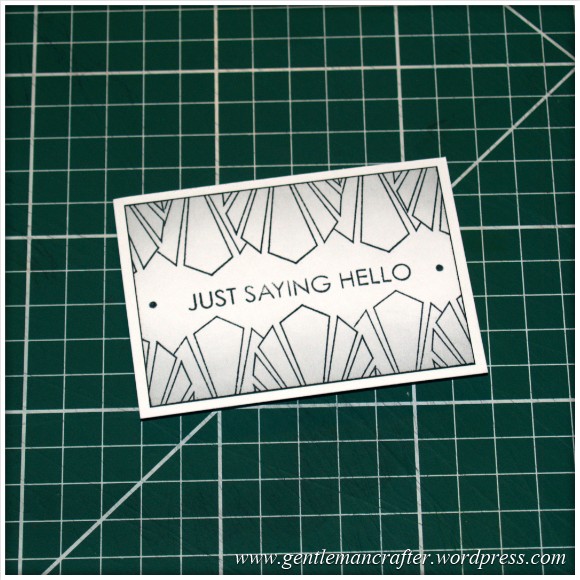
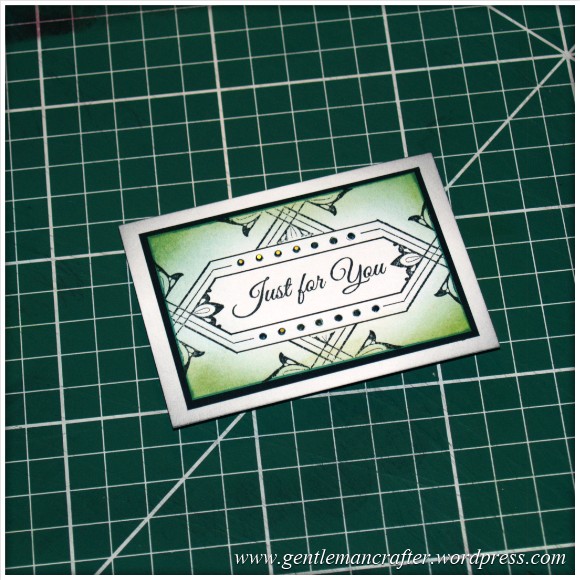
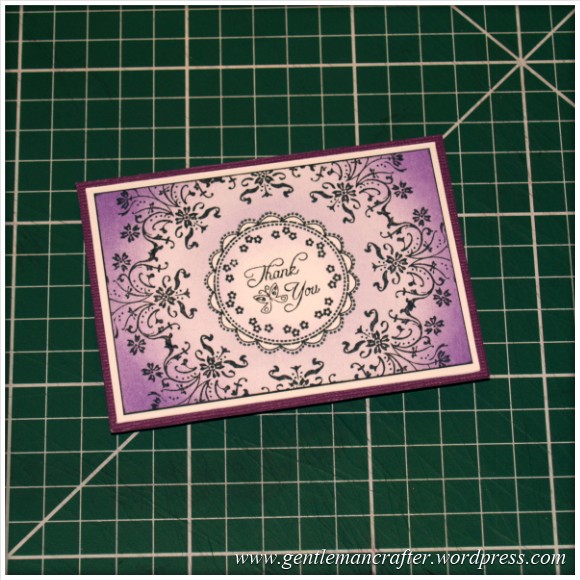
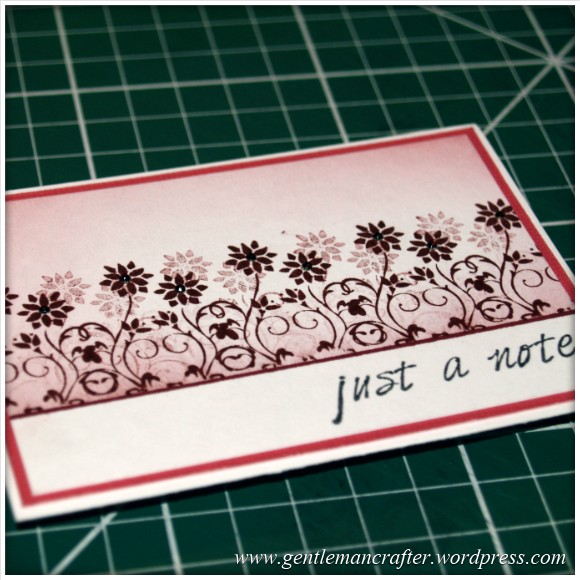
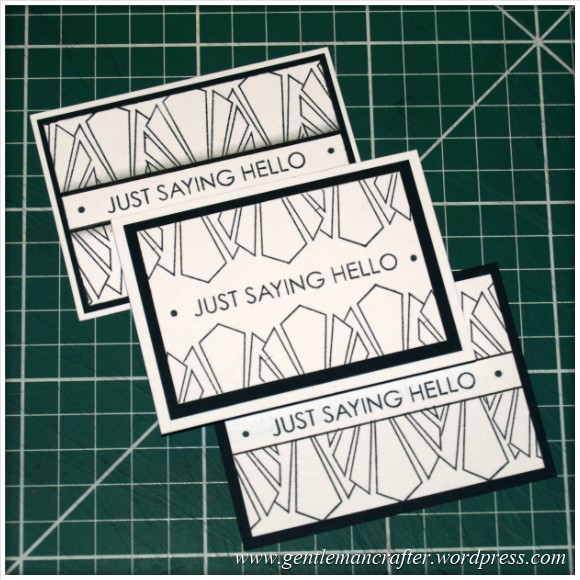
The technique above can be used on a variety of small shapes and sizes, here are a few that I created. (Click on any of the images to open a slide show).


Anyway, I hope that you have enjoyed this little experimental session and would love to know what you think of this technique. Is it something that you had been thinking off for a while or is it a new idea to you?
Please feel free to leave any questions or comments in the box below. It would be good to hear from you.
Thank you for reading.
Back soon with more!
J :)

I love your methodical and well thought out process for using this system. Big thanks for your fab tutorial and inspiration :-)
LikeLike
Thank you for generously using your time to put this very informative tutorial together. It was one of the things niggling me about the system and how you could scale it down.
Thanks also for reminding us that size is not important lol!
Ang x
LikeLike
Some great ideas here – I have all the wheels, so I’ll experiment. I just wish ‘they’ had produced a border cog, just a single straight length, and I want to buy more paddles (without the same stamps all the time) for small classes.
LikeLike
Some good ideas there. I’ll feed them back.
J :)
LikeLike
glad the lady asked the question as I had tried to do smaller prints without success. love the sets and have used them mostly to decorate large card boxes and they have been admired. Now I can make more use of them THANK YOU John. Really good buy.
LikeLike
Great tutorial and fabulous creations John.
Hugs
Linda xxx
LikeLike
Every time I see this demonstrated I wonder if I would use it. Time to stop thinking and start saving. As always a great demo John thank you
LikeLike
Love this idea – just need to get the set.
LikeLike
These projects look great, what luck that someone asked the question. I am so looking forward to getting my gear, I ordered some of the other stamps yesterday. Like most crafts the possibilities are endless once you take the time to experiment. I really like the projects you have done.
Nick
LikeLike
Great little big card designs John. I’ve only been working on large a4 sized copy paper and most my designs are around 8″x8″ approx. I will have to save and buy the rectangle and square inkadinkado sets.
LikeLike
You can achieve the smaller designs with the circular stamping gear also.
J :)
LikeLike
Wow thanks for all that John going to go and get out my system now. x
LikeLike
I think this is great advice. Thank You.
It will help when using up scraps of paper left from other projects.
LikeLike
Good thought Val. Always good to have stash busting techniques.
J :)
LikeLike
Hi John. Brilliant! My round cog and circle should be arriving any day now and I was wondering how to work on smaller items, so this demonstration is very timely. Thank you. Gail (Rist).
LikeLike
Hi John, I hadn’t thought about makig “small” cards until now! Thanks for the inspiration and a big thank you to Suzanne!
LikeLike
Oh, you are so clever, John! Must get out my stamping gear again. I bought the all over sticky notes but haven’t got around to trying them yet. I have so many different ideas muddling about in my head, but the good weather today is calling me to my daughter’s garden where some drastic weeding is needed. Thank goodness I can refer back to your blog when i get around to trying these great ideas!
LikeLike
Hi John your show on C.C. was fantastic ,lots of tips and advice and you made something I thought was too tricky ,very easy to follow ,I love the designs you did .I am new to stamping ,so I think this would be great for me.I was sorry we did not get to see your Canvas ,I have bought some canvas and am trying to think of ideas to make a project ????????but my brain is blank.My hubby is a great artist and I am trying to find a way to be able to use an image of some of his work ,on to my cards??????I will e.mail you some of his work.
Smiles
Ita in Ireland
LikeLike
You could always take a photo of his painting, import it into Serif Craft Artist and work with it that way. It’s just a thought.
J :)
LikeLike
Thanks John, I didn’t think you would be able to do this with these so you have made me re-think about a purchase. Vanessa x
LikeLike
Hi, I loved what you have done. I am thinking of getting this system for my birthday (hubby not informed yet) I love stamping and have several different tools for different techniques
Gina
LikeLike
Lol. Isn’t it you that’s supposed to get your birthday surprise and not your husband?
J :)
LikeLike
Hi John. Thanks for thinking of me again. This post was very helpful – I really appreciate your suggestions. I guess I hadn’t been thinking outside the box as they say!! Will look out for you again on C & C. Regards. Sue
LikeLike
Always good to be inspired into new ideas.
J :)
LikeLike