
Here is a quick post about a floral card that I made using the Cricut Mini and the Flower Shoppe collection.
Two things I should tell you about first.
1. I didn’t have a particular person in mind for this card as I was designing it, in fact I didn’t even know what the occassion was! It was just a bit of fun. *shrugs*
and
2. I wanted to use a Cricut machine as I hadn’t for yonks and I missed playing with it. *sighs*
Given what I have just confessed it is probably no surprise that when I opened the Cricut Craft Room software I went with the fail-safe go-to theme of flowers. It’s a tried and tested subject and generally presents itself well, unless of course the recipient is a big rugby player who suffers from an aversion to flowers – then you’d probably want to rethink…
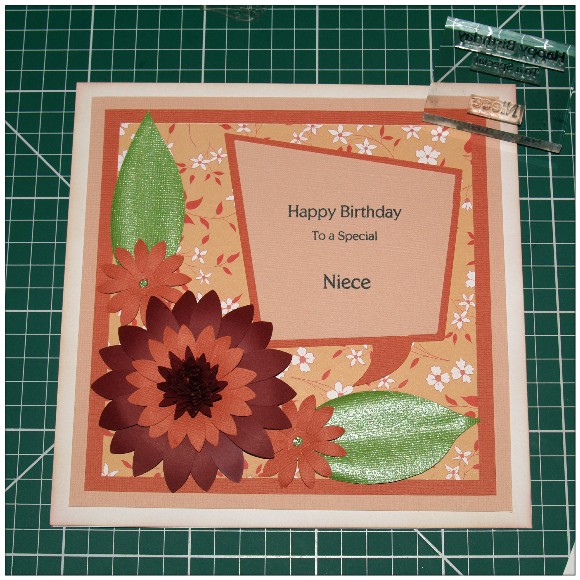
Anyway, I’m waffling already and you probably want a good look at the card that I’m talking about, right? Righto, here it is :)
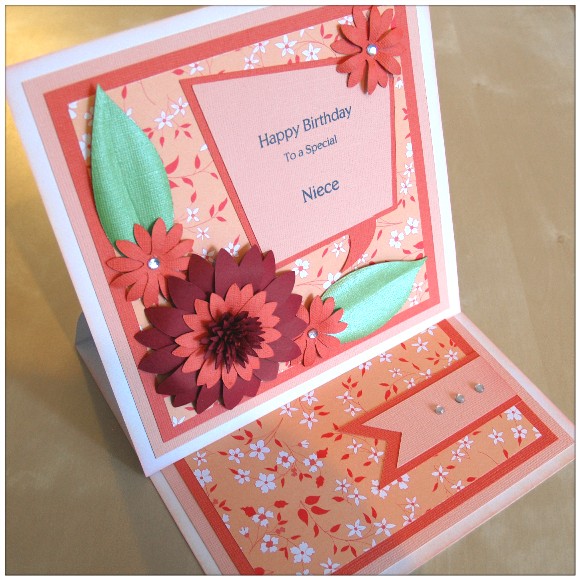
The good news is that it was all fairly basic. I did however come across a couple of design hurdles, but I’ll explain as I go.
I first designed the layout in the Circut Craft Room. Here’s a picture of what it looked like in the software.
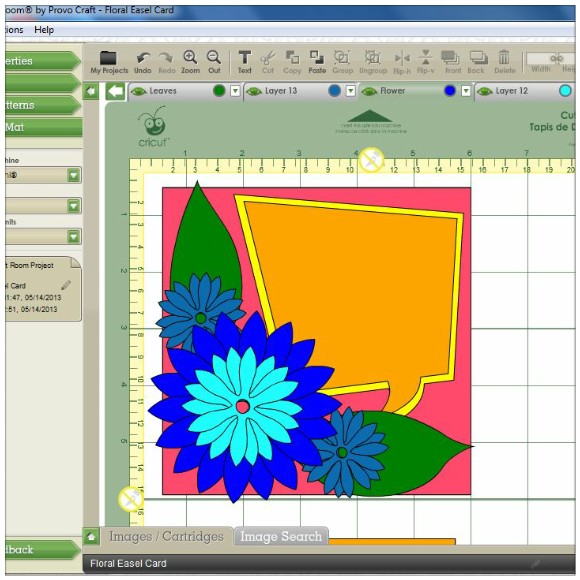
This bit took me ages as I am a born procrastinator but I did have the idea that if I created each layer in a different colour then I could see how each element would stand out from it’s neighbor. I’m not just a pretty face you know :)
When I had completed the design I saved a second copy under a new name and re-organised all of the elements so that I would get the most efficient cut from each piece of cardstock. There were four colours in all.
I chose the colour of the cardstock based on the patterned paper that I was planning to use as the background. I’ll be honest here, as I was editing the photos for this post I noticed that a lot of colours weren’t coming out true to life. Not sure if it is my camera, the fact that I chose one of those weird colours that looks very different each time you look at it or that the sun was in and out all day, but hey ho, I think that I managed to get a true representation for the completed card.
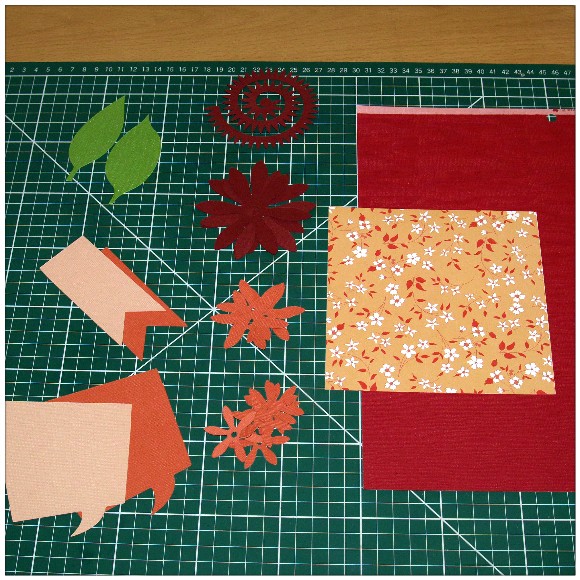
The following was cut from the Cricut Craft Room:
- Two leaves
- Two penant banners
- Two speech bubbles
- Three large flowers
- Three medium flowers
- Six small flowers
- A zig-zaggy spiral
Once I had cut it all, I laid it all on my mat, like so.
Then swept it to one side and got cracking putting it all together. I’ll be quick over this as it’s fairly straight forward.
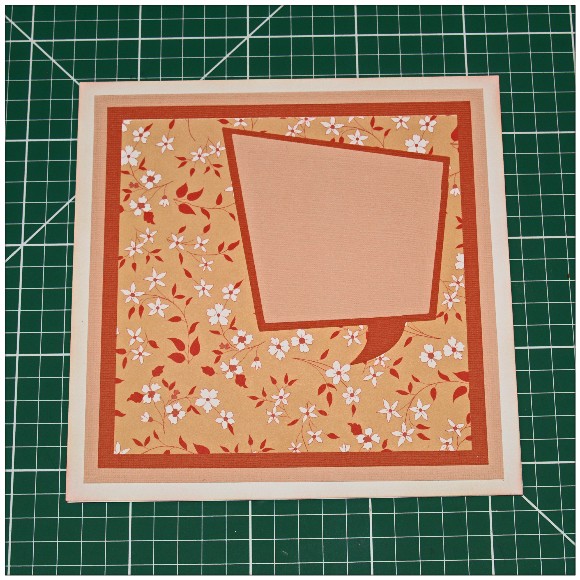
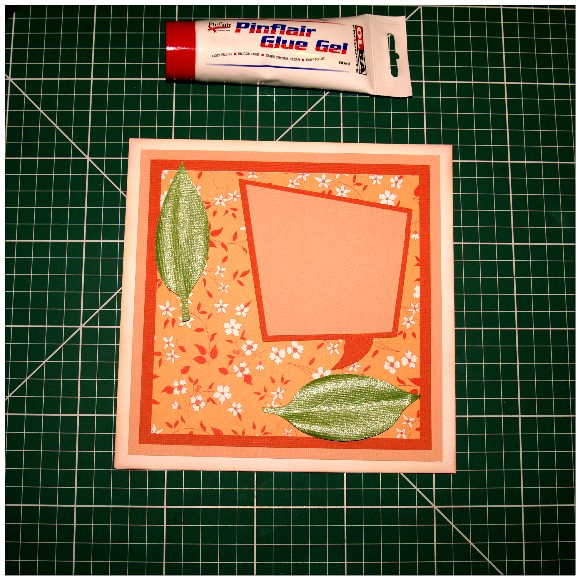
First, I layered up some coordinating cardstock and patterned paper. As it was an easel card, I also created a small section of layered cardstock to sit at the front of the card and act as the “stop”.

Next I applied the speech bubble. The lighter coloured cardstock was cut slightly smaller so that it would sit on top of the darker cardstock however this wasn’t a proper shadow cut and therefore the little handle-thingy didn’t fit neatly – so I chopped it off.
Then I shaped the leaves on a foam mat using the flat end of a bone folder. I stroked the back of the leaf from the centre to the outer edge to give it a rounded effect.
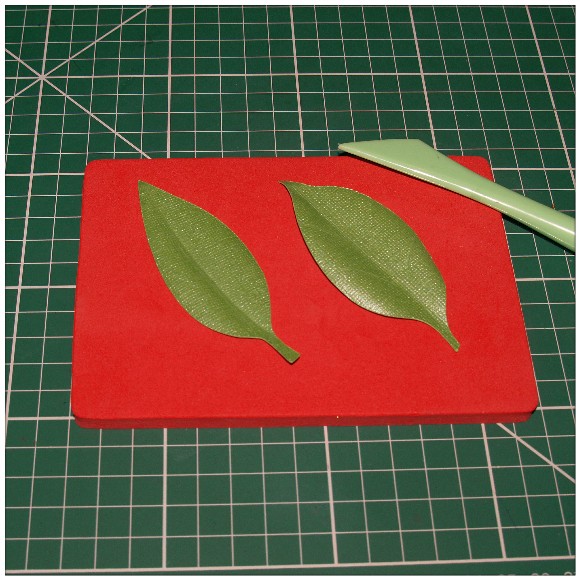
I then added the leaves to the card. I’m working from the background to the foreground, in case you hadn’t guessed that – but I’m sure you did. I find it easier to work this way as then I haven’t got to keep shuffling things about to fit it all where it needs to be.
Two small flowers were then added next to the leaves. I layered two cuts for each flower. By the way, I also added some dimension to the petals by stroking them in the same way as I did for the leaves and working from the centre of the flower out.
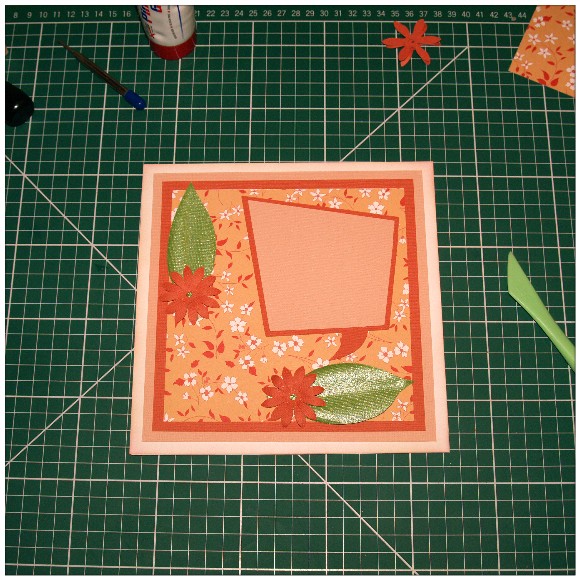
The large and medium flower were given shape in the same way as the small flowers and then added to the bottom left hand corner. I also rolled up the zig-zaggy spiral thing with a quilling tool and glued it in place in the centre of the large flower.

To create the sentiment I used several separate stamps. To help me line them up correctly, I used my cutting mat as a guide.
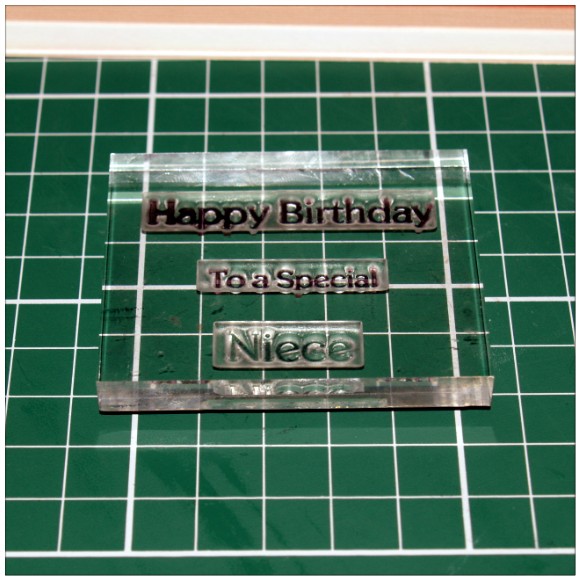
The sentiment was stamped using a memento inkpad.
I wonder how many people stamp the sentiment onto the card after they have put the plaque in place. Probably just me as it’s an idiotic thing to do – what if it all goes wrong?! Luckily it didn’t :)
Anyway, after looking at the design I felt that it was a little off-balance so added another small flower at the top left hand corner. This was intended to form a design triangle with the two small flowers in the bottom left hand corner.

I obviously added gems on the small flowers and a trio of gems on the pennant (which I did change slightly from the original mat/layer layout you saw earlier).
Construction time was less than half an hour, the designing took all of the time on this one. Do you take longer to design something than make it?
So, what do you think? Is this something that you might enjoy making or receiving?
As ever, if I haven’t covered anything clearly, or you have any other questions or comments about this card, please feel free to leave a message in the box below and I will endeavour to reply when I can.
Many thanks for reading.
John :)

Hi John
This is a great looking card. Love the way you adapted it to work better for you. Love the colour scheme too. It always takes me ages to design a card and try and think what to make and do, the making of it is normally quicker unless I tweak the design like you did. I find cutting things straight and to an exact size my problem so I usually use a pre-made card blank and bodge it a bit. I have an aversion to seeing the white edge of the card blank but I’m trying to overcome this as it always looks good when I see others cards with it showing.
I always lay out where I want things to check I’ve got the design looking ok. I’m not very good at drawing so a sketch is a bit beyond me, if it needs a change I tend to either cut other bit and keep the pieces I’ve decided not to use for another time or I rearrange the bits until I’m happier. I find quilling tools really useful for turning paper spirals into flowers much easier than using your fingers to try and roll them.
I love this Cricut creation. Thankfully I don’t know any big rugby types so I’m safe with a flowers theme!
Best wishes from Katie-Louise
LikeLike
Lovely card John, I like the way you lay out all the components used!! Mx
LikeLike
Nice card, but what is the size of the base and the fold lines are scored at _________?
I can probably figure it out buy would be nice to have all the info in one post.
LikeLike
It is an 8 inch square card. I scored one side of the 8 inch card at half way to create the easel. I then used an 8 inch square piece of card to create the topper area.
Hope this helps.
J :)
LikeLike
Great card John! In answer to your question sometimes it takes me longer to design a card than make it, other times when I know what I want to do it takes no time at all. The joy of crafting.
Hugs
Linda xxx
LikeLike
Too true Linda :)
LikeLike