Hello to you once more, *doffs cap*.
Well, who would have thought that I would have managed to get two blog posts out per day for three days in a row?! Well, I have, *puffs out chest and looks proud*.
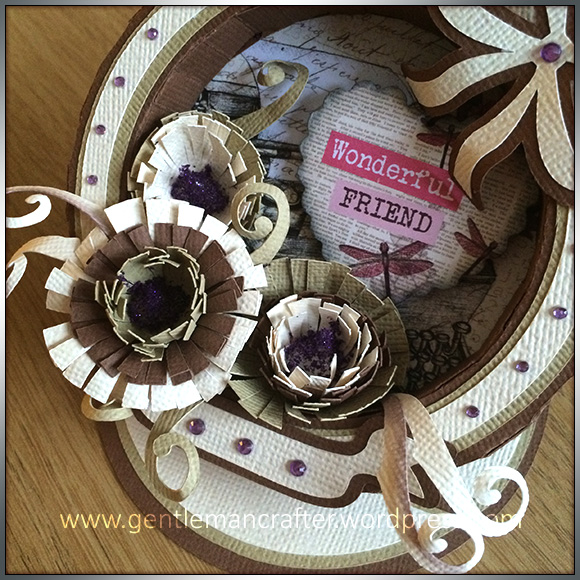
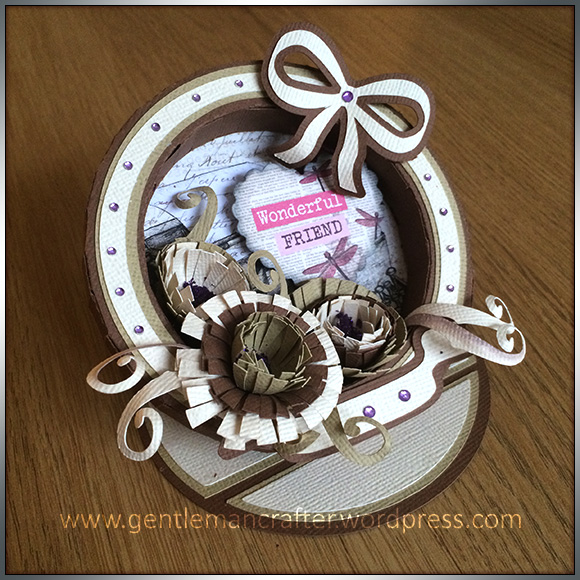
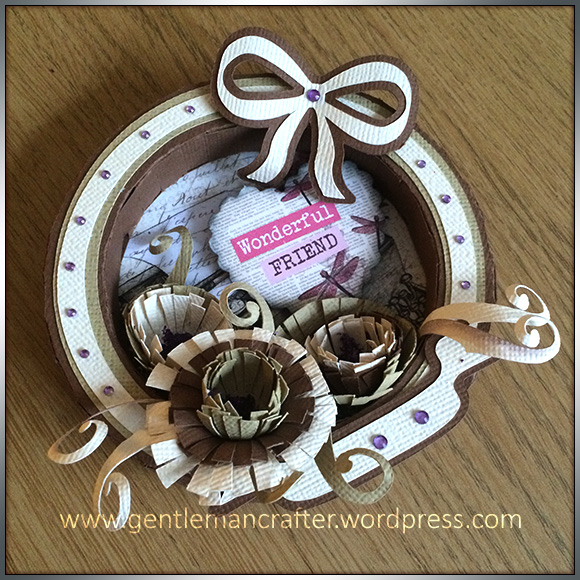
For this one I went back to designing box frame card fronts, but this time I thought that I would add a twist and a bonus.
So, first up, here is the finished project that I have designed.
Now, before I move on I have been asked if you need a cutting machine for these projects that I have been sharing. In most cases, no. I do provide PDF and PNG versions of my most recent files so even those without machines can print the templates out and get cracking.
Anyway, now that I have clarified that, lets crack on. You’ll probably feint with this next revelation but I actually managed to get an edited video done too!
Ok, ok, now go get a cloth to mop up the tea you just spat out, lol!
Before I show you that though, I just wanted to say that for this product I have designed an almost complete set.
The easel base, box frame set and some embellishments are all included.
The entire project spans just two 12 inch square sheets of cardstock. One sheet (none of the juan sheet jokes please) for the main easel and box frame plus a couple of bits and two 6×12 inch pieces for the layering and embellishments (if you want to use three colours or tones as I did).
Look, I’m waffling now. Let’s just crack on with the video shall we?
Can someone turn the lights down please – and pass me the popcorn S.T.A.T!
Hope you enjoyed that. Here is a quick run down of those points again.
- Click here to download the full project pack.
- Cut your bits out.
- Collate your bits.
- Assemble the bottom part of the box frame and the base of the card.
- Glue together the two sets of edge strips.
- Glue the layers onto the front part of the box frame.
- Muck about with flowers and embellishments for a while whilst the glue dries. Or even pop off for a snack; your choice.
- Add the box frame edge strips, starting with the inner edge.
- Add the front.
- Embellish up to the nines.
- Done!
- Have another snack :)
So there we have it. A circular easel box front card!

As always, if you have any comments or questions about this post then please feel free to use the comments section below. Also, If you know of anyone that would appreciate reading this post, there are handy sharing icons below.
Many thanks for taking the time to read about my little creations.
I’ll see you again soon!
J :)

Hi John , may I suggest you buy yourself a dishwasher.
Love the card
Adrienne
LikeLike
Hi John
Wow I love that idea. Thanks for sharing.
Jenny x
LikeLike
Unusual and great, you have some amazing ideas can you share your brain with mine please as I’d like to have one just like yours lol
LikeLike
thanks for another great idea – lovely
Irene
LikeLike
Great idea and super video.
I cut myself washing up quite badly, a wine glass had broken in the water and I wasn’t concentrating and as I wiped the inside of the glass one way and then back the other the broken edge went into my little finger and cut two thirds of the way round my knuckle. Very painful and took ages to heal.
LikeLike
Ouch! We shouldn’t do housework I think :))
LikeLike
You never cease to amaze us. Excelled yourself here.
LikeLike
Hi John
Another fab idea- and well done for pointing out you don’t need a machine for these.
Hugs, T x
LikeLike
what a fab card idea – love it :-) x
LikeLike