
Today marks the end of Januarys adventure creating a decorative patchwork quilt block from the pre-designed blocks found in the Scan N Cut machine. Grab a brew and I will update you…
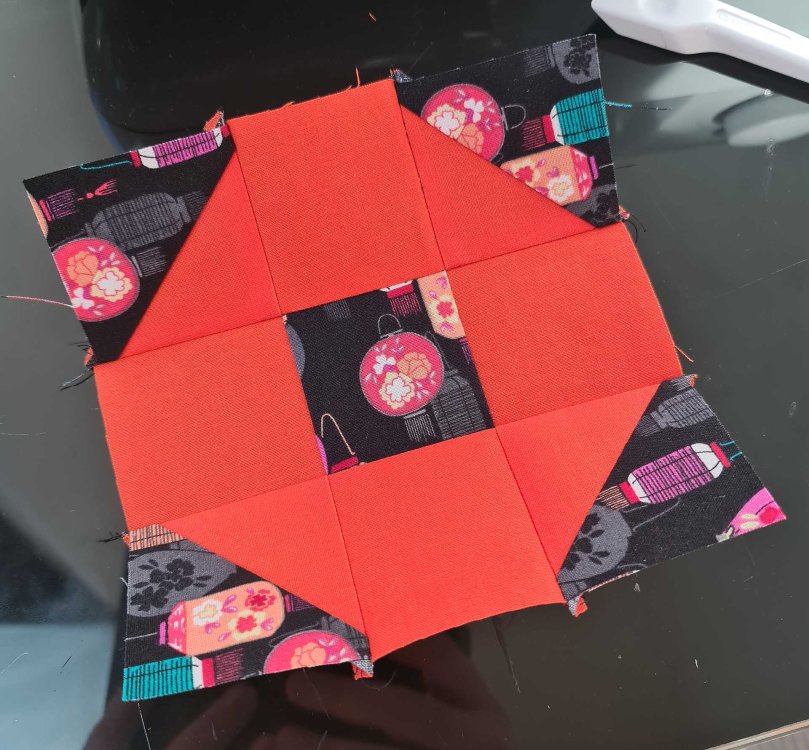
When I last left you in this blog post I had managed to cut out all of the relevant shapes for the nine quilt blocks and stitch the first of these together.
Now, I don’t want to pretend like everything was plain sailing. There were couple of boobs along the way that I hoped wouldn’t show too much but I will need to keep in mind for next month’s adventure.
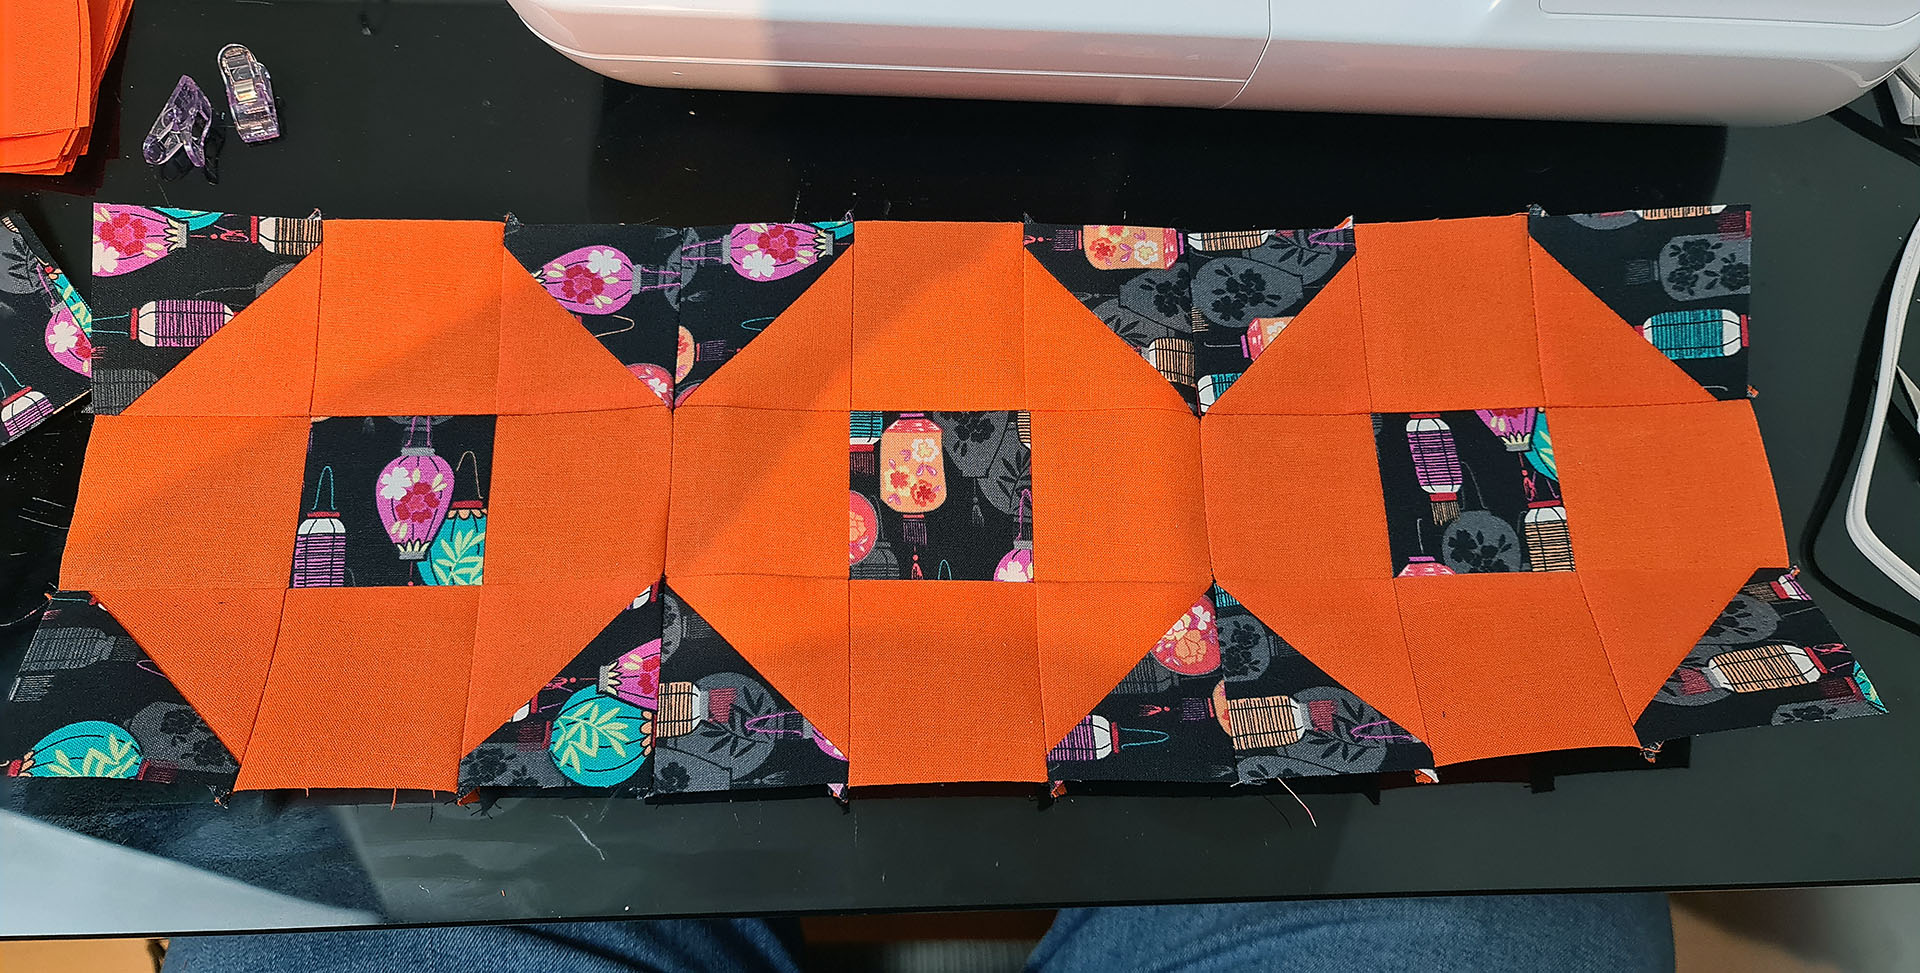
Anyway, time to assemble the blocks for the top layer. I chose to work in rows as I had for the smaller block parts, first sewing into rows.
It was at this point that I realised that I had sewn the central square so that the pattern direction was different to the corners.
Ok, hopefully it won’t be too obvious once it’s all together and hung on the wall. Or maybe I will just call it a design choice, lol!
So, it was onwards with the rows.
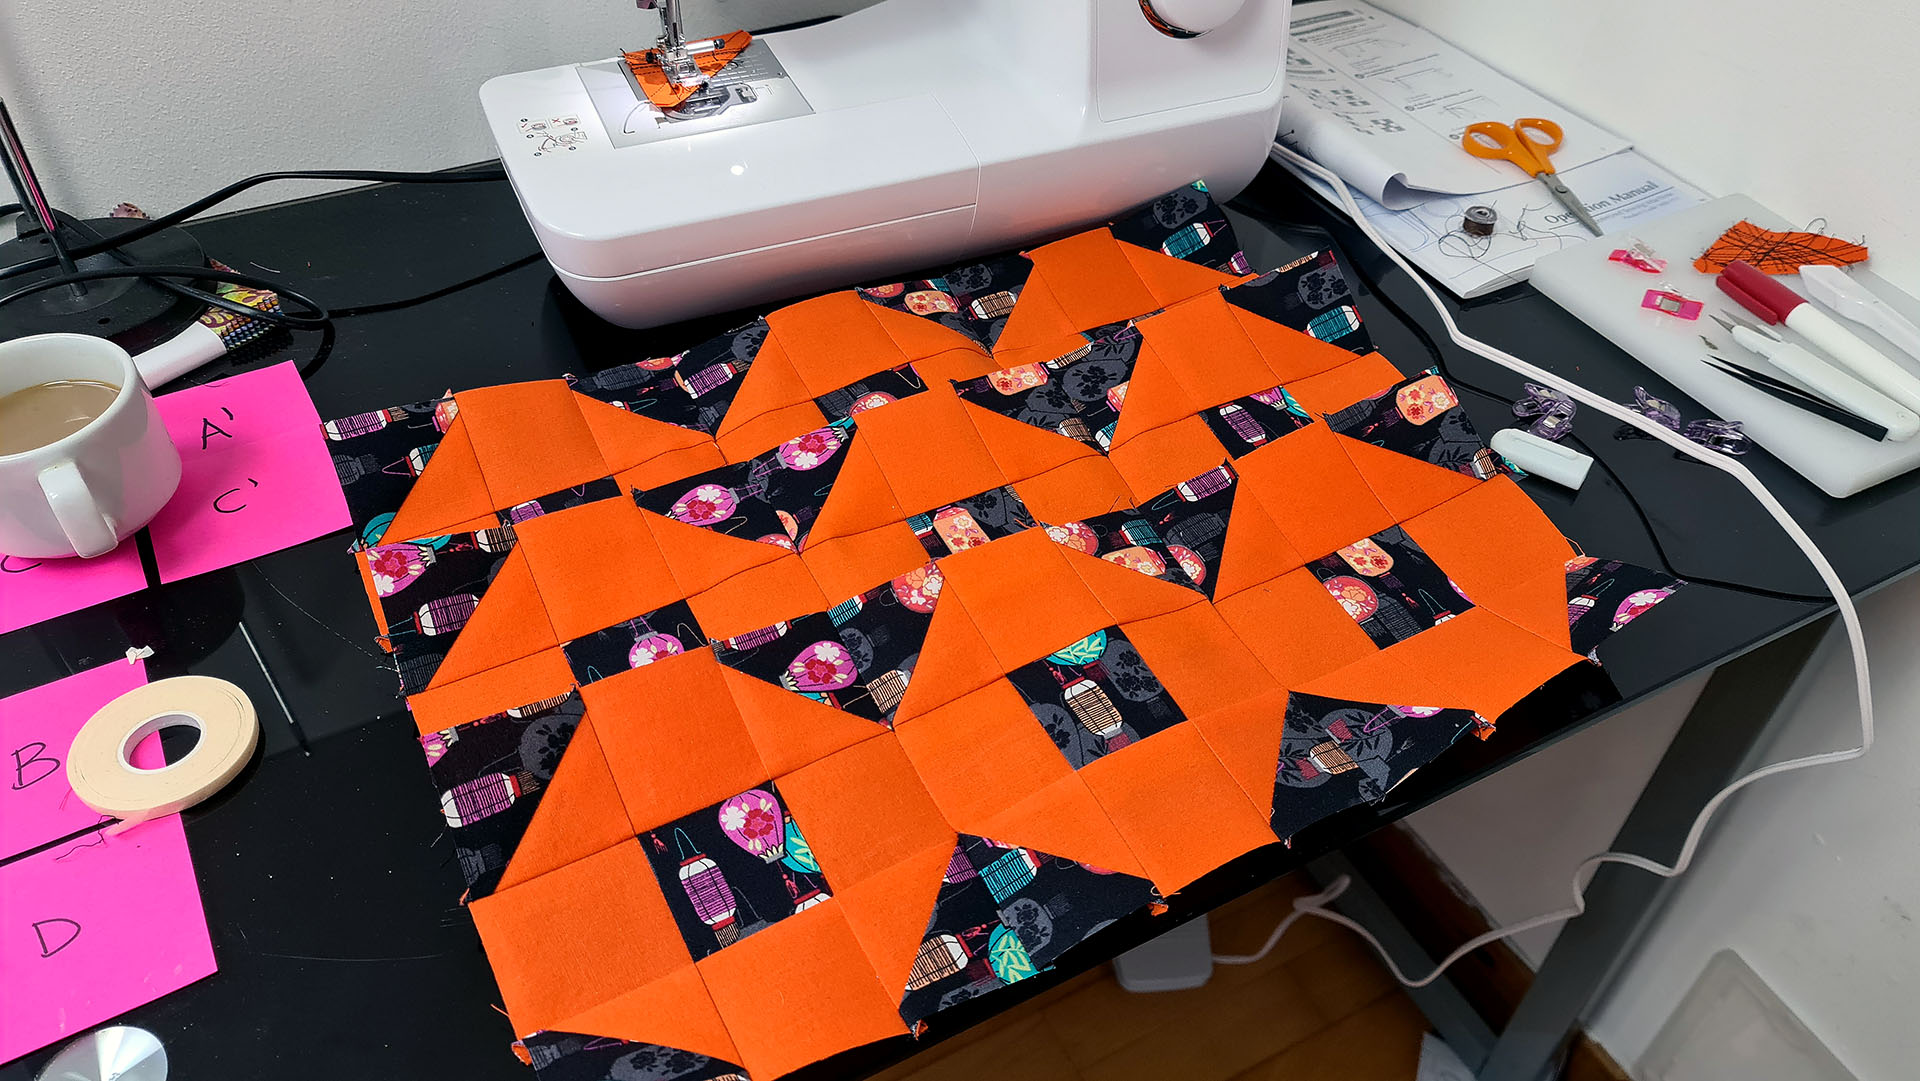
Then time to stitch all of the rows together.

What a relief! At least “most” of the seams/joining points lined up so that it looked like a reasonably respectable effort.
I do however think that I made another boob when I chose to press the seams of the corners out. This is because those joining points became very bulky.
I think perhaps in the future that if a square part is to be made of half square or quarter square triangles I will press the seams open. This will hopefully reduce the bulk at joining points.
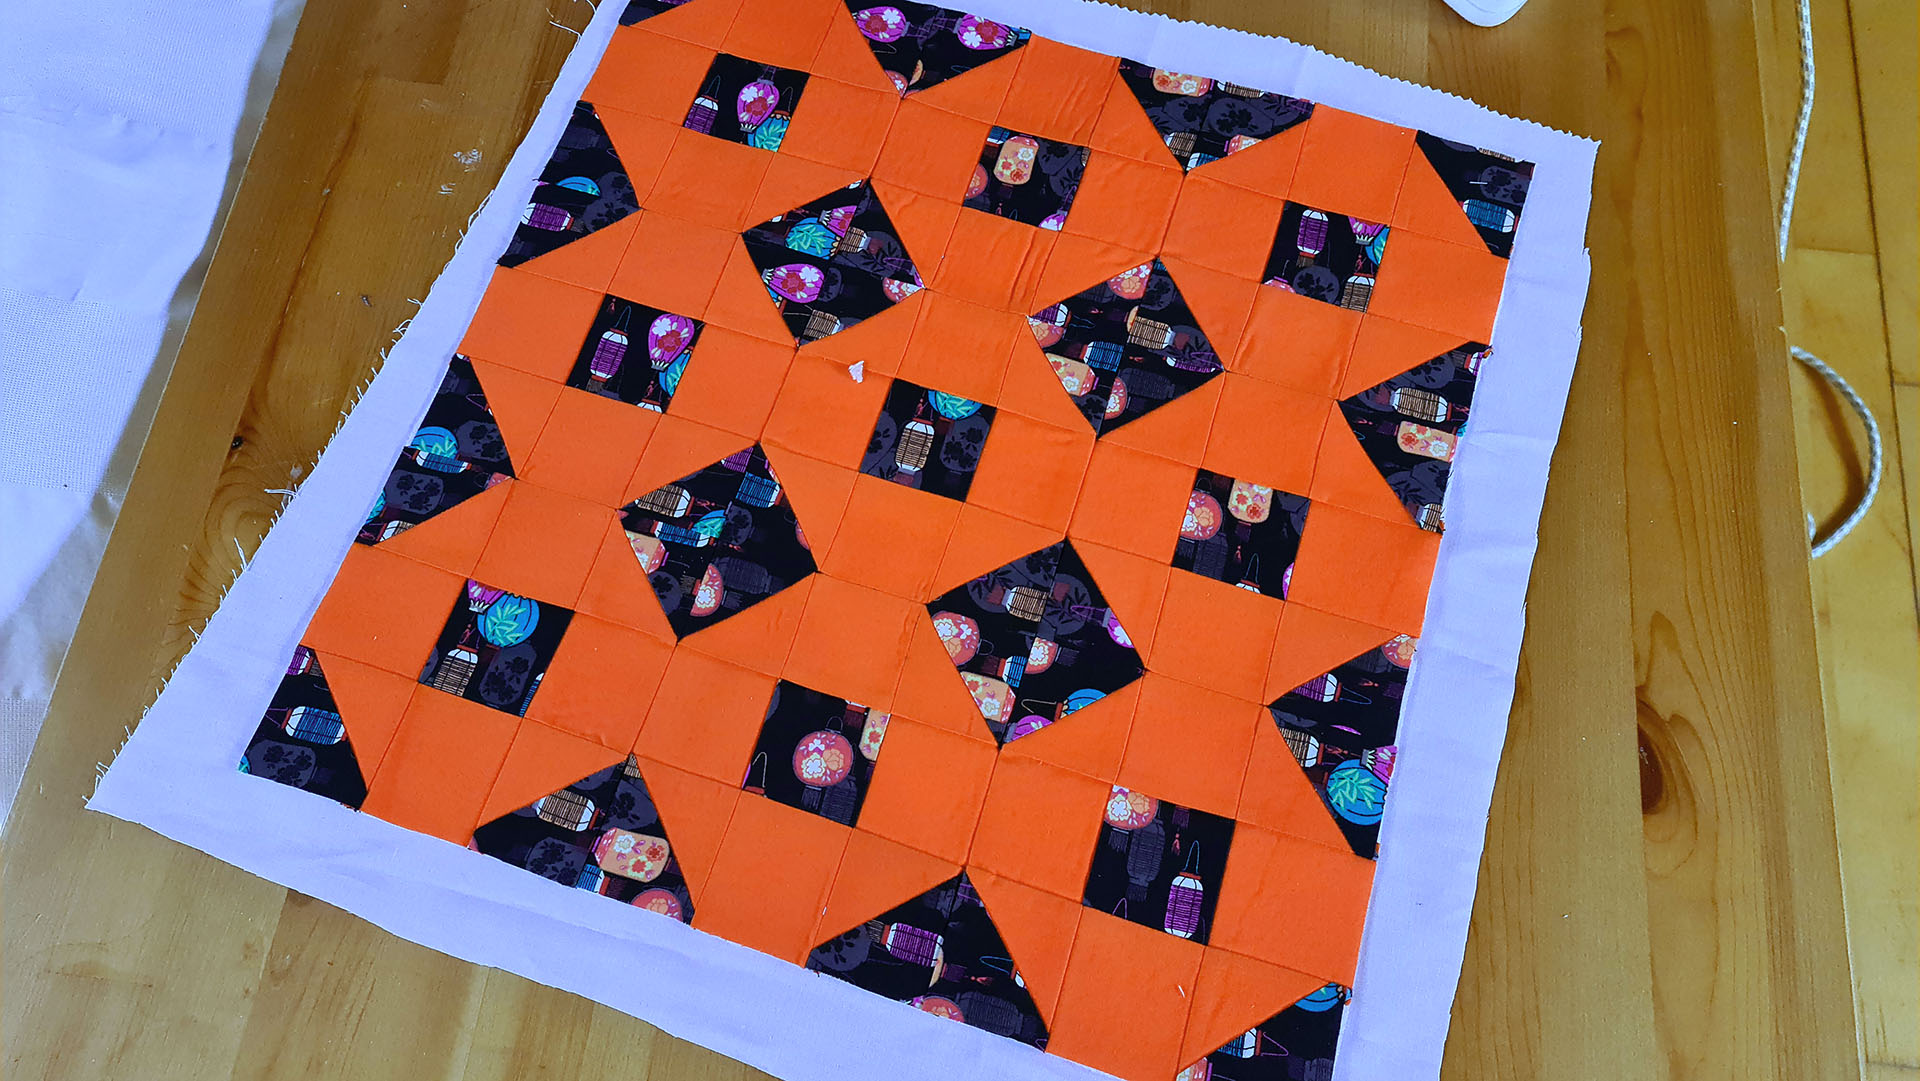
Right, time to “baste” the backing and the batting to the top layer.
I put the “baste” in quote marks as I ended up cheating and using a heat fusible fleecey backing. I did however have the steam setting of the iron on which I forgot tends to wrinkle the fabric as you press, so yeah, whoops!
I also cheat-set the backing fabric – which should have been black but I forgot to order some in time for finishing this so it ended up being white – using 505 temporary hold spray.
So many corners being cut! Shameless!
Anyhoo. “Basting” complete. Time to add some top stitching to secure the layers together.
That quilting guide that I mentioned in the last post – the one that came with the Scan N Cut – suggested that every line starts in the centre.
Guess what I did … yup, totally ignored that and went top to bottom. I did however do centre lines and then worked outwards towards the edges for each line of stitching.
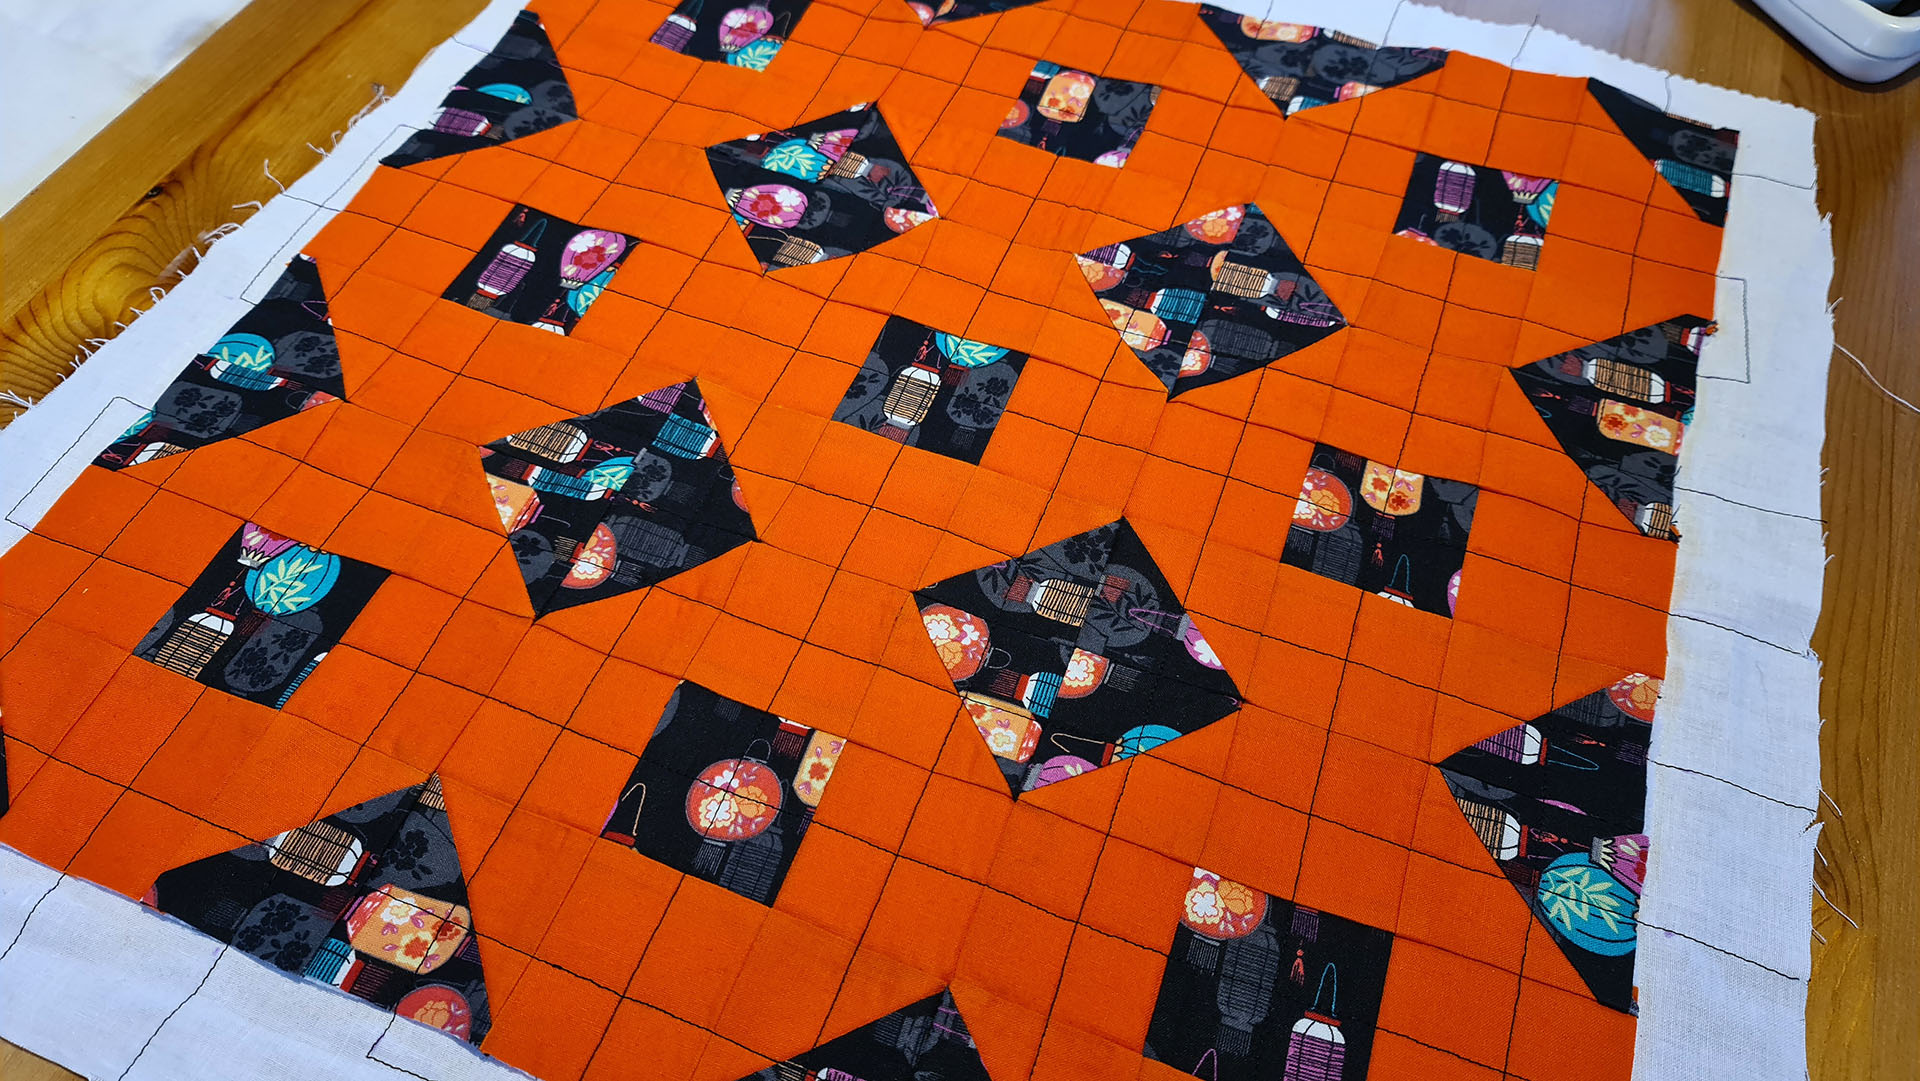
That worked, kinda. :) I didn’t add stitching “in the ditch” as I was afraid of those bulky joints.
Time to add the edge binding. Totally forgot how to do this so had to look it up on YouTube – what on earth did we do before the internet? Remember things? Go to the library? Have books in our home? Probably all of those things.

Ok, all done!

Well, despite all the short cuts, boobs and random winging it – it turned out kind of Ok, didn’t it?
One thing is clear, it’s been quite a long time since I’ve tackled construction of this kind and my mind has really lost it. Hopefully I can get that back over the year.
As you may remember, this is a year long effort to get back into sewing and so I wasn’t hoping for perfection on this first project, which is probably a good job. Ha!
Anyhoo, I will be hanging it up somewhere in this place soon but for now, it shall be the worlds biggest mug rug.
Right, I really hope that you have enjoyed following this series of posts through the month and will join me in February for the next one!
That’s about it for this one.
If you have any questions or thoughts about the content of this post, please feel free to pop them in the comments section below. I look forward to hearing from you.
Many thanks for stopping by and hope to see you again soon!
Bye for now.
John.
There are literally hundreds more posts in the archives so please do check out the suggested posts at the bottom of this page or visit one of the category archives below or check out the related posts section at the end of this post.

It turned out great! I am curious… what do people do with quilt blocks?
LikeLiked by 1 person
Blocks are a collection of smaller shapes. These blocks are then sewn together in various configurations to form useable or decorative items such as table runners, quilts and handbags.
LikeLiked by 2 people
Beautiful, John. When I was given a quilting course for my birthday a couple of years ago, our teacher went into the origins of quilting and patchwork. One of the things she told us related to the Amish culture who often put an “error” in their work because only God is perfect. So you are just following their lead! Looking forward to your next project. X
LikeLiked by 2 people
Well done John, orange and black look fab together. Watch out, your Shiba Inu friend would love to snuggle on that! To be honest, it’s probably only you who will know where the stitches you’re not so happy with are!
LikeLiked by 2 people
It looks amazing! Well done on confronting your mistakes and learning from them… it’s a lesson to us all!
😁 💕 Clare x
LikeLiked by 2 people
Very neat seams, very impressive. You always inspire me to try new things.
LikeLiked by 1 person
No one is perfect all the time John, l never outed myself of my mistakes Ithink that makes you live up to your name. Gentleman John. X
LikeLike
Love this.
LikeLike
Enjoyed reading through your process with this boobs or not it looks great xx
LikeLiked by 1 person
That looks wonderful John, and I love the bright orange. I’m sure you can be forgiven for cutting a few corners, after all, you’re trying to get your sewing mojo back. Im sure the next one will be more traditional. So love your blogs they brighten my day. xx
LikeLiked by 1 person
It looks fabulous John, really love the colours and design xx
LikeLiked by 1 person