NESNA Ikea Bedside Table Makeover
A while back I started several new things but for one reason and another, they got put to one side. With determination to get those W.I.Ps done, I have finally got around to finishing a few.
This first one was an idea that was born back when I first started out playing with resin.
When visiting the neighbours I noticed that they had an IKEA NESNA bedside table in their lounge.
Here is said table, in my place, not theirs. Forgive the splotches, it was raining one that day. Hence also the lit fire.
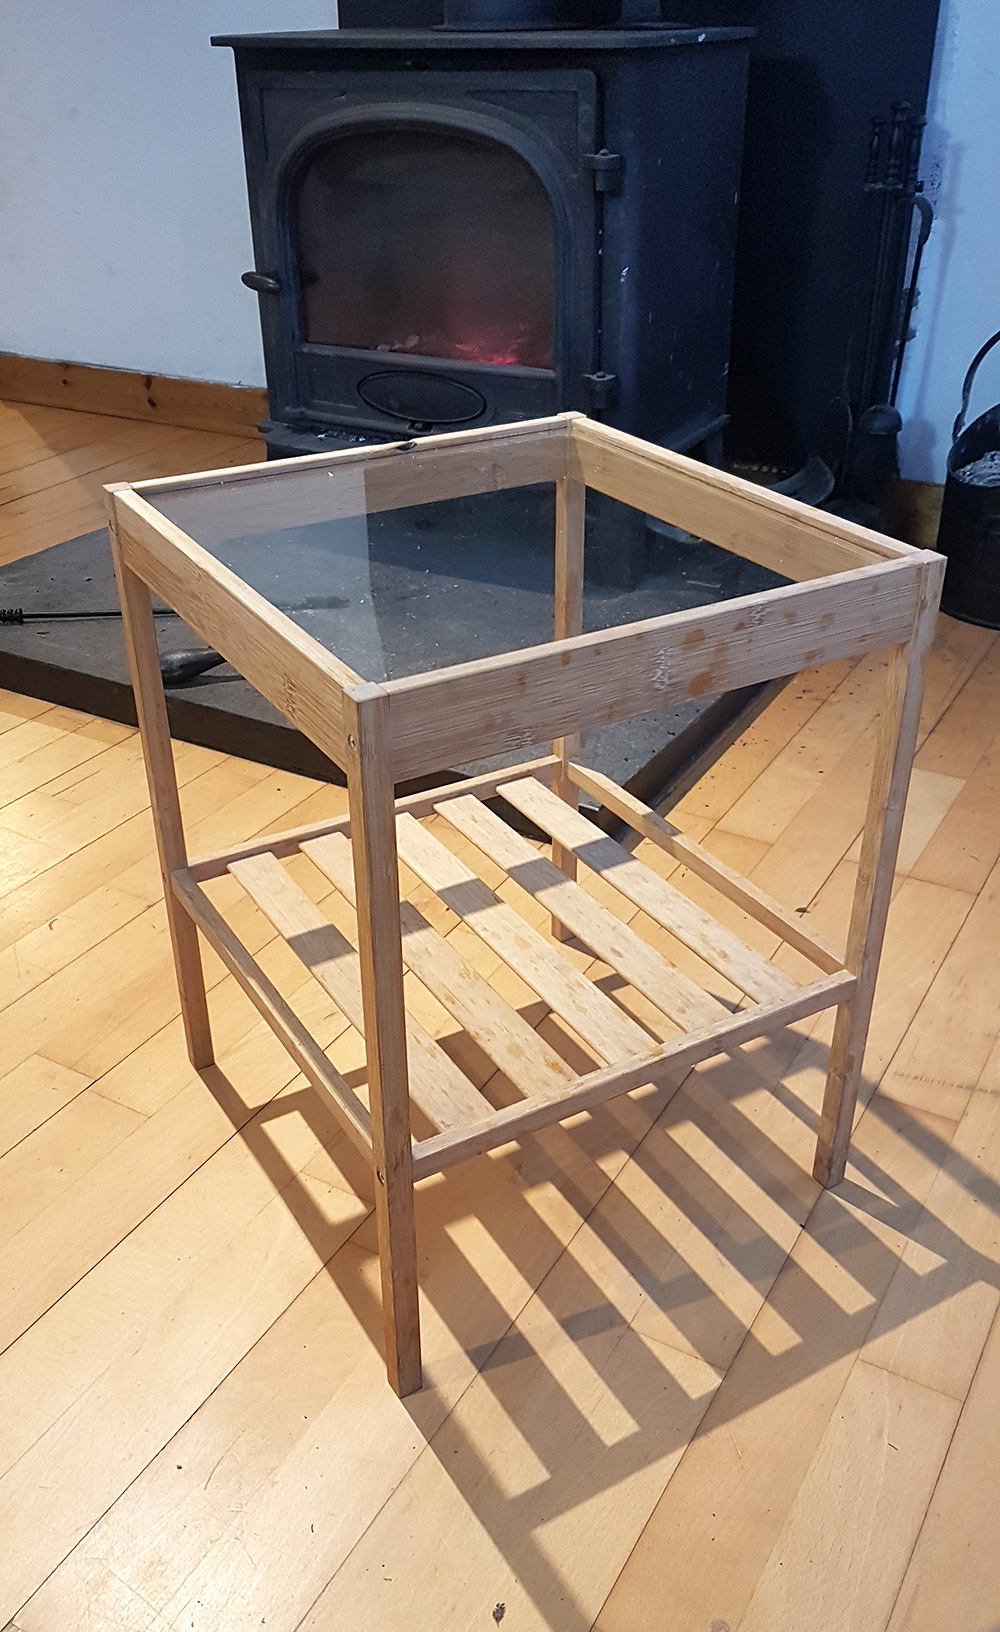
It was an incidental bit of furniture that, due to it’s colour, didn’t really fit with their decor, in my humble opinion.
I subtly, by way of gasps, gagging noises and general pointing of finger whilst screaming, pointed this fundamental flaw in their decor out.
That went down well. Lol!
Having realized that my “subtle” comments might not have been so subtle, and that I was unlikely to get invited back anytime soon, I hastily back-tracked when a peace-making opportunity popped into my head.
Having remembered the resin experiments that I shared a while back an idea formed and I offered to give the table a makeover.
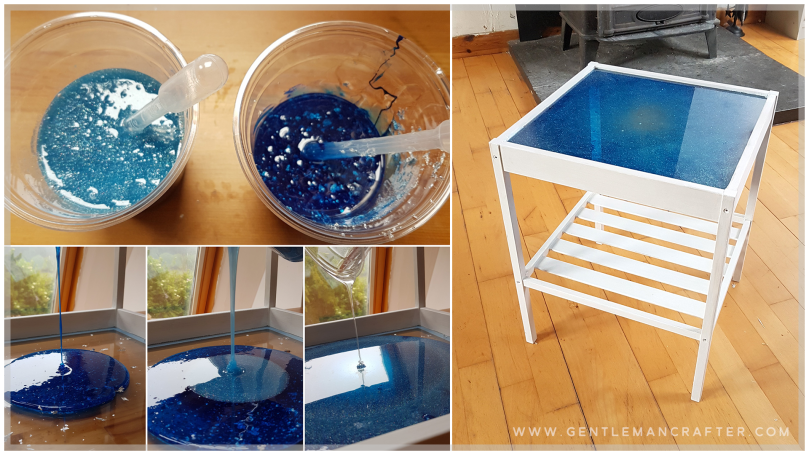
Things started out well, I masked off the edge of the glass and started sanding back the surface of the wood – I could have disassembled the table but to be honest, everything was within reach and well, why bother when you don’t have to.

Next I gave the wood a few coats of white paint..

This is where the project ground to a halt for a few – erm – months.
As I mentioned at the outset of this post I recently picked up where I left off and set back to work. You’re probably grateful for that or this would be a very rubbish blog post, right?
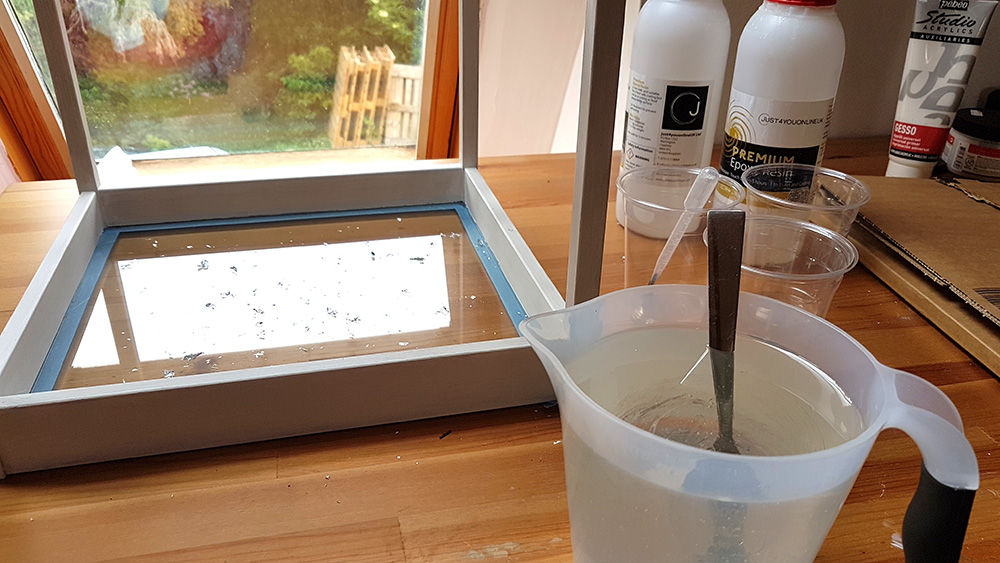
So, the plan? Do a resin pour on top of the glass surface. The issue? Will the contraction of the resin as it sets make the glass crack?
Remember, this occasional table might be used for putting coffee cups on.
Well, my brain went into meltdown. I know that glass has a COE – coefficient of expansion – meaning that it expands and contracts at a set rate when heated/cooled BUT, does resin? I know that there is a mild thermal reaction during the curing process, this is the reason you shouldn’t work in layers more than an eighth of an inch thick but … etc etc etc and lots of buts.
Also, if I am using a blow torch to help pop the air bubbles, won’t that shatter the glass as a result of thermal shock?!
Gah! Me and my big mouth for volunteering to do this!
Anyhoo, I duly dived into/onto “The Google” and began to read horror story after horror story of how other folk had tried it only for the glass to then crack.
Great.
I did however stumble across one YouTube-r that was working on glass and they seemed to be having good results. One thing that I noticed was that she was working in thin layers.
Well, Ok, could I prevent this being a problem? I mean, I have a whacking great log burner in my place – could I light that, work near it and then the resulting heat will a) prevent thermal shock, b) keep the glass warm during the curing process and c) keep me warm while I am working. I mean, there has been some nice weather lately but it’s not summer yet.
Quite honestly, no idea, love.
After mulling over all of the input, I came up with this output …
- Work in a warm area.
- Apply just a thin layer of resin.
- Keep my fingers crossed during the whole curing process.
Sounds like a plan, right?
Well, it did to me so I gathered up my bits and pieces and started mixing …
… and …
Join me on page two of this journey by clicking on the numbered page links at the bottom of this post to see what happened…

That came out nice! Is the glass still there? I have a table that needs glass but I want to fill it with resin in different layers and then have resin be the final layer.
LikeLiked by 1 person
The glass is most definitely still there. What I have noticed is that there are some small areas where the resin is separating from the glass. If I redid this in the future, I’d likely not use a hobby resin and instead look for something more fit for purpose.
LikeLiked by 1 person
That was one of the things I was so confused about. I redid my kitchen counters with an epoxy resin but from what I was reading, it doesn’t layer like some of the craft epoxies.
LikeLiked by 1 person
Good luck.
LikeLiked by 1 person
I love blue & the beach, so I absolutely love this. I have not tried resin. Would it work over acrylic (Perspex, clear plastic, sorry I am not sure what it might be called in the uk), do you think, as this would make me less nervous than glass.
LikeLiked by 1 person
Whilst it would work over perspex you’d need to check that the resin doesn’t react and cause the perspex to “frost” or warp if using a high thermal reaction resin.
LikeLike
Wow John, what a result you got!!! It’s brilliant, not surprised your neighbours were pleased with it. Love the colour and all the sparkly bits too. Not tried resin, would I? YES I definitely would, I am a bit of a risk taker lol…if you don’t try, you never know is my motto!! Would love to see how something like this turned out. Right, now to find something I can revamp with resin 😃 I’ve revamped an old cork board this week for die storage, used Nuvo mousse and gesso and really over the moon with the result 😍 happy days xx
LikeLiked by 1 person
That sounds fab!
LikeLike
Lovely, but no I will never be that brave lol – Abe
LikeLiked by 1 person
Have I been trying “a Bit” of resin?!! Its all your fault John ha ha! The table looks brilliant and you’ve given me another idea. Wxx
LikeLiked by 1 person
Whoopsie 😁
LikeLike
Great ikea- whoops, I meant idea!
LikeLiked by 1 person
Lol!
LikeLike
It looks Brilliant John. Love the colour
LikeLiked by 1 person
Fab job John! I wish you were my neighbour! Xx
LikeLiked by 1 person
Hi John, I think the table looks beautiful, well done. I would not have the nerves to do it to someone elses table, but perhaps try on an old table I have. I love the way you can see the floor colouring through the middle of you design, it will make the table fit in anywhere.
Maybe the glass used in the table is toughened glass as opposed to just a decorative glass. My huband sat on his Mom’s glass table, and of course he went through it.Only the table was damaged thank goodness.
Great demo John
Love and Light
Sioux x
LikeLiked by 1 person
Oh my!
LikeLike
Stunning result John, sometimes you just have to go for it. I hope you are very very very proud of it and yourself. You have inspired me to look into resin work now xx Hazel
LikeLiked by 1 person
It looks great! Of course, in our house, it would probably be dog hair rather than glitter flakes in the added embellishment….
LikeLiked by 1 person
This looks brilliant. Job well done. X
LikeLiked by 1 person
Wow. How fabulous it looks. Not sure I would be brave enough to attempt anything as big as that. I’m still to take the resin plunge – but on much smaller creations. Thank you for sharing John and inspiring me to have a go.
LikeLiked by 1 person
Very brave but worth the effort. Looks very stylish.
LikeLiked by 1 person
What a fabulous idea! Love the colours so effective!
How much would that be in a designer store???!!!
LikeLiked by 1 person
Wow
LikeLiked by 1 person