Hallo! Hope you are well and enjoying time in your craft spaces.
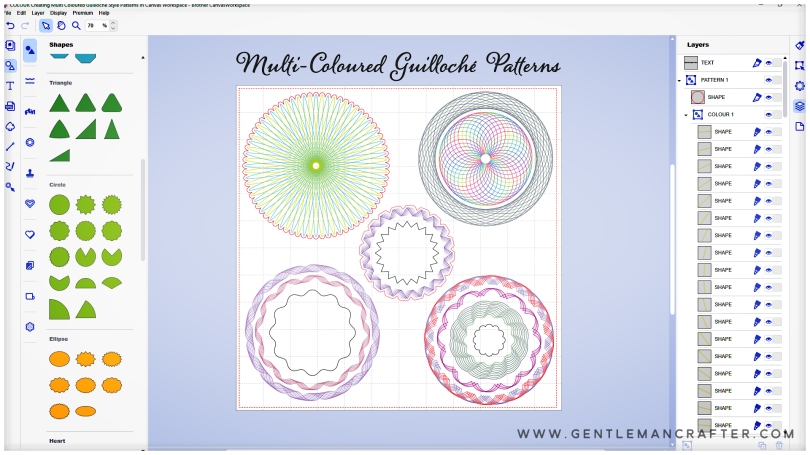
For this Scan N Cut focused blog post I have been looking at new ways of using Canvas Workspace to create drawn patterns and have created a cool Guilloché pattern workflow that I think you will adore!
Oh, and I’ve also been gathering new tools to review AND am going to be organizing some live “workshops”, so, worth a read if you’ve got a Scan N Cut.
Ok, let’s do the first thing. The pattern drawing.
If you’ve not heard of Guilloché patterns, they are the very fine line patterns that you see on certificates, banknotes and security seals.
Just to be clear, I am NOT encouraging you to do anything naughty, just giving you a new creative way of working with Canvas Workspace and creating fancy-pants patterns that can be drawn out with your Brother Scan N Cut.
Anyway, hear are some of the results that I achieved on my first go-round.

You might be surprised to know that most of these used the same technique and so, for the video tutorial [see below], I narrowed these down to unique techniques and will be showing you these …

The video is approx 15 minutes long and will cover the following stages.
- Designing the project in Canvas Workspace – recorded in real-time.
- Drawing the project on the Scan N Cut – shortened/some steps not shown.
If you do need more thorough guidance on the basic operations of the machine, please do check out my full “Brother Scan N Cut – Cut, Draw and Scan with Confidence” course on Udemy. It’s crammed with over 12 hours of information right from setting up, all the way through the three key functions of cutting, drawing and scanning on both the CM and DX models and also goes on to cover using the Canvas Workspace software and premium accessories too!
Want More SVG Cutting Files?
If you would like to see more SVG cutting files from me, please visit my Patreon page.
When drawing these designs you can use the standard pen/pen holder or, as I did, one of the two universal pen holders. You could even use the calligraphy accessory set or indeed the foiling or embossing kit for a totally different look!
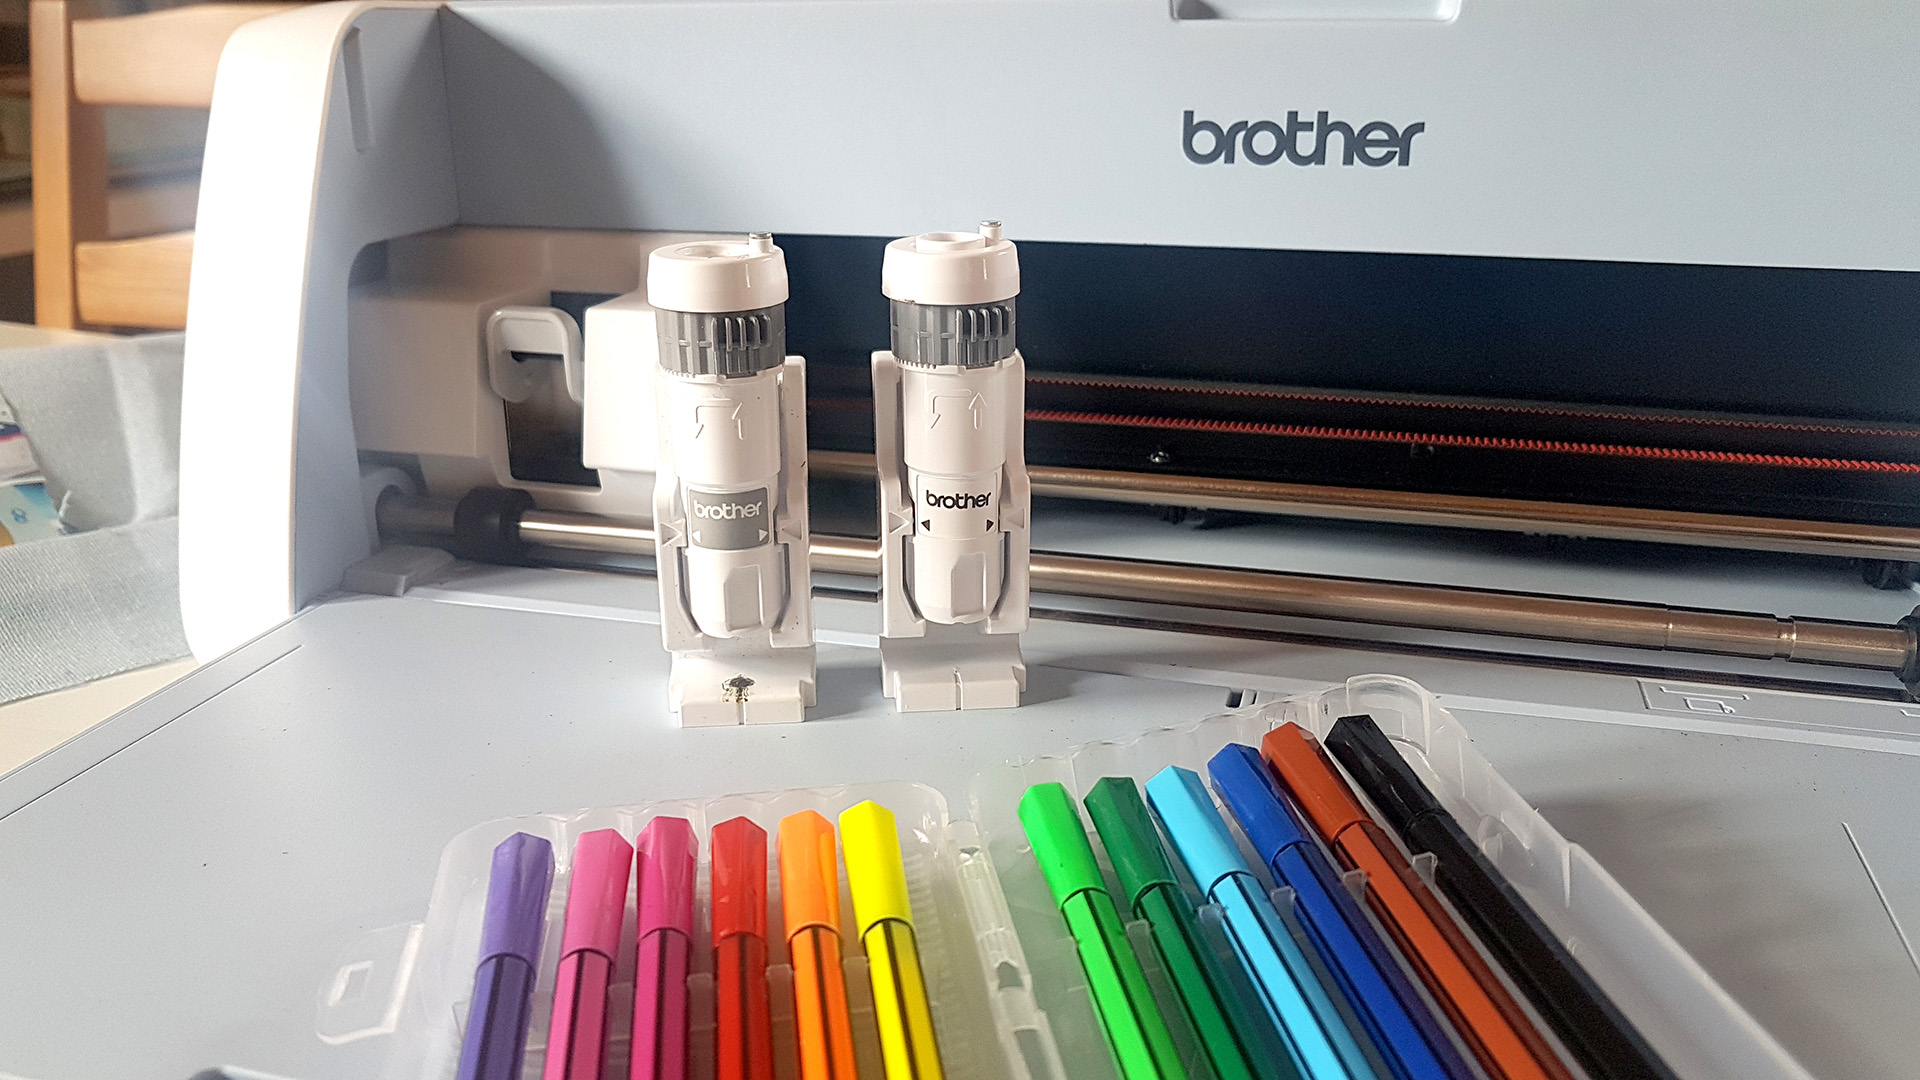
If using the universal pen tool, it is possible that you might need to adjust the drawing speed or pressure in order to match the flow of the pen so always do a tester or two to find the right settings before committing to your final project.
These are some of the pens/results that I achieved on my test runs.
First, a no-brand cheapo fine-liner black pen with the “wavy-ribbon” design.
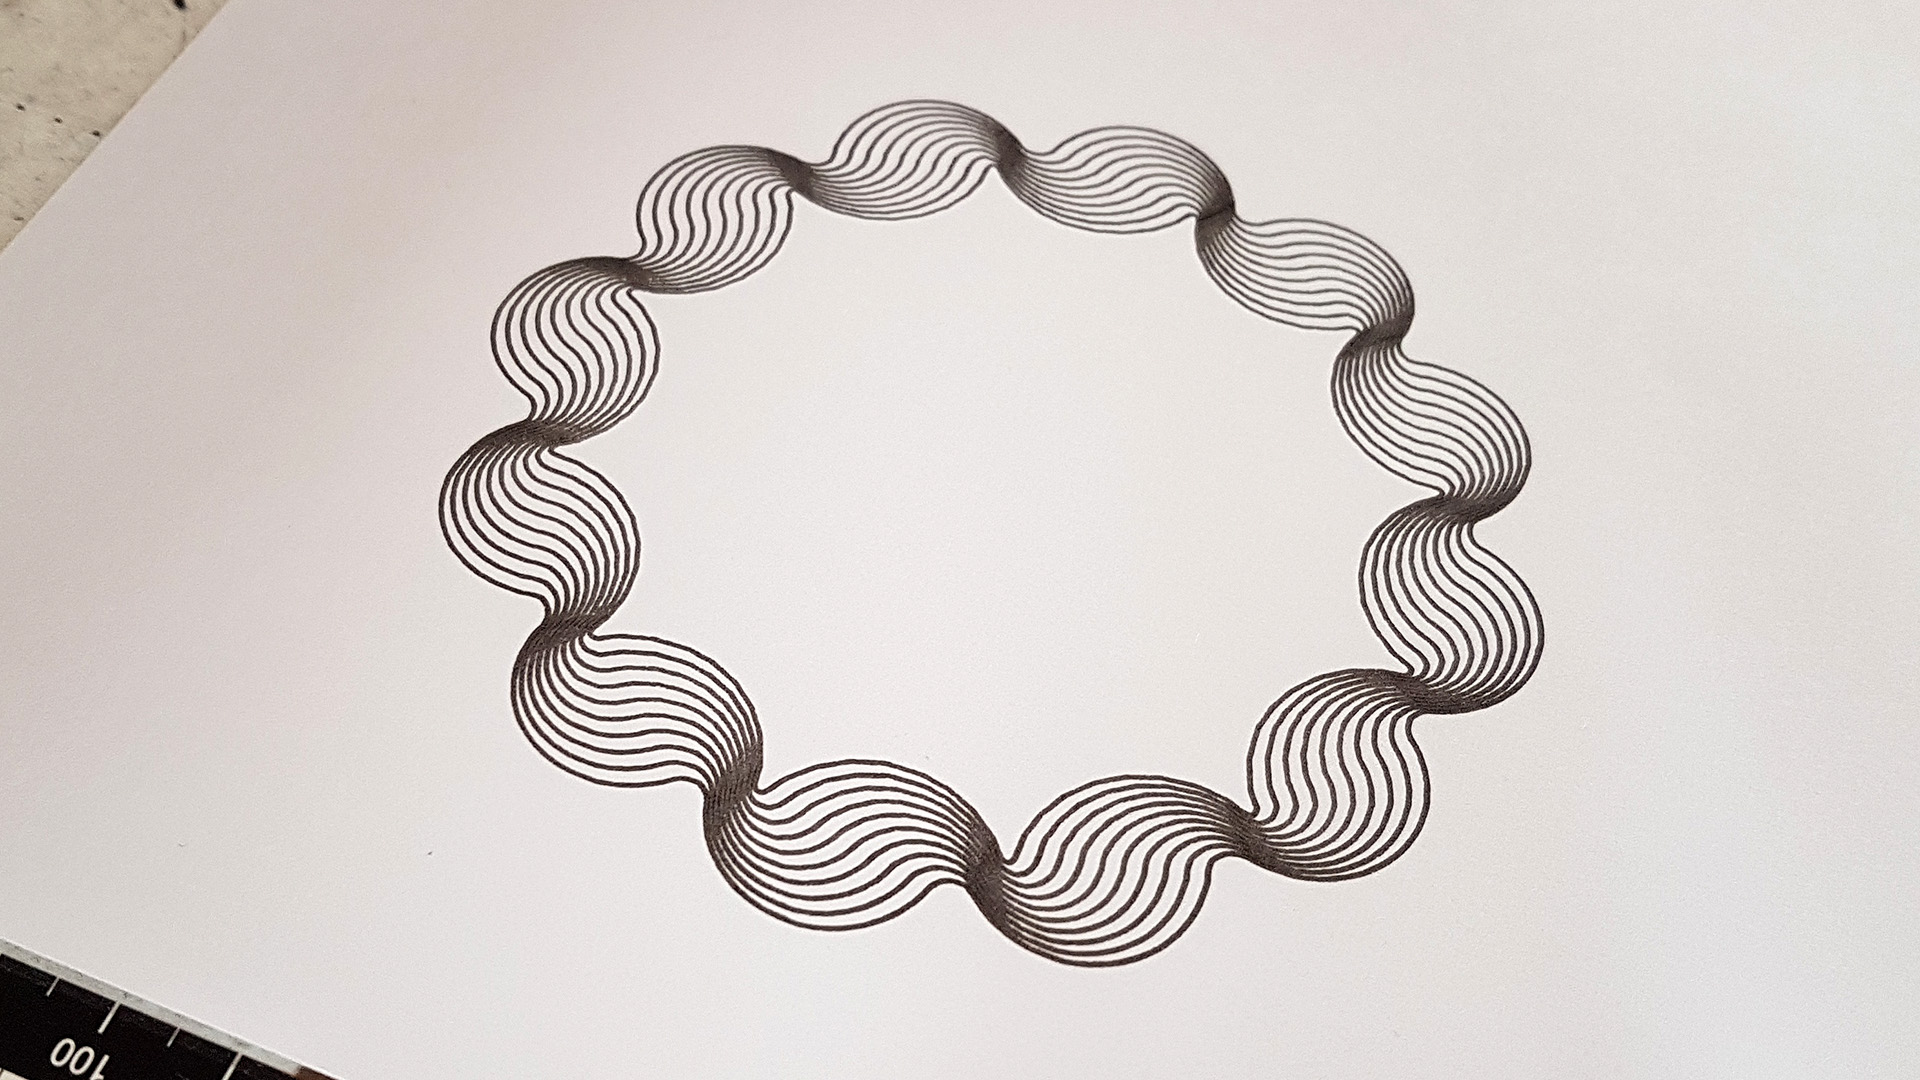
I did have a thought after doing this that I should try drawing each line in a different thickness of pen for a unique look.
Then some no-brand budget felt tip pens from Home Bargains.
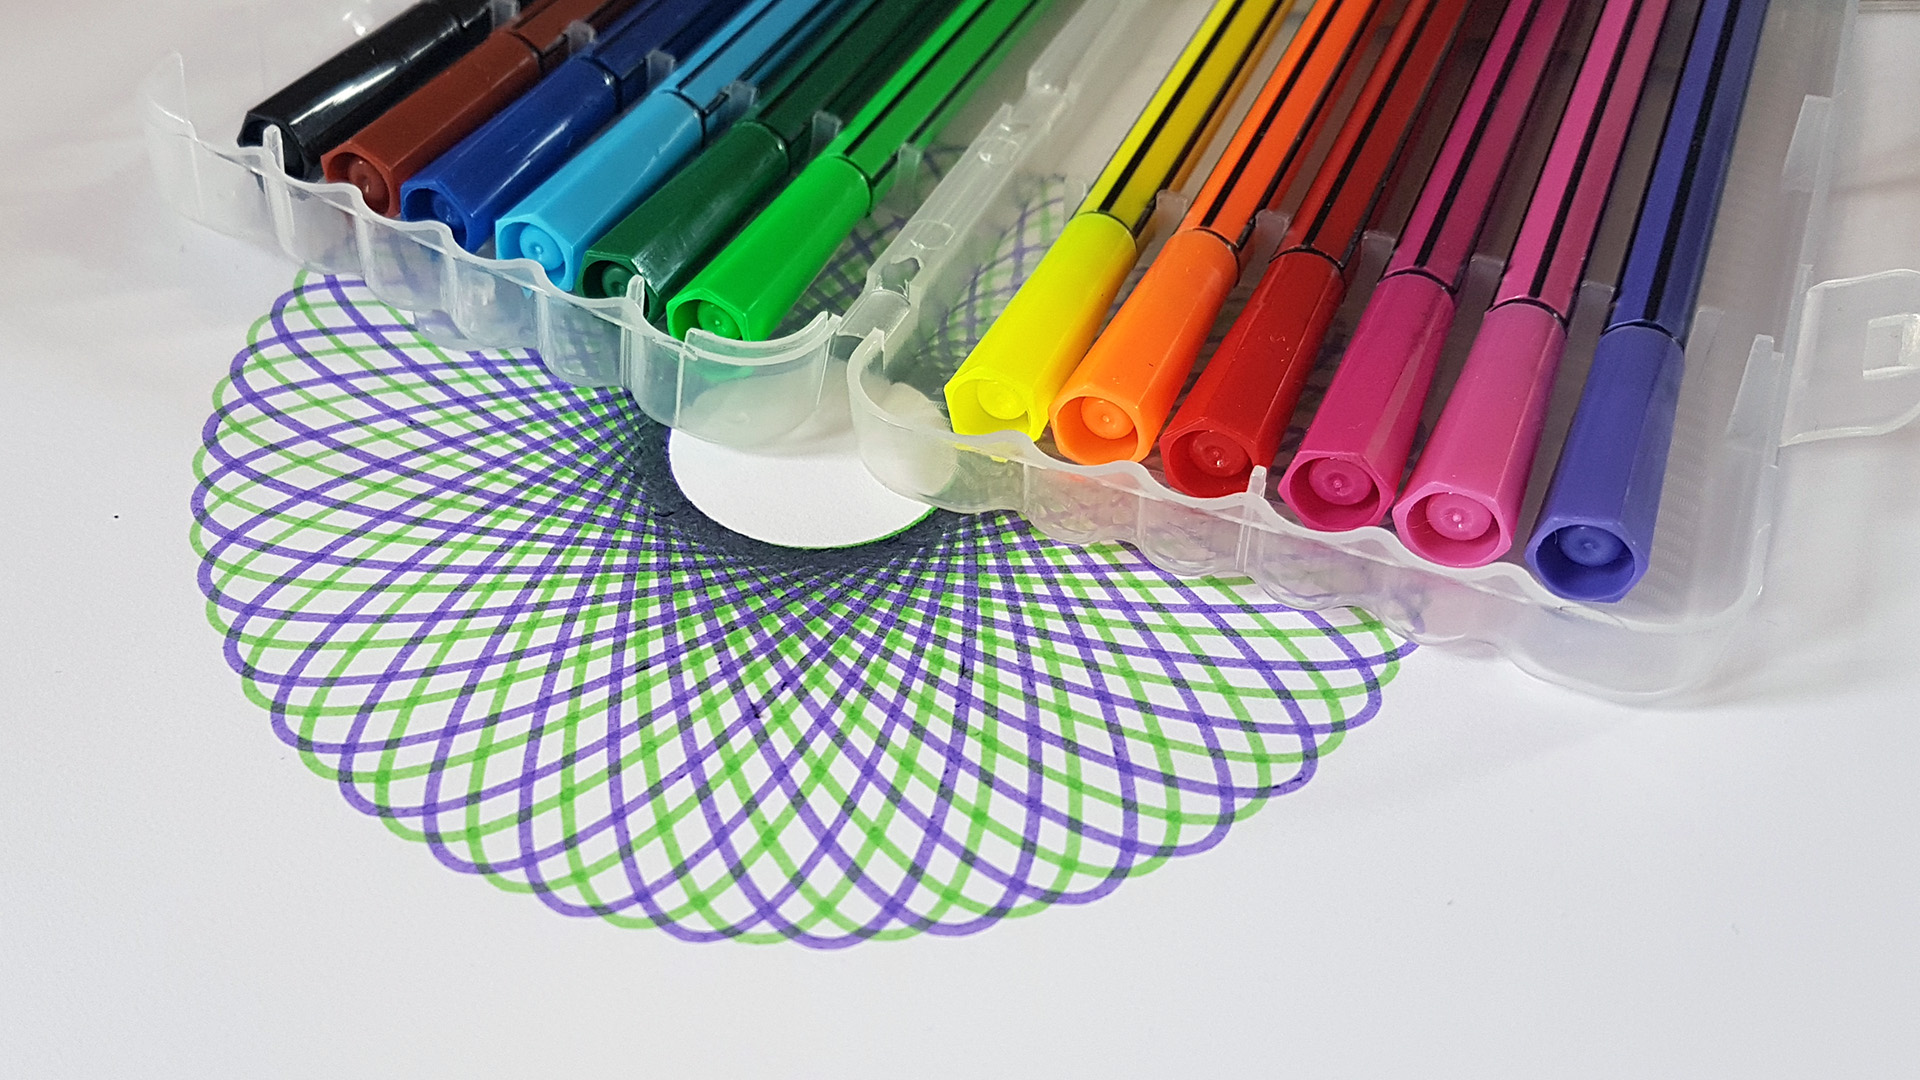
They came out surprisingly well!
Finally, some Stabilo Point 88 fine liner pens on the “Rainbow Ribbon” design.
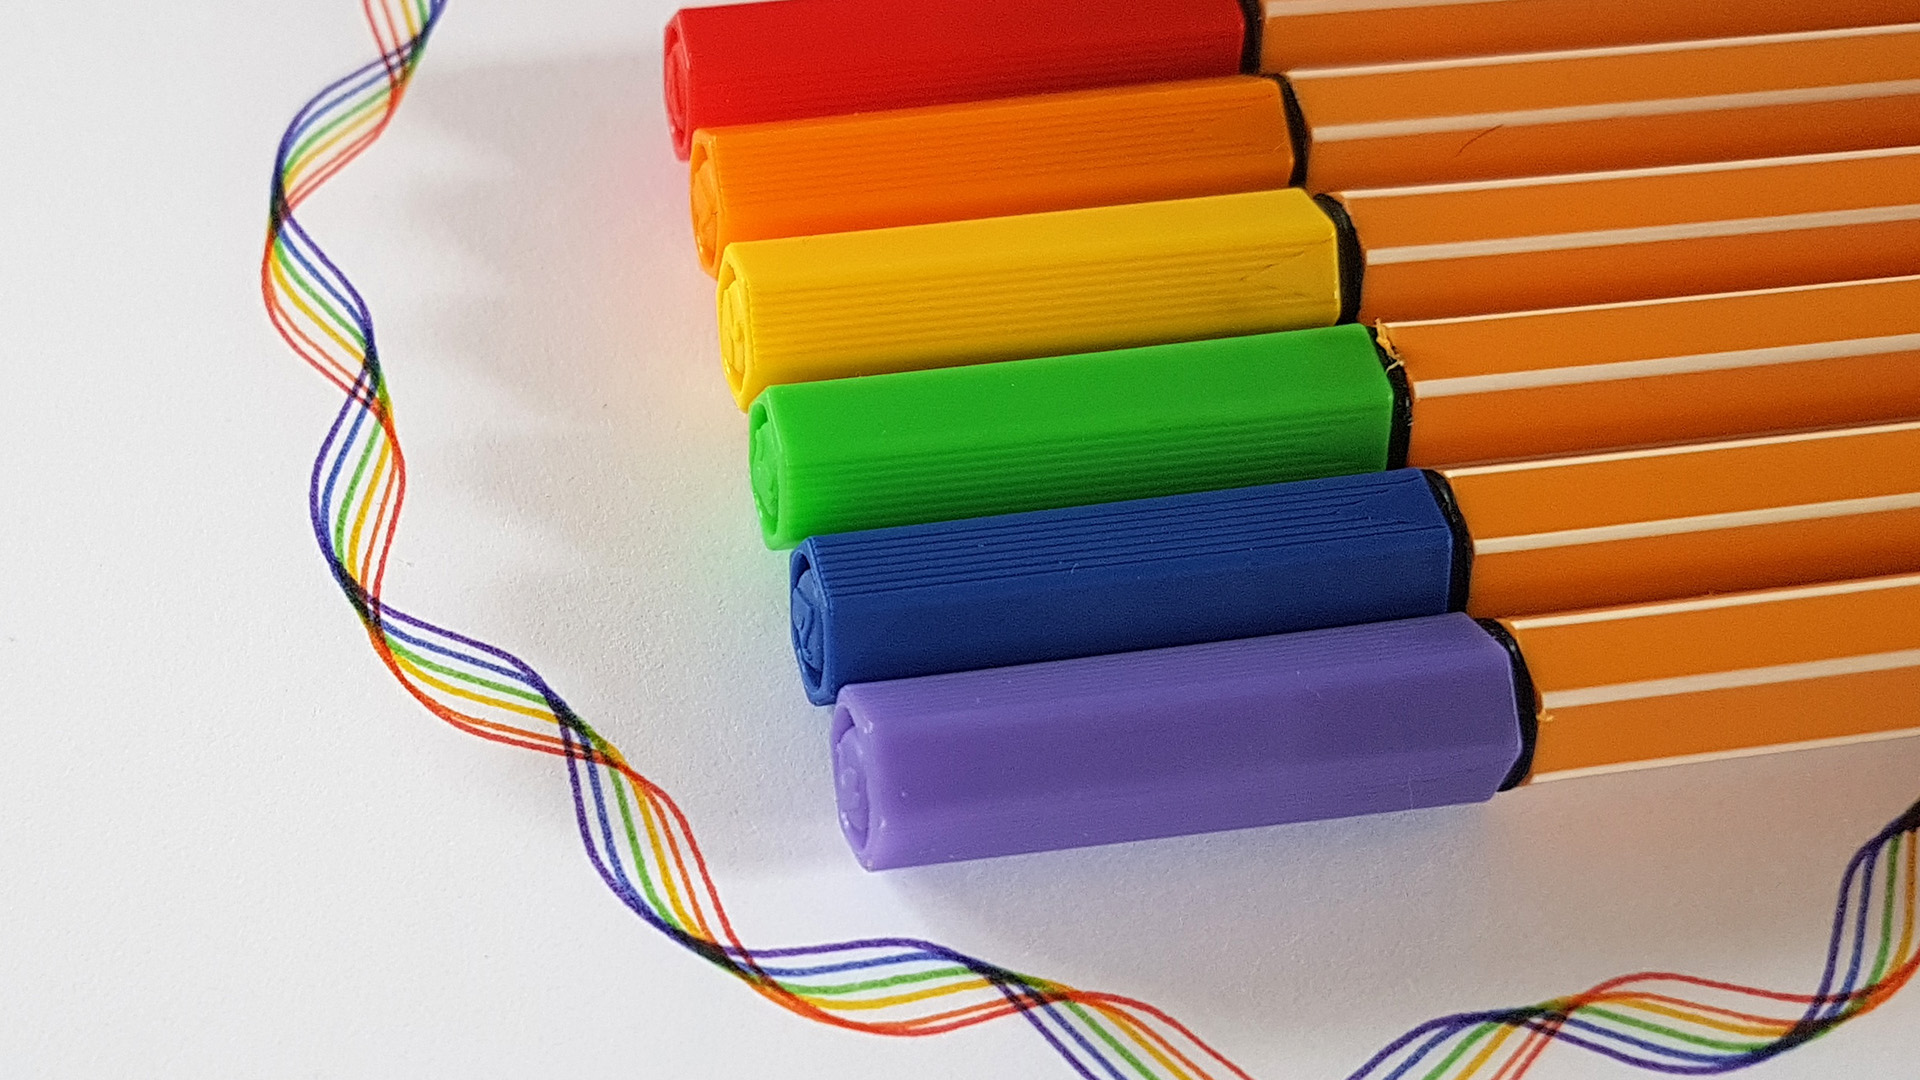
Please forgive the shift on the orange line, completely my fault.
Cool though, yes?
Anyhoo, hopefully these have interested you enough to sit through this bunch of waffle …
Hope you enjoyed that tutorial and will give it a go yourself. If you do, and would like to share your creations with me you can find all of my social media links at the top of this page.
Oh, before I go, I’ve got some new toys to play with …
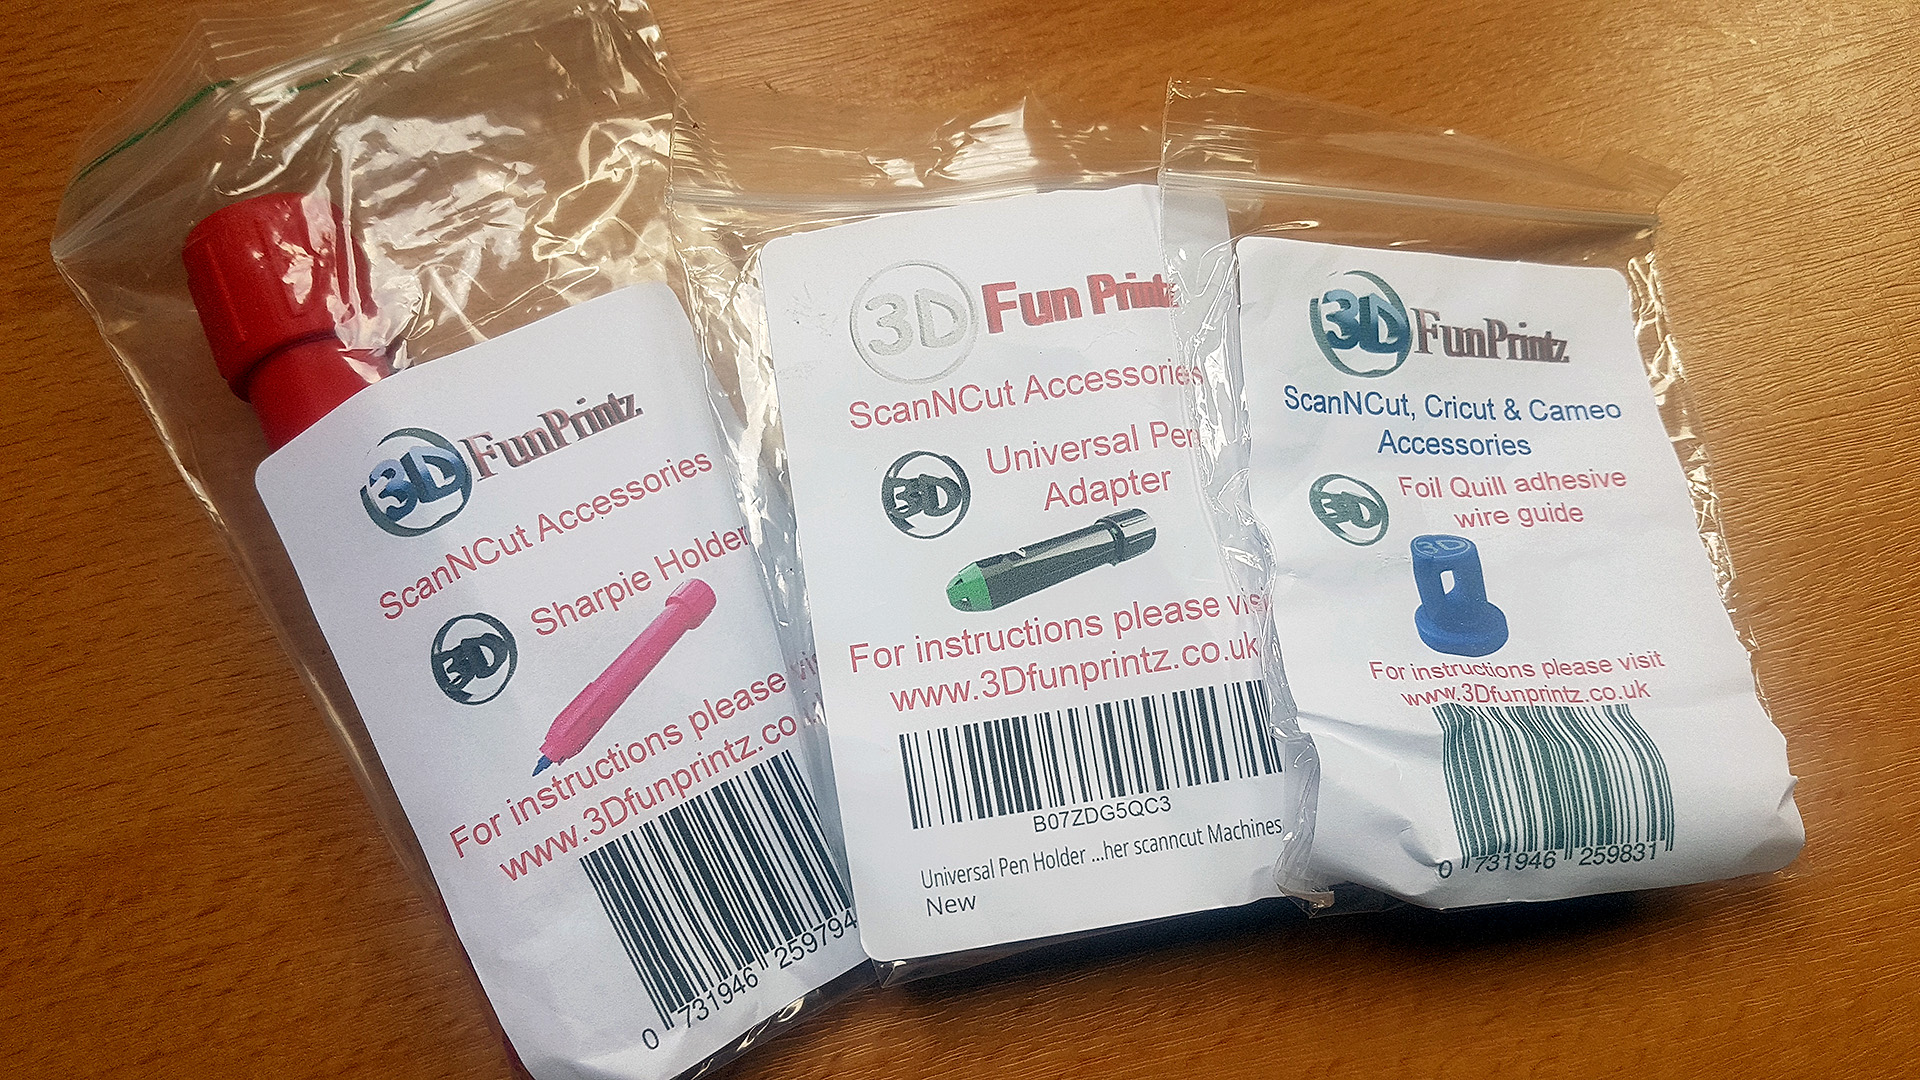
Have you tried these? I’d love to hear your experiences.
One more thing before I go, I’m hoping to organise some live SNC webinars/YouTube videos about moving on from the basics so I am wondering what kinds of things you would like to hear about …
If you have any questions or comments, please feel free to leave them in the comments section below.
I look forward to hearing your thoughts.
Thanks for stopping by and I look forward to sharing more with you soon!
Bye for now.
J :)

Thank you John, for a super demonstration. I’ve tried this using the online work space (I’m more familiar with using this) and have had some brilliant results. My CM300 is not wifi enabled so I did have to make some adjustments, to the way I saved the design to USB, to achieve the same results. I was able to do the second design, the one with many colours, by taking just the one shape to my CM300 and having drawn that shape, selecting it and adjusting it by 2% changing my pen and drawing again. I did this several times and achieved a similar result to the one you illustrated. Thanks once again for coming up with such good ideas and giving me confidence to experiment.
LikeLiked by 1 person
No problem. Glad you enjoyed it.
By the way, you could achieve the multi coloured one by saving out each colour as a separate file. Then, when drawing out, don’t unload the mat, just load the first colour, draw, don’t unload the mat, clear the design and load the next. Repeat. Should work that way.
LikeLiked by 1 person
Thanks
LikeLiked by 1 person
OMG absolutely fantastic, it so just reminded me of my childhood using Spirograph but more flare
LikeLiked by 2 people
These remind me of the old Spirograph patterns I used to do as a kid (oops – showing my age again!!!), but without the hassle of pinning down rings and drawing with wheels! This is way more accurate and neat – probably because I didn’t have the patience back then to take my time, and the wheel teeth would often slip out of position and I’d mess it up.
Thanks for this tutorial John – I’d never have thought of using my SnC to do this!
LikeLiked by 2 people
Wow, great tutorial John, not long ago it was my birthday and I received both of the universal penholders. I have to give them a try yet but this is something to keep in mind for trying out. Thank you so much for sharing, stay safe and have a wonderful weekend.
LikeLiked by 2 people
Thank you so much. I’ve learned such a lot from your course. And now I’m eager to try these new ideas out.
LikeLiked by 2 people
WOW. Love this. Thank you John x x
LikeLiked by 2 people
Can’t wait to try this out. I have your course which is brill. I would love to learn some more stuff in canvas
Thanks John
LikeLiked by 2 people
Good to know ❤😁
LikeLiked by 1 person
You make things look so easy John. I cant wait to try this out. I have a cm300 but have not drawn with it yet but i will be this afternoon now. Thank you.
LikeLiked by 1 person
Great! Have fun 😁❤
LikeLike
I think I’ll have to have a go at this. xx
LikeLiked by 1 person