
Well hello there! In the last few weeks, I have been exploring the world of MDF, more specifically, designing for laser cutting and creating DIY construction kits.
In this post, I will share with you that journey and the result!
Before I begin, let me tell you that I have included so many images that I have had to split this post over 3 pages so when you get to the end of this page, just use the handy page number links to skip onto the next page.
So, to the beginning of this design adventure!
Well, I decided some time ago that I wanted to create a platform for my Scan N Cut machine that would offer me several benefits.
Those were:
- A stable and level platform to use my machine on without having to use it on a table.
- A stable and level platform for the mat to run on at the front and back.
- A place to store accessories and mats.
So, I started the design process in Microsoft 3D Builder, a free 3D design tool bundled with Windows 10.
This software isn’t very technical but my goal was to work in three dimensions so that I could understand where parts connected and what dimensions would work.
A wee bit of tinkering later and I had my first draft.
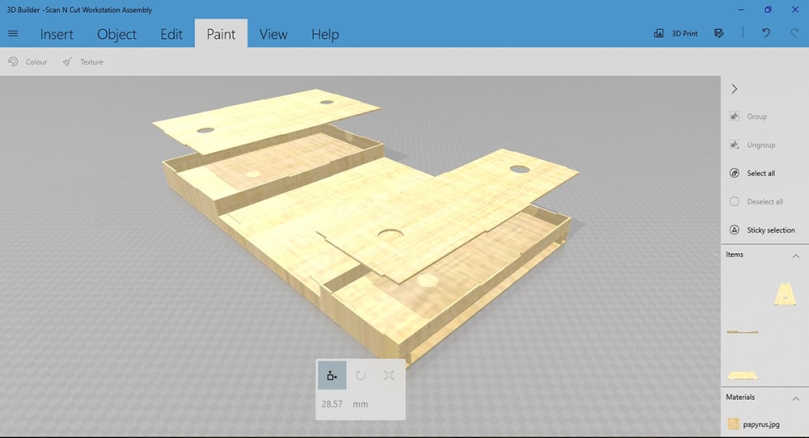
Great to see it in 3D as I can zoom and pan around to check it all out.
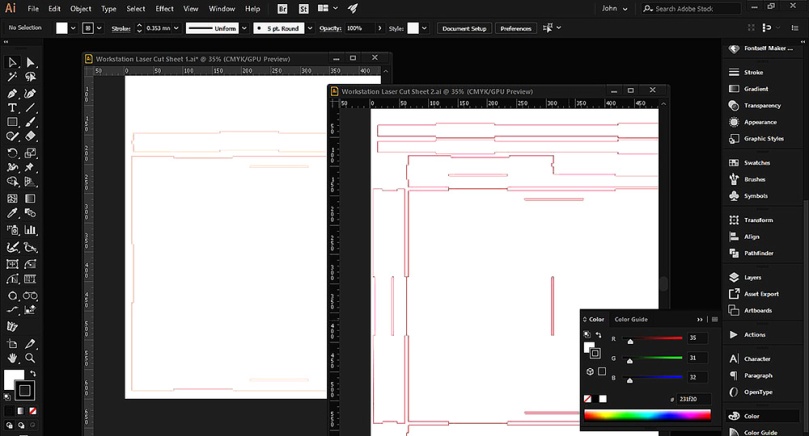
Now to start mapping out the pieces in Adobe Illustrator. The reason that I chose to work in Illustrator was that it is the perfect and most professional tool for creating vector drawings which, when it came to last cutting, would be essential.
One thing crossed my mind at this point and this was that I didn’t know what size the MDF sheets would be that would be used to cut the design so I went on the hunt for a laser cutting company that did custom cutting services and found www.lasersmith.co.uk
Not only were they able to help with information on the sheet size but they were able to offer help on design parameters for submitting designs for cutting.
Armed with this information I returned to Illustrator and got plotting. *copious mouse clicking ensues.
Several attempts, and a little bit of swearing later, I again had a first draft of the cutting file.
Because of the size of the project that I was planning I had to spread this across two sheets of MDF.
Lines marked up as appropriate and files exported it was time to send this off to Laser Smith and get it cut!
What seemed like an incredibly speedy turnaround, especially considering the snow, there was a knock at my door and there stood a delivery guy with a large package in hand!
Stop sniggering you, naughty people.
No, it was this!

How piggin’ exciting!
Now, where the heck did I put my special parcel opening scissors? FYI, they are just the bog standard pair that I often think that I have stored in the kitchen drawers but often find somewhere else having used them to open some package or other.
After only a minor hunt as, oddly, I found them in the kitchen drawers (?!) and I was hacking away at the packaging with gay abandon.
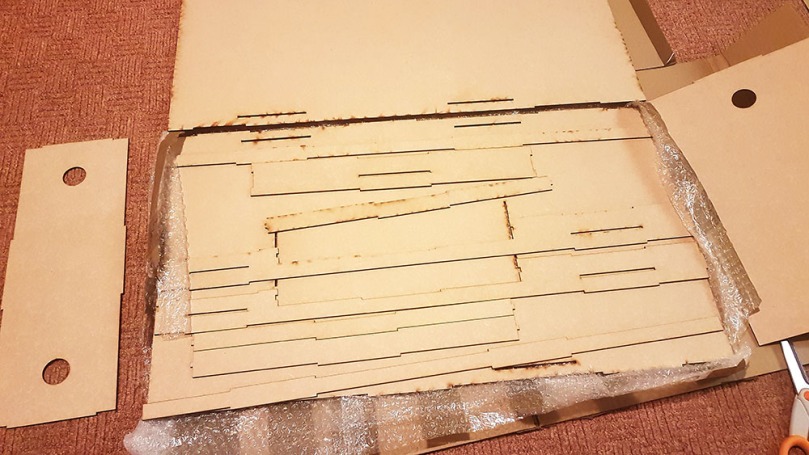
The aroma of laser-cut MDF filled the air and I inhaled and exhaled at the joyful scent and the thought of putting together some flat pack. *happy sigh.
Double checking that all of the ‘bits’ were there, I grabbed my tacky glue and set to work.
Step 1. Glue in the support struts and then the middle shelf.

Step 2. Stick the sides and centre panels on. A little trickier as there were various tabs and slots to line up but it went together well.
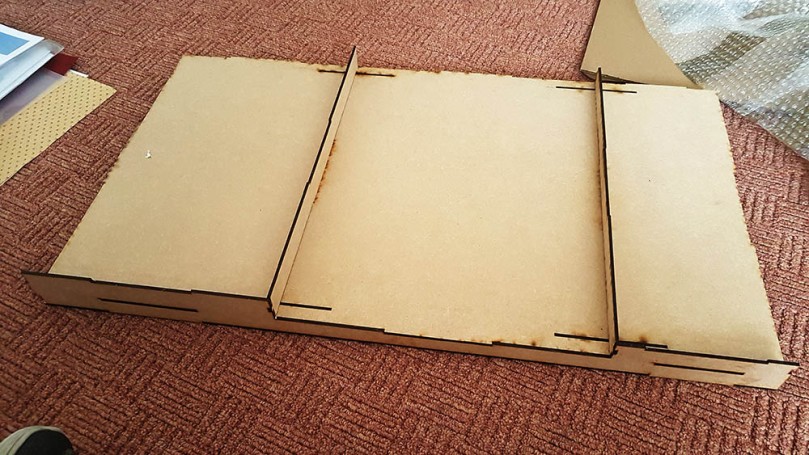
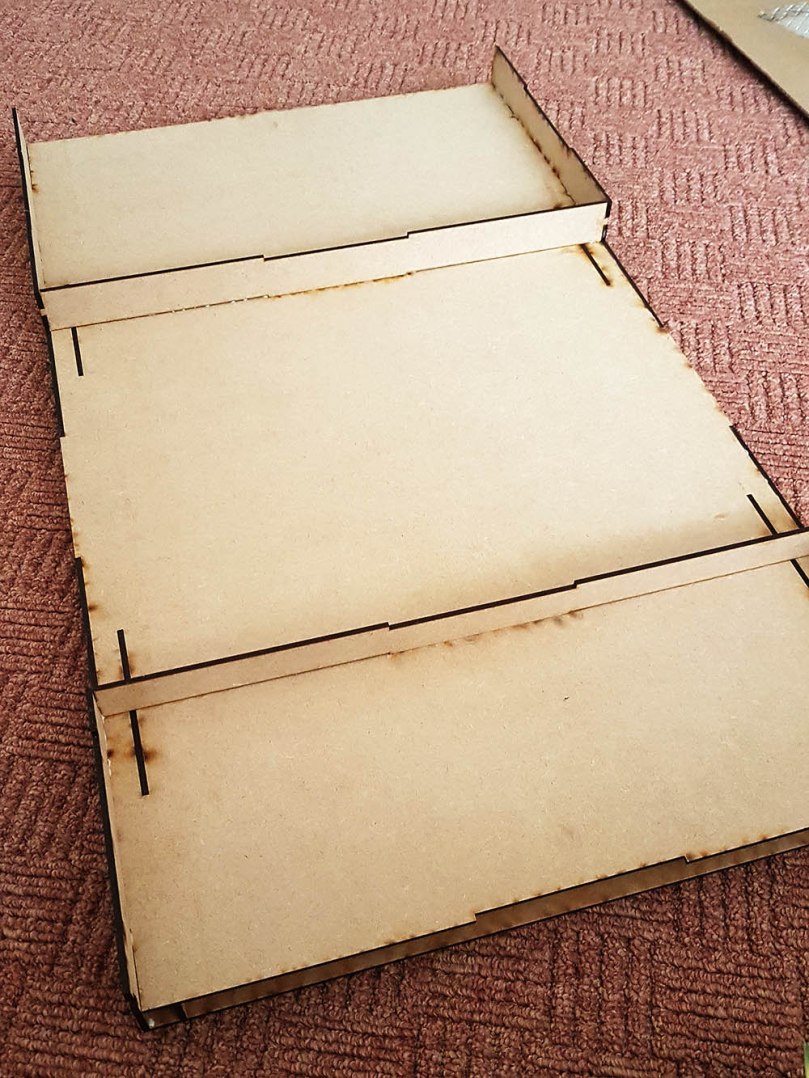
Step 3. Stick on the front and back panels.
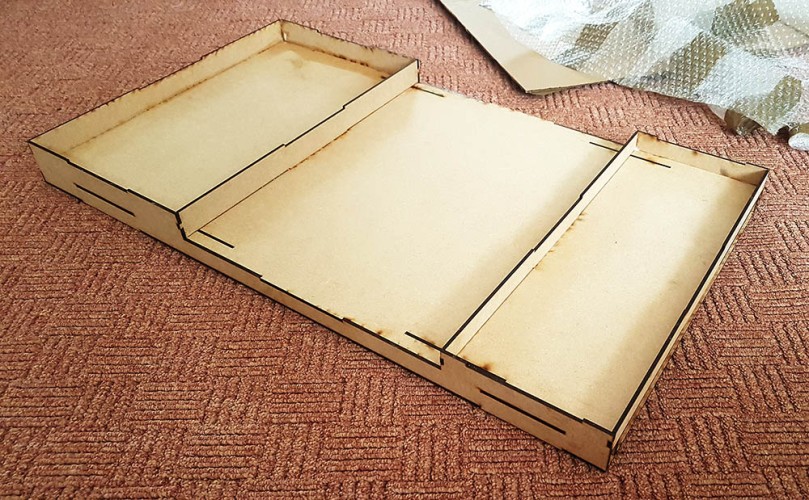
Almost done.
Step 4. Insert the tray tops, no glue this time as these will be removable so that I can access the storage trays, hence the finger holes – designed especially for podgey digits like mine.
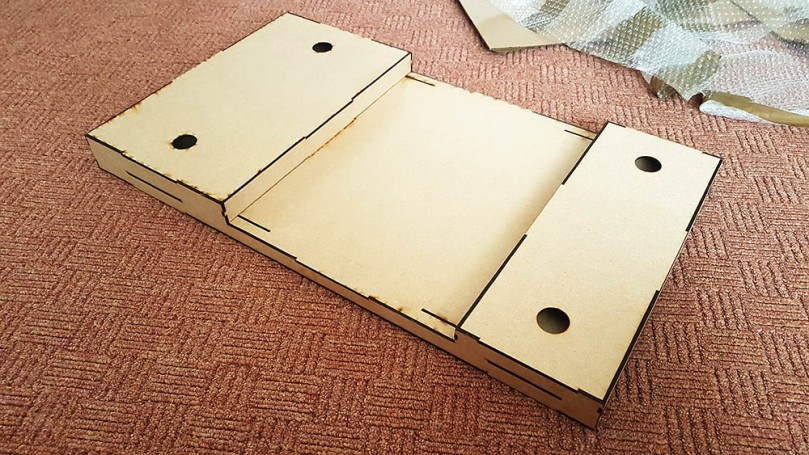
Construction complete!
Time to see if it lived up to the three pre-requisites that I had designed it for…
PLEASE VISIT THE NEXT PAGE OF THIS POST BY CLICKING ON THE NUMBERED LINKS BELOW

May I just say “bloody brilliant” no seriously it’s an excellent idea. I would use all my scrap pieces colour it a beautiful red. Don’t forget to let us know when you will be selling them 🤗
LikeLiked by 1 person
John, you and this design is better than excellent..I do hope that we are going to see this for sale SOON..I’m joining the que..xx
LikeLiked by 1 person
You are so talented John and an inspiration to us all. I would decorate mine with some craft inspired images and scrolls from the Scan n Cut.
I would love to buy one of these from you when you have had chance to use it and see if it needs any modifications.
Look forward to seeing your updates on how you decorate it and a video of you using it👍😊
LikeLiked by 1 person
Mr creative! You should be very proud of yourself as this is an awsome idea! Well done you! X
LikeLiked by 1 person
Can’t wait to see what it looks like !
LikeLike
Brilliant idea John…there is definitely a need for this me thinks! Well done and can’t wait to see it completely finished x
LikeLiked by 1 person
You are an inspiration John a very clever guy this is genious you sure will get plenty of orders for this x
LikeLiked by 1 person
Whoo Hoo! Clever clogs ;-P I love it! Well done you xx
LikeLiked by 1 person
Wow, this is amazing John! When can we buy them – bet I’m not the only one who’d be in the queue😀 And the storage space is brilliant! Lasersmith are great – I’ve bought a lot of their MDF products.
LikeLike
i think you shoukd decorate with some of the designs from the machine, like the paint brush and pot, in different colours and a rainbow of course, or all girly with flowers from the machine,
LikeLiked by 1 person
bloody hell John your brain has been working overtime, so when do we see it for sale on Create and Craft? May be Stephanie will take it on as a mass production unit.
LikeLiked by 1 person
Just WOW, John :)
LikeLiked by 1 person
Fantastic idea, I neeeed one of these
LikeLiked by 1 person
Your amazing. X
LikeLiked by 1 person
I neeeeeed one of these, especially if I can store my 12 x 24 mats inside. Well thought out, you can tell it was designed by a crafter, because it covers all of the bases. I think you should make your logo in scan n cut & cut it in vinyl.
LikeLiked by 1 person