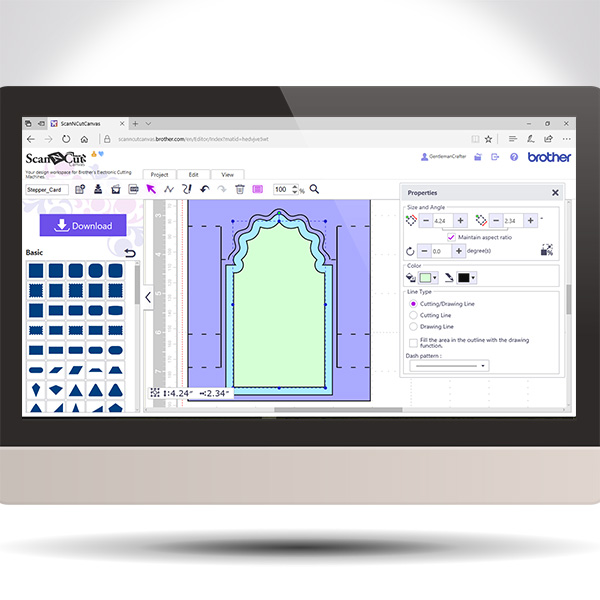
Back again with another in the Scan It Saturday series. This time I will be sharing with you how to create a stepper card in real time so you can play along if you would like.
Thanks for watching and of course if you have any questions please do pop them into the comments section below.
See you again next week.
J :)

Hi John, I’ve just found this tutorial…..Another excellent tutoial, thank you John, I notice you use the arrow icon quite a bit to activate at various times….I have tried this but my arrow does not seem to do the same thing…..could you please do a small tutorial on it’s use and how to…thanking you in advance.
LikeLiked by 1 person
Thanks for the tutorial. I found it very challenging, but eventually got at least the basic card worked out. But I can’t seem to fold it properly in a way that make that central part stand out. Is it possible to show an example of it finished?
LikeLiked by 1 person
There are many examples of this type of card on the internet that you could refer to. Sadly I don’t usually have the time to do the tutorial and a finished project as I have to fit these in around paid work.
LikeLike
Hi John,
not a question about this post per se, but a Scan’n’Cut one.
Which foils can I use with my machine? I’ve got the kit and it’s brilliant (despite foiling my mat first time, very pretty, but a waste), but I can’t find replacement Brother foils, and I don’t know which are compatible.
Thanks,
Michelle
LikeLiked by 1 person
Haven’t had a go with this yet however a guess would be that You’ll need those that work with glue. Not the ones that are hot foil.
LikeLiked by 1 person
Thanks
LikeLiked by 1 person
Another wonderfully instructional video, John. I have already been able to design a few things I never thought I would be able to do, just from what you have so kindly taught us so far! Keep up the good work!
LikeLiked by 1 person
Really enjoyed this video John didn’t understand it all but hopefully if I get time to play and I can check it out again.
LikeLiked by 1 person
Thank you John I Learnt a lit from this tutorial. I enjoyed second guessing your cursor as I learnt the next step ( if that makes sense ) .
Big hugs
Ally’s
LikeLiked by 1 person
Another great tutorial John thank you, but life would be much easier if Brother would put an X & Y axis on canvas :)
LikeLiked by 1 person
Hi John, sorry I missed your blog/show, I have the CM300, can you use canvas on your laptop? Also I have the embossing kit (haven’t used it yet), I keep all my scanncut things in a box, so I have thrown away the box for the embossing kit! Do I need a code to use it?
Thanks for all your great demo’s, excellent work on raising money for MIND, well done. Hope to see you more on C&C.xx
LikeLike
Hey Louise,
You can use Canvas on your laptop. It works in the same way. You can even use it on some tablets and smart phones too.
Regarding the Embossing Kit, you will be able to use it with the machine, however, the activation code that was in the box would have unlocked some more designs in canvas so it looks like you won’t be able to access those.
Hope this helps with your query.
J
LikeLike
Brill tutorial John. Often wondered how to do this – now I know!! Thank you so much.
Hope you enjoyed your break & feel relaxed.
Happy crafting.
LikeLiked by 1 person
You are so talented, very clever man :) xx
LikeLiked by 1 person
Another practical one, I do enjoy these. x
LikeLiked by 1 person