Right! I’ve had a 3D printing pen for as long as I’ve had a 3D printer but sadly haven’t really had much time to play so I cleared a small window in my diary and sat myself down with what I hope would be as exciting as the 3D printer.
What did I discover? Read on to find out …
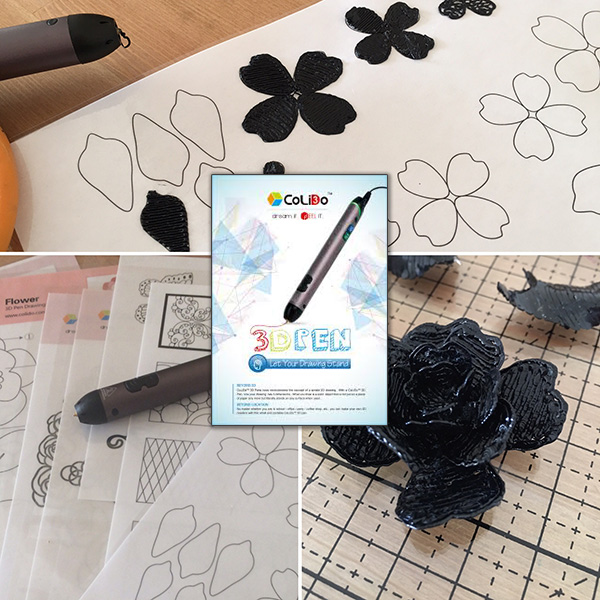
First, let me tell you that I was using the CoLiDo 3D pen (the same team that I got the 3D printer from) which is available from Create and Craft TV – here is a little video they made about the pen …
Ok, so, in my hands – what will happen?
Well, the first thing I did was watch a billion YouTube videos whilst working on other projects – my eyes divided in two in order to maximize the time. No, seriously. Lol. No, I watched a few before bed.
Research done and I downloaded some templates to get me started. These I laminated as I wanted to be able to use them over and over again and get good – that’s a phrase right?
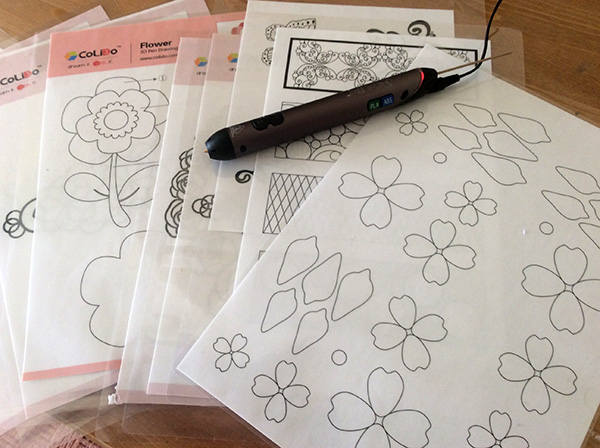
Ok, following the instructions for a change I had the pen set up and running in no time and began to doodle over the printed designs.
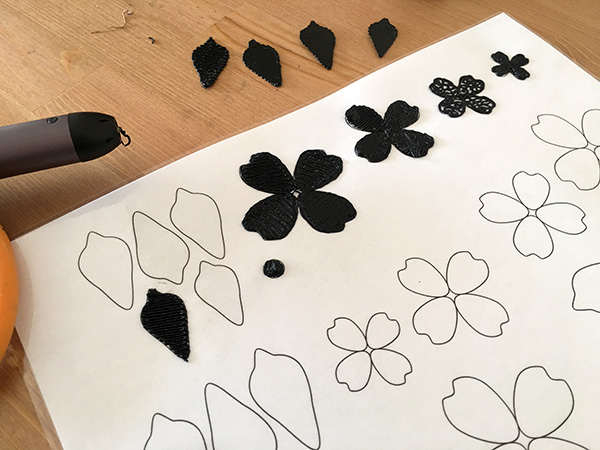
With a little practice it was a lot easier to use than I had first thought it would be. It’s like drawing or doodling, but a little slower and with thicker ink – think piped icing – except that you can’t eat it.
Right, flat things. Not very 3D. I had a thunk and eventually realized that the process that makes the PLA filament extrude is that it is heated to about 200 degrees.
What if I could apply less heat – would it become a little flexible …
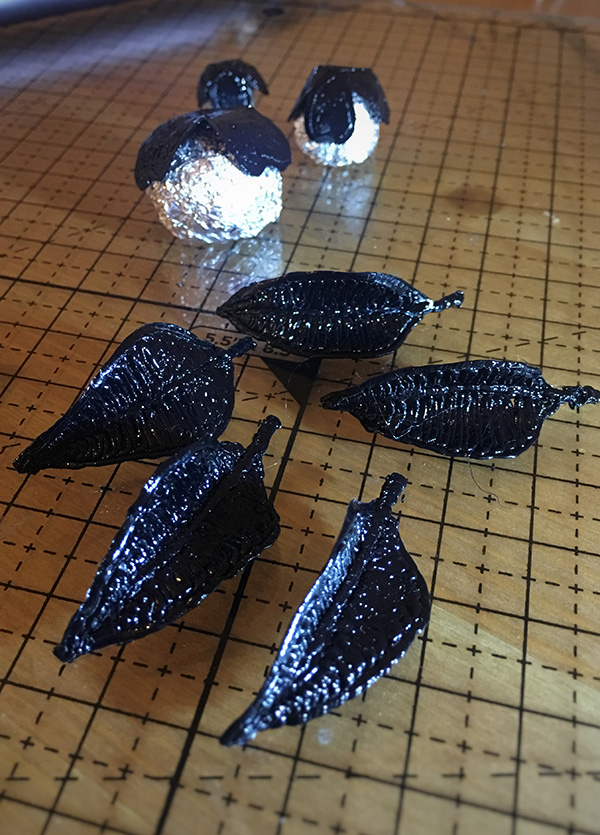
… YES!
Don’t you love the home-made tin foil forms over which I drooped my petals?! LOL.
Anyway, point was that I now had a way to make the shapes and then shape the shapes. Huzzah!
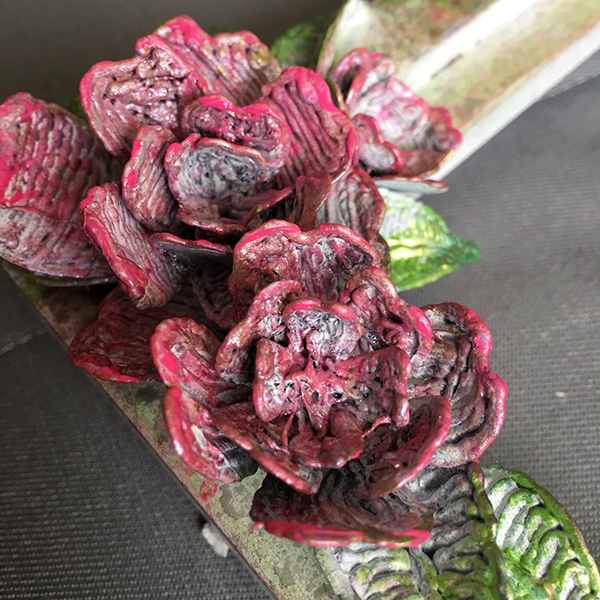
So, a few petal sets and leaves later and I was popping together a fantastic rose-like design.
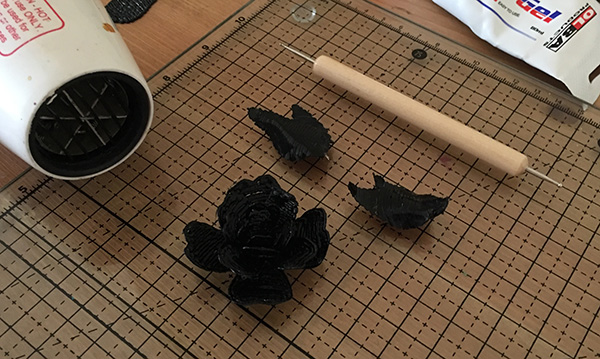
Well, maybe several as I got a little carried away in my excitement!
")
")
")
")
")
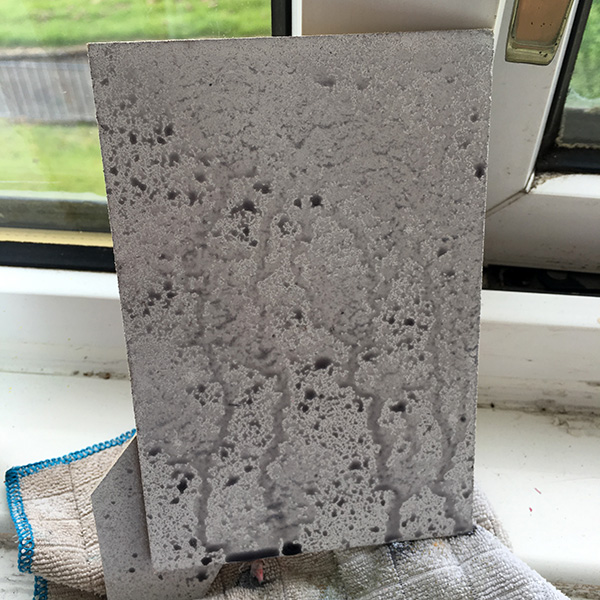
Whilst making the petals I began thinking what I could use them with and I decided that it would be nice if these could top a napkin ring, so I set about creating a lattice ring.
Flat first and then heat-draped over a tin foil covered loo roll – empty, of course.
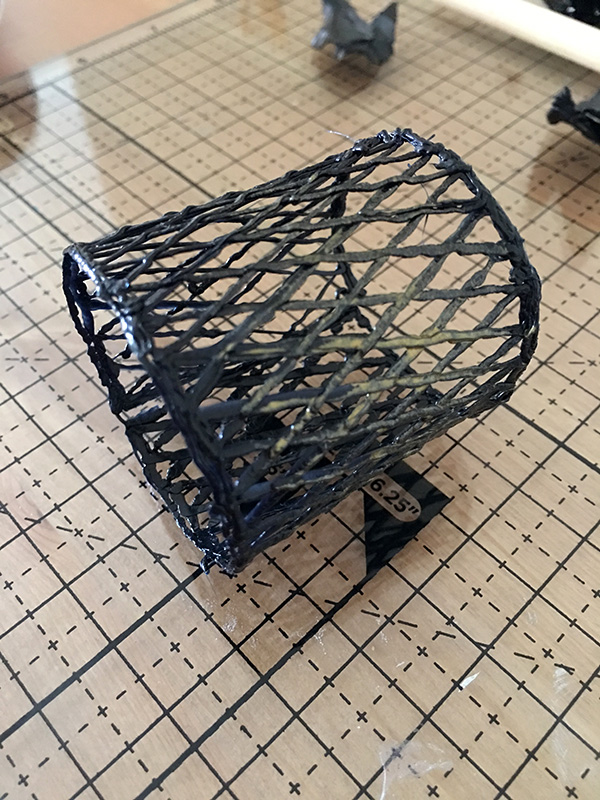
Really loved how it had the look of a hammered metal!
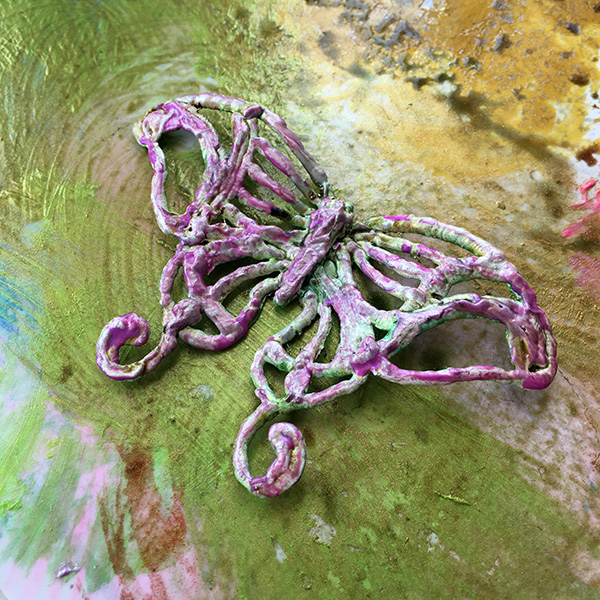
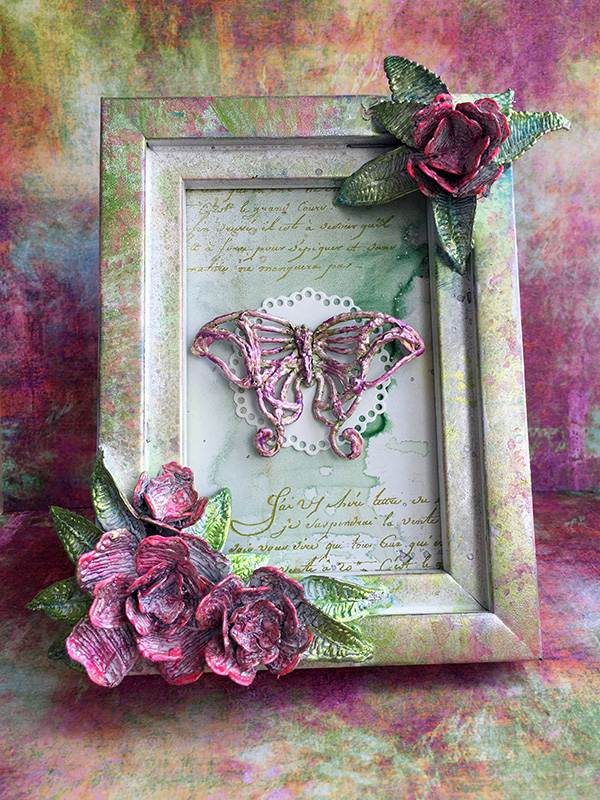
Anyway, me being me I changed my mind and decided to use a picture frame but then thought that I wanted to create something to put in the frame as well as decorate it so I grabbed another template and began working the PLA filament over the design and, as I have now discovered this awesome technique, heat-draped it over a slightly bent piece of tinfoil.
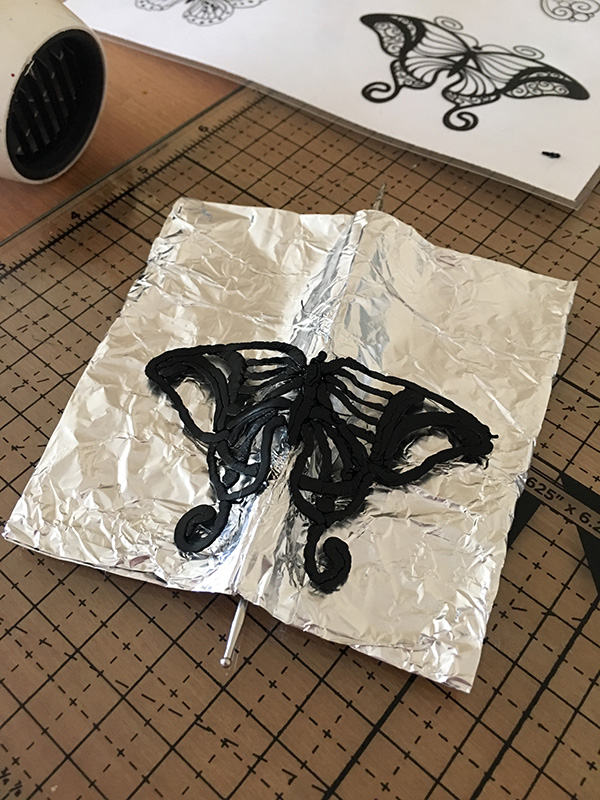
Butterflies are go. I repeat, BUTTERFLIES ARE GO!
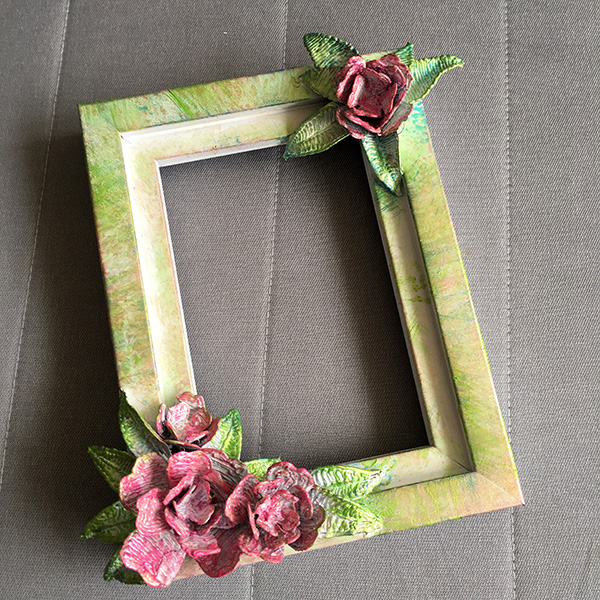
Anyway, time was up and I had to move on to making the planned project with these bits and bobs. First I glued the flowers to the frame.
")
")
")
")
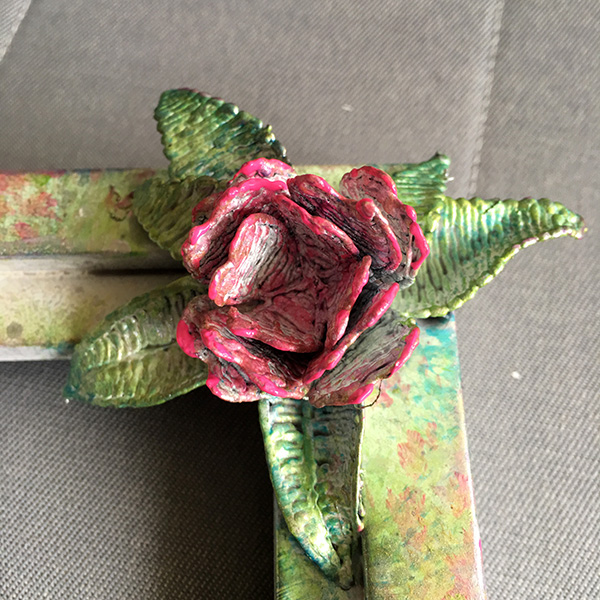
Although I liked the way the black PLA filament worked with the natural wood I still gave it a coat of white acrylic.
Then I added a dusting of colour to the tips of the organic shapes and the edges of the frame.
")
")
")
")
hmmm, should I add more?
*sucks air through teeth*
What if it goes wrong …
Oh well, in for a penny, in for a pound. A little more maybe.
")
")
")
Ok, I think that that’s enough.
Time to sort that butterfly and the background out.
*strokes chin thoughtfully*
Basic mess making ensued…
Oh, and I titivated the frame a bit more.
To finish the background I used some green Archival Ink to stamp some script text in opposing corners and dusted some around the edges.
Right, time to put this beauty together I reckon.
A quick die cut doily and some Pinflair Glue Gel was all that it took to finish this off.
Et Voila!
Of course the wee gallery for your delectation too…
")
")
")
")
")
")
")
")
")
")
What do you think? Did you think you could achieve this with a 3D pen? Are there any ideas already popping into your heads?
Well, I’ll leave you to cogitate for now and of course many thanks for popping in.
Fancy grabbing a 3D pen for your own craft room? The CoLiDo 3D Pen is, at the time of writing this post, available through Create and Craft TV.
Right, time for me to pop off, ciao for now.
Hopefully see you again soon!
J :)

To put it simply John “this is wonderful”! Might have to buy a 3D pen as well. Keep it up! Best wishes, Lorraine x
LikeLiked by 1 person
Thanks, John. Having seen what you have made, I now see that the pen could be a “dip your toe in” choice.
LikeLiked by 1 person
That’s really lovely John. How much would this picture frame have cost to make? You see things saying it comes with 100 filaments but it doesn’t show how much 100 filaments would make.
LikeLiked by 1 person
That is because that would depend on what you make. As a rough guide 500g of filament would make approx 280+ shapes approx 1inch wide. Which makes it pence per embellishment.
LikeLike
Love what you have done John. It’s gorgeous. Thank you for sharing this.
LikeLiked by 1 person
Hi John, wow wow wow, what a fabulous frame, thank you si much for sharing it. You are so talented.
LikeLiked by 1 person
That looks impressive I will have to show it to the other half and see if I can inspire him to try creating something! Thanks x
LikeLiked by 1 person
Brilliant, I will get it out the box and have a go. You’ve inspired me again. Now if only you could inspire me to go and finish cleaning the bird baths out. I noticed today, the blackbirds didn’t have a bath, so it must be a bit yukky. Craft room LATER……….Well…… x
LikeLiked by 1 person
Oooooh! See I knew you would exploit the 3D pen that I haven’t got and shouldn’t spend money on and when you had I would have to divert some of my baked bean money from my 3D printer fund….cheers ….again John!
So much creativity, so little time, so little money…
and at this rate, very little baked beans : )
LikeLike
Sorry ;/
LikeLike