Well my friends since appearing on Create and Craft TV with the CoLiDo Compact 3D printer I have been working on various experiments and was saving today’s post for a couple of weeks time but liked it so much thought that I couldn’t hold it back.
Want to see … ?
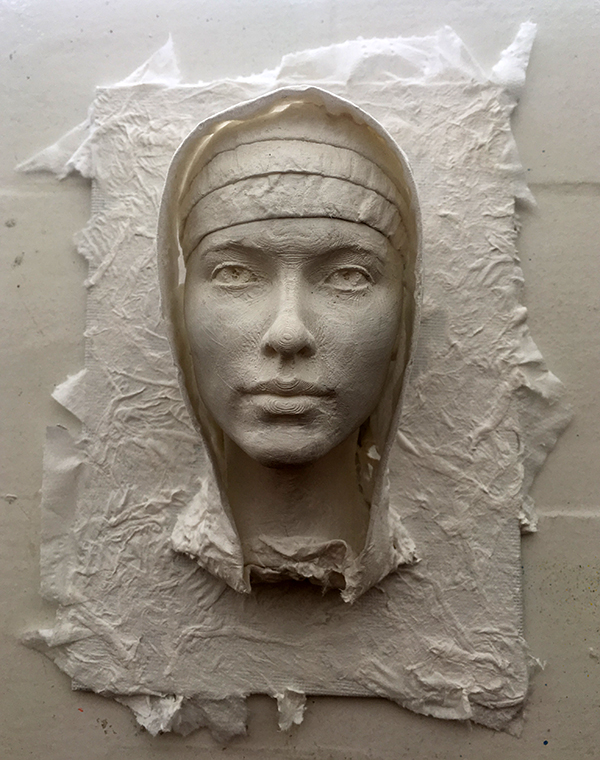
So this project started with a 3D print of a head.
I tried several size variations and also tried it as a completely 3D design however I didn’t really like any of them so edited this in Microsoft 3D Builder – a free 3D design suite built into all Windows computers with Windows 10.
This was sent to print on my CoLiDo Compact 3D Printer. It took a while as this was a big head – no jokes please. It kept popping in every now and again to see how things were going and eventually the print finished so I whipped it out and laid it on a canvas board.
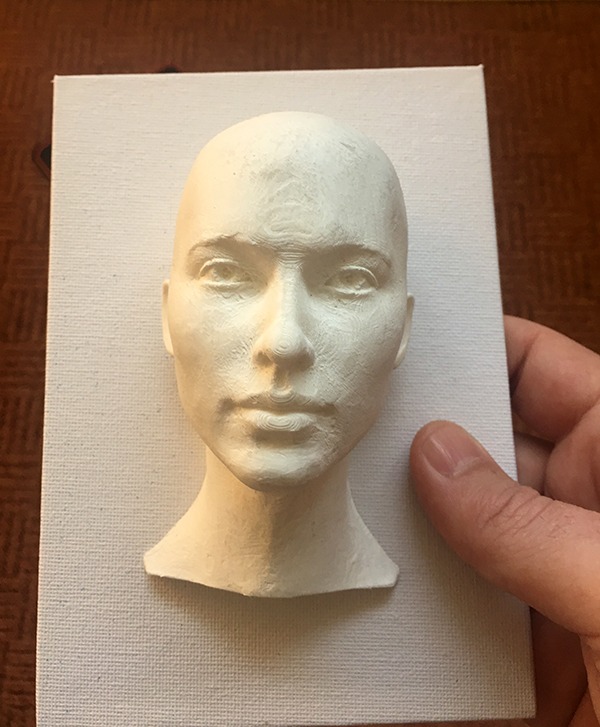
Perfect!
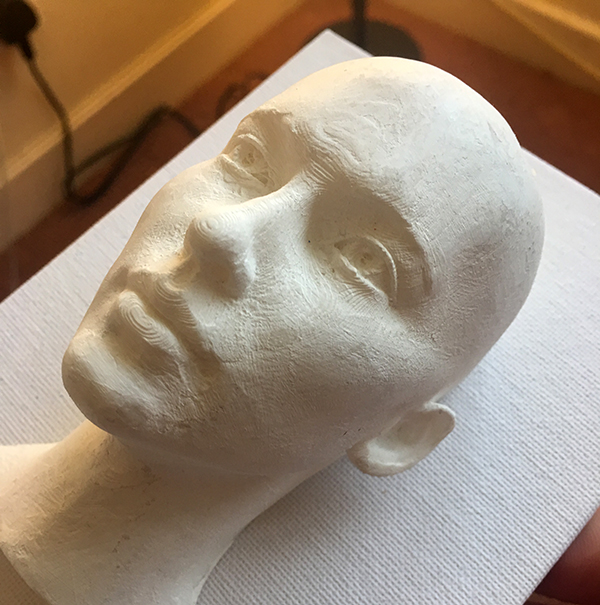
To soften the ridges that are naturally formed during the print, as it is made of layers of filament, I gently sanded the ridges down a little with a nail file and then applied a little carve-able paste to give it a more stone-like texture.
Cool! Right, time to go to the loo.
No, not for a number one or a number two – I need loo roll for the next stage as I already had an idea of what I was going to do with this.
To give you a head start on this thought process imagine girl with a pearl earring. That’s the style that was going through my head at this time.
I applied three folded strips and glued them down with Mod Podge.
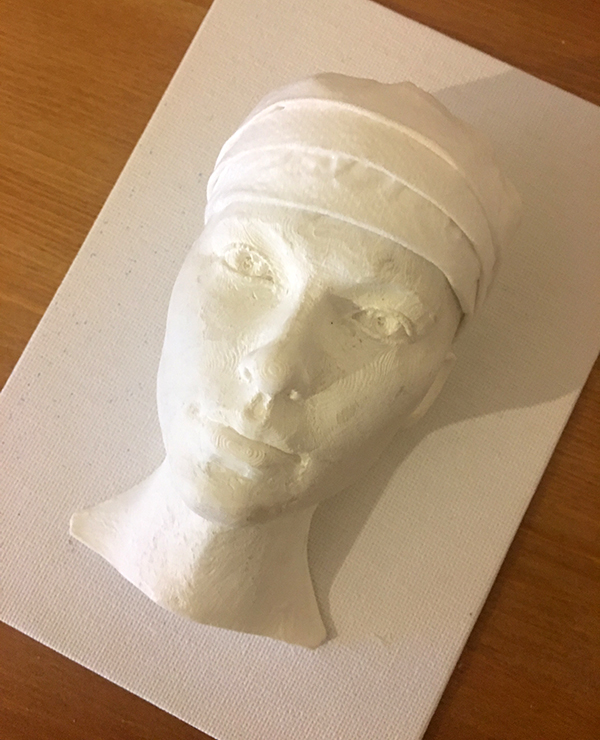
More loo roll was then used to make the hood to this head gear.
Finally, for this stage, I applied more loo roll to the background and smoothed it down with more Mod Podge to give a textured background.
Now I will admit, I was tempted to leave it as it is right now but I think that would have been a cop out and besides I have some new metallic paints that I haven’t used yet so I used some car spray paint primer to coat the whole thing.
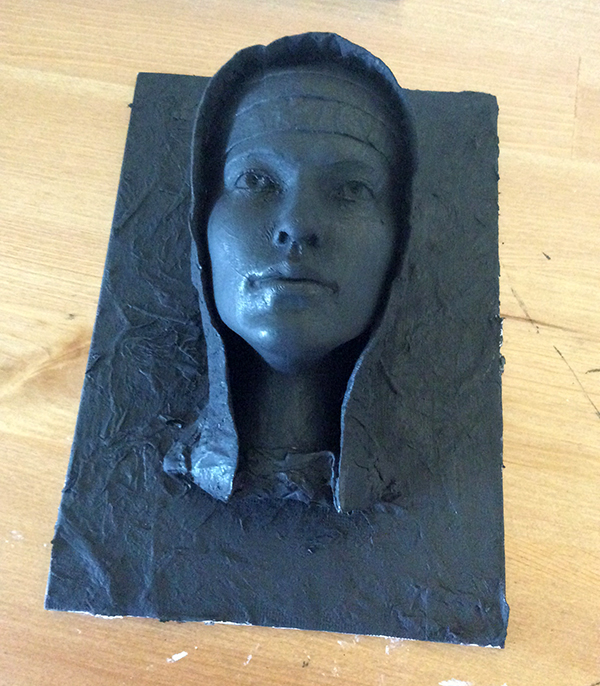
Even this looked good as it was.
Onwards though.
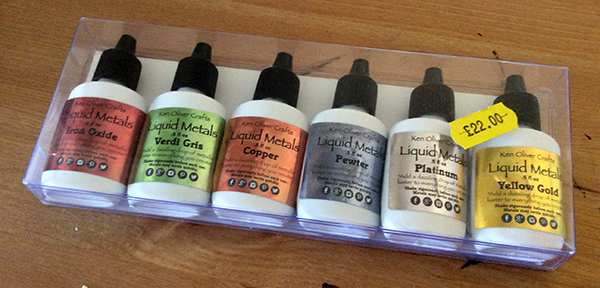
The new metallic paints? They were this gorgeous set from Ken Oliver.
At first I mixed them with art painting medium, a colourless very fluid acylic style paint.
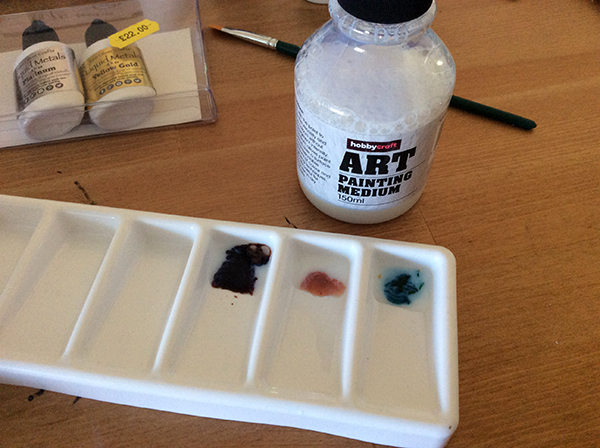
Which did give an OK result.
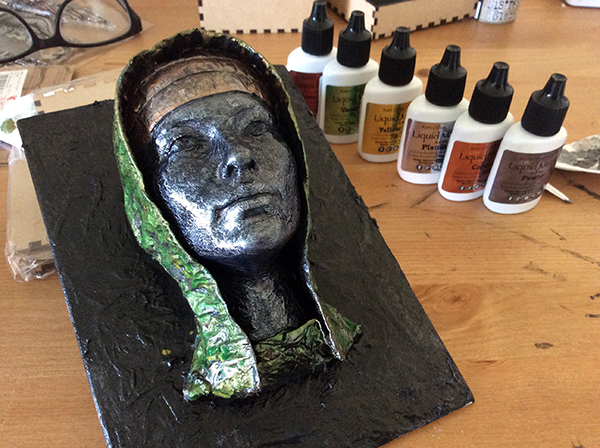
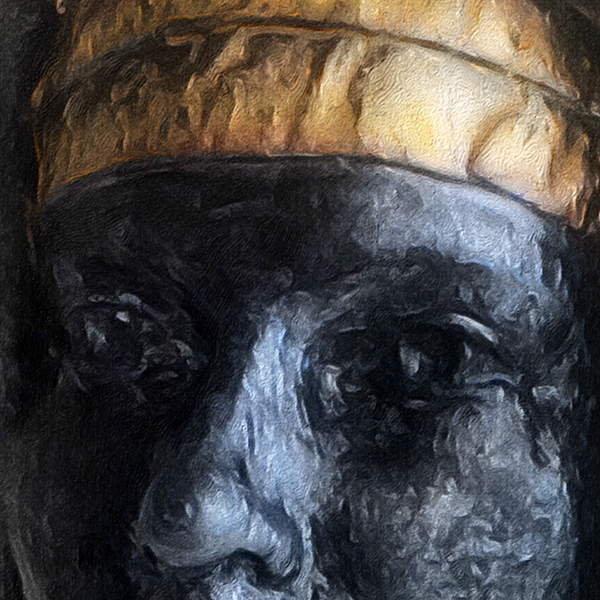
It was a little too much for me so I repainted the face with black acrylic and also applied subsequent layers and drizzles and spatters of the metallic paint until I was happy.
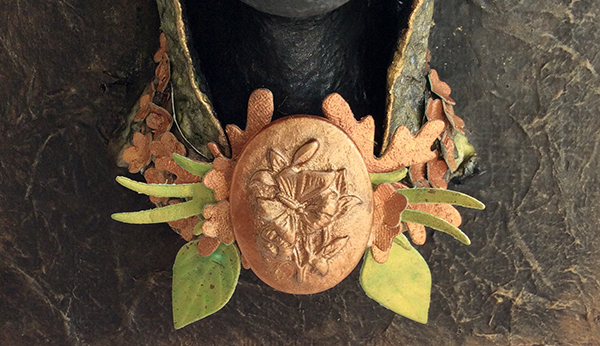
The neck seemed a little exposed so I had a rummage through the die box and also the embellishment box and came up with a few goodies.
To make sure that they coordinated with the rest of the design I coated some cardstock in the Ken Oliver metallics – which I freakin’ love by the way – and also coated a cameo that I found.
Flower and leaves were then cut from this cardstock and cut in place with Pinflair Glue Gel.
Sweet!
From here I simply dry brushed a tiny amount of copper gilding paste over the crumpled tissue background and she was complete!
Ok, time for the catwalk show!


What do you think? Would you have stopped when it was just the marble white colour or would you have gone on to do more?
Either way I think that you can see that 3D printing is something that doesn’t have to end at the completion of the print.
I have also recently discovered how to convert my SVG files into 3D printing files so I reckon you can guess what I will be printing next …
If you are interested in finding out more about these fabulous machines, why not head over to Create and Craft TV now.
Right, I’d best get on and get some more stuff printed.
Hope you have a great day.
J x

Hi John I have only recently managed to get my Colido working properly, blocked nozzle and non level platform to learn about, but finally managed to get going. Would love to replicate your fit for a canvas face, is there a link for the 3d head that you used.
LikeLiked by 1 person
I’ll have a rummage and see what I can find.
LikeLike
Oooo John that would be most appreciated.
LikeLiked by 1 person
amazing – how many rolls of the filament did this take?
LikeLiked by 1 person
Way less than one
LikeLike
Hi John, I loved the natural simplicity of the head after the stone finish was applied, the filament ridges on the lips and bridge of the nose add even more to the dimension. I think you should have a series of these heads from the natural and then with different finishes- metallic as you’ve done , matt, multi coloured, monotone ,highly textured- very inspiring!
LikeLiked by 1 person
Wow!! I love it….
LikeLiked by 1 person
OMG! John this is amazing! Can;t wait to see what you come up with next! xx
LikeLiked by 1 person
Stunning work, John. The world is now your oyster with all your .svg files. You really are clever … not just a pretty face!
LikeLiked by 1 person
BEAUTIFUL. XX
LikeLiked by 1 person
Or even ‘fantastic’!
LikeLiked by 1 person
Just one word ‘fantastc’.
LikeLiked by 1 person
Reblogged this on Catwithoneear's Blog and commented:
Check out this fabulous 3D printed head. John is so creative.
LikeLiked by 1 person
It’s fabulous. I like it both ways and I can’t wait to see what you come up with next.
X
LikeLiked by 1 person
Well done John. This really is genius.
LikeLiked by 1 person
Fabulous John, tfs.
LikeLiked by 1 person
each photo I like the way it was coming, could not imagine the end ut well impressed,. new busness in interior design comeing up ?
LikeLiked by 1 person
Yes, I do like this one. I think it’s probably my favourite to date, of things you have made. Scotland seems to be agreeing with you. It needed taking to this stage to finish it off. Anne xx
LikeLiked by 1 person
Really enjoyed this John seeing it transform into your spectacular finished work of art X
LikeLiked by 1 person