Been having another play with the CoLiDo 3d Printer and have come up with a couple of variations from a bust design that I found online.
Fancy a look?
Don’t worry, it’s the classical statue kind of bust – not the other kind.
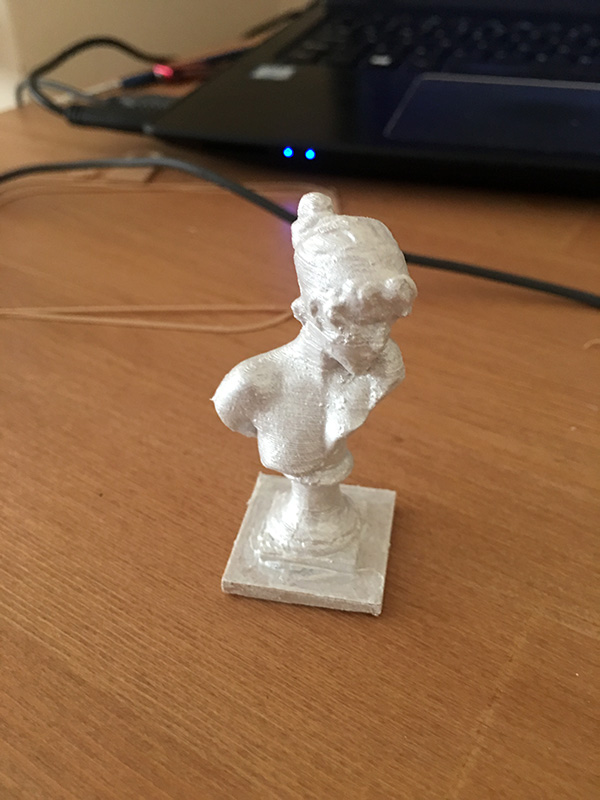
So, this post begins with me printing a head.
Could have done with this a while back – a new head, lol!
Anyway, this one needed support whilst it was printing so that her eyelids didn’t droop – or some such.
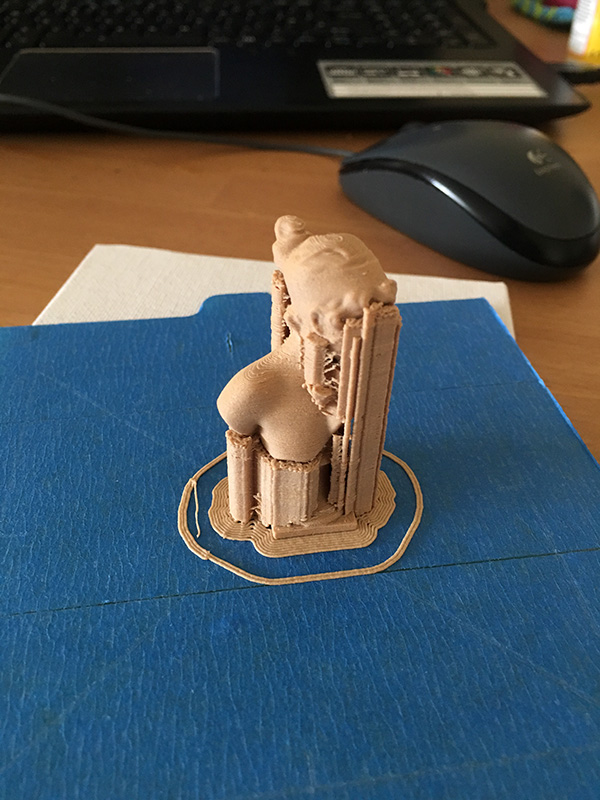
Not every day you get scaffolding for your face is it?
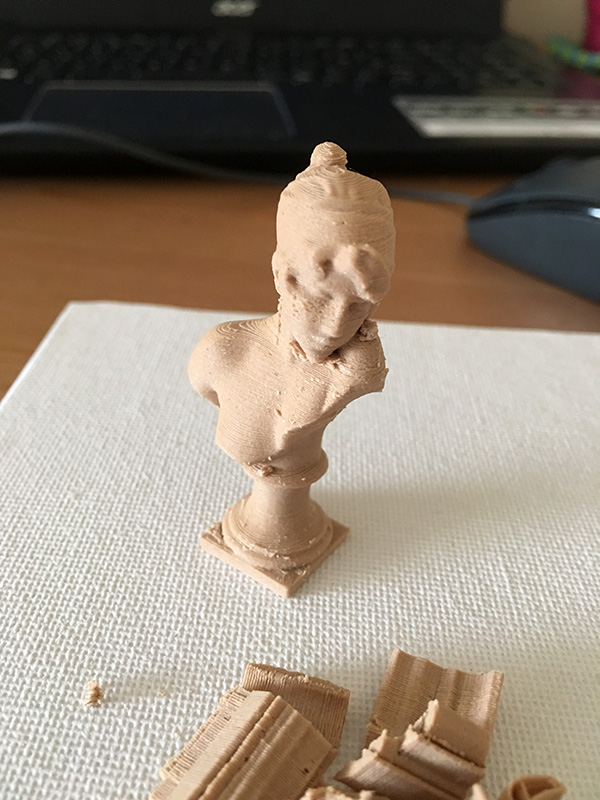
Time to grab me some flush cutters and snip away the supports and reveal the beauty within – sounds like a make up commercial.

Quite impressed with that. Will need some find tuning if I do it again and I’d probably print it on a finer setting – this one was printed on draft.
Go on love, give us a twirl!
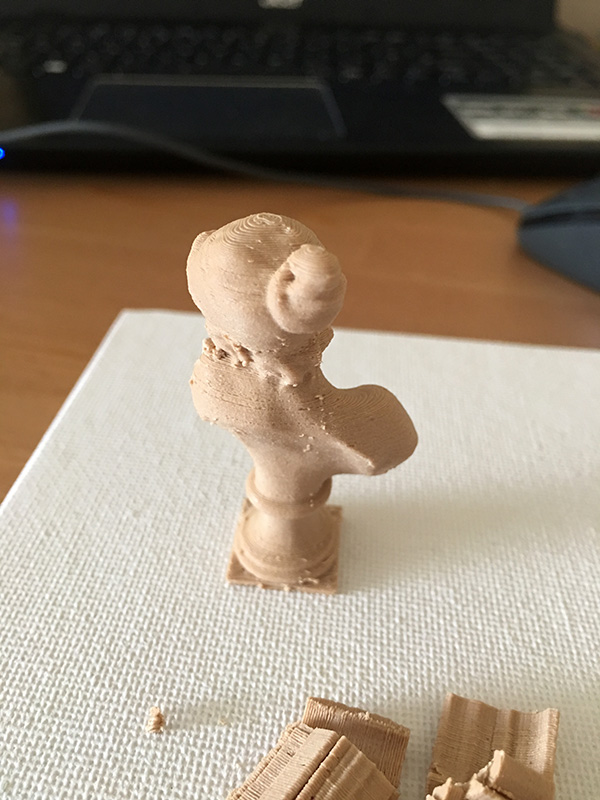
She’s a coward – literally spineless!
Sorry, it’s the awful old jokes that get me.
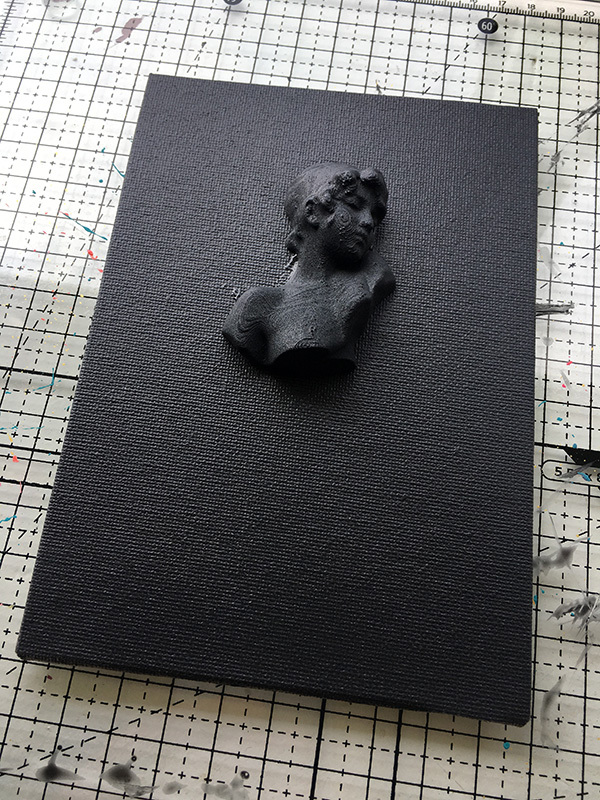
Think she needs a makeover – or a coat of shimmer paint at the very least.
Only a single coat of basic white acrylic paint before I slapped on the shimmer paint too.
From beige to fabulous in two coats! Really hope that’s not a make-up commercial slogan, lol!
Right, now what can I do with this.
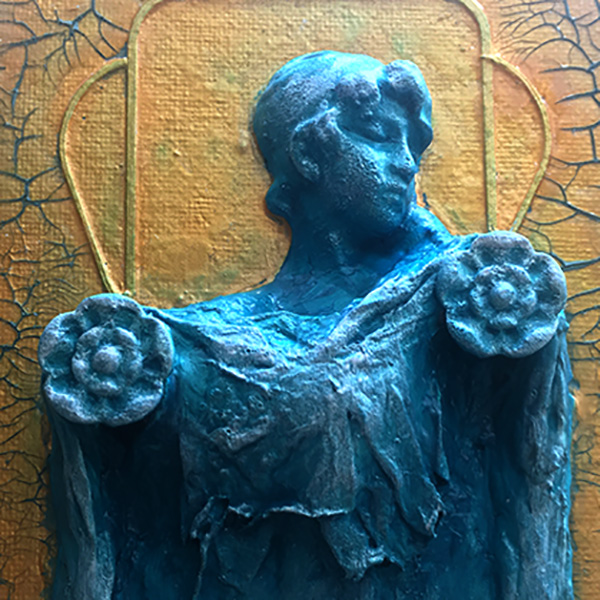
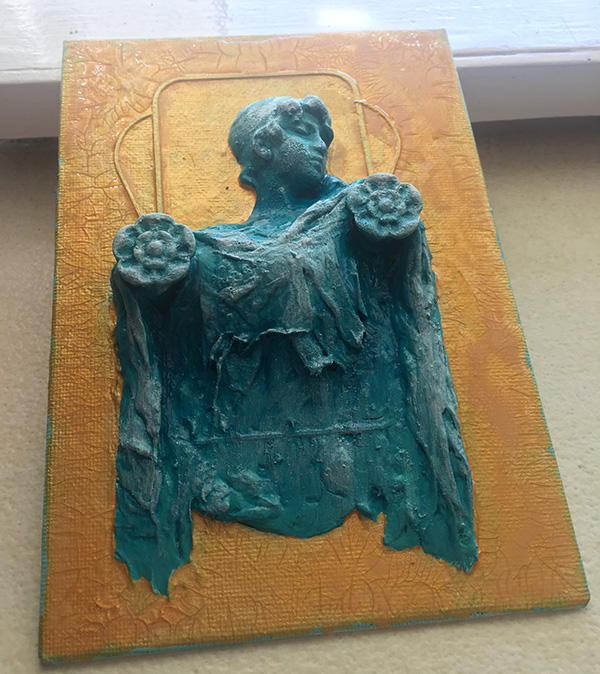
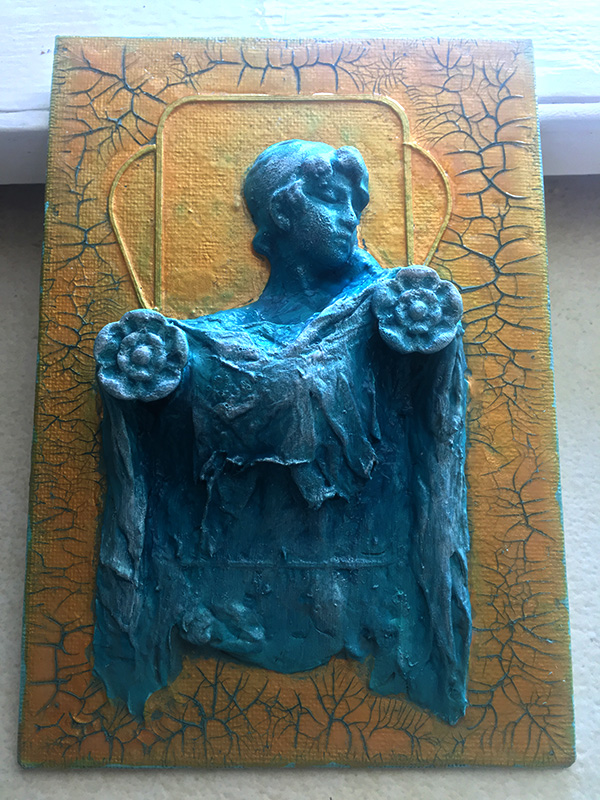
Ironically a bit too 3d for a canvas so I adjusted her in the software. That’s a nice way for saying that I chopped her in half – eek!!!
Then, using Pinflair Glue Gel I stuck her to a small canvas and gave it all a light coat of spray primer – like the ones they use on cars.
Began thinking this through and decided that it would look nice with some drapery so made some pillars on the 3d printer. and stuck them down.
This was followed by layers of toilet roll with mod podge being applied in a drapey sort of way.
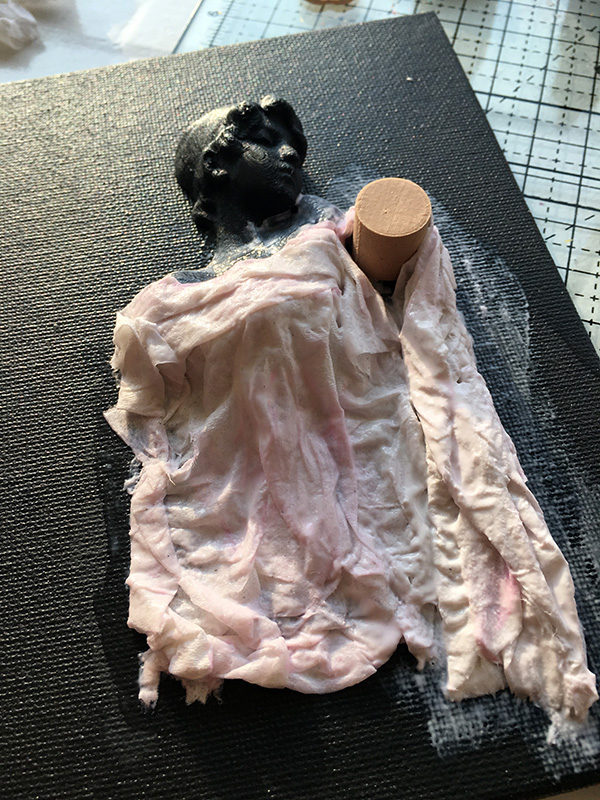
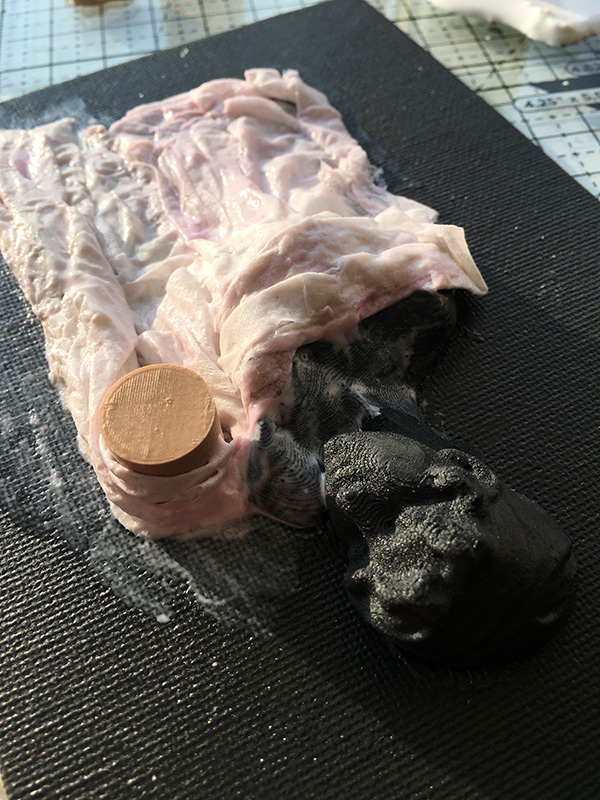
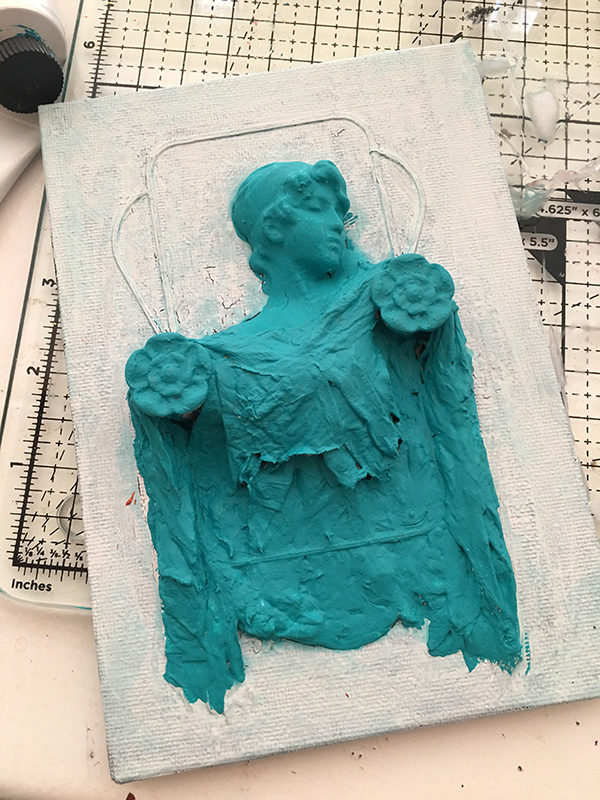
I also used some of the waste from the 3d prints to create a frame surrounding her head and then extended this into the lower area.
As an extra touch I added some rose embellishments, also made on the 3d printer, to the top of the posts.


After inspecting this for a few mins I decided that I really didn’t like the black/grey – bit too grim – so I coated the whole thing in two coats of white and then applied a layer of teal to the body and the ‘fabric’.
Going off the white I then applied a coat of gold to the background – I may make up my mind soon.
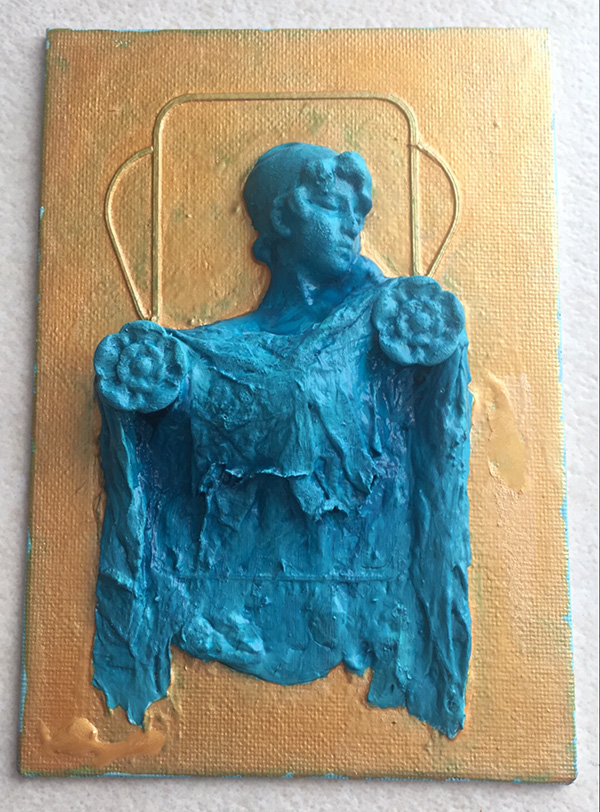
Ok. Gold it is. I’d like to add a little ‘interest’ to the background though so I added a layer of crackle glaze and waited for it to – well, crack.
Waited some more.
Starting …. waited some more.
Stuff waiting, I’m starving.
Off to Morrison’s Cafe I trot for some sausage, egg and chips.
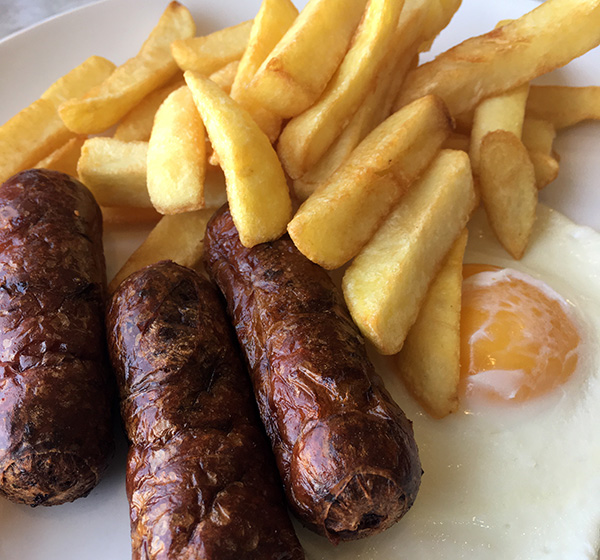
The sausages did look a little over done however were actually rather tasty and done just right – must be the colour of the meat or something.
I’m avoiding saying what I really think they look like …
Anyway, lunch/tea scoffed and off back home to check on the progress.
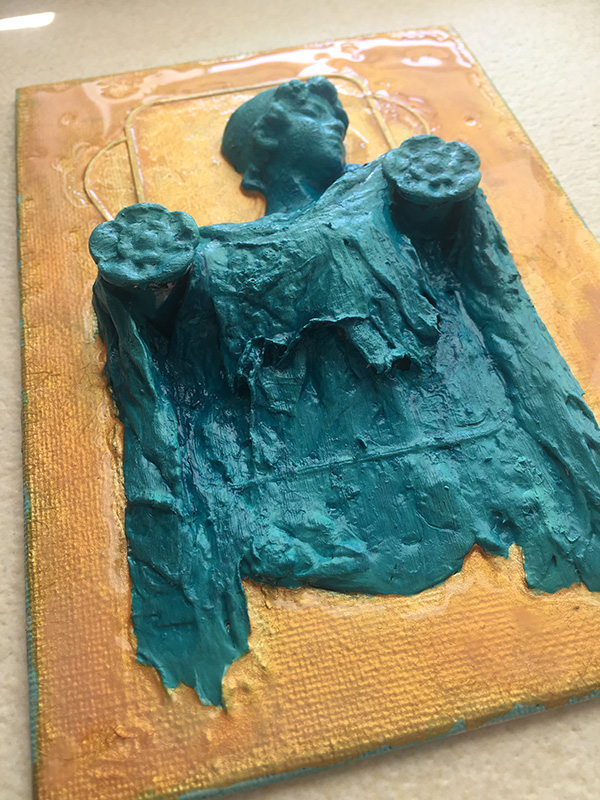
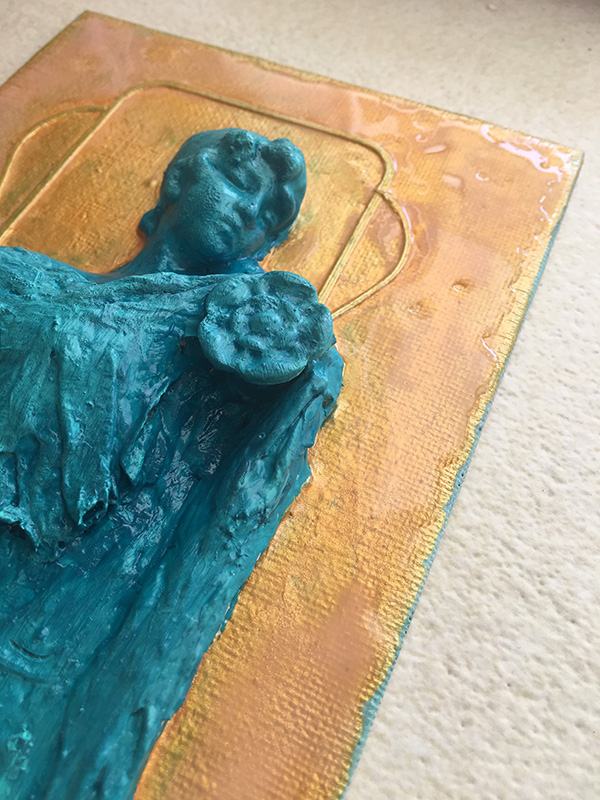
Well, the cracking had certainly cracked so I applied some aging cream from DecoArt and this, for all of that faffing, was the result.
I like it in some ways but at the same time I really want to do it all over again and make different choices.
I guess that I can with the 3d printer as the components are easily made again – and I’ve always got toilet roll in the house.
What do you think? Would the gold and teal work for you? Would copper and teal have been better? Would you have stuck with the black?
Would be good to hear your thoughts.
I’ve one more thing to share with you on this short series about my first steps in 3d printing so stand by for My First Ever Steps in 3D Printing – Part 4 !!
If you are interested in knowing more about the Print Rite CoLiDo 3d printer from Print Rite then please do head over to Create and Craft TV’s website.
Thanks for reading. Lovely to see you again.
Hopefully see you again some time soon.
J :)

the crackle glaze definitely brought the whole design together-looks like a whole lot of fun. I was so amazed when the news hit about 3D printers the best invention, so much to aid medicine, science etc and of course the most exciting thing craft. Have been lucky enough to see 3d printers on a bigger scale in a university they are mind boggling.
continue with the creativity its fantastic~ bit out of my price range at the mo.
LikeLiked by 1 person
How much of the reel of plastic did you use so far? Did this take more than the reel which comes with the printer? I am wondering just how much the consumables it takes to make something of a decent size, so I am wondering what size she ended up as. Sorry for all the questions, but it is all helping me to decide if I do want to buy one or not.
LikeLiked by 1 person
Biggest thing I printed weighed 23g which worked out at about 50p based on the 1kg reel price. You get 750g with the machine.
LikeLiked by 1 person
I think your samples are much cooler than the ones that have been used on c and c so far…I mean no offence intended to the presenters they have used….I am sure they would agree.
LikeLiked by 2 people
Love the idea John but I personally don’t like the flowers I think they are too big. maybe make the pillars and flowers smaller.
LikeLiked by 2 people
Will add the thought to the ‘do over’ list :)
LikeLike
Brilliant John, gave me some ideas for using our 3d printer in crafts xx
LikeLiked by 1 person
Love this John. Like the colours when you finished and the crackle. Thank you.
LikeLiked by 1 person
I love the final results and agreed with all your changes throughout, then end result with the crackle glaze and ageing cream sets it off perfectly x
LikeLiked by 1 person
Love the end result John – sometimes projects just need to evolve don’t they 😃
LikeLiked by 1 person
They sure do :)
LikeLike
I found this really amazing at how easy it is to change your mind and alter things as you go along ! I must say the result is just great, love it with the crackle, it was a really interesting read. Thank you. x x
LikeLiked by 1 person