Well now, I’ve been deliberating, cogitating and pondering about getting myself into 3D printing for some time.
Is it just another use for my bank account or will it actually change the way I craft? It’s a bit like a cliff hanger right at the start of the post isn’t it?!
Thankfully I shall answer both questions after first telling you about my first ever steps in 3D printing …
So, let’s begin at the beginning.
Whilst I was last down at Create and Craft TV HQ, minding my own business in the hotel, I received a rather exciting email. Here is the excited email face …

Hmmm, maybe I shouldn’t pull that face in front of a mirror.
Anyway, the content of this email was thus – “Would you be free to take a look at a 3d printer and then demonstrate it on air in May please?”
Frantically prodding at the phone screen whilst trying to sound nonchelant, I replied, “Ok”. Brief, but to the point. No miscommunication there I think you will agree.
What a rather lovely coiincidence – a chance to try out this marvelous emerging technology!
Anyway, a few more emails later and an introduction to the team at Print-Rite and a 3D printer was on it’s way to me.
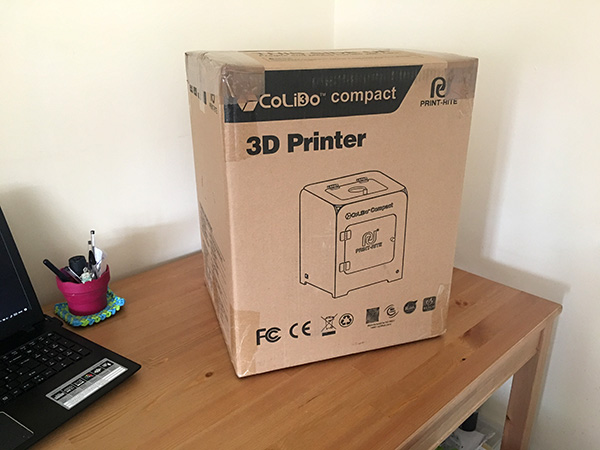
The 3d Printer in question is the CoLiDo Compact from Print-Rite. Previously a sell out in a matter of minutes on Create and Craft TV so I was excited to be getting involved with a popular model.
It was like Christmas when it arrived! A large well taped down box just waiting to be opened!
I had to hold on to my excitement though as I had promised my friends that we would go out for dinner when I had got back from Peterborough.
Off to Largs we went to the wonderful Nardini’s!

It’s a rather well decked out Art Deco style eatery.
Food ordered and delivered to our table and we stuffed our faces with the most amazing fish and chips, or ‘fish tea’ as they call it here. ‘


Fish Tea’ even included ice cream for pudding! It was that lovely that we decided to toast the evening with it!

Cheers! Lol!
After dinner we also went for a walk – needed it after that bunch of carbs – to ‘The Pencil’.


Don’t ask, I have no idea. Mysterious and historic is how I shall sum it up.
Nice view over the water too.

By the time we had got home it was a tad late to start unpacking the box so again stayed myself and flopped onto the bed and snored the night away.
The sun smashed through the windows a little earlier than expected and I leapt out of bed and went to put the kettle on – NO MILK!! How can I have my morning tea without milk?!
Ok, containing the excitement once again I power walked to the shop and minced back with milk in hand and made the brew.
RIGHT! NOW, GO!
Stabbing the tape on the box with a knife, like Norman Bates on check-in night, I excitedly extracted the contents of the box and – for once in my life – sat and read the instructions and checked through the contents list before beginning the set up.


Ok. Let’s get this set up.
Remove all packaging.

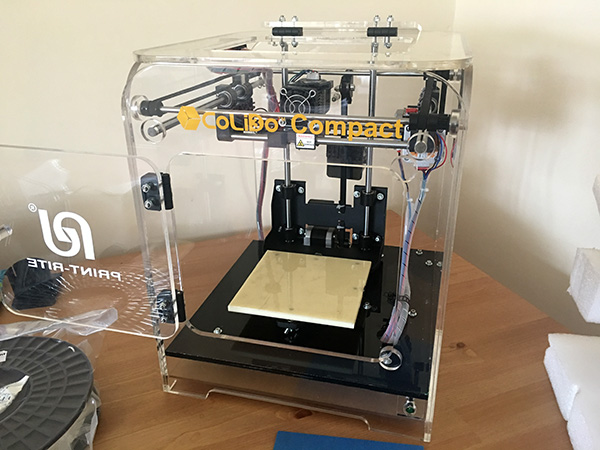
Done.
Insert filament and print plate. Plug in. Connect to computer.
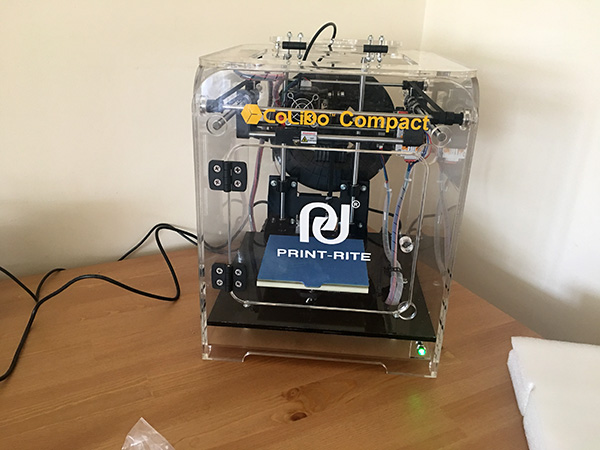
Done, done, done and done.
Install software. Load test design. PRINT!
DONE! Success!
Hmmm, now for something else.
Ok, maybe I should design something?
Can do. I popped over to Tinkercad and created a very basic vase. I mean reeeeeeaaaally basic. Essentially it looked like a tube with a solid bottom but hey ho, it’s just a tester to make sure I can do this – and that it was easy.
Following the process through again from loading the design and slicing it to print and …


… it worked!
I think that some post printing finishing may be required but I chose to leave that for now and try out something else so I printed up some test square inchies as I wanted to test paints on them later on. More on those another time.
Next I tried printing some faux pearls. The first ones were set at 3mm in size. I’ll be honest with you, that was probably a tad too small for the printer to give good definition on.
So I increased a bunch of them in various increments to do a test and see at what size they came out Ok at. They ranged from 5mm to 9mm in size.


Ok, not bad. Can definitely see the layers in these but there is certainly some dome on those pearls … that’s not a rude saying, is it?
Decided to have a quick try with some post printing finishing.
Here is the process that I followed.
- Used a rough cardboard nail file to decrease the ridges.
- Used a finer cardboard nail file to smooth what was left.
- Painted two layers of Storm Cloud coloured acrylic paint – drying between each layer.
- Painted a final layer of Pearl White coloured paint to give it a luster.


Pretty awesome eh? Smooth and shiney!
Technically you’re not supposed to be able to sand PLA filament, the stuff that I am printing with, however you can get away with a little for refining the final print.
Kinda just negated the need for the squares now though but at least I have them if I decided to test some other medium out.
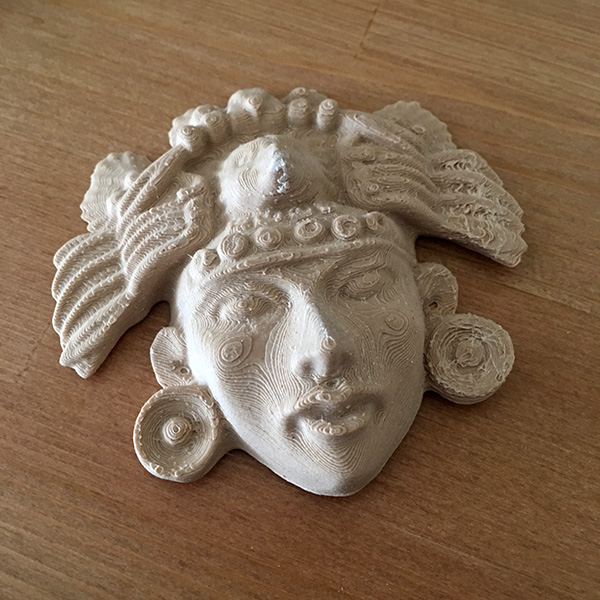
Ok, time to try something much bigger now so I went routing for designs and found this one …

… on Thingiverse where they have lots of free files.
I downloaded it and tried to load it into the software … oh dear, a warning message.
‘Not manifold’.
The good thing though was that the software suggested a way that I could fix it so I followed that guidance and had the file fixed and back in the software in under 5 minutes – boom!
Right, time to slice and print!
Didn’t tell you before but the software also tells you how long the print will take – this one would take 3 hours. Time to put the kettle back on I reckon and start typing this blog post.
Take that sentence for a time loop Doctor Who! LOL!
Ok, time has caught up with us so we’d best bring ourselves up to date.
Printing went well although I did notice that one side had started to lift a little. Decided that as the printer wasn’t really noticing it and that it wasn’t really affecting the printing I would let it carry on.
Several teas and various tinkerings on the computer later, as I could still use the computer while the machine was printing, and we have the print!


Eek! My head is now buzzing with thoughts and ideas not only to print but to make with the things that have been printed.
I think that I had better go and make this thing that’s in my head right now, using this print out, before the idea goes and maybe I’ll calm down a little too.
Join me for My First Ever Steps in 3D Printing – Part 2 tomorrow!
If you are interested in acquiring a machine for yourself, they are available through Create and Craft TV now.
Thank you for reading and I hope that you found this post interesting.
J :)

Great work! You could also try a program like fusion 360 to design more complicated models or blender if you want to try sculpting on the computer!
LikeLiked by 1 person
Looks like you will be having fun. My husband has made his own 3D printer on a slightly bigger scale. I read this blog out to him and he has a few suggestions for you. The ridging effect is caused by layer thickness, look at the layers closely, may need a magnifying glass, adjust it, if its pushing outwards you need to up the layer thickness if its going inwards it need to go down. Also hes says nail varnish remover painted over the exterior helps to melt the lines down giving a polished look. Or the glue you get at a DIY store for gluing pvc pipe together has the same effect.
LikeLiked by 1 person
Lovey and thank you (and your man) for the tips. Sadly the acetone doesn’t work on PLA filament but I’m exploring other options.
Do get a better result when decreasing the layer thickness so will tinker more in time :)
LikeLike
Its not acetone its a solvent which works give it a try.
LikeLiked by 1 person
Ok. Will do :)
LikeLike
Already got one – built the Eaglemoss 3d printer, and it works as treat, looking forward seeing you on TV.
LikeLiked by 1 person
hold on folks the 3D printer is not that easy to handle you will have to come to terms with a design software .This is not that easy I have tried and have failed must have got something wrong .Machine dose not have enough of a manual to give freedom of design ,ie have problem with design to printer or no slice compatible to print ,it’s not a bye and go printer it takes time to learn how to use it . be careful with the USB mine did not work they sent me a new one .But still not enough info on how to solve problems. and when the drum of PLA material in the white drum is out you do not have the conection to use the other drums , I had ti refill mine and had to reduce the amount on the real as it was to tight
LikeLike
Hi Malsolm,
Sorry to hear that you felt that it was a little difficult to get used to. I guess that any new technology has a learning curve attached.
Design software has come a long way to and there are a number of easy and free options out there that would be approachable by anyone.
The machine has sufficient help to get set up and running and then Print-Rite are very happy to help people out with any queries.
Not sure why the USB did not work but glad to hear that the company sent you a new one.
The guys at Print-Rite advise me that the connection to use PLA and ABS reels after the cartridge is complete is included with all shipments and it is unclear why this was not in your package but probably something to take up with them directly if this is still an issue.
With regard to the reel being too tight – perhaps again if you take this up with Print-Rite then they will help and advise if there are any other adjustments that you could make instead of reducing the amount of filament on the reel.
Hope these points help – stay subscribed to the blog and perhaps some of the future posts that I have planned will also help you get the best from your machine?
Best wishes,
J :)
LikeLike
I don’t need one I tell myself then started reading your article. No I still don’t need one,as I sit on my hands, but you are very persuasive. They have certainly chosen the right person to promote this.
LikeLike
Hi John lovely to get a chat with you again. Just started reading your post and mentioned the words 3D printing and like a bolt of lightening hubby was by my side devouring the contents. Like me he is happy with his life here on the other side of the world but looking at the printer and accessories from create and craft he got the same pangs I get when checking out the latest craft accessory! Geez I miss the convenience of crate and craft but not enough to give up my new life style here under the lovely blue skies. Keep smiling. Karen
LikeLike
Wow. This looks very interesting. Thanks for sharing this John.
LikeLike
You lucky devil, buying the printer is not a problem but I have a feeling the filiment reels will work out expensive. but very tempted.
LikeLiked by 1 person
I had got it in my head, that I could manage quite nicely without one of these in my life,
Then you appear, trying one out, oh dear….Anne x
LikeLiked by 1 person
Sorry, not sorry.
LikeLiked by 1 person
Looks like you’re at the beginning of something really interesting! Very exciting. Liz X
LikeLiked by 1 person
Get you! Our new 3D guru! Looks great xxx
LikeLiked by 1 person
golly, I see the point now! oh dear and I am broke already :)
LikeLiked by 1 person