
Hello again, and welcome to another Fabric Friday! :)
Now, you were probably expecting me to be showing you the finished project from last week’s post however, on time honoured tradition, I appear to have been distracted by another technique, lol!
This week I have been having another go with foundation paper piecing.
Foundation paper piecing is a simple way of achieving great results in patchwork. It involves the methodical direct sewing of fabric pieces to a paper pattern. These pieces are then sewn together to form larger blocks.
The thing that appeals to me about foundation paper piecing is that I can work to a smaller scale and that there is a higher chance that all seams will match up neatly as you assemble your blocks. It’s a win-win technique in my mind.
I have had a brief go at this in the past however my experiments have been short and basic so far and as these testers were some time ago I decided to go back to basics and try a simple pattern or two first and then, if that all worked out Ok, I would progress a little more and try something from the book.
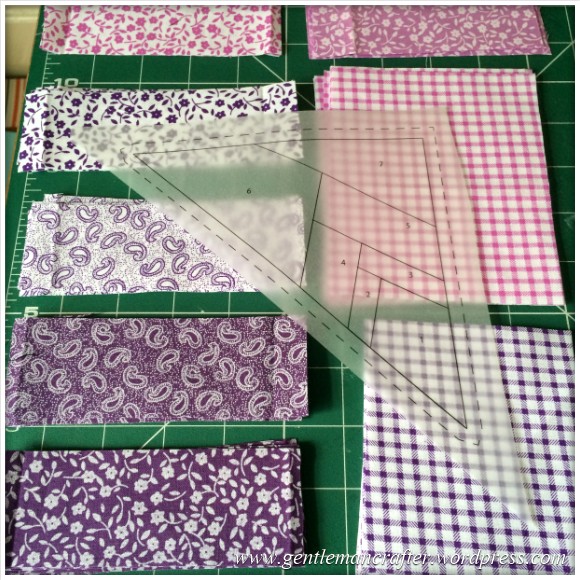
After a while pottering around the internet looking at all of the amazing designs and patterns I decided on a couple of patterns and printed them onto 60gsm tracing paper. From my readings it doesn’t seem to matter what type of paper that the pattern is printed onto as long as it’s quite lightweight.
I chose tracing paper as it gave me the advantage of being able to see clearly through both sides, was cheap(ish) to buy and also took and held printer ink well.
Here are the two designs that I chose.
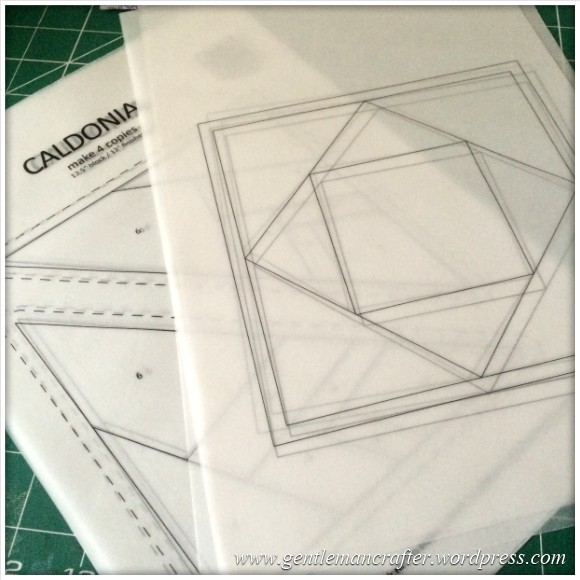
The top design was a basic square pattern – there are many (slightly) varying versions of this around the web.
The second design is called “Caldonia” and I got mine from 627handworks however this style of star pattern is also available from various different websites,
I chose to start with the basic square as I needed to familiarize myself with the process of piecing again.
Normally these patterns would be numbered but this one wasn’t. The patterns are numbered so that you know which piece to place next. For this pattern however it didn’t really matter as long as I worked from the centre outwards, completing each group before moving outwards to the next.
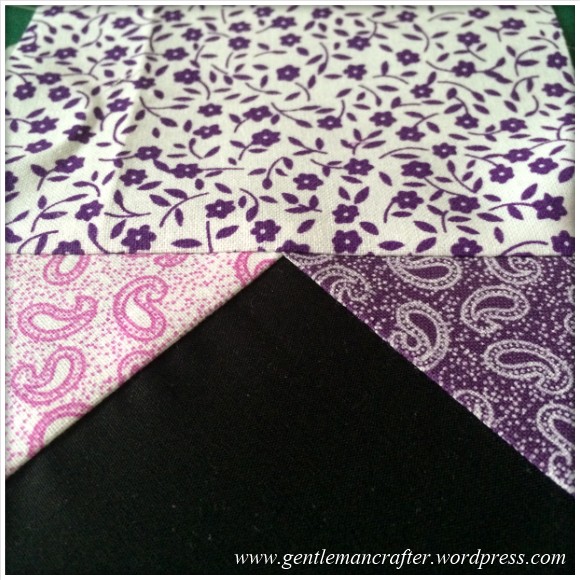
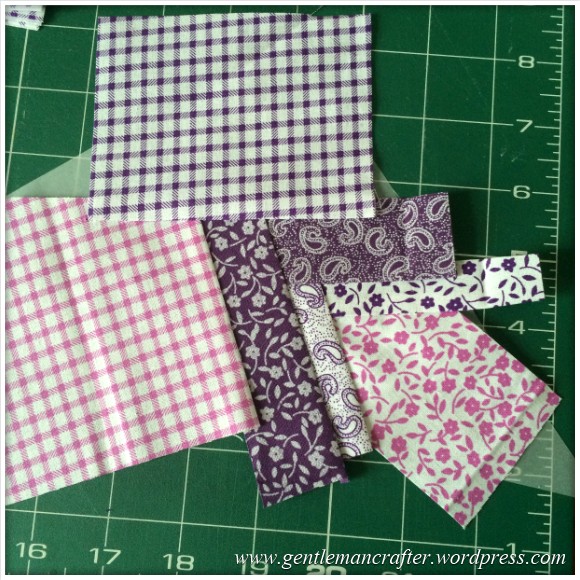
As this was a tester, and still had some of the fat quarters that I have been using over the last few fabric Fridays, I chose to work with those fabrics again.
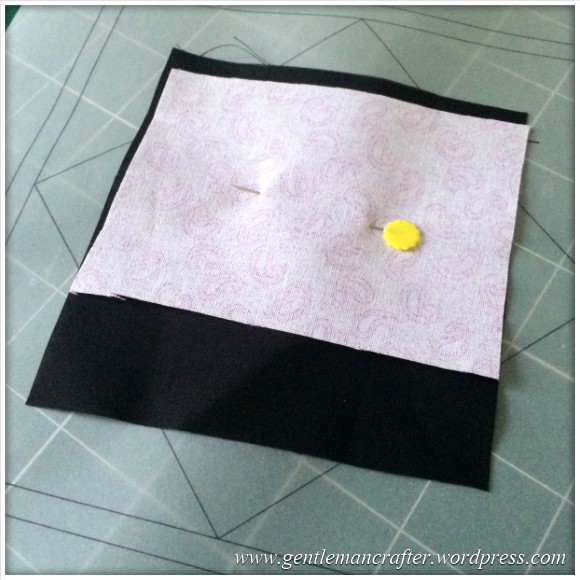
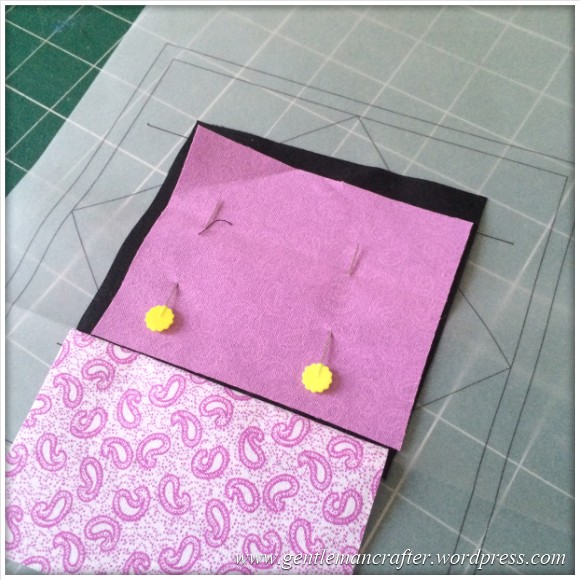
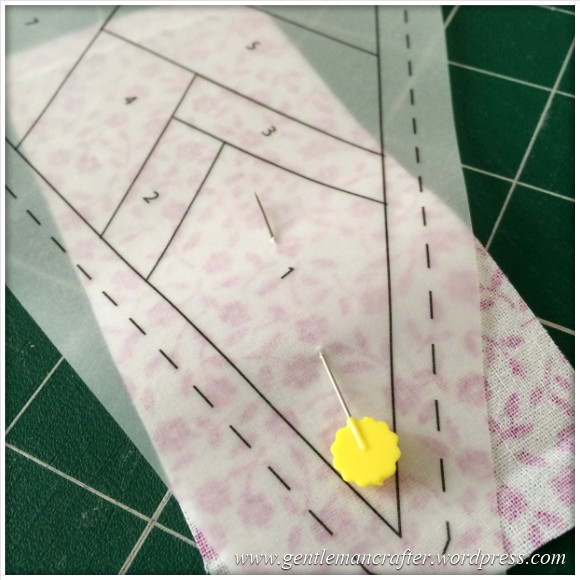
For this design I roughly cut the fabric as I went, starting with the large black piece for the middle and then the next piece.
I secured the centre and second piece in place with a pin.
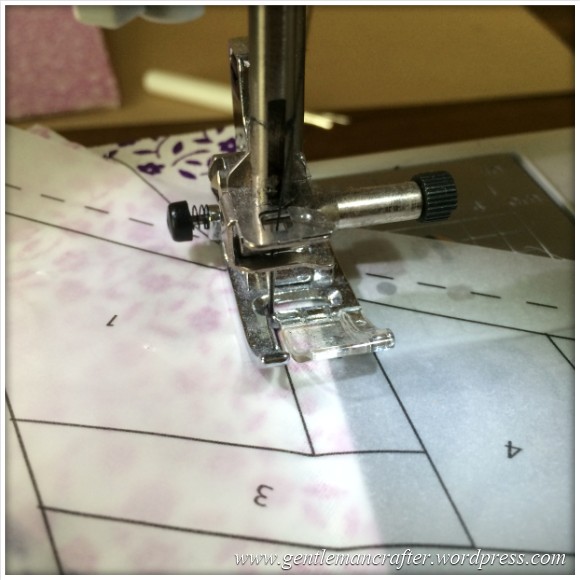
I then flipped this over and stitched along the appropriate line.
Generally all sewing is done on the printed side of the “paper”. I overstitched the joints a little to add stability.
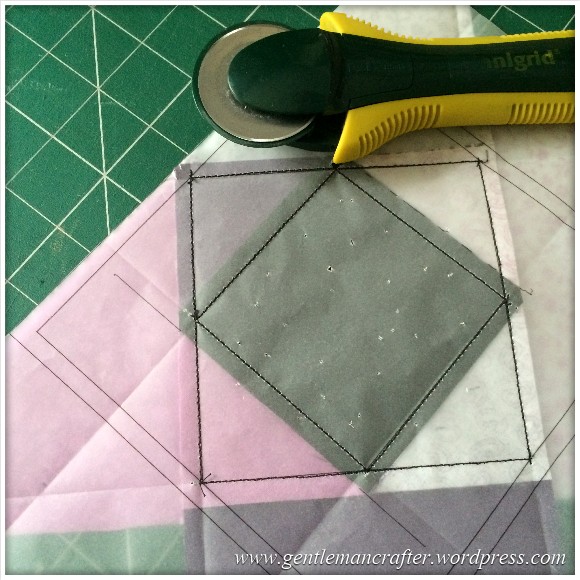
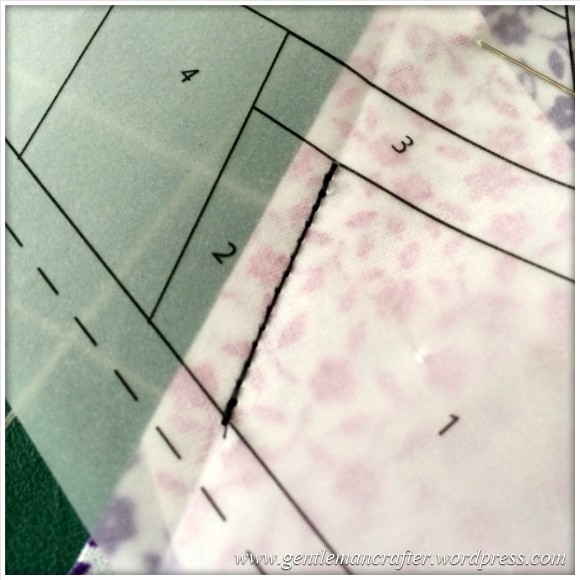
I then folded back and trimmed down the seam allowance.
To be honest I should have done this before, with just the base piece in position as then I would have had a straight line against which I could line up the next piece, but this didn’t quite sink in until later on.
Piece two was then folded back on itself.
The next steps were simple, just keep repeating what I had just done with a variety of fabrics.
Until I had covered all sections with fabric.

I then had to trim back the block to the seam allowance.
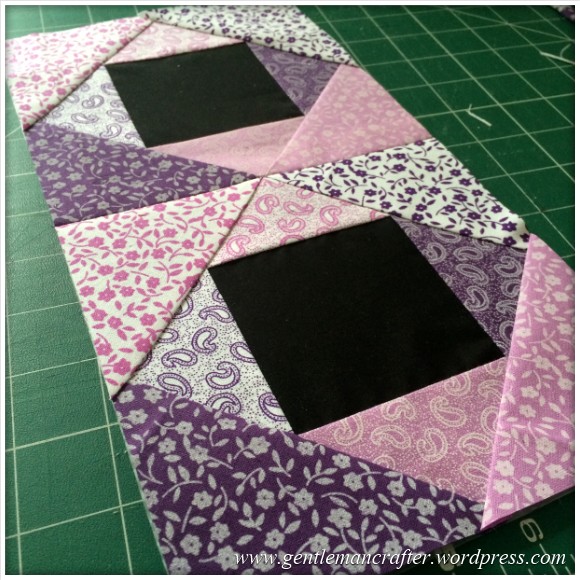
This is then what the little block looked like.
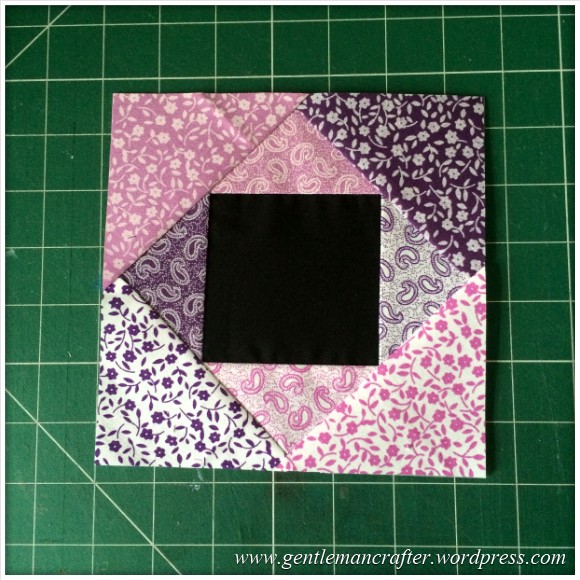
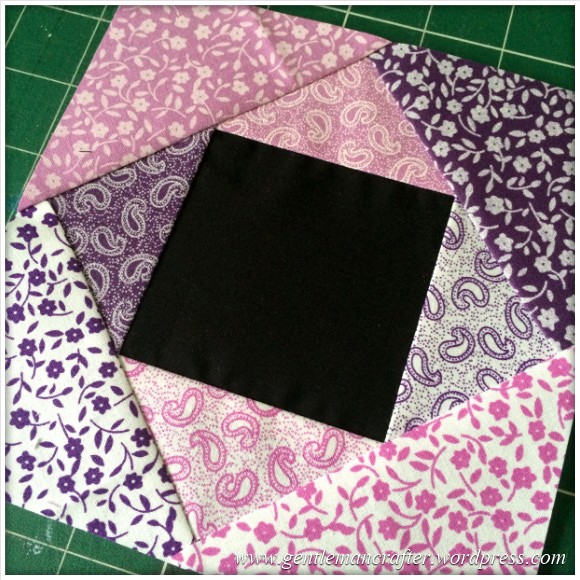
I loved how the points were so sharp.
After admiring my little block for a while I went on to make a couple more and stitched them into a strip.
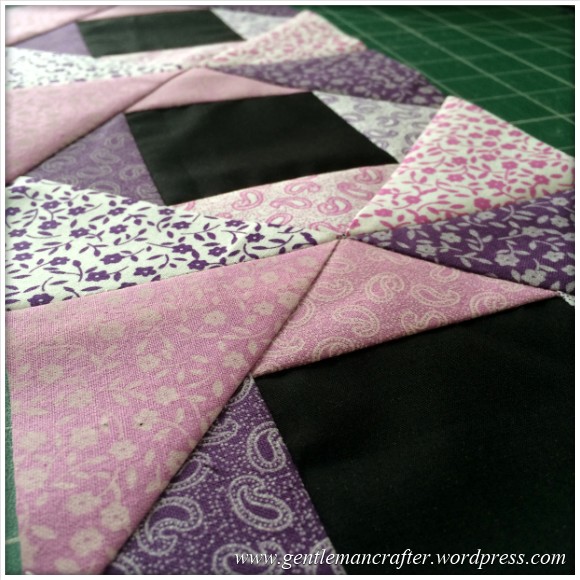
Ok, think I’ve got the hang of this. I really enjoyed the making of this; it formed quickly and was so neat when finished.
Technique check – tick!
Now to move on and tackle the other pattern that I had downloaded as it had a range of sizes of pieces to work with.
This is the “Caldonia” pattern from 627handworks.
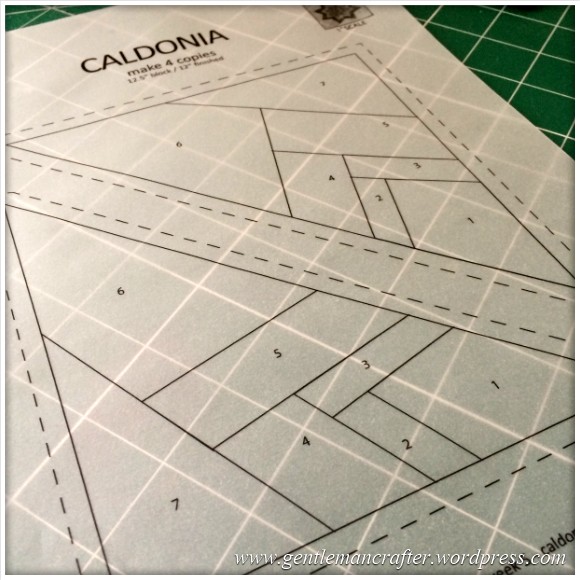
This pattern required the completion of 8 pieces (four each of the two triangular pieces that you can see in the image above).
So that things didn’t get messy and confusing as I worked the pattern I began this one by cutting a lot of pieces that were approximately the right size for the pieces that they would be used for. I had to remember to include sufficient in each piece so that it could fold back on itself and to cover the pattern section of the pattern.
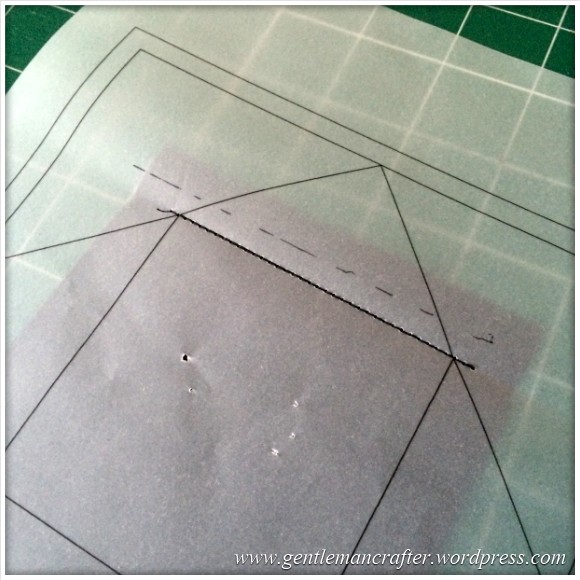
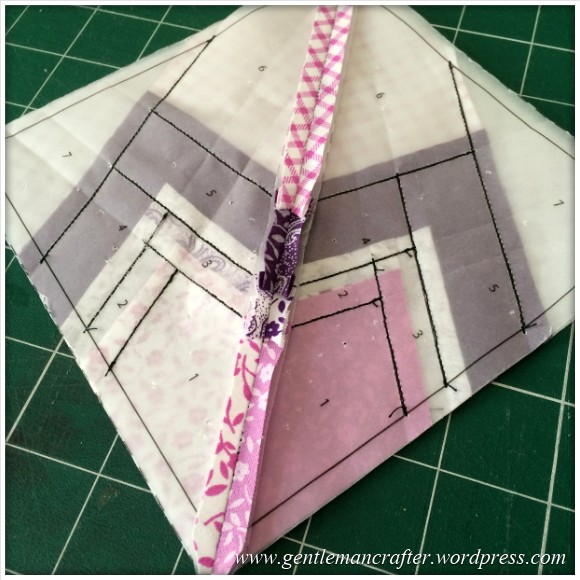
I began as before by securing the starting section in place. This time the pattern was numbered so I could tell where to place it.
For this pattern there were lots of lines that ended at another line so I stitched from the outer edge into the centre and finished at the intersection. This way the fabric piece was being secured in the seam allowance and also I could see exactly where I was sewing up to.
For this first step it was the line between the 1 and 2 section.
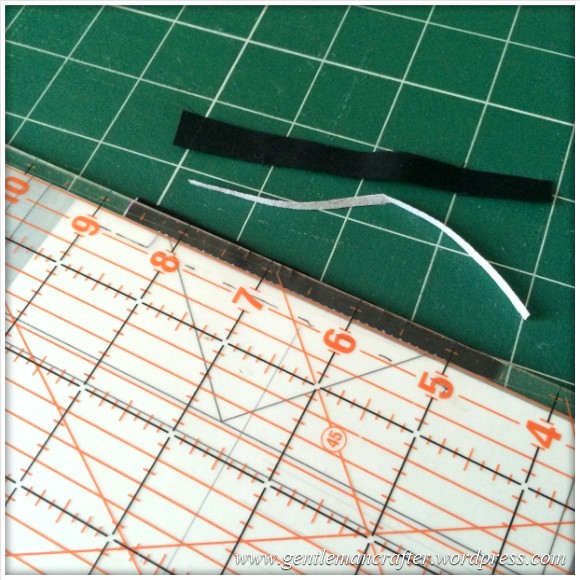
(this time I remembered to trim the seam allowance of the first piece of fabric before applying the second piece)
Piece 2 was then folded back and I pinned the next piece in place after trimming the seam allowance as before.
I continued in this manner until I had the entire pattern completed.
Then as before, trimmed the design down to the seam allowance of the overall pattern piece.
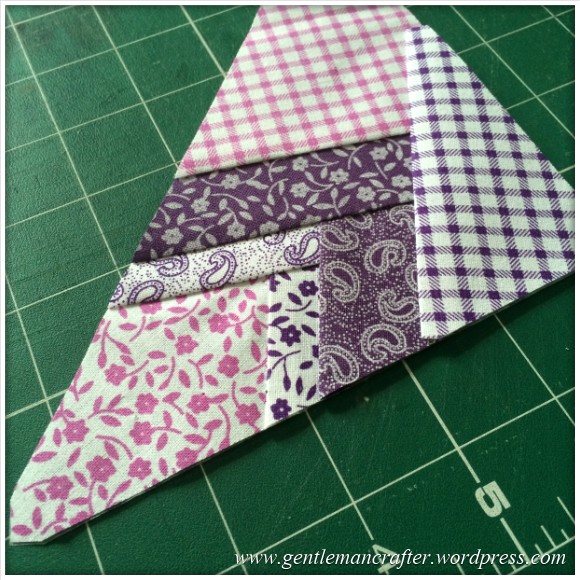
As I mentioned above, for each square there were two triangular pieces to make and stitch together. For the second piece I changed the fabric that I used at section 1. This was a deliberate design choice and was intended to give me alternating “spokes” in the star design when it was complete.
I then stitched the two triangular pieces together and used my fabric creaser to fold the seams open.
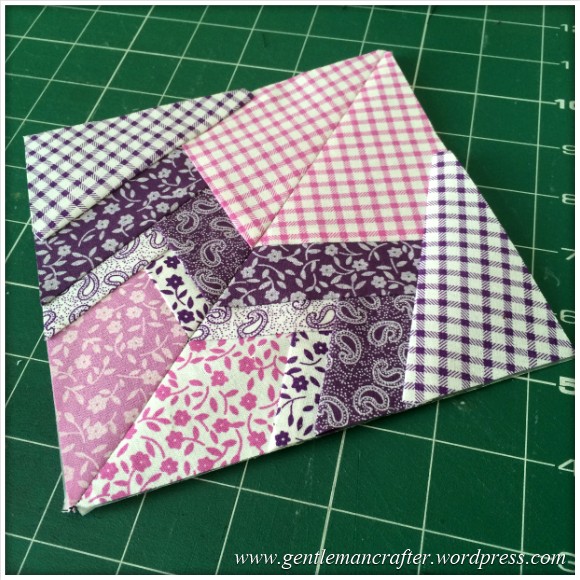
Here’s what it looked like from the front.
I just needed to make four of these blocks in order to completed the star block in the pattern.
After completing the second I attached the two that I had made together to see how it looked.
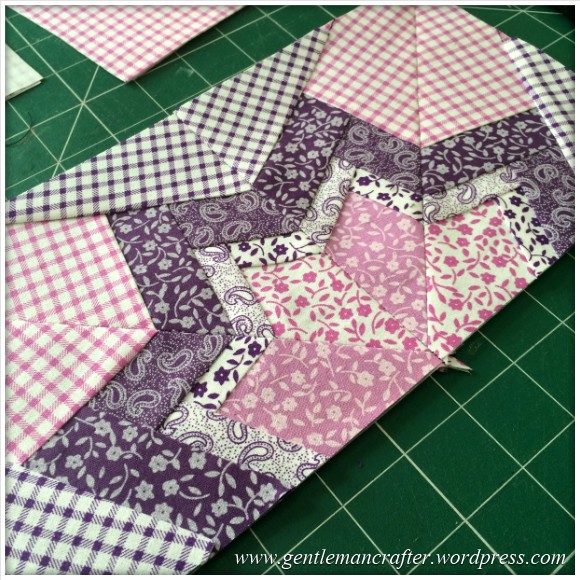
*Squeals!* I LOVE IT!
Next time though I am definitely going to use some solid colours to break up the design a bit.
Sadly at this point I had to down tools again – seems to be not enough time in the day to sew these days.
Anyway, there are a couple of things that I have picked up from this blog post.
One – I cannot believe how much you can get from two packs of fat quarters – yes, I’m still using the same collection that I have been using for the last few posts!
Two – I love foundation paper piecing! Look out for more of this in the future! I’ve already started collecting some inspiration together on a Pinterest board and I have a Carol Doak book on order to! :)
Right, that’s just about it from me for this one.
Thank you for reading, and sorry it’s a bit short.
If you have any questions about this post then, as always, please feel free to use the comments section below.
See you again next time fabric lovers!
J :)

Hi John I’ve been doing paper piecing for a while now and like you find you get great results in a short space of time, I have a question about printing the pattern on tracing paper, I usually draw my with a pencil and ruler. Did you use an inkjet or a laser printer?
LikeLike
I have an inkjet printer and use lightweight (63gsm) tracing paper.
LikeLike
congratulations, what an inspiring person you are, just love Fabric Friday xx
LikeLike
A useful and interesting post – thank you, John.
LikeLike
Thank you John. I’ve only ever done a similar technique with paper so am looking forward to trying this out with fabric . Once the block has been made up, could I use say, a bag pattern, to place on top to cut around and then stitch all the block patterned pieces together. I’ve just read back through this and I’m not sure it makes sense? Maybe you will understand what I’m trying to say? B :-) x
LikeLike
There would be nothing stopping you using the resulting block as you would any other piece of fabric. I guess thought that you wouldn’t want your hard work disappearing around the sides or under the bag so it might simply be easier to inset the block with other solid colours (then do as you suggest) and then it can be a feature panel in the bag?
LikeLike
That’s what you were on about last Sunday. Thank you for such an easy to follow lesson. I am definitely going to give it a go. Yes, that fabric has lasted ages and looks great :)
LikeLike
Excellent work!!!!!!!!!!
LikeLike
Wow, really encouraging, I will have to give this a go. The finished blocks look so perfect. I just joined a sew along group and bought a pattern for peicing a quilt. Felt a bit daunted but then this has given me new courage to get on with it, thank you so much.
LikeLike
Hiya, I had never in my life heard of paper piecing apart from in my paper crafting. So, after reading your great blog and seeing the almost finished gorgeous item, I went over to you tube and watched a few video’s. Wow, I feel a new hobby coming on, get the thinking cap and chocolate out.
Love and Light
Sioux x
LikeLike
I enjoy piecing, the results are always neat, and it’s so fast. Tracing paper, though, that’s too sensible for words. Does it tear away easily?, and how does the stitching look then? as tracing paper is quite thick.
LikeLike
I used a very thin tracing paper. Tears away just fine.
LikeLike
Brilliant as always. You are an inspiration to us all. As it’s my birthday today I think I’ll just ‘play’. Trouble is, what to play with – card making, cutting using my Brother, sewing, knitting……….the list is endless and there are only 24 hours in the day!!! Where did you get the tracing paper and patterns. I’m inspired to give it a go and I love your fabric.
LikeLike
The tracing paper was from Colemans. There are links in the blog post for the patterns.
LikeLike
Just a suggestion. If you run a line of stitching in the ¼ ” seamline around each pieced block, it stabilises them nicely for sashing or joining the block(s), and these stitches will be hidden in the seam when construction is complete.
LikeLike
Good idea! Thank you :)
LikeLike
I really look forward to fabric Fridays . Thanks for showing us this John and for sharing the pattern website. I am definitely going to try some of them to add to the blocks I have been making for my first quilt I am attempting to make.
LikeLike
You are an inspiration John, I will have to give this a go, best wishes Jackie
LikeLike
Excellent project…looks intricate, but achievable with a little patience. I have these particular fat quarters, and feel I will just have to have a try.
Thank you John.
LikeLike
You were very good this week John – no breaks with cake or chocolate!!! Thanks for encouraging us once again. It’s quite a few years since I’ve done this technique. I was always pleased with the neat results. I have few books on paper piecing which are very useful. I must have another go!! It’s just time needed!!! Thanks again. Carole.
LikeLike
Thanks for reminding me about paper piecing. Need to have another go at it. Yours looks really good.
LikeLike
John braking it down makes it look so easy, thanks
LikeLike