
Just a quick one this week to share a cutting file for a tag with a pocket that you can use with your Brother Scan N Cut machine.
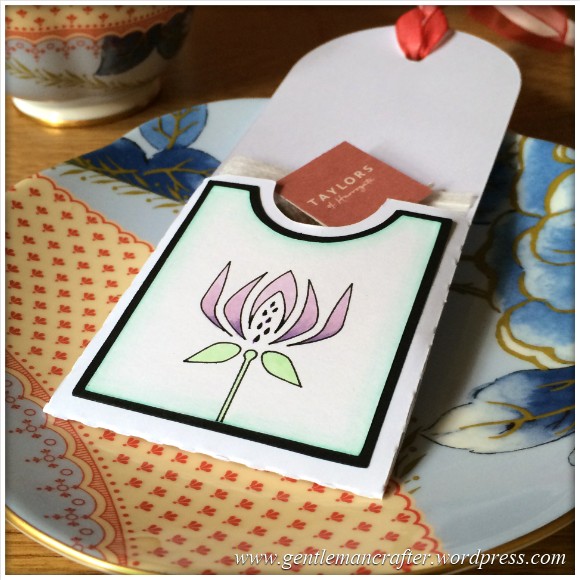
I designed this after I recently tried out some Rhubarb tea (not as nice as it sounded) and thought how wonderful it would be to give someone a little individual teabag in a tag that was attached to a gift of tea time treats like some lush biccies.
Something along these lines.
I tried getting some biccies to use as “dressing” for the photos of these tags however when I opened the packet they were mostly broken!
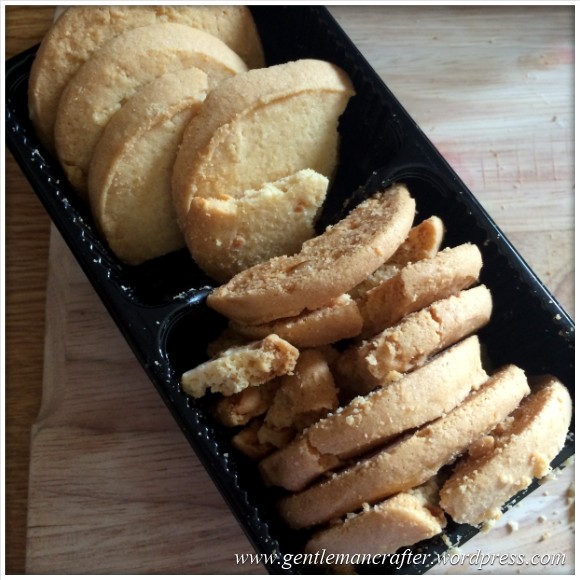
So I basically ate them instead. Lol!
Anyway, first of all, here is the link to the cutting file set.
There are multiple files together in a zipped file on this occasion. To download, right click on the link above and choose ‘save link as…”. This time, unlike before, you will need to save this to your computer, unzip it (right click on the folder and choose ‘extract all’) and then transfer the uncompressed files to your USB stick – files will not load/cut on your Scan N Cut until they are uncompressed.
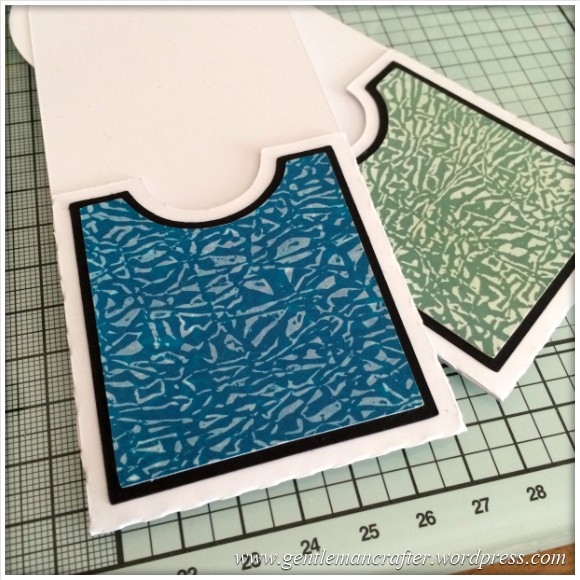
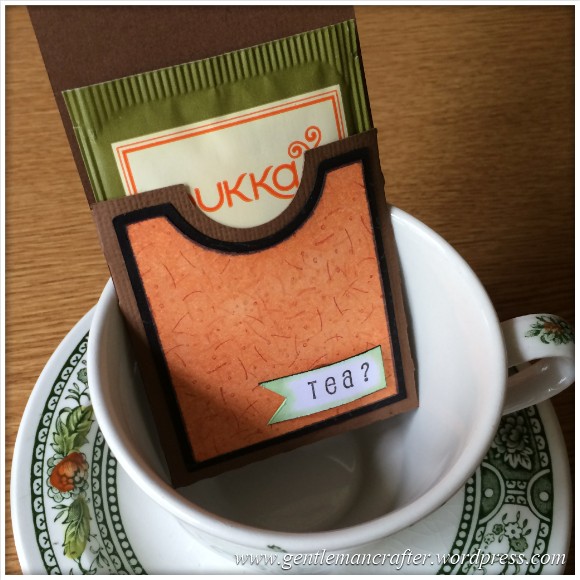
The tag with pocket cuts as one piece. Construction is easy peasy, just fold over the tabs, apply glue and then fold over the front and stick to the back. I used a wet glue and held it in place with small pegs as it was drying, which didn’t take long.
You can cut two from an A4 piece of cardstock so I have put two on the cutting file, but they can be individually edited so you can delete this after loading up if you don’t want to cut it.
Just a couple of notes before I show you what I have made with these.
Because you fold over the front to meet the back, it will be better to cut from cardstock that is the same colour/texture on both sides. You can of course cut it from a double sided cardstock for a different effect.
In the cutting files there is also a mat/layer for the front of the pocket (as you will see in the ones that I have made). Cutting these from plane cardstock allows you the freedom to stamp, doodle or print something in that panel before or after cutting it out.
As a finishing (mostly construction based) touch there is also a circular hole reinforcer cutting file included for the top of the tag. This will help prevent the top edge from tearing if you are going to insert a ribbon or piece of cord from which to hang the tag.
These are all provided as individual files so that you can pick and choose how your tag turns out or cut them from different cardstocks if you need to.
Combining all of these together gives a “complete” look but it’s by now way compulsory. Just have fun! :)
Here are a few decoration ideas that I tried out.
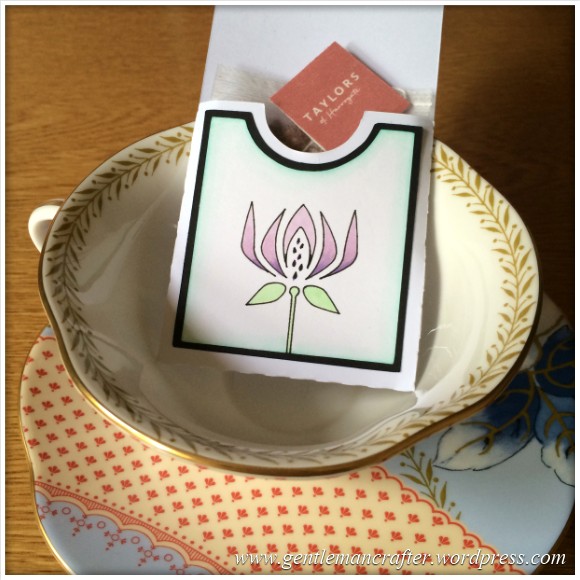
This tag was simply a combination of basic cardstock and some background cardstock that I had created using the wax resist technique some time ago.

I thought that it might work well as you could then colour theme the tags according to the brand, flavour or intended purpose (i.e. relax, rejuvenate etc).
The next design incorporated a Balzer Designs stencil from TCW. I used it to trace out a flower and then coloured it in with a small selection of pro-markers.

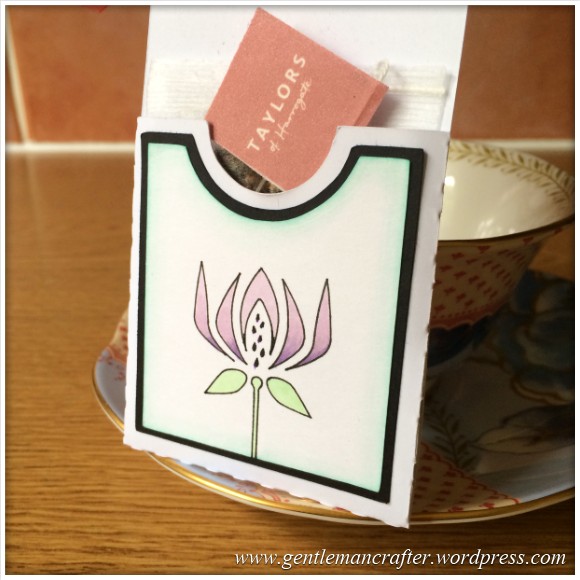
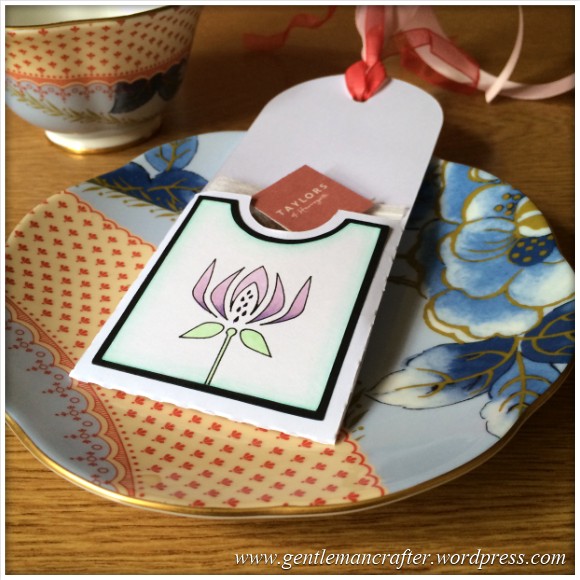
This I thought was a nice simple decoration idea and doesn’t take that long but still gives it the handcrafted feel.
This final design idea uses some texture stamps to create a texture (like tea leaves floating in the water) on the panel and then I have used little letter stamps to stamp out the word “tea” onto a small pennant which I then attached to the design.


Now, of course, it doesn’t have to be for teabags, it could be for seed packets, mini bookmarks, gift tokens etc.
Anyway, like I said, just a quick one today.
Hope you enjoy making things with this file. Please feel free to tag me if you are sharing your images on facebook (http://www.facebook.com/GentlemanCrafter) or Twitter (http://www.twitter.com/john_bloodworth).
Just a final point re the angel policy for the cutting files that I am sharing.
As this file was designed from scratch by me I am happy for you to make and sell as many completed tags as you like. Please don’t sell/share the unfinished cuts or the electronic file. If you know someone that would like the file then please direct them to this blog post.
As ever, if you have any questions or comments relating to this post, please feel free to use the comments section below.
Thanks for reading.
Look forward to seeing you next week fellow scanners!
J :)

i cant unzip this. doesnt give me the option to extract all. my computer wont unzip anything. i can only seem to use fcm files
LikeLike
Sorry to hear that. You can have a look online for free programs that will zip and unzip files. That should then help.
LikeLike
Tfs this John, i have a question about scan n cut, can you advise me of another adhesive that can be used on the mats…its costing me a fortune buying stick n spray, many thanks from Gina :-)
LikeLike
I haven’t really tried any others up to now I’m afraid.
LikeLike
What a lovely idea, I have a friend who is a real tea belly, but loves drinking from little china cups. She could take some of these to work with her and be as posh as she likes. Thank you John I love it, (and the biscuits).
Love and Light
Sioux x
LikeLike
I LOVE this project!! Something a newcomer can be successful with too. Sooo much fun. The sky is the limit!!
LikeLike
Hi John
Thank you for all your posts and tutorials for the Scan n Cut. They are really helpful as I’ve just purchased the SNC. If I have an image that I’ve scanned and saved on a USB stick is it possible to import the file into craft artist 2 on my PC?
Sent from my iPhone
>
LikeLike
As long as it’s an image file, yes.
LikeLike
Thank you. It is a fcm file so do you know how I change that to an image file? I have tried canvas but can’t find a way.
LikeLike
You can convert a JPG into an FCM but not the other way around.
LikeLike
It is a fcm file which I have tried to change to an image file using canvas but I can’t seem to find a way. Any suggestions please?
LikeLike
You can’t change FCM files into image files I’m afraid.
LikeLike
Thought as much. Thanks for your help. I will have to try another idea for my one layer card. I’m hoping to scan images I regularly use from my Cricut so I can cut them with SNC – big task!
LikeLike
Thank you for this file John. You have given me some ideas for (dare I say it) Chr…., no I can’t…., stocking fillers. SueL
LikeLike
Hi John,
Another lovely project. It make me even more sad that I can’t afford the Scan & Cut machine. Anyway I can continue to enjoy your projects.
All the best.
Carol
LikeLike
Sorry about the Rhubarb Tea, and as for the biscuits, they all go down the same way broken or not! lol This is a fab idea, and just in the nick of time as I needed something to put a gift card into for a 70th birthday, as the recipient loves bikes I could stamp/die cut one and put it on. Thank you x
LikeLike
thanks John, these are pretty and sweet !!!!
LikeLike
Many thanks John, also great for giving money to Teanagers (lol)
LikeLike
Hello John,
this is a nice little idea for a lovely little gift in a card. Thanks for sharing this and allowing us to use your designed files for items made for sale. This is very generous.
I never know how many hours your days have as you do so much. Each of your posts is so creative and inspiring and I really enjoy reading your blog.
LikeLike
I’m an early riser Hannah. 6am is a lay in for me :)
LikeLike
What a nice idea to send to a friend you can not be with and send them a cup of tea and say we will both have a cuppa at 11 o’clock thinking of you x Thank-you Gentleman Crafter x
Jenny Way
LikeLike
Thanks for this young man will be making these for the seeds from the garden for our next fête day in August.
LikeLike
I’d love to see a picture of the stand! :)
LikeLike
Thank you for sharing this John. It will make a very useful voucher envelope if we are allowed to enlongate the shape?
LikeLike
It can be resized but if you need to increase it a lot you’ll need a 12 x 24 mat and really big cardstock.
LikeLike