
On Saturday I shared a cutting file for a chocolate gift box for use with the Brother Scan N Cut. This post continues on from there and features some of the chocolate “pockets” that I decorated.
If you would like the cutting file for the box, please just head over to the Scan It Saturday – A Chocolate Gift Box Cutting File post where you can download it.
This post however focuses more on a few ideas that I had for adding the finishing touches and in true Monday Mash Up style uses a variety of products from my craft stash.
Ok, let’s get started on this visual tour shall we?
A Polka Dot & Rose Combo.
Starting things off with a very simple design was this red polka dot design.
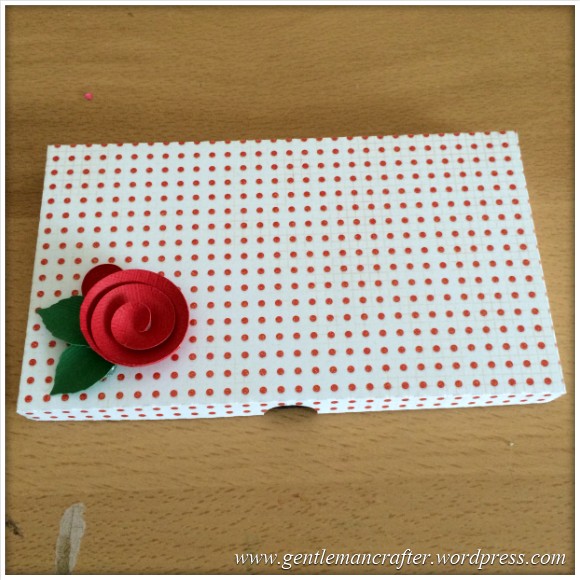
I loved how the glittery red polka dot cardstock, from Die Cuts With A View, looked so didn’t want to add too much too it so I design a very simple spiral blossom and cut it from red cardstock and then added two leaves.
The leaf was a pre-installed design on the Brother Scan N Cut – AR-A024.
All of the pieces were cut from the Brother Scan N Cut and then shaped and adhered to the card with Pinflair Glue Gel.
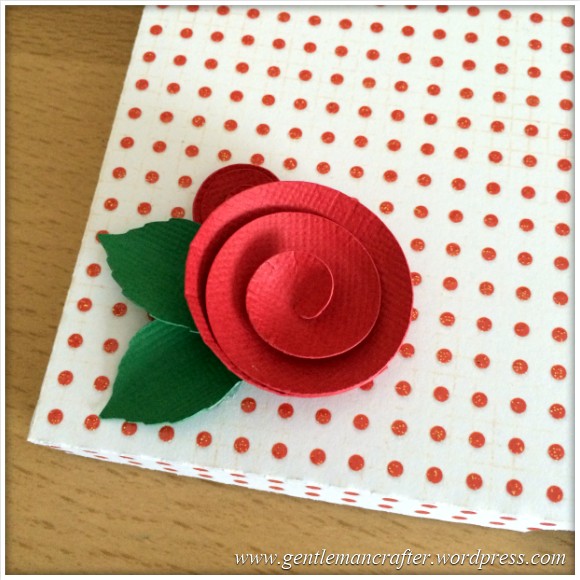
Here is a closer look at the rose itself.
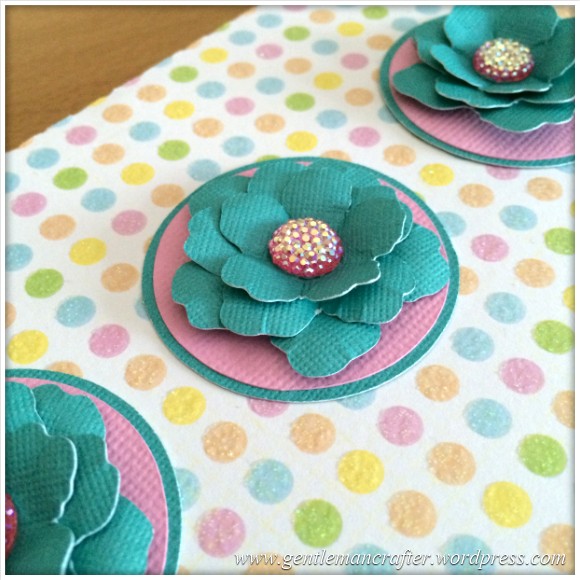
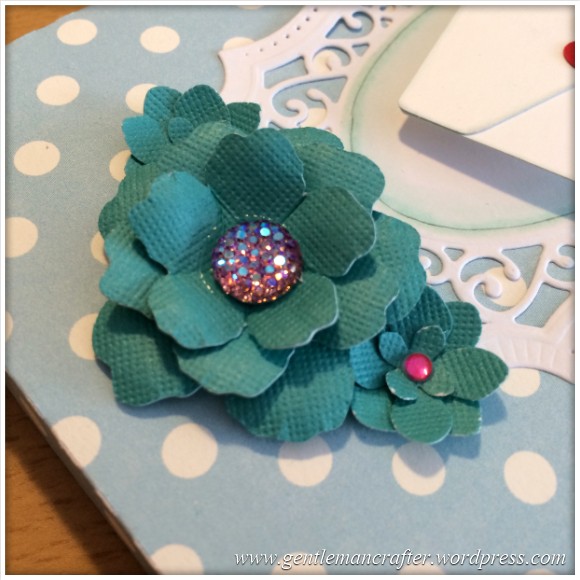
Polka Dot and Blue Flower Trio
For the next box I kept things simple again and let the cardstock do the talking.

The circles and flowers were cut using the Brother Scan N Cut and then shaped and assembled before being stuck onto the box lid.
The floral design is already built into the Brother Scan N Cut and is design – AR-A019
The aurora borealis effect gems were then added to the centre of each flower.
Here is a closer look at the flowers.
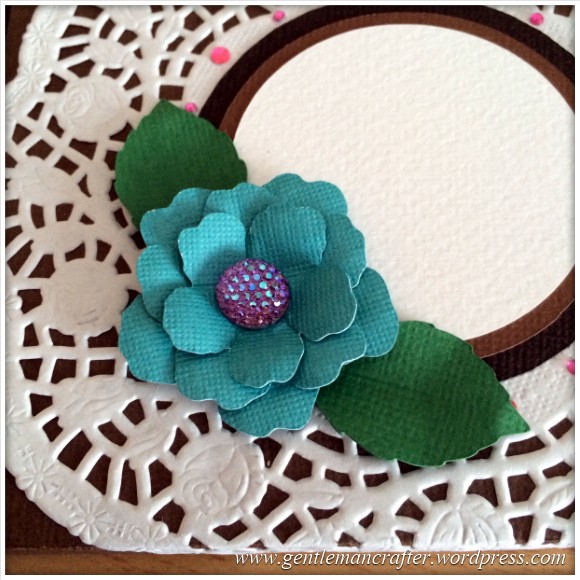
A Doily Delight
I had some flowers left over from the last design so I chose to use them again for the next box.
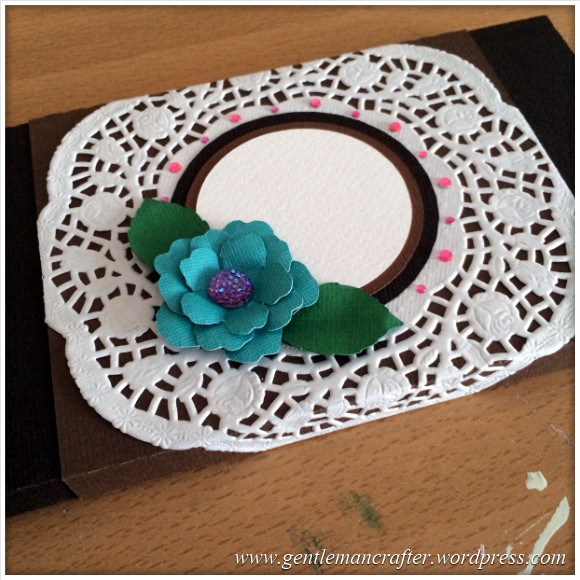
The doily was one from a pre-cut pack. This was added to the box wrap and then I added the circles and embellishments on top of this; finishing it off with some pink gems.
I left room in the central circle to add a sentiment or name later.
Here is a closer look at the central area.
Black Plaid and Cut, Fold and Tuck Classic Box
For the next box I went with the colour scheme from the lid but added a little more detail with some Spellbinders Dies.
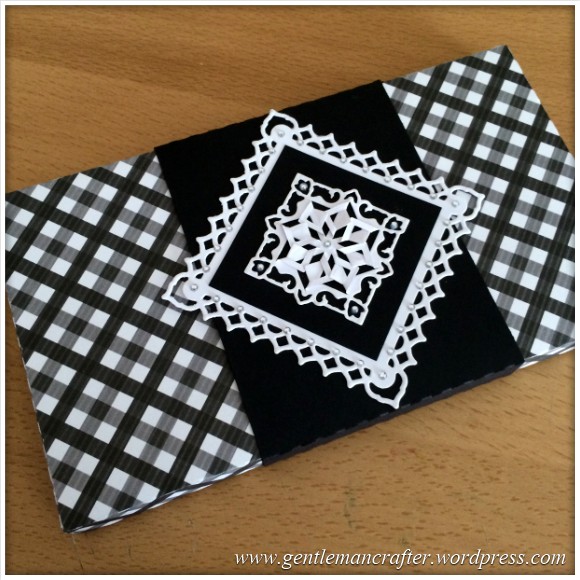
For the outer white square I used the Captivating Squares die set. This was adhered to the wrap and then a small square of black cardstock was added on top.
For the central cut, fold and tuck design I used the smallest of the dies from the Folded Lace die set.
I added some clear gems to finish.
Here is a closer look at the central panel.

Pretty Blue Love Note
Got a little fancy with this next one and thought that there might be someone that I loved enough to give my chocolate away too – LOL, no, NEVER! ;)
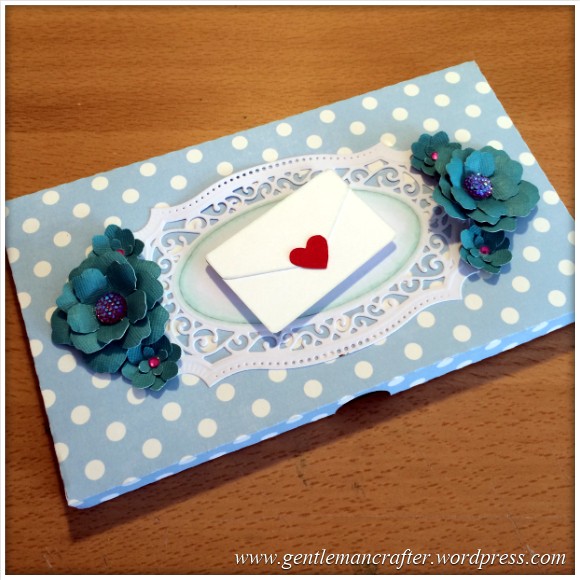
The white swirly background is from a Spellbinders Die Set – Majestic Labels 25. I gave this a blue tinge to the centre with Spectrum Noir Pens (mostly because my inkpads were under a pile of “stuff”).
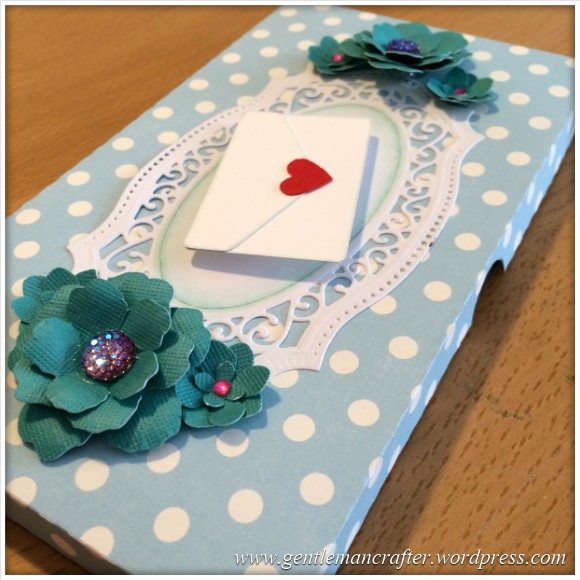
The love note was a pre-installed design from the Brother Scan N Cut – AR-E012.

The large flowers were the same ones that I made earlier – I clearly made a few too many mayhaps?!
The smaller flowers were from a Martha Stewart punch. The punched card was shaped using the Tonic Studios Flower Forming Set.
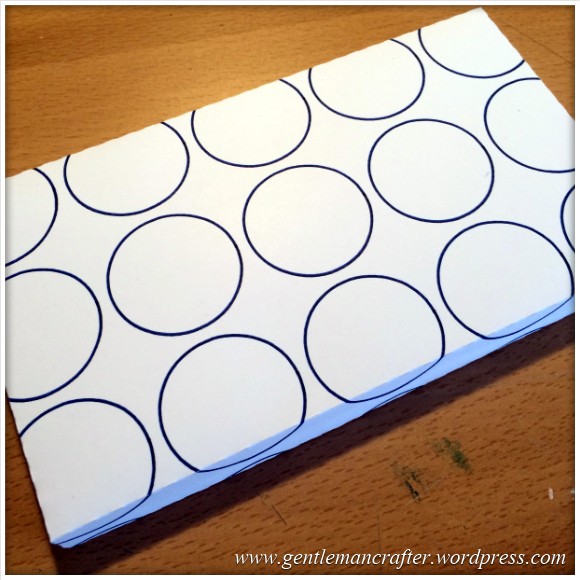
Drawing A Box
This next design actually used the Brother Scan N Cut to draw the design onto the cardstock before cutting it out.
It was an experiment and I didn’t pursue it much more than this test, but I guess there is an idea that you could “write” the sentiment or name all over the box?
Hashtag BOOM!
The next box was a very colourful one and again used some very attractive cardstock from Die Cuts With a View.

For the decoration on this on I cut a strip from the wrap and then chose some cardstock that matched some of the colours in the striped design.
From orange cardstock I cut some of the swirly flowers that I had created earlier. I spritzed these with some doCrafts gold spritzing ink.
I then cut some turquoise swirls from a Cheery Lynn die.
After assembling it all, this is what it ended up looking like – I’m not convinced with the finished result here, but at least it made sense in my mind…

Beautiful Butterfly Box
For the next box I wanted to make a single butterfly stand out. Think I managed that perhaps …
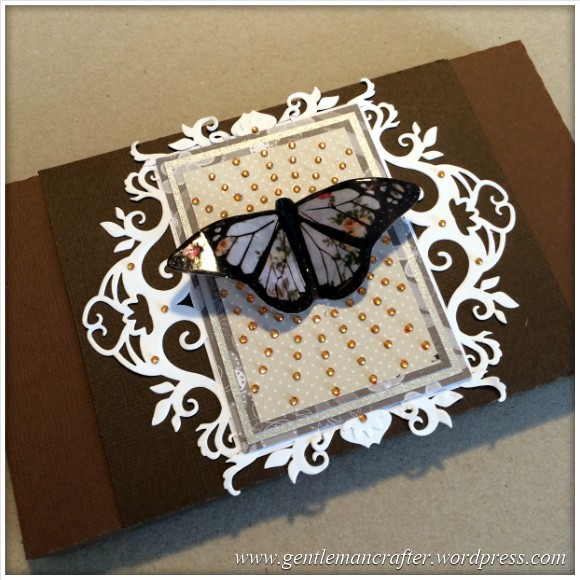
The outer swirly design was taken from a decorative Spellbinders Die (I’m afraid that I have lost the packaging and don’t know the name of this one – if you do, please feel free to list it in the comments section below).
The resulting cuts were then carefully chopped up and re-arranged before being stuck down.
I then layered some cardstock/paper on top and added a sun burst arrangement of gems, one by flippin’ one.
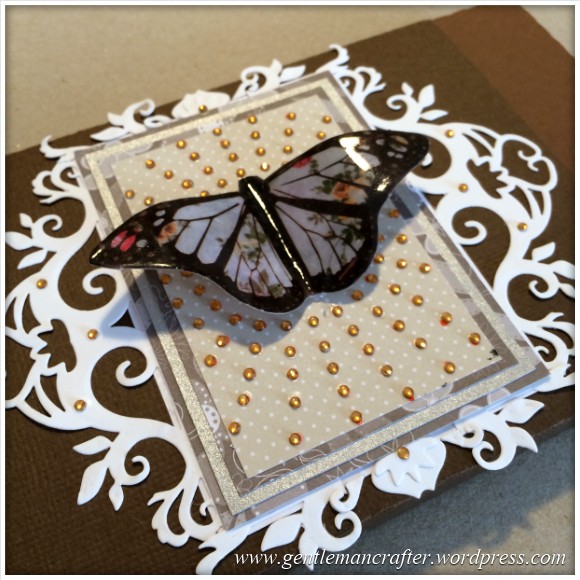
The butterfly was from a sheet of die cuts from Studio Light.
To give it a little something “extra” I inked it up with Perfect Medium and then added some clear embossing powder and then heated it.

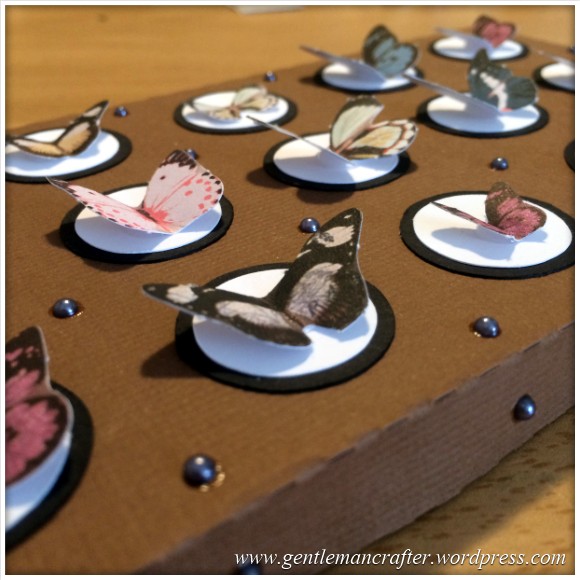
Fly my pretties, FLY!
As I was choosing the butterfly for the last design, it struck me that there were lots of the die cut sheet and that it would look cool if I arranged them on the box top as if it were a display in a Lepidopterist’s collection. So I made it.
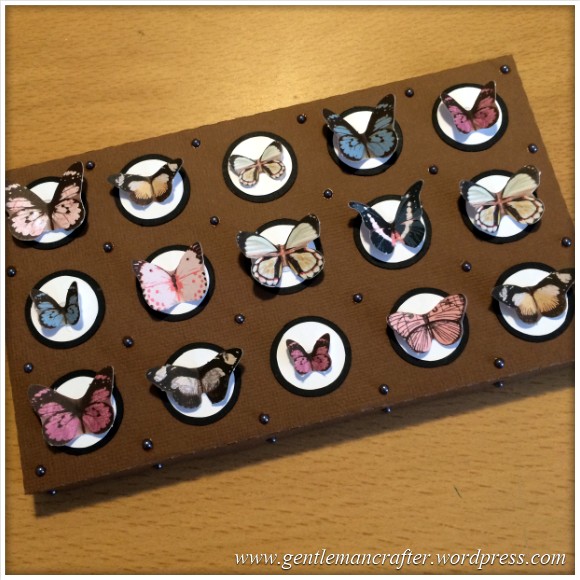
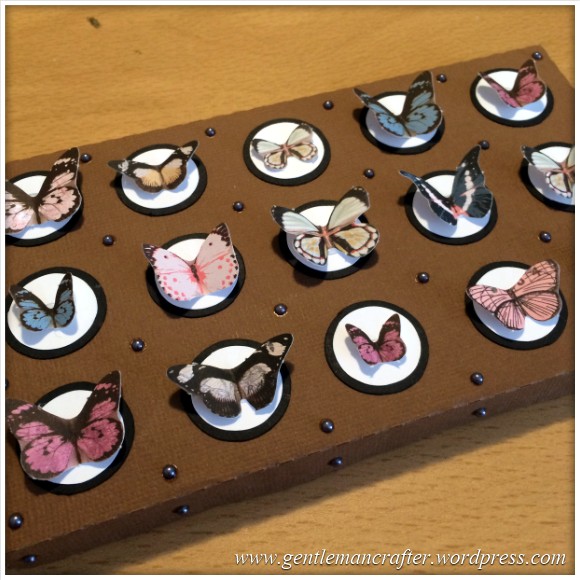
Each of the fifteen small black circles had a white circle stuck on top of it and then I stuck each butterfly on using a glue gun.
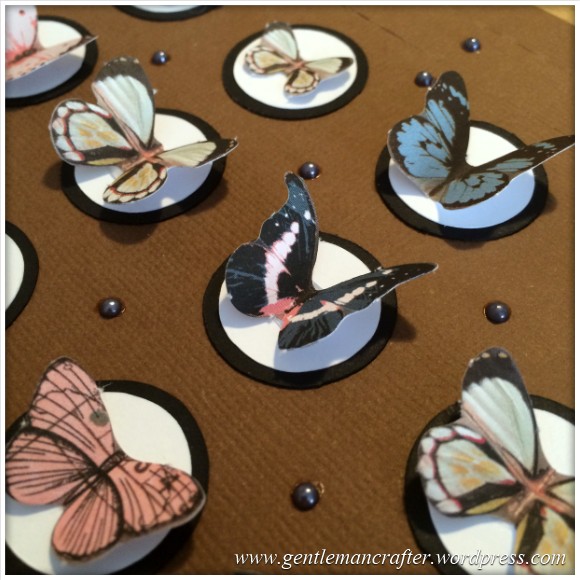
I finished the design off with some flat-backed pearls (that too me looked like rivets in the wood cabinet).
Ok, so there we go. Seven simple ideas for tarting up a chocolate gift box – if the chocolate ever makes it in there of course; just so you know, you can fit little notelets or pencils in instead if you need to ;)
I hope you’ve enjoyed this little trippette through some ideas for box decoration but sadly I have to draw this post to a close – mostly because there is chocolate on my craft desk and it and I need a few moments of ‘alone time’, lol ;)
If you have any questions or comments regarding this blog post, please feel free to use the comments section below.
Anyway, thanks for reading and I hope to see you next week for another Monday Mash Up.
J :)

Hi John can you please tell me if I can use any memory stick in my scan n cut ,if not can you tell me which ones are the best to use Thank you Janice Isaac
LikeLike
Hi Janice. There is a compatibility list compiled by brother. There is a link to this list in the links on the right.
LikeLike
Dear john
I have now found your down load of the manual. Perhaps I can get started now. I do keep all your blogs so keep up the good work even for the dumbo’s like me.
Sandra Crockett
LikeLike
Beautiful boxes ! You are so talented. The flowers and decorations on the box are beautiful. Thank you for sharing the Scan N Cut flower numbers. If you ever get a chance showing us how to put them together would be great. Thank you for your sharing.
LikeLike
Hi John
Well I must confess I am jealous of all these designs I would like one myself what a great idea.
Tracey mcintyre
LikeLike
loved all your projects with a special favourite being the butterfly display, what a clever idea. thank you John for all your hard work x
LikeLike
An absolutely delightful, delicious (!) collection
John they are just fantastic. You’re a marvel!
TFS
Annie x
LikeLike
the box lids are sooo beautiful!!!
LikeLike
Awesome boxes. So many lovely ideas. Thank You John. Jill
LikeLike
All lovely again as per usual. loved the collectors box with all the flutters on.
Christine in Bulgaria
LikeLike
Once again you have come up with some gorgeous designs. Well done you lovely man.
Love and Light
Sioux x
LikeLike
Fabulous as usual, I wish I had half your talent and the way you share it with us all is unbelievable generous of you. I love your style of tutorials and the photos are brilliant, you are a very inspiring person and I wish you did workshops for us followers. Keep showing us your great ideas please.
LikeLike
WOW! WOW!WOW! What fantsatic and nspiratinal ideas for decorating the box, John. The designs are G-O-R-G-E-O-U-S! Is the box for a bar of choc or individual ones? I am feeling the urge to have a go at chocolate making :-) x
LikeLike
I think it’ll fit most 100gm bars.
LikeLike
Thank you :-) X
LikeLike
Fab as ever you are a very talented man and a generous one too thank you x
LikeLike
We all appreciate being able to see what you create, you are so talented. I love everything you make.
Andrea x
LikeLike
You deserve chocolate after all that work! Tho’ probably doesn’t seem work!! Fantastic designs, thank you for sharing your ideas.
Carole.
LikeLike
A fabulous array of chocolate boxes John, love all of them, but especially love the ones where you’ve used the Spellbinder dies. What a wonderful kaleidoscope of butterflies and bling on the last one xx
LikeLike
Absolutely fabulous. Couldn’t possibly choose a favourite – so I’ll take them all please, don’t even mind if they are not filled with chocolates. Is all the cardstock DCWV ?
LikeLike
Good morning, John. I left a comment the other day about a cutting file for an Artist Trading Block and you asked me for clarification. I have found 2 very good examples – shellyhickox.blogspot.co.uk on 24th June 2014. The theory is just the same as an ATC but you’re dealing with a cube instead. Just about to backtrack and have a read of your chocolate box post from Saturday. You are opening up so many possibilities for me and my SNC, thank you
LikeLike
Hi Claire. The first link you posted did not work. Had a look at the second.
I’m not sure I get the concept. Are they boxes with lids or cubes that don’t have an opening?
LikeLike