
Yup, I’ve finally gotten around to it. It’s bag making time!
*races off to the craft room* …
Ok, slow it down Bloodworth, we’ve got some time.
Right, well in that case, first things first. A little potted history mayhaps. I started making bags yonks back, probably around 1993, but only really got into them (not literally, or I’d need one for each foot) when I began demonstrating Toyota and Brother sewing machines on Create and Craft TV back in 2009.
Here’s me looking all smiley on one of those shows. Cheesey grins, people! Cheesey grins.

Anyway after that I made a few as gifts and for friends and colleagues. I even wrote a small pattern booklet that got given away during some of those shows. It never went into proper production, can’t imagine why it would to be fair, but hey ho and on we go.
Since having this blog I have repeatedly promised to give you an idea of how I go about making these little beauties and I am pleased to say, thanks to a few days off from the other job(s) I have managed to dedicate some time to doing that, just for you. Not the others, just you :)
In this first post I’ll show you a basic tote pattern and then hopefully over the coming months I can build on this. Baby steps John, baby steps.
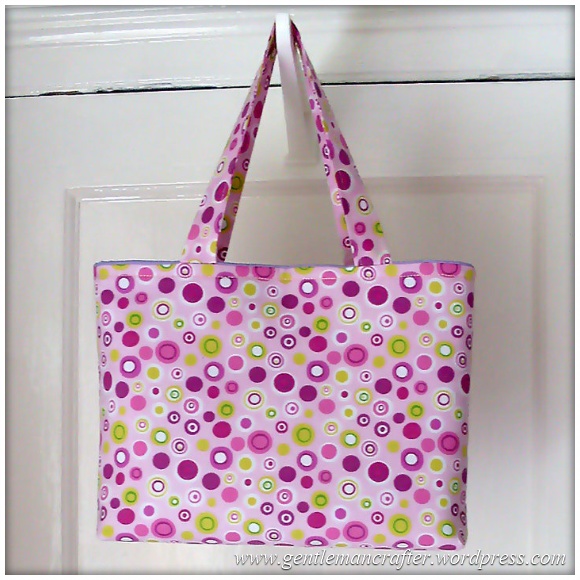
What do I mean by a basic tote?
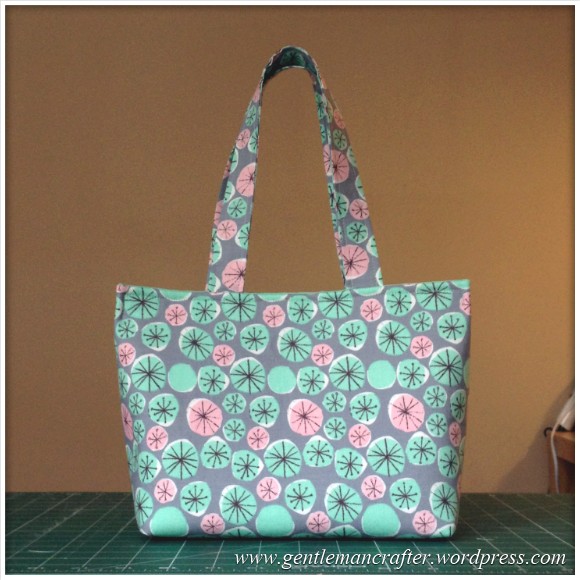
Errrm, something like this one …

Just a simple single fabric (outer) with matching handles, firm bottom *snigger* and a magnetic clasp.
It has been so much fun randomly making these over the years but it’s possibly one of the easier things that I have made. It can be made in an afternoon and takes very little technical know-how.
So I’d better get on with it I guess!
First tip – clear the decks!
When sewing I like to have as much work space as possible. This means that I can have the cutting mat, sewing machine and all of the gubbins set up and on-the-go at the same time and don’t have to clear down to change tasks. Some people may not have this luxury, but to be honest, a good sized dining table would be more than ample – so tell the family they’re eating in front of the TV tonight! Lol ;)
Anyway, here’s a proud moment for me – a completely clear work space! (Almost).
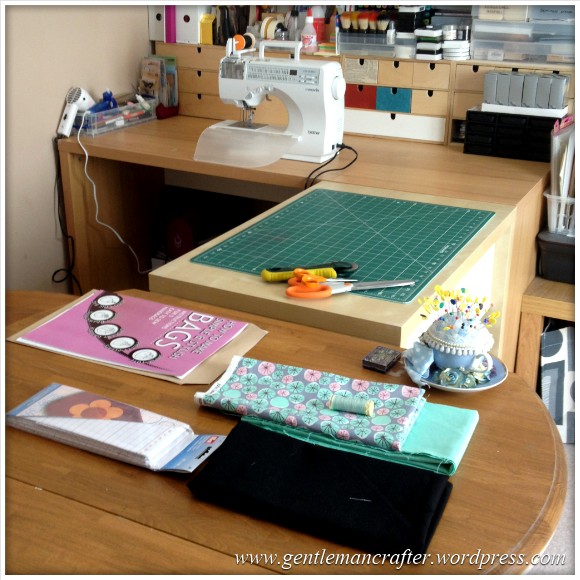
This happens so rarely that I thought that I had better show you all as proof!
I’d better let you know what tools and stuff I used.
First the tools.
- A sewing machine (obviously). Doesn’t have to be anything special, you just need to be able to sew a straight stitch and have the ability to remove the “free-arm”.
- Quilters Rule. If you’ve got it, a 24 inch long one would be ideal.
- Rotary Cutter. Just marvellous for cutting fabric with a quilters rule. Gives a nice crisp cut.
- Pins. I use flat/flower head pins as they lie flat on the fabric and can be sewn over (although I did use some glass headed pins too, lol).
- Ironing and Ironing board. Don’t worry, there’ll be no domesticity here, just fun :)
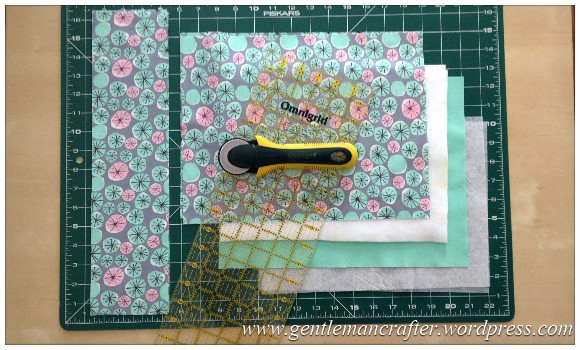
And now, the materials.
- A half metre of “main” fabric. This will make the outside of the bag.
- A half metre of “contrast” fabric. This will make the lining of the bag.
- A half metre of fusible fleece or fusible compressed fleece. It basically looks like wadding that has been squashed into a flatish layer and has a “grit” on one side that is heat fusible.
- A half metre of lightweight fusible interlining. It’s an iron on fabric that adds a little “oomph” to your fabric; it’s often used in dress making to add that “oomph” to lapels etc, ya know, the flappy bits that need a bit more gumption so as not to slump down the front of the dress or whatever.
Strictly speaking, a half metre is more than enough – you can (as I will show you later) probably get around two bags from this lot).
Finally, in time honored tradition, now the “notions”.
- Thread. Best if it matches the fabric but the world won’t end if it doesn’t although it might turn chilly and that will be your fault, not mine.
- Two piece magnetic clasp.
Right, so that’s the stuff and gubbins collected. Now I guess we’d best get chopping.
You’ll notice that I didn’t list a pattern. That’s because this style of bag making doesn’t need one. It works quite simply using rectangles of fabric and a little know-how, which I’m about to go through.
Firstly I cut the following:
- Two pieces from the “main” fabric measuring 13 inches wide and 10 inches high.
- Two pieces from the “contrast” fabric measuring 13 inches wide and 10 inches high.
- Two pieces from the “contrast” fabric measuring 15 inches wide and 4 inches high.
- Two pieces from the “fusible fleece” measuring 12 inches wide and 9 inches high.
- Two pieces from the “fusible interfacing” fabric measuring 12 inches wide and 9 inches high.
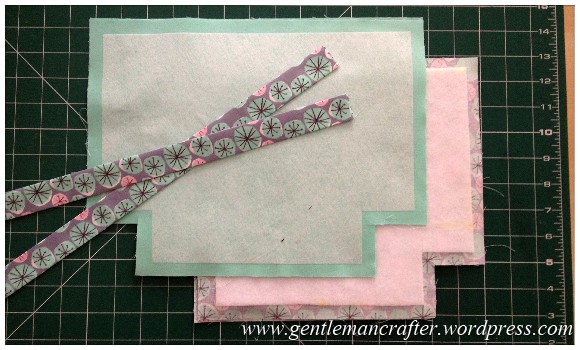
Once chopped and gathered together into a neat group, they will look like this.
You can skip the neat group thing if you’re short on time, it’s not an essential step.
Next, from the eight bag body pieces I cut out a 2″ square from each of the bottom corners.
This is what one of the “main” fabric panels looked like when this has been done.

Just repeat this for the other piece of “main” fabric, the “contrast” fabric pieces, the fusible fleece pieces and the fusible interfacing pieces.
This cut out square determines the depth (from front to back measurement) of the bag. The square that you cut will be half of the depth – i.e. cutting a 2″ square here will give you a 4″ deep bag. You can make the bag thinner by adjusting the size of this square. I did this for the second bag that I’ll explain a bit later in this post.
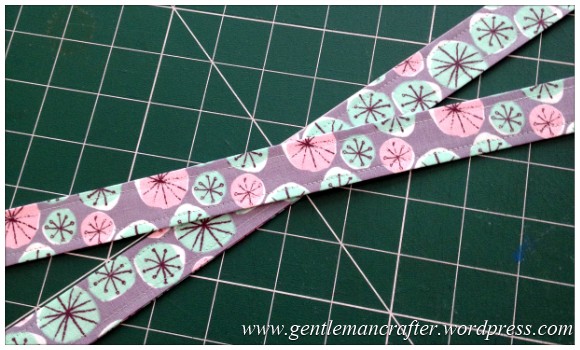
So, I needed to get everything ready to sew. First the handles.
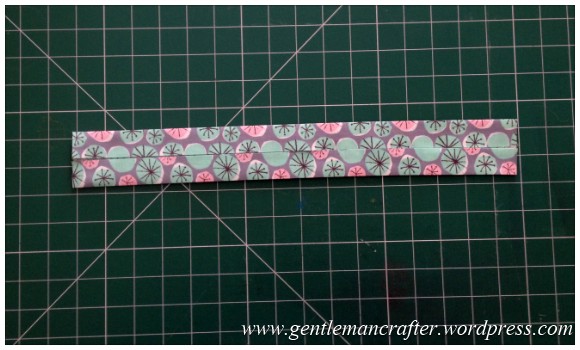
I took one of the 15 inch long strips and, on the ironing board, folded it in half (lengthways) and pressed it and then unfolded it.
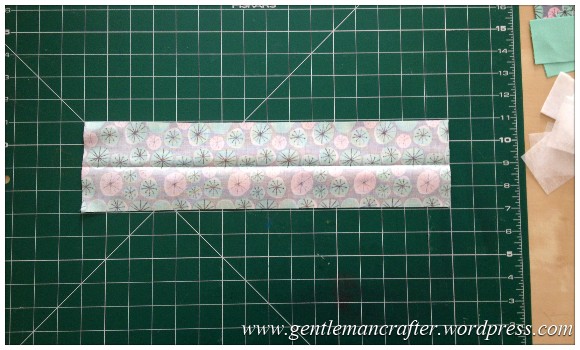
This little crease now became a guide for the next step.
I folded one of the raw outer edges into this centre line and pressed it (so that the wrongs sides were together).
And then the other side so that the two raw edges met in the middle.
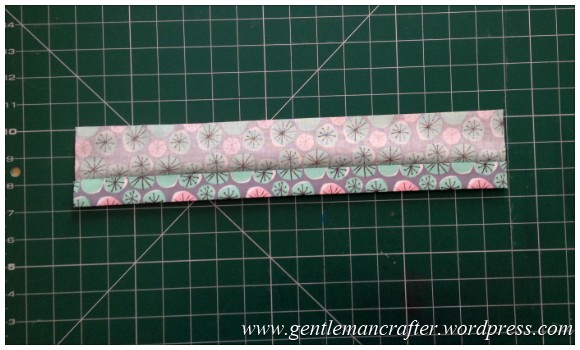
I then folded the whole thing in half again, hiding the two raw edges in the middle of the strap (no pic here).
Next up I pressed the fusible fleece pieces onto the wrong sides of the “main” fabric pieces and then pressed the fusible interfacing to the wrong sides of the “contrast” fabric. I often use a pressing cloth, which in laymens terms is another piece of fabric that you put over the top of the things that you are pressing – pretty obvious really. You don’t really need to buy anything special, just a scrap of cotton fabric will do.
I also have a confession. I did cut sew-in interfacing instead of fusible however to my joy I found out that Crafters Companion Stick & Stay For Fabric is marvelous at turning a sew-in piece into a fusible piece!
Now that neat little pile has changed a little. I was almost ready to sew now.
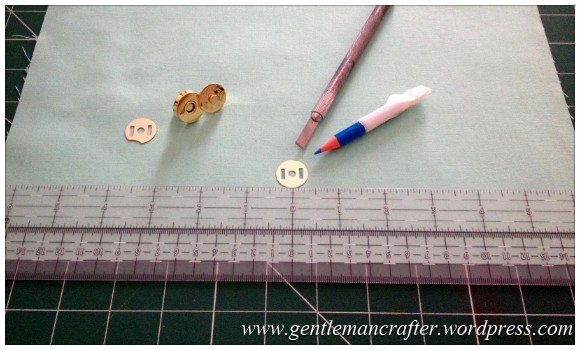
Just one more thing before I got sewing. I marked the position for the magnetic clasp on the “contrast” fabric pieces by using a centering ruler from EK Success. You can work the centre out manually if you want, I was just being lazy and as I had that tool, I thought that I would use it :)
The marking/slots needed to be positioned approximately 2.5 inches down from the raw top edge.
I also have a blade that I got in a set that is totally flat at one end; this was perfect for cutting the slots into which the “legs” of the clasps would go later. Again, it’s not essential and you can use a pair of fine point scissors, but as I had it … etc.
Anyway, time to pin some things together.
With right sides together I pinned the two “main” fabric pieces together …
… then also the two “contrast” fabric pieces, again with wrong sides facing.
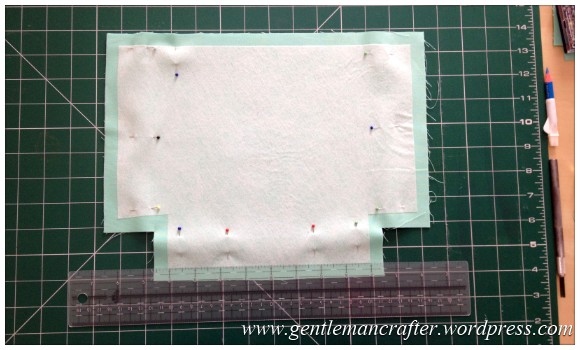
Oh good lord, what idiot just used glass head pins. Oh well, they should still be OK.
Right, everything was now ready to take to the machine. So I took it there.
Well, I actually had a tea break first and a slice of cheesecake – naughty me! *sniggers*.
Tea break over and I began by top stitching all the way down the folded (closed) edge of one of the long handle pieces.
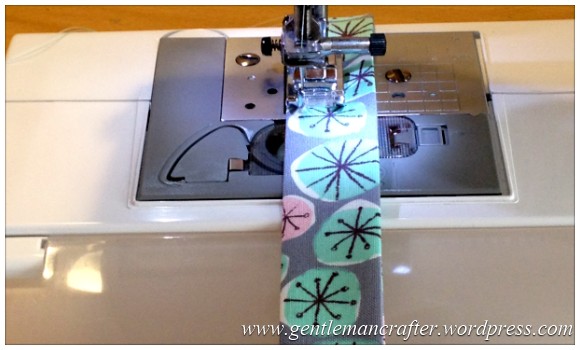
And then top stitched down the other (open) side.
Then I repeated this for the other strap. Now the handles were finished and ready to use.
I guess you could shove something up them to make them more firm however I like this style as they are easy to make and work well as handles go. I’ll be looking at more handle types in future handbag making blog posts.
Next I stitched down the sides, along the base and up the other side of the “main” fabric sandwich using a half inch seam allowance (the gap between the edge of the fusible fleece and the fabric edge should be about a half an inch because of the way that I cut it earlier – it was 1 inch shorter on two sides which means that I had 0.5 inches less at either side – it’s genius I tell you! Lol).
Tip – don’t sew across the top or around the corner cut outs; just down the side, cut threads and re position, along the bottom, cut threads and re position, up the third side.
Like this …
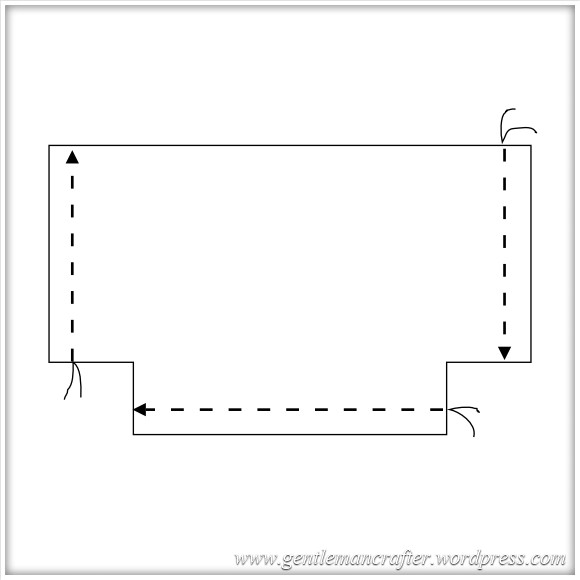
I then repeated this on the “contrast” fabric, leaving a 3 or 4 inch gap in the centre of the bottom edge (as shown by the centering ruler and red pins in the image further up – oh, that must have been why I used those – because of the different colours … *looks around shiftily*).
Next, on the outer body piece I squashed the side of the bag body in on itself so that the side seam met and lined up with the bottom seam and then lined up the edges of the square cut out that I made earlier and pinned it into place.
I then stitched across the open gap using a half inch seam allowance, making sure to back stitch at both ends to make it secure. (These stitches are going to be what holds all of that stuff in the handbag – so make em strong and tough!)
I repeated that on the other side and turned the whole thing right sides out.
I then repeated the sewing of the corners on the “contrast” fabric piece but did not turn this one right sides out.
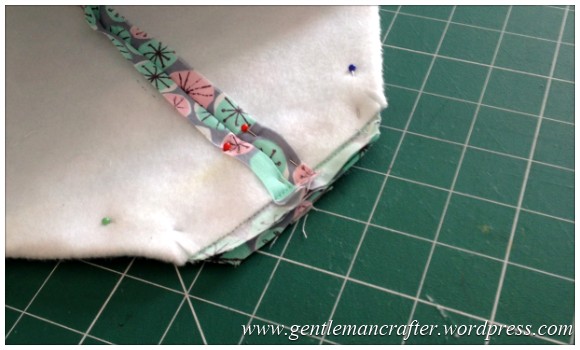
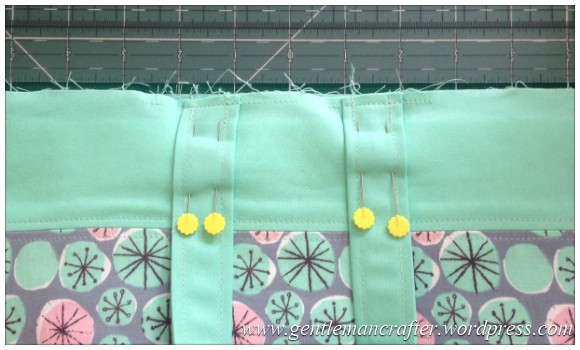
Next I positioned and pinned the handles into place on the outer body and then stay stitched along the top edge (using about a quarter of an inch seam allowance).
Now, I totally forgot to take a photo of this stage the first time around so I took one on the second bag that I made for this post – it looks slightly different as I have used a coloured header band, but the positioning and pin/stitching is what we are looking at here.
Having done that on both sides I now had the body and lining of the bag ready to put together. It seems that I am whistling through this – are you with me so far?
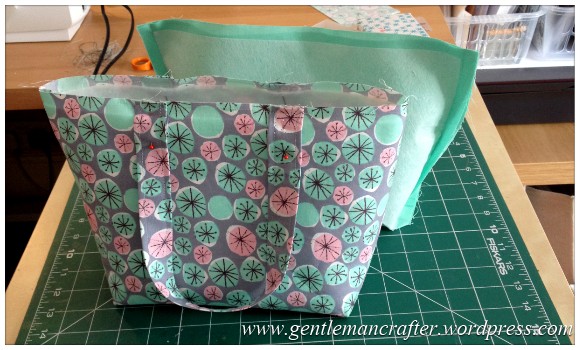
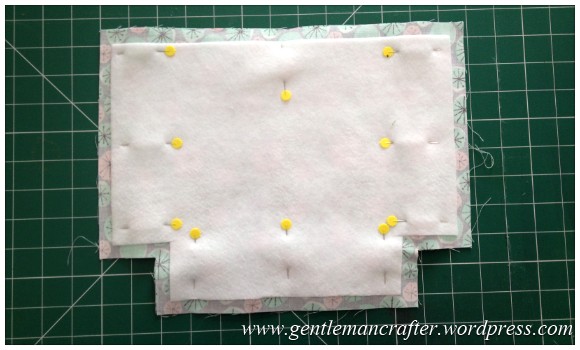
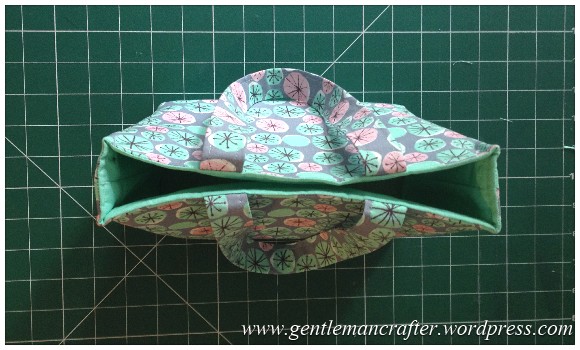
I inserted the outer body into the lining and pinned around the upper edge.
As you can see above, the wrong sides are facing outwards on both pieces – this is correct :). I remember it taking me a while to get my head around this when I was first making these.
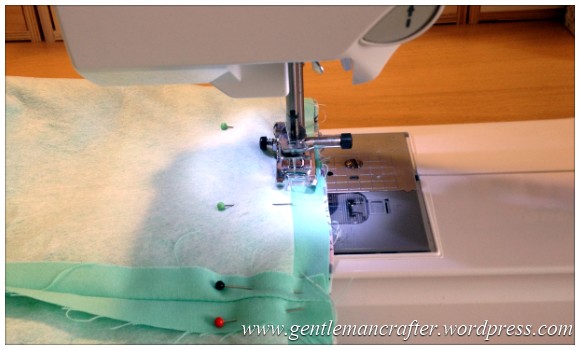
Slipping the bag shell over the freearm on my sewing machine, I stitched around the upper edge using a half inch seam allowance. It was a bit “hilly” in places like the side seams and where the handles were but it didn’t seem to phase the machine, I just needed to make sure that it didn’t wonk off. Yes, a technical term for going off course.
After removing the pins I turned the whole thing right sides out through the gap that I had left in the lining.
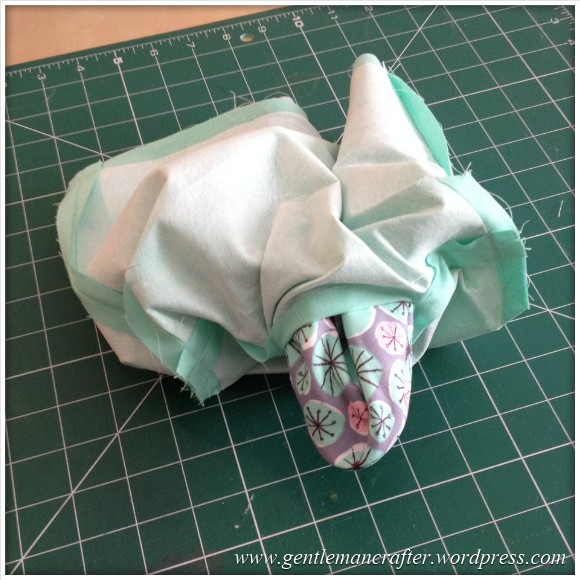
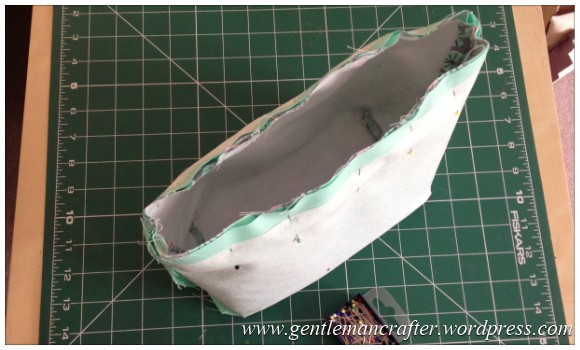
I’ll be honest, this photo didn’t look pretty when I took it, and I’m not feeling the love right now … I shan’t tell you what I was thinking though. :!
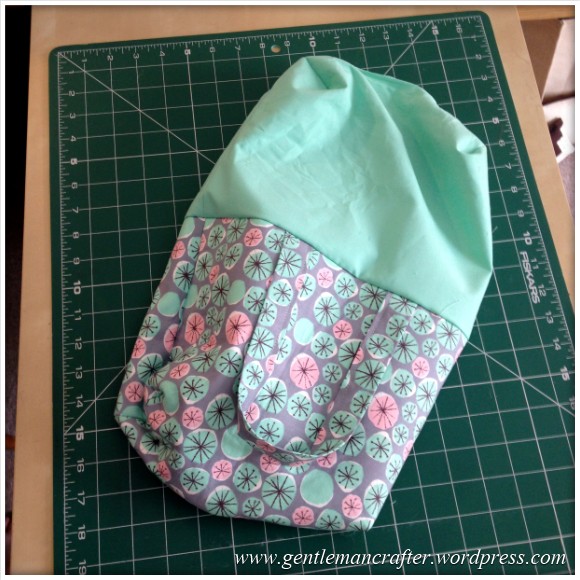
After pulling that all the way through, it looked a little like this.
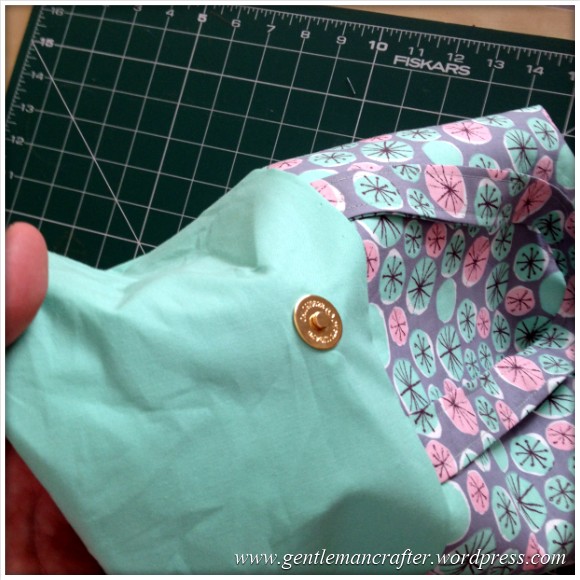
I chose this point to insert the magnetic clasp. Mostly because it seemed logical to do it before I secure the hole in the lining closed.
This was a fairly swift operation, and very much like using brads in paper craft. The two prongs went through the holes that I made earlier (from the right side of the lining).
Then I reached in and slipped on the backing disc and pressed the two little legs outwards. Like so …
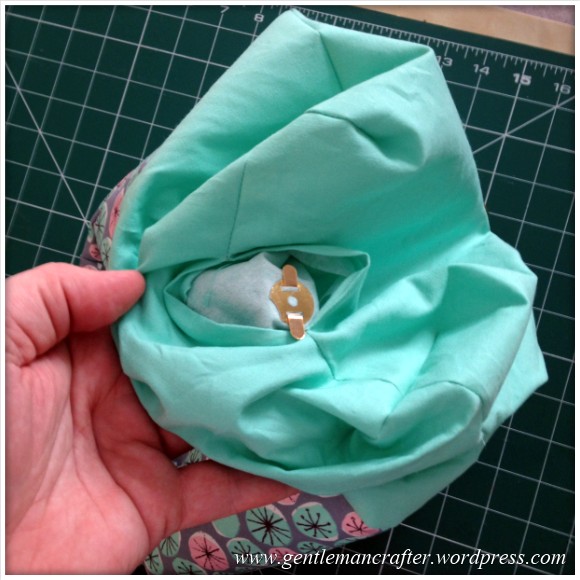
I repeated this for the other part of the magnetic clasp on the other side of the lining.
Next, I pushed the lining into the body of the bag and then pinned around the upper edge and top stitched close to the upper edge again.
This secured the handles into place and also stops the lining from creeping out of the bag.
At this point I added a bag base. A bag base is nothing more than a stiff piece of “something” that stops your bottom from sagging (oh, if only it were that easy!).
I used a product called Supertex200. I am not 100% sure that it is still made as I got it about 5 years ago from Australia, and they seemed to be the only ones at the time that had anything like it. I know that Clover do a bag base product and also there are others on the market. You can always use a bit of cardboard, but you might want to make it so that you can take it out of the bag if you need to wash it – or it will be a wreck after a few spin cycles.
Anyway, here’s the cut down Supertex.
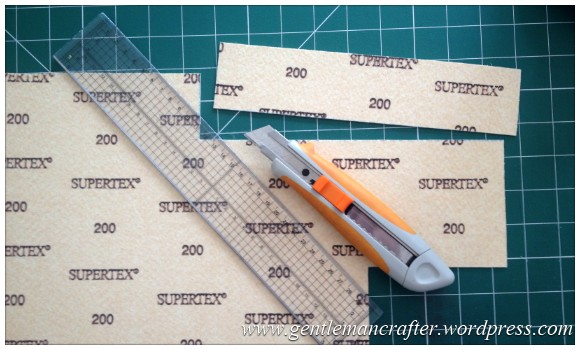
Most exciting picture of this post I think you’ll agree.
To add this to the bag it can be slipped in through the gap in the lining and glued into place or it can be covered in fabric and then just inserted into the bag after the gap in the lining has been closed.
To finish the bag I used fabric glue and quilters clips to close the gap in the lining but you can of course slip or whip stitch it closed also.
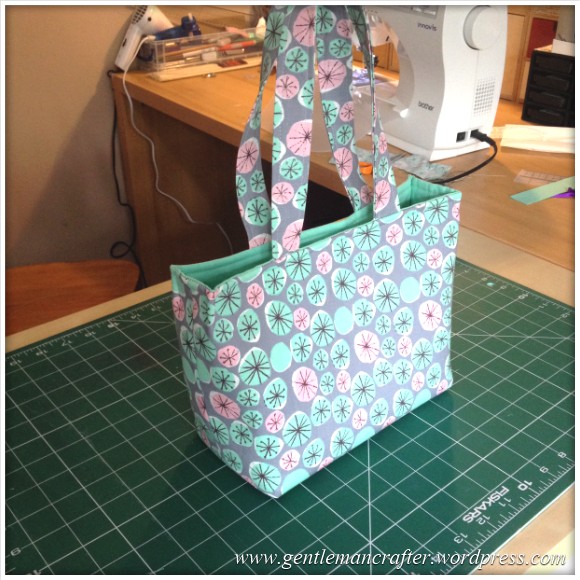
And this, my friends, is what I ended up with. A cute little tote :)
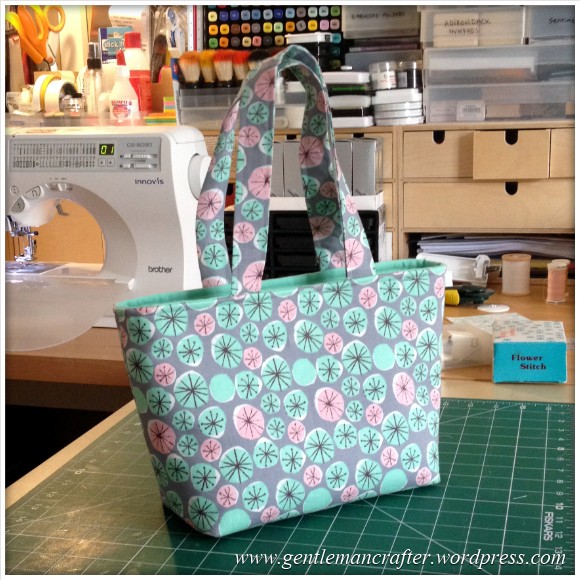
Now, you could leave it at that however there is one little thing that I sometimes like to do that makes sure that the bag holds its shape and has “body” and that is to sandwich and stitch the front to the side at about 1″ from the seam on both the back and the front – just a few stitches down.
I do this on all four corners and end up with something like this.
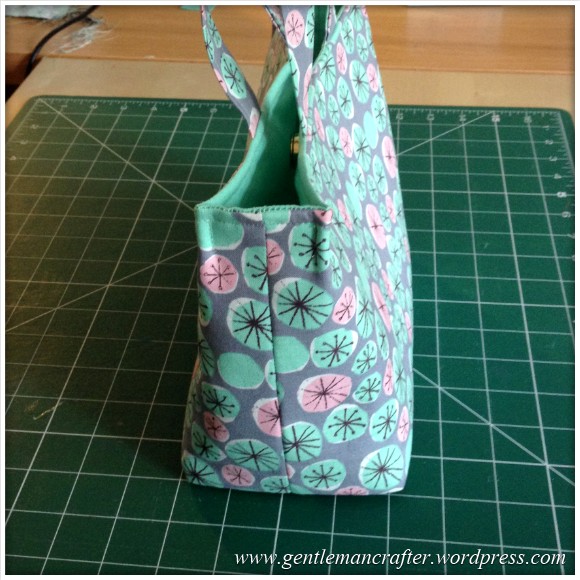
Now there is no flop from the bag body and the bag will remain upright when placed on the floor or table. Here’s a few more shots of this creation.
You can of course decorate this to your hearts content however I’ll be looking at that in future posts, this was more about construction.
There will also be ways in the future that I hope to share for making it a totally enclosed bag.
So, that’s one way.
Now that the principle of making the tote is established, you can get a little clever.
We know that we start with a rectangle, so what’s stopping us sewing strips of fabric together to make that rectangle or adjusting the size of that rectangle? Answer = nothing!
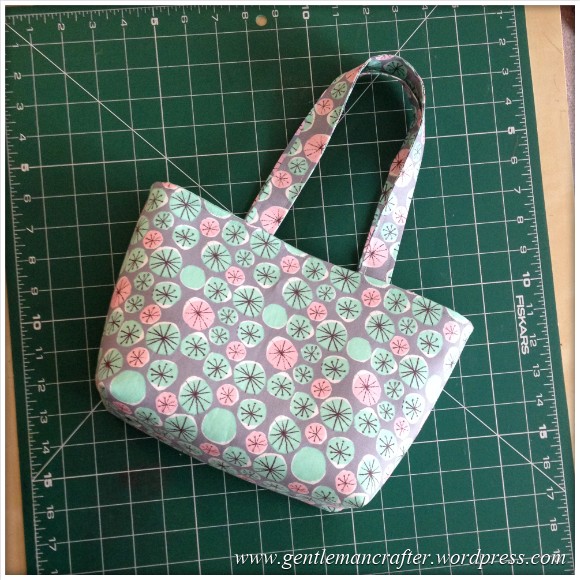
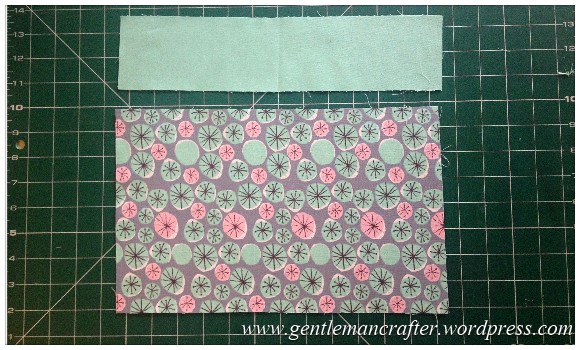
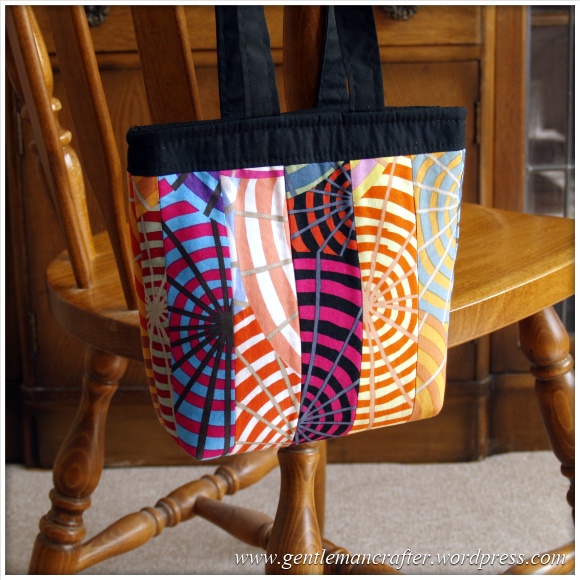
I bought a half metre of each of the fabrics that I used and didn’t really think about how I placed the pattern pieces when I was cutting them out so didn’t have enough of each to make another one just like the last so I cut a smaller strip of the main fabric and contrasting fabric …
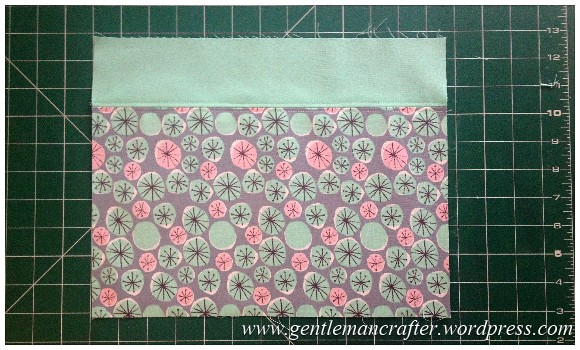
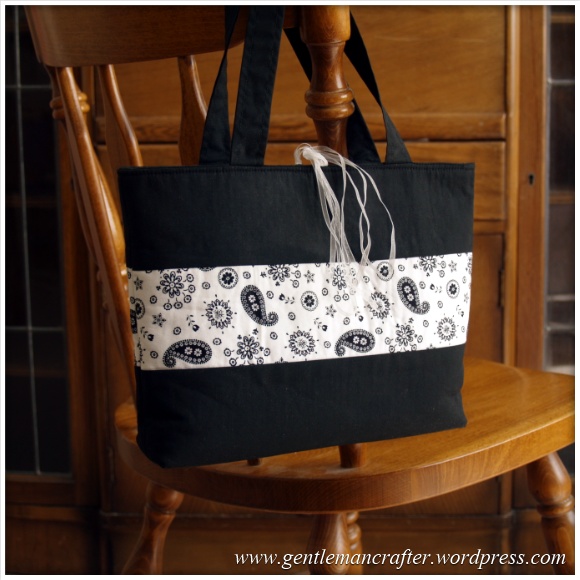
Stitched them together with a half inch seam allowance and then top stitched the seams down (and to give it a decorative look).
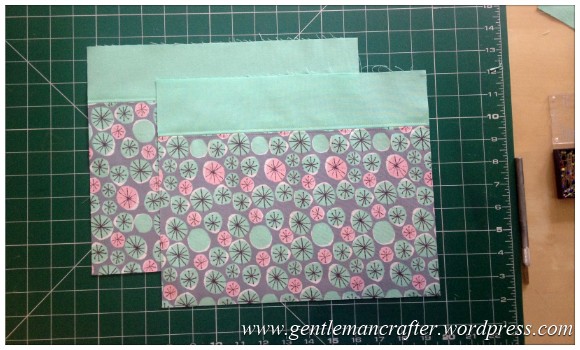
Then repeated that so that I had the two main body pieces as before.
Construction was as before and this is what I ended up with.
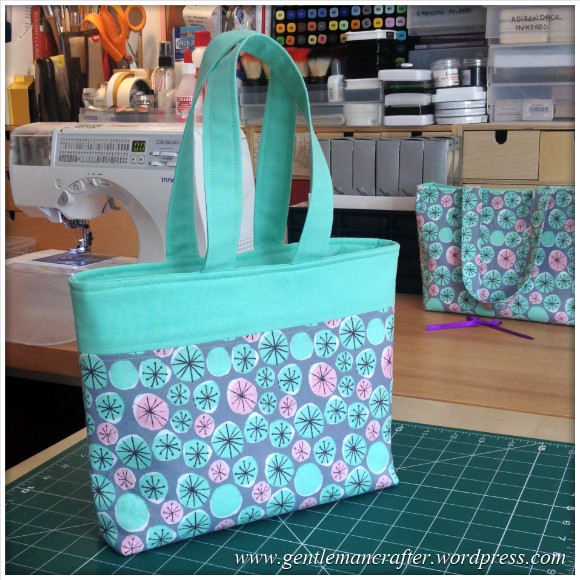
Cute eh?
Now, if you were to supersize those rectangles, you could end up with your own bag for life shopping tote, like these.
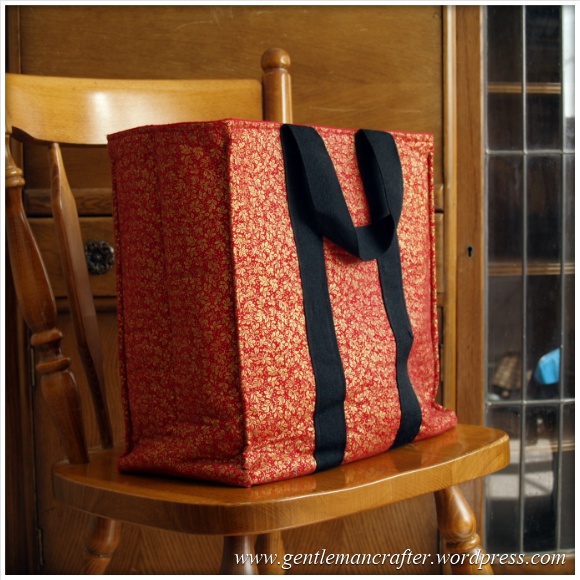
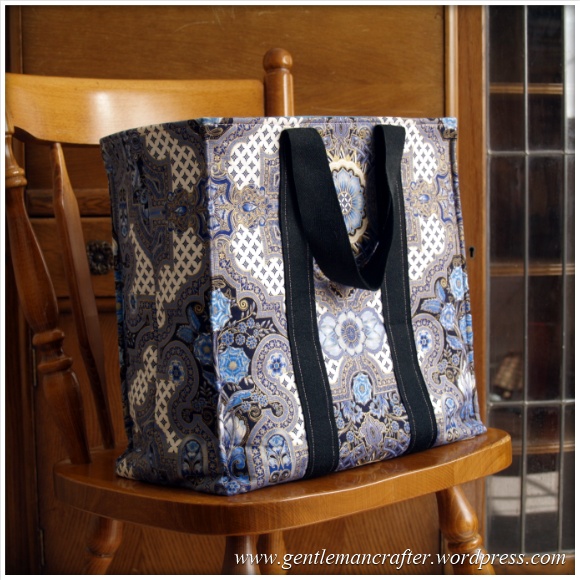
There was one small difference in construction of these and that is that I used a webbing strap for the handles and stitched them to the bag shell from top to bottom before assembling the outer shell. It just gave a little extra support and strength to the bag that will be carrying my potatoes home.
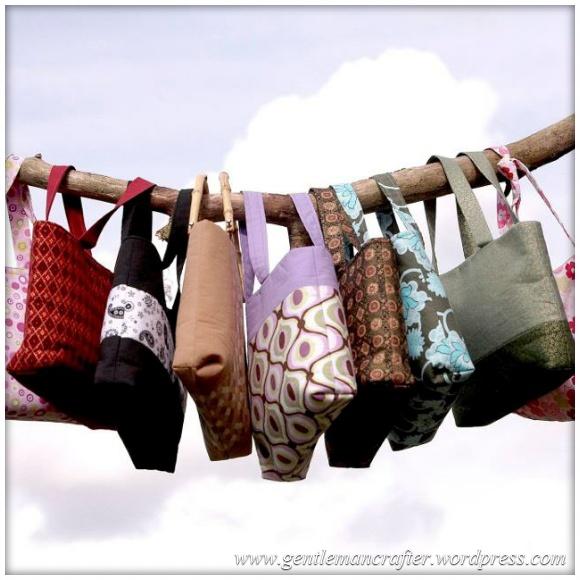
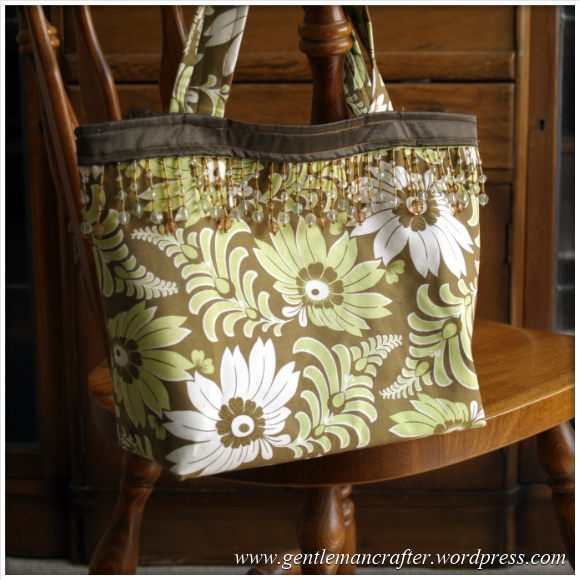
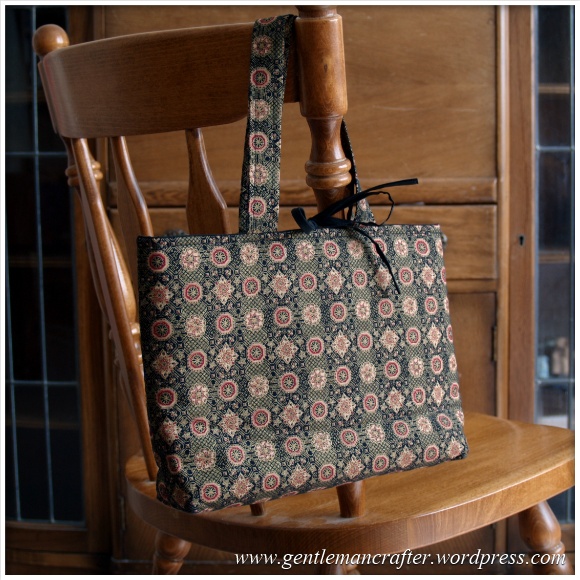
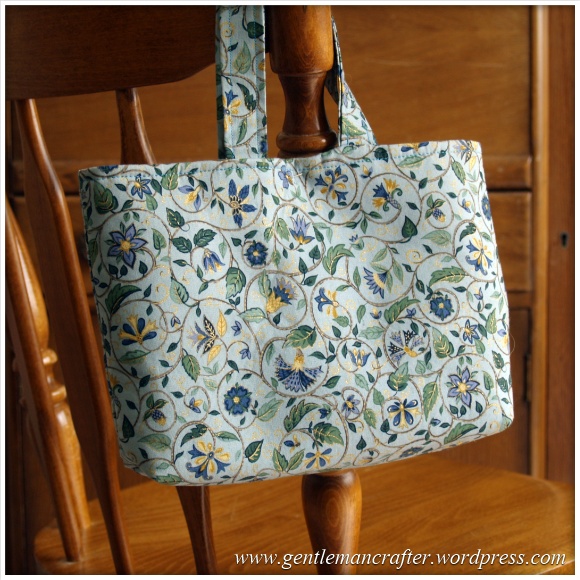
And to finish, here are a few more that you may have seen in the past however I thought that you might like to see them again as we are talking about sewing handbags and using various combinations of strips and decoration to make a tote bag.
Ok, so that was the first in what I hope to become a series of bag making posts – I can’t guarantee when the next one will be as it takes up quite a bit of time – perhaps I’ll go bi-monthly with the bags and do decorative techniques in-between – who knows, just getting these posts done is an achievement! LOL :)
Anyway, I hope that you liked it either way and will share it with all of your sewing buddies and even have a go yourself.
As ever, if you have any questions about this post, then please feel free to use the comments section below.
Thanks for reading – see you again next week for the next Fabric Friday!
J:)

John I was so impressed with how easy you made the instructions with your pictures and think even I can give it a go. I did use my machine recently and finished a project for an elderly neighbour which was a hanging bag with pockets that would sit neatly over a handrail with a round top that slips under the mattress of a bed and I really should have taken some pics of it. I was so pleased with it when I finally finished it. Now I need some funky fun fabric to have a go at the tote bag. I have loads of cotton batting that I bought for a patchwork cushion cover that I was doing in conjunction with a class and was wondering if I use my stick and stay on that would it work the same as the fusible stuff? Thanks for taking the time to share so much of your diverse creativity with all of us.
LikeLike
Stick and Stay for Fabric will work just fine :)
LikeLike
Bought some lovely ‘furnishing’ fabric, bargain price when I was in Wales recently. Just the pattern I’ve been looking for – cheers! Off to find my table top!
LikeLike
john, what a inspiration your blog is, i want to have a go right now, however its 30 years since i last use a sewing machine, could you point me in the direction to buy a sewing machine which a novice could use for quilting and craft projects
LikeLike
Most machines will cope with those. There are a few at Create and Craft or you could always visit your local sewing machine shop to look at/compare a few models.
J :)
LikeLike
Annemarie, perhaps there is a ‘sewist’ living near you who could let you have ‘a go’ to see how you feel after all this time & we would all say what we think of our own machine & whether they are suitable for a returner. There are lots of online groups you could look at for thoughts on machines – some painfully honest about the products they have bought and tried.
Research is the name of the game, the wrong buy could put you off sewing for another 30 years :) despite John’s inspiration…
LikeLike
Absolutely Brilliant well done John your tutorial will be invaluable to new and seasoned sewers alike can’t wait for your next instalment and thank you for taking the trouble to take time from your busy life to do this
LikeLike
Great timing, I had cut out a bag a few days ago, outer, lining etc. But had then been head scratching trying to decide which bit to stitch first and to where?
Then I was pointed in your direction, my problem is now solved, what a great tutorial, wicked humour, great photo’s I am really looking forward to more, so thank you John, so much, I’lll be finishing this. tomorrow.
One less UFO!!!!
LikeLike
Hi John thank you for your time the tot is lovely made lots of them but never put batting in one am going to give it a go
Beth
LikeLike
Great tutorial, good photos and easy to follow instructions
LikeLike
What a terrific tutorial! You have a great gift in being able to write in such a clear, easy-to-follow way. Thank you for including suggestions on how to adapt the pattern. I am eagerly awaiting your next sewing tutorial.
LikeLike
Wonderful post John. I’m a sewer as well as a paper crafter and its always fab to see fabric makes appearing in blogland x
LikeLike
Love it, love it, love it. My sister and I used the bag bible by Lisa Lam we made the reversable tote. Impresed by your sewing area being tidy.
LikeLike
Oh lordy I feel another craft looming! I hated sewing at school, learnt not a lot although I have made curtains in the past. My late father in law insisted I had a sewing machine sits in a lovely old tea chest, can’t even remember what it is lol!
I can see it being resurrected! John great blog and fab instructions. I said it before and do so again C&C are missing a trick here!!!
LikeLike
Hello John
What gorgeous bags and material.
Definitely going to have a go at these.
thanks
Diana
LikeLike