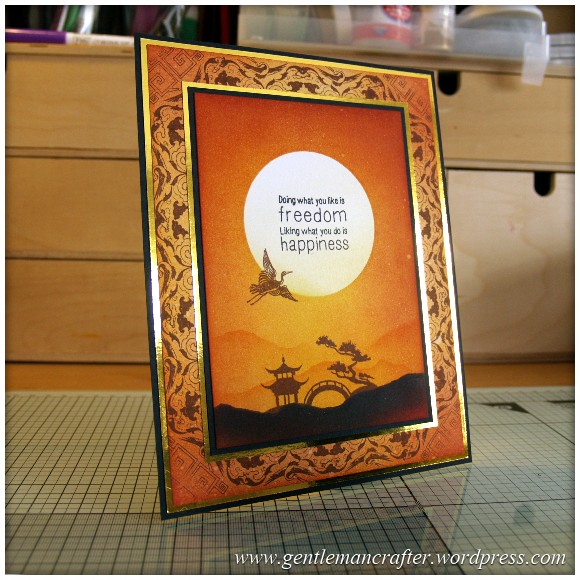
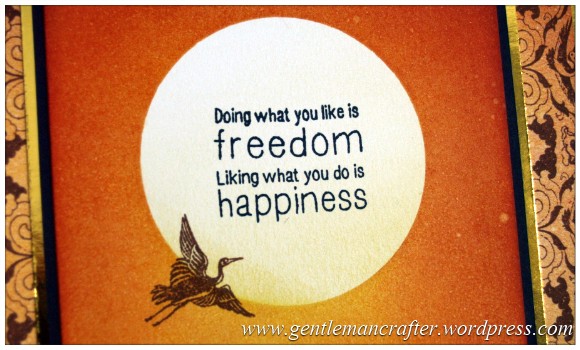
The key to happiness is quite elusive. According to some rubber stamps that accompanied this month’s issue of Get Stamping the message is clear, “Doing what you like is freedom; Liking what you do is happiness”.
I guess that they have a point.
Anyway, don’t worry, I’m not going to waffle on about philosophy and all that. I think that you can guess that this post is in fact about something that I made with the stamps that I got with the magazine.
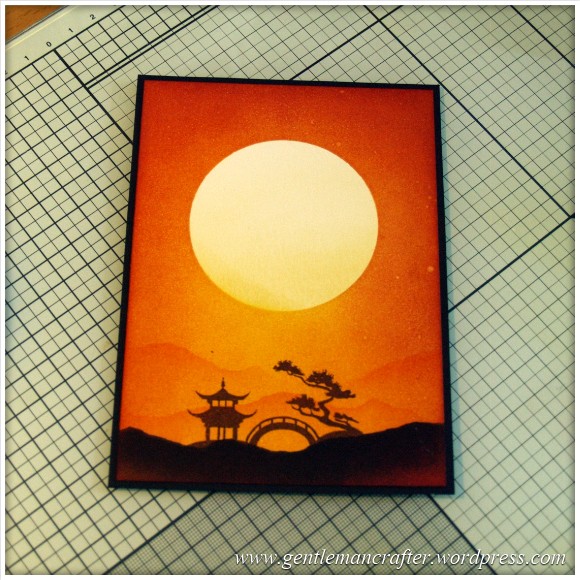
Here is said card …
Definitely proud of this one as all of the design was done by my fair hand as I wielded blending brushes, inkpads and rubber stamps, even the background! *puffs out chest with pride*
I was lucky enough to have just enough time to photograph a good proportion of the steps as I made this card so we’ve got ourselves a full description below of how I went about making it in case you were interested.
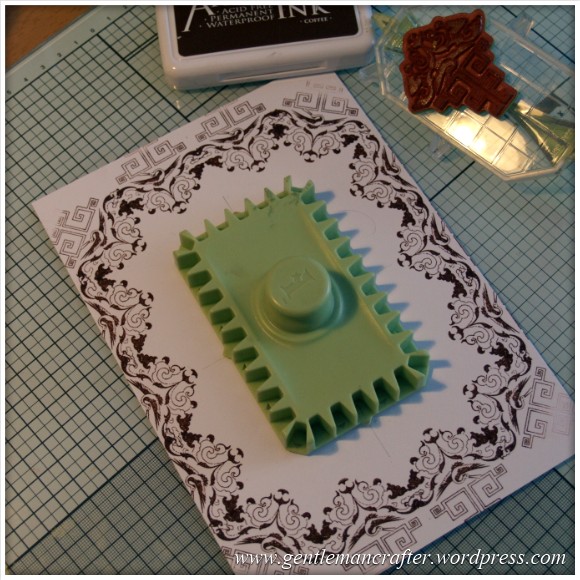
So I gathered up a whole bunch of stuff as follows …
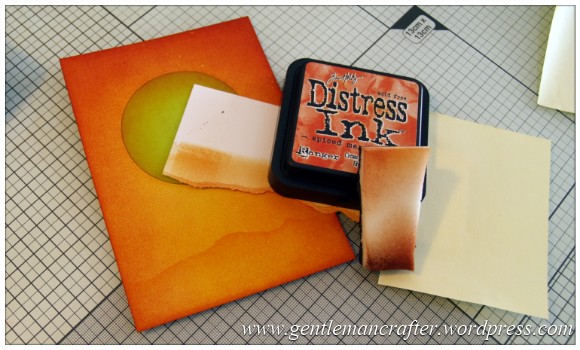
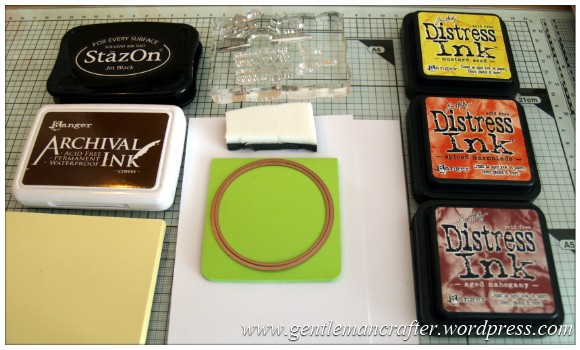 This pic shows most of it. I added in the Inkadinkado Stamping Gear rectangular cog later and also didn’t end up using the stazon for much.
Oh yes, Here is the stamp sheet that I was talking about earlier also…

Lots to choose from :)
I went for the three that are bottom right of the sheet. The crane/stork, the bridge and the sentiment.
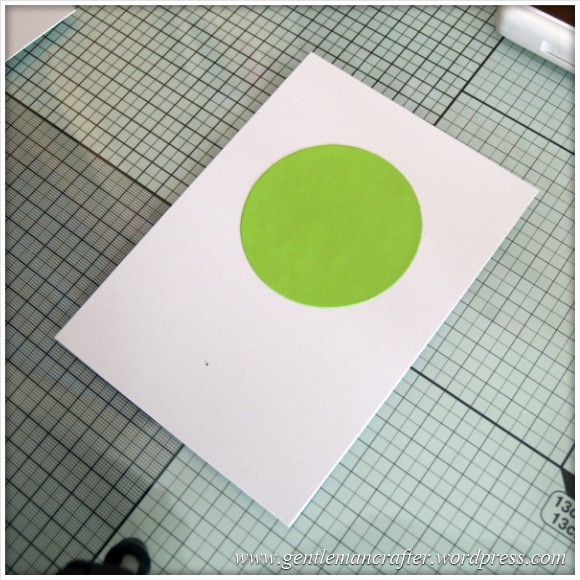
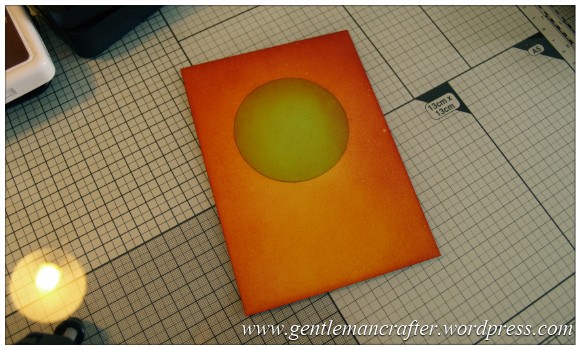
The first thing that I did was to cut the all over post it note with the circular spellbinders die and plonk the resulting shape in the upper area of the A6 cardstock. I say plonk, I clearly got the ruler out and checked that it was equidistant, as any good virgo would.
Then it was time to start inking. Using my make shift ink blending brushes (shaving foam brushes for 60p from Wilkos) I blended on the first colour of Tim Holtz Distress Inkpads which was Mustard Seed.

Then I used Spiced Marmalade…

And finally Aged Mahogany.
I also added some “speckle spots” to the design by spritzing with water and then dabbing away with tissue – I thought that it need it.
By the way, I like it when my brushes are saturated with colour – look how cute the look all lined up and having a natter – now back to work brushes!

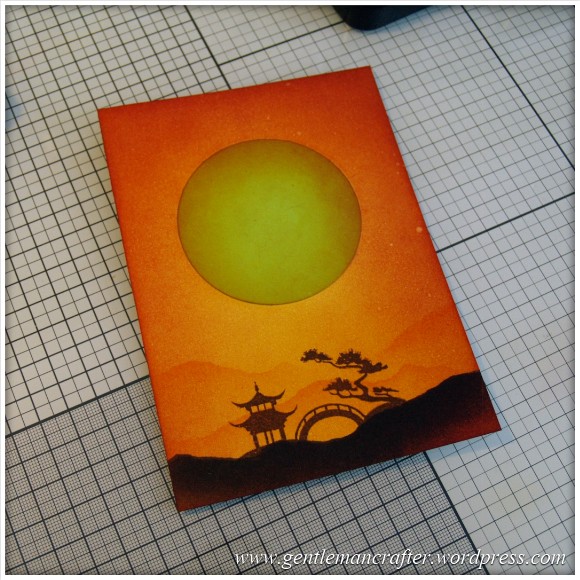
Ok, Ok, they deserve a break. For the next step I used ink blending foam. I tore some paper in half and used this as a mask (to represent mountains) and then blended some ink (the mask covered the top part of the design and I blended the ink towards the bottom area).
I repeated that a couple more times, moving the mask each time and using less/more ink to give the impression of the hills receeding into the background and then I used the Archival Coffee coloured inkpad to stamp on the bridge.
Then I – woah! What, where did this come from (and what happened to the other one)?! *looks around innocently*
Mmmm, look at it’s delicious custardiness …
Ok, I don’t mind if I do – scoff, munch, nom.
Moustache wiped and it was back on with the card I removed the mask and layered the sheet onto some black cardstock; trimming the edges down to 1/16″ with my perfect layers rulers.
At this point I thought that it might look a bit boring just mounted like this (well, let’s say subdued as the scene is ok, but it’s not really making an impact – for me anyway).
So I broke out the rectangular Inkadinkado Stamping Gear cog and paddle along with one of the oriental style Inkadinkado Stamping Gear stamps. Using the Archival Coffee coloured inkpad I stamped out a border pattern onto white cardstock (about A5 in size).
I trimmed the two short ends of the card a little to make them look like the two long sides and then, using the same Tim Holtz Distress Inkpad colours as earlier, I blended the edges giving it a shaded look. As before I spritzed lightly with water and then dabbed off with tissue paper.

I then added the sentiment and the crane/stork – the sentiment was stamped with black stazon and the stork with the coffee coloured inkpad.
The gold layers were added to give a little “pow” to the design. All were done with the perfect layers rulers in order to make it all neat and proper.
That, as they say, was that.
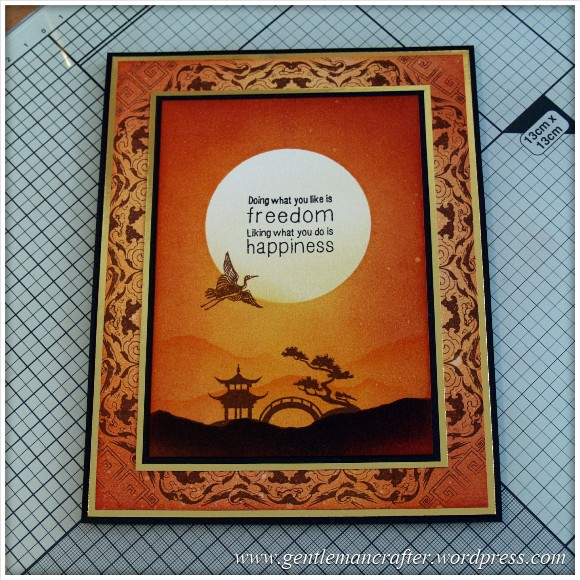
Finally, here are a couple of close ups for your perusal.
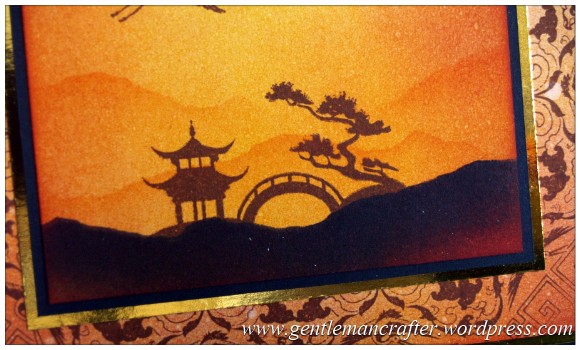
So here is that there card all finished and proud.

What do you think? Not a bad effort eh?
Looking at the sentiment, I can definitely say that I liked what I did here, and the custardy donut finger :)
As ever, if you have any questions or comments about this post, I’d love for you to pop them in the comments section below.
Many thanks for reading. See you again soon.
J :)

Loved the card, ordered the mag but cannot find the inkies stamps, any ideas please?
LikeLike
Love this card, I have now received the stamps and have made a version of this for my dad’s 80th birthday, thank you John for such inspiration, although I failed to do the border, my card still turned out pretty nice
Take Care
Stephanie xx
LikeLike
After a bit of a lapse in my ideas section this card has set all my little (very little at the mo) grey cells exploding with ideas again. Add miracle worker to your CV John got me up and running again also love the Brother scan n cut. Love all my Brothers have now got 5, printer, embroidery machine, labler, knitting machine and now the newby wish I had more hours lol.
LikeLike
Love this. The clever use of colour makes it look very oriental. (the border stamps didn’t look Oriental until you coloured it, then it was like magic!)
LikeLike
WOW! John this is beautiful, too good for a card, looks so good as a picture in a frame.
Great images to show each step.
Love and Hugs
Jacquie J xxx
LikeLike
Stunning card John. I have these stamps as I fell in love with them as soon as I saw them on the shelf. I have a really important question though….. what happened to the other doughnut ??? Only guilty responses please !
LikeLike
Ok, ok, I admit it. I scoffed it :)
LikeLike
Hi John, New crafterish (couple months) just bought some distress inks, so your demo and excellent pics will give me good instructions to create and use the tools, Fabulous card and yes I bought the last ‘Get Stamping’ and waiting to find the next one in the shops because the stamps look great so many to use. Brilliant and thanks.
LikeLike
You did make me laugh reading this and I hope you enjoyed your cake :-) fab card by the way
LikeLike
Absolutely stunning John, love it.xx
LikeLike
This is beautiful! Must get the mag so I can have those stamps. Love the colours. XX
LikeLike
Great demo, John. Looking forward to future demonstrations, I must get the magazine & get cracking, I’ll try to keep up with you.HaHa! also with the cakes.
LikeLike
hi john love the card ( and the doughnut ) great tip for the shaving brushes for my distress inks will be buying some of those as I have tried using ordinary sponge but not very successful
LikeLike
Great card, thanks John, Lots of techniques I want to try out, they all work together beautifully in this card.
LikeLike
Hi John, this card is absolutely stunning! Love the oriental theme and the way you have used the stamping gear.to create the background. Also love the colours that you have used. Time for wilkos I think for some brushes!
LikeLike
What a fabulous card – and doesn’t the inkadinkado background really make it all pop! (love the inkadinkado system!). Thanks John for yet another amazing post – your step by step guides are so helpful and I’ve learned lots of lovely techniques from them x
LikeLike