
I find creating geometric patterns in Serif Craft Artist very easy. I have had a couple of questions in recently asking if I could create a video on how I do this.
I don’t actually have the facility to do this right now however I though that it would be easy enough to explain how to do this with step by step screen shots – so that’s what I did. I hope that this helps those of you that were curious …
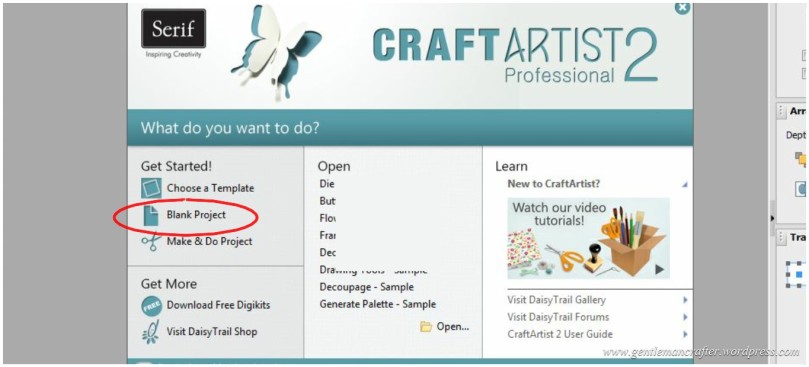
Ok, well first step is to obviously open the Serif Craft Artist Software.
Choose the option marked, “Blank Document”.
From the next menu choose A4 and then clock OK. You might be presented with the Digikit Browser; just click OK without selecting one.
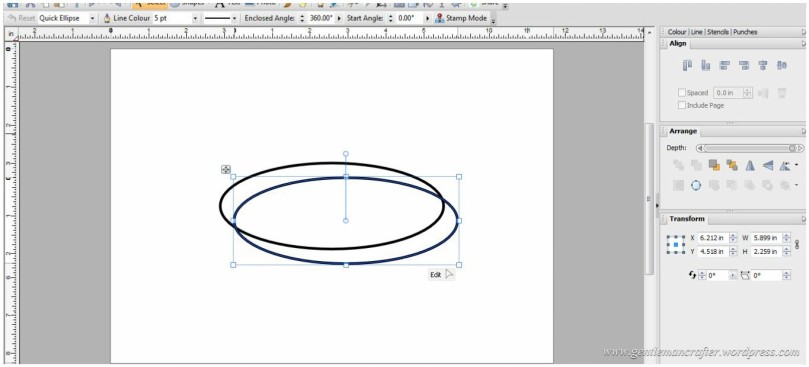
Next, drag a circle auto shape onto the page, but make it more ovular than circular, if that makes any sense – maybe a picture will help here.
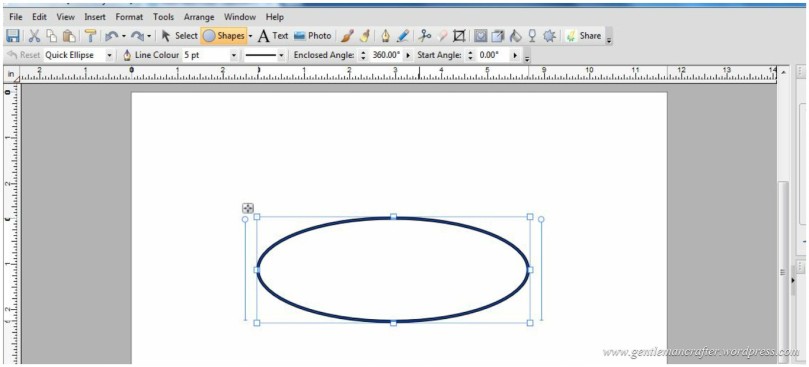
Set the line weight to 5pt.
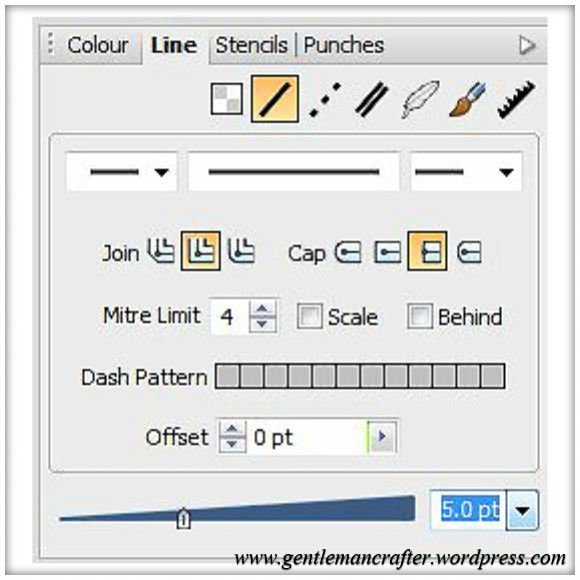
Set the Fill Colour to transparent.

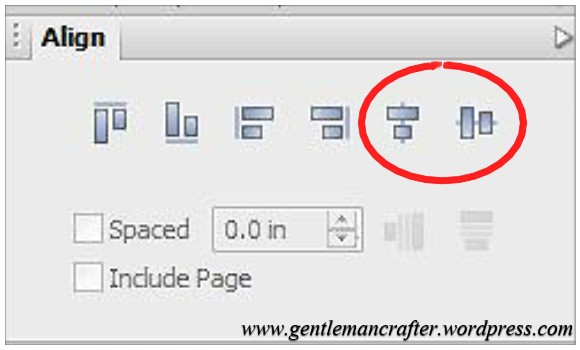
Then, click on Centre Horizontally and Centre Vertically to centre your oval into the middle of the page. This step is not strictly important, I just got into the habit so that I know where everything is going to end up and if I am zooming in and out, it’s likely to end up where I can see it.
Next, copy and paste the oval.
Then, using the Transform Tab, rotate this oval 30 degrees.
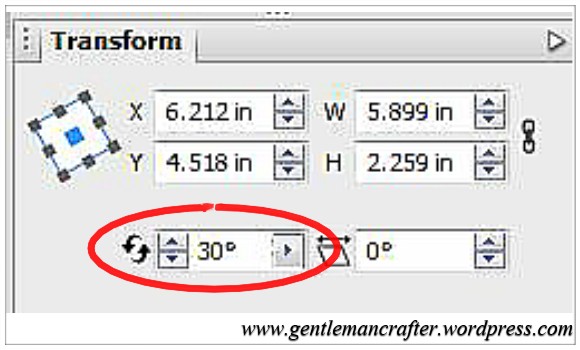
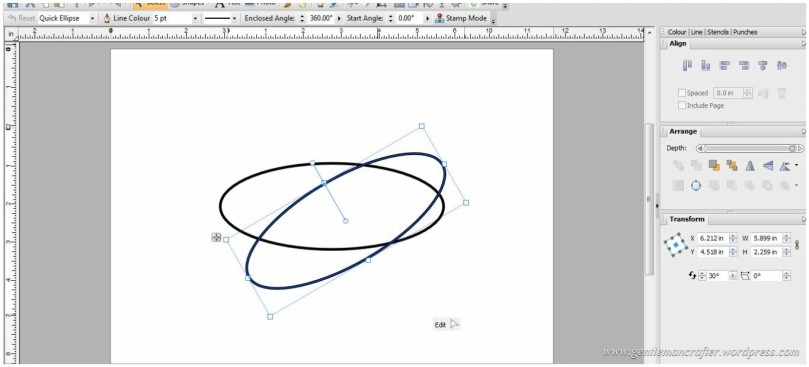
Now continue to paste and rotate the oval, increasing the rotation 30 more degrees each time (i.e. 30, 60, 90 etc), until you have six shapes on the page.
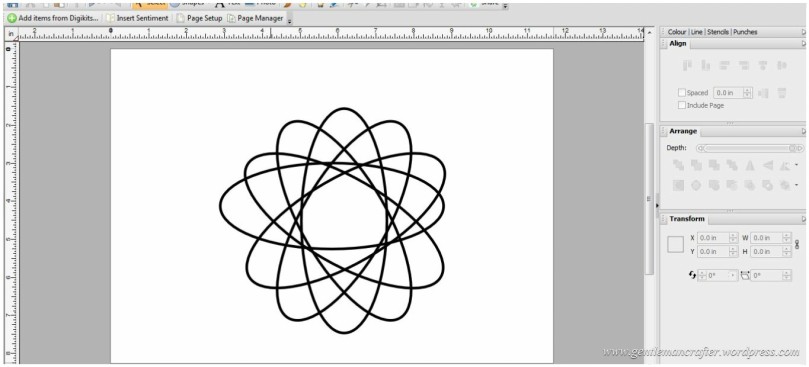
Click and drag your mouse so that all 6 shapes are selected.
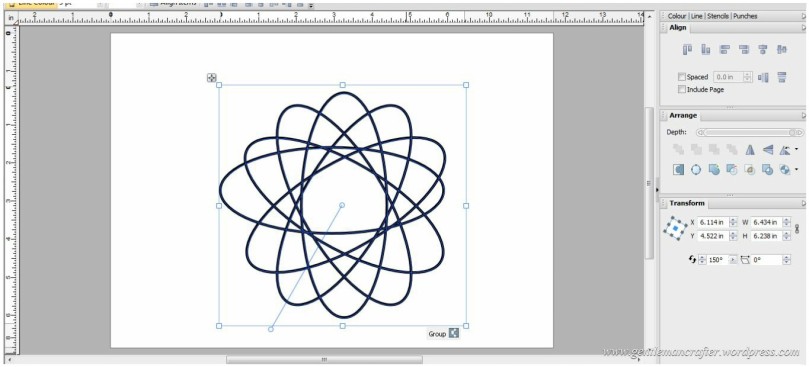
Then, using the Align Tab (shown in a previous step), click on Centre Horizontally and Centre Vertically buttons. This will arrange your ovals into a uniform pattern as seen here. Click the Group ‘button’ at the bottom of the group of objects and then click Centre Horizontally and Centre Vertically again. This will put your design in the centre of the page if it isn’t already.
Here is roughly how it will look.
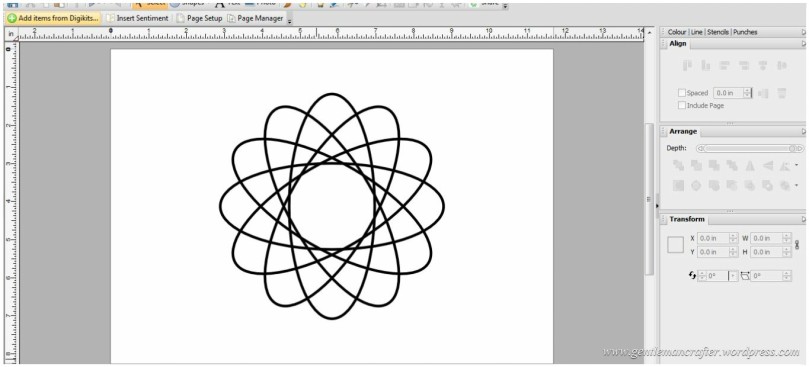

You can of course use the floral autoshape and adjust some of the parameters there but I thought that this was a nice easy way to help you understand how I go about it.
Now it is up to you what you do with this.
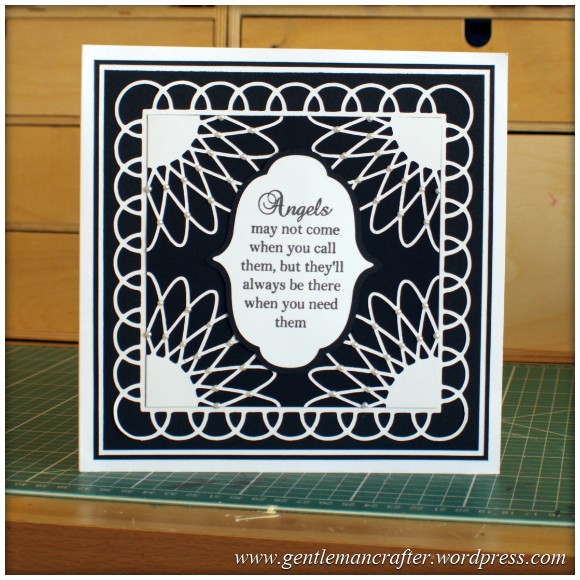
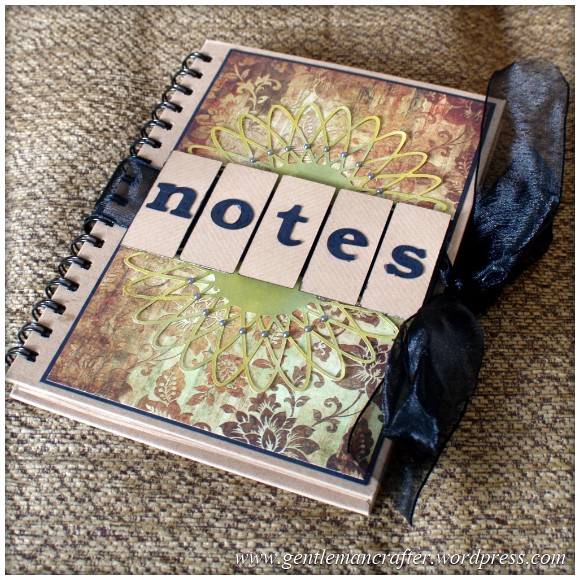
This way of designing geometric patterns is how I created the design used in the black and white card and notebook that I showed on recent Brother Scan n Cut shows.
You can of course use these patterns in order to create digital stamps and punches to use again in Serif Craft Artist, but that of course is up to you.
Anyway, that concludes this quick post. I hope that you have learnt a little from it and will start creating your own unique designs.
If I haven’t explained something well enough, please feel free to use the comments section below to post your question.
Many thanks for reading. See you next time.
J :)

Hi John
I have managed to create this design in CA2 but I cannot work out how to transfer it to my SnC. When I try to export as a picture (svg) I get the message that it uses too much memory so won’t save, and exporting as a PDF doesn’t work in the Brother Canvas. What am I doing wrong or do I have to print it out and scan it in?
Great blog by the way and very helpful.
Chris
LikeLike
Printing/scanning is the quickest. Alternatively try altering SVG export settings to ‘selected items only’ rather than ‘whole page’. That might help.
LikeLike
Thanks John, it works – I selected the drawing and then export – thanks. Keep up the good work, I’m sure I’ll have more questions :)
LikeLike
You’re welcome anytime :)
LikeLike
Thanks John the instructions are fantastic, however even though I have saved my geometric design as an SVG file it does not appear on my Scan n cut machine. I have used your lattice files easily-they were saved to my USB stick and were recognised by my machine. Can you help?
LikeLike
Jan, I am not sure what you are asking me as you say that everything worked…
FYI, SVGs will NOT appear on the Scan N Cut machine as it only accepts one type of file. To use an SVG with the machine you will first need to convert it.
LikeLike
Hi John,
Just a quick question about the shape – how did you keep the central part in place? Mine cut out this part!
Fiona
LikeLike
If you can emails pics Fiona I might be able to advise better :)
LikeLike
John I am able to store some things on it but it then wont let me open up those images. I can view them on laptop. It is an Integral 32gb. I am now going to purchase one from your list. Thank you. Morag.
LikeLike
Thanks John, have just had a go at this tutorial and have managed to get my design to look like yours. This has really helped me learn a bit more about Serif! Thank you!
LikeLike
Thank you John. I didn’t realise that serif was so versatile. I managed to recreate your geometric design, scanned it in to the snc and am now making hubbies birthday card.
LikeLike
Brilliant John this worked really well, now how did you do the circle of squares.
Sue
LikeLike
In a similar way but used two squares positioned them a bit apart and then grouped them. I then used that group in the same way as the ovals.
LikeLike
Brilliant tutorial John I have Serif, Craft Artist 2 but no Brother Cut’n’Scan (boo hoo!) yet! But will have ago at making the “shape” to use as an embellishment, punch, stencil etc
LikeLike
Good idea Karen; although it was intended to show how to create the thing that I made with the Scan N Cut, there is nothing stopping anyone using the idea in other ways :)
LikeLike
John, I want to try this and use with my ScanNcut. I don’t have this software. I have Adobe Photoshop (very old version) and an old version of Corel Draw which does not work well with my Windows 7. Please could you advise what version of this software I need to do this sort of technique which you have demonstrated? I doubt if the Freebie download version will work for this. Tks in advance for your help and/or advice.
Mo (Moira Reilly)
LikeLike
Moira. All of the tools that I used for this will be in the free version of serif craft artist. :)
LikeLike
Thank you John, that’s fab. Will try it out.
LikeLike
Thank you John, decided to have a go, but my Serif was so old, so treated myself to the one you were using, following your instructions, got there in the end, today I will do the cutting out bit. i am not that good with some of the technical things but your instruction were so easy to follow, so can we look forward to more in the future, which us “Oldies” can follow please.
LikeLike
I have purchased a SanDisk Cruzer Edge flash drive. It was a good deal to go for the 64gb rather than a smaller one. But the USB list does not mention this one, other SanDisks are on so I was wondering if a bigger gb makes any difference. Don’t want up open package if it won’t work!
Hope you can help. Many thanks for all your advice in shows etc. I enjoy them & it has helped enormously in getting to know the machine.
Carole.
LikeLike
Carole, I genuinely can’t comment on individual storage devices as there are so many. Brother put together the list to show those that are compatible after testing them. It might be better to try and choose one of those in order to guarantee compatibility.
LikeLike
Totally ace. I’m experimenting with chain lines in serif draw 5. Working well just need to make sure shapes are joined to something, So I have lots of almost theres and tweaking. My only bug bear is having to use printer ink to print out. As even if I make it a SVG brother canvas doesn’t always seem able to read it I get errors. But I may of found a way last night with one of my svg’s that brother wouldn’t read, I made the pattern a JPG and used the brother canvas to trace image, the option that worked was colour (no idea why it was black and white) the other image trace option just gave an outline.
LikeLike
HI JOHN TRIED THIS PATTERN BUT MINE LOOKS NOTHING LIKE YOUR’S IT LOOKS MORE OF A MESS
HAVE YOU ANY MORE TIPS SO IT WILL LOOK MORE LIKE YOUR;S THANKYOU GAYNOR
LikeLike
Try working through the steps once more exactly as written.
LikeLike
Thanks John, I love visuals like this, far better than reading lots of things! xx
LikeLike
John, you’re a star. Thank you so much for this post. These are the instructions I’ve been trying to track down after seeing some of your BSC demos. I want to create quite a few different templates & as I’m not familiar with Craft Artist I didn’t know if the software itself would be sufficient or if you had used additional digikits to produce your templates. Great stuff !
LikeLike
Thank you John for taking the time and trouble to do this for us all, it was so clear and informative I just need to get the CDnow as i can see it would go great with my scan n cut
LikeLike
Is it possible to do this using the cricut craft room and a cricut???
LikeLike
Possibly.
LikeLike
Thank you for explaining it in a language I can understand can’t wait to try it out.
Jeannette
LikeLike
Thank you sooooo much John I am not too PC savvy but followed your instructions and created a shape similar to yours, not quite got it yet but will keep trying. look forward to more of the same .
Sheena x
LikeLike
I have the scanncut but do not find it as easy as you make it look on your television programs I can get it to cut but find the screen so very small – I have scanned in one of my favourite elephants which it cuts ok but it does not cut the eyes or ears that are inside. It scans ok as I can see the eyes and ears on the screen when scanned – hope you can understand what I mean as not very good at explaining. I expect I am doing something wrong and with your help will get it right Many thanks I do enjoy your programs Kind regards Tandi
>
LikeLike
Is the image a stamp?
LikeLike
Well done John, you have just helped me to get my cd out to practice, had no idea before, will also have to learn about exporting then will be happy, got loads of crafting cd’s but only looked at them and not used x
LikeLike