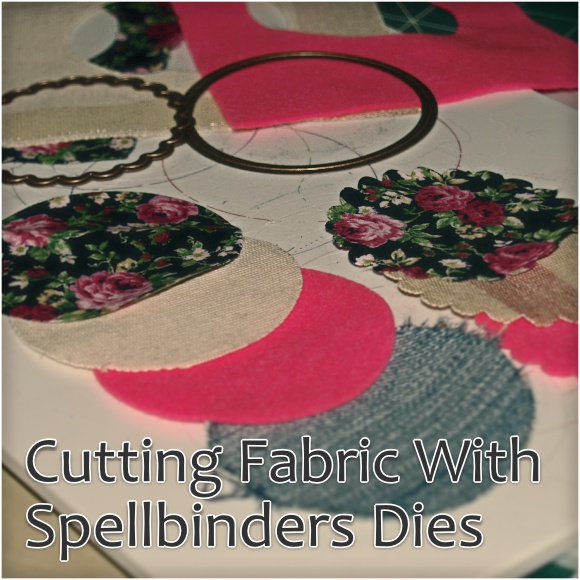
Since I mentioned that you can cut fabric with the Spellbinders Grand Calibur, I have had a lot of questions about how to do it so I thought that I’d try out a few different types of materials and report my findings.
When I first found out that the Grand Calibur could cut fabric I was very excited.
So, now that I’ve tried out a few paper projects, I thought that I’d return to fabric and see what this little machine could do.
Today I have had a root through my fabric boxes and chosen a few different types of fabric to see what results I could get and I was very pleased indeed.
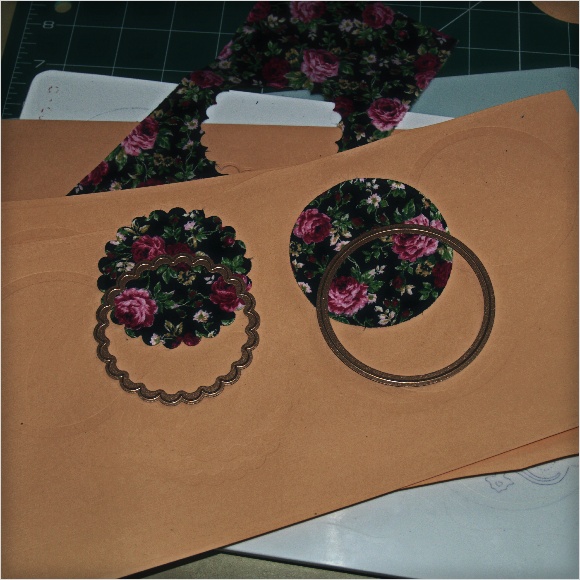
For the testing I used a plain circle and a scalloped circle to make sure that I tested the intricate cutting capabilities on fabric. I don’t yet have any really intricate dies so can’t really say how they will work at this time, but as soon as I do, I will post some new tests.
I’m sure that you’ll want to have a go at cutting fabric once you realise just how easy it is however there are a couple of things that I should point out at this stage:
- I found that starting with the cutting plate at the bottom of the sandwhich and building up from there helped me position everything where I needed it to be before adding the final base plate.
- Always have the ridged side of the die facing into your white cutting plate whichever way you build the sandwhich, this will avoid any damage to your cutting plate.
The first type of material that I chose to try was felt – it’s bright it’s funky and I am hoping to make a batch of Plushies soon so I thought that it would be great to cut the circles for eyes.
On the first run through I tried the basic cutting sandwhich – Cutting Mat / Fabric / Die / Base Plate. This didn’t cut all the way through and left a lot of fibres attached.
The previous sandwhich was obviously too thin to make an impression so I added two sheets of lightweight cardstock (to act as a shim and thicken the sandwhich) on top of the dies.
The new sandwhich is built like this – Cutting Mat / Fabric / Die / Cardstock Shim / Base Plate.
This worked well. It was a clean cut all around the edge as you can see in the image below.

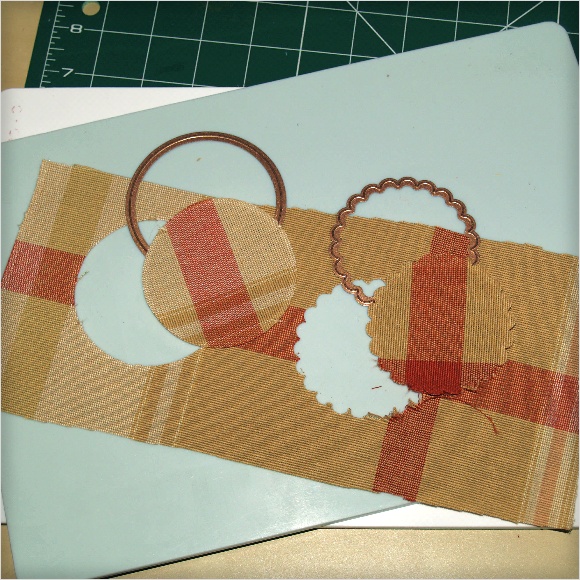
Next I tried an upholstery fabric. I thought that this would be good to try as it’s quite thick and I’ll probably be using some of the basic shapes in the future to make cushion covers and other similar soft furnishings with geometric designs.
The fabric that I chose had the feel of kitchen roller blinds or dining chair seat covers. It is a heavy fibre and it almost felt as if the fibres were individually coated in a wipe-clean kind of surface – but not plasticized like oilcloth. Anyway, I’d best stop blathering and get onto the results.
As before I tried the basic cutting sandwhich of – Cutting Plate / Fabric / Die / Base Plate. This cut almost alll the way through but left one or two fibres visible as shown in the two images below.
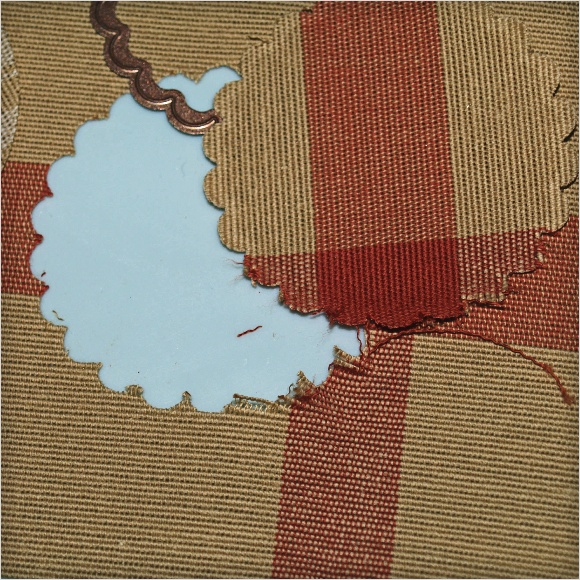
To be honest, if I hadn’t been in such a rush I probably would’t have ripped the shape out and could have snipped the little blighters, but I tried a different sandwhich instead.
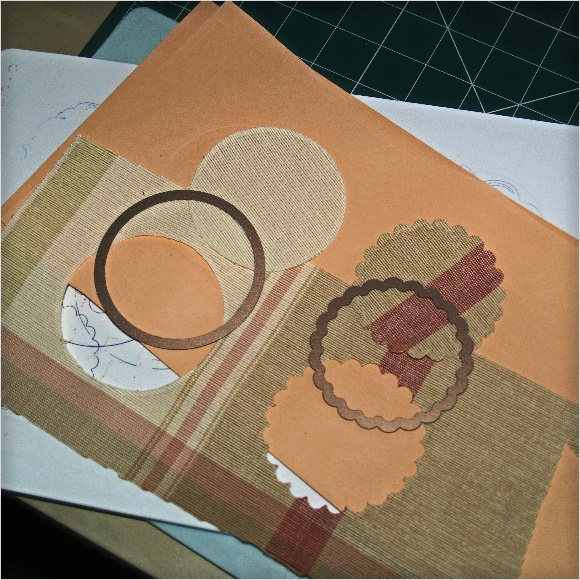
The second time I used the cardstock shim as I did for the felt. This worked perfectly again as you can see here.
Next I tried 100% Quilting Cotton. This has a dense but lightweight cotton fibre weave and is one of the most readily available fabrics and I have a stack of it in a miriad of designs (so need to find some ways of using it!).
I tried the basic sandwhich. This did not cut any fibres at all.
I then added the double cardstock shim again – Cutting Plate / Fabric / Die / Cardstock Shim / Base Plate.
This worked Ok, but still had a couple of fibres attached that I needed to snip.
So far the fabrics have been quite dense and/or thick so I thought that I would try a much lighter fabric. I chose a very lightweight polycotton.
I again tried the basic sandwhich – this didn’t make much of a mark on the fabric at all – the sandwhich was definitely to thin.
So I tried the cardstock shim again. This improved the cut but it wasn’t the best so I experimented with other sandwhich combos and began changing the order that things went into the sandwhich. After a few attempts I found that moving the cardstock to the lower part of the sandwhich, between the Cutting Plate and Fabric, worked wonders and the fabric simply slid out after the cut.
The sandwhich looks like this – Cutting Plate / Cardstock Shim / Fabric / Die / Base Plate
With this new sandwhich the cardstock gets cut at the same time as the fabric and I thought that it would add considerable cost if I kept using up cardstock in this way.
To try and reduce this wastage of good quality cardstock I estimated that my cardstock shim totalled around 300gsm to 400gsm and tried to recreate this with other lesser quality paper/cardstock. I found that four sheets of copy paper worked as well as the two sheets of card so will likely use this in the future.
I then tried repeating all of the materials that I tried before and saw improvements in the cut on all of them, particularly the cotton and polycotton which had no fibres left attached and simply fell out of the dies after the cut.
So, after all of that my final trial was on denim. Sadly no matter what combinations of shim/die I tried, I just could not get this work. It wasn’s a total disaster and I did manage to get a cut once or twice. The closest that I got to a perfect cut was by using the cardstock shims on top of the dies however even then there were still some stubborn fibres that just would not cut as you can see below so I yanked them out in a paddy and weirdly I actually quite like the distressed look that this had when it came out – I am sure that I can find a creative use for it :) so it’s not a total loss, LOL.

So that concludes all of the tests that I made. I hope you find this post useful and maybe even try some things out for yourself.
If you have any questions, or would like to share your own tips and ideas on cutting fabric with the Spellbinders Grand Calibur and dies, please feel free to comment below.
Many thanks for reading :)

i can cut tin.. ie a cola can cut to a flat peice i use the rasberry plate.. then file edge to make safe. tin hearts and shapes.
LikeLiked by 1 person
Hi, I’ve just been given a spellbinder – please could you tell me if you used specific fabric die cutters on this project?
LikeLike
The ones that I used were Spellbinders however there are others out there that will also do the job.
LikeLike
I’m thinking of purchasing a Grand Calibur and luckily found your article. Did you try cutting leather. Am thinking about using leather designs to make earrings.
LikeLike
I don’t recall trying leather. Thin metal dies are not sharp. For this reason i doubt they would be strong enough. You would need steel rule dies like sizzix offer. These do not fit through the Grand Calibur.
LikeLike
Thanks for posting such a comprehensive guide. I am trying to find out whether the X-cut dies would cut fabric. They’re so similar to Spellbinders dies so having read your guide I think I’ll have a go! Just bought the new X-cut owl die which I think will look lovely appliqued to a cushion cover.
LikeLike
Thank you for your ideas, saved trial and error for me, but just gotta say you spell sandwich without a h sorry tis my OCD xxxx
LikeLike
Do you mean with an h?
LikeLike
The spelling of sandwich is grinding my nerves too – that’s the teacher in me!
SANDWICH
Sorry John, great , helpful article though.
LikeLiked by 1 person
Just found your blog John – I found this post – as well as others – really useful as I had tried cutting fabric with little success and had reverted to using my Bigshot – I shall now try with the Grand Calibur again using your ‘sandwich’ suggestions – hopefully with more success. Please keep bringing your ideas to air and blogging.
LikeLike
Thanks so much for this, it has bee so helpful. I would like to start doing simple patchwork so all the info has been brilliant
LikeLike
You’re welcome :) Glad you found it useful.
LikeLike